Page 68 of 371

2-
2-1
Section 2 Features and Controls
Here you can learn about the many standard and optional features on your vehicle, and information on starting,
shifting and braking. Also explained are the instrument panel and the warning systems that tell you if everything is
working properly
-- and what to do if you have a problem.
2
-2 Windows
2
-6 Keys
2
-8 Door Locks
2
-11 Remote Keyless Entry System
2
-14 Trunk
2
-17 Theft
2
-18 Theft-Deterrent System
2
-20 PASS-Key� III
2
-22 New Vehicle ªBreak-Inº
2
-22 Ignition Positions
2
-24 Starting Your Engine
2
-25 Engine Coolant Heater (If Equipped)
2
-27 Automatic Transaxle Operation
2
-31 Parking Brake
2
-33 Shifting Into PARK (P)
2
-35 Shifting Out of PARK (P)
2
-35 Parking Over Things That Burn
2
-36 Engine Exhaust2
-36 Running Your Engine While You're Parked
2
-37 Tilt Wheel
2
-38 Turn Signal/Multifunction Lever
2
-46 Exterior Lamps
2
-51 Interior Lamps
2
-53 Mirrors
2
-57 Storage Compartments
2
-59 Sun Visors
2
-65 Sunroof (Option)
2
-66 HomeLink� Transmitter (If Equipped)
2
-70 The Instrument Panel -- Your
Information System
2
-75 Warning Lights, Gages and Indicators
2
-89 Driver Information Center (DIC)
2
-100 Vehicle Programming and Personalization
Features (If Equipped)
2
-108 Navigation (Option)
2
-109 Ultrasonic Rear Parking
Assist (URPA) (Option)
Page 74 of 371

2-7
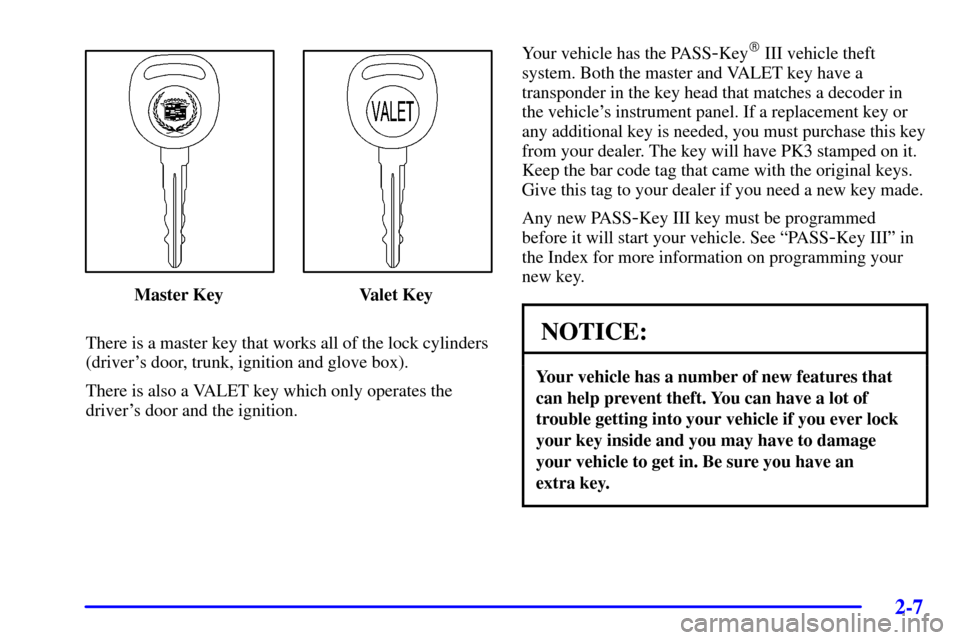
Master Key Valet Key
There is a master key that works all of the lock cylinders
(driver's door, trunk, ignition and glove box).
There is also a VALET key which only operates the
driver's door and the ignition.Your vehicle has the PASS
-Key� III vehicle theft
system. Both the master and VALET key have a
transponder in the key head that matches a decoder in
the vehicle's instrument panel. If a replacement key or
any additional key is needed, you must purchase this key
from your dealer. The key will have PK3 stamped on it.
Keep the bar code tag that came with the original keys.
Give this tag to your dealer if you need a new key made.
Any new PASS
-Key III key must be programmed
before it will start your vehicle. See ªPASS
-Key IIIº in
the Index for more information on programming your
new key.
NOTICE:
Your vehicle has a number of new features that
can help prevent theft. You can have a lot of
trouble getting into your vehicle if you ever lock
your key inside and you may have to damage
your vehicle to get in. Be sure you have an
extra key.
Page 81 of 371

2-14
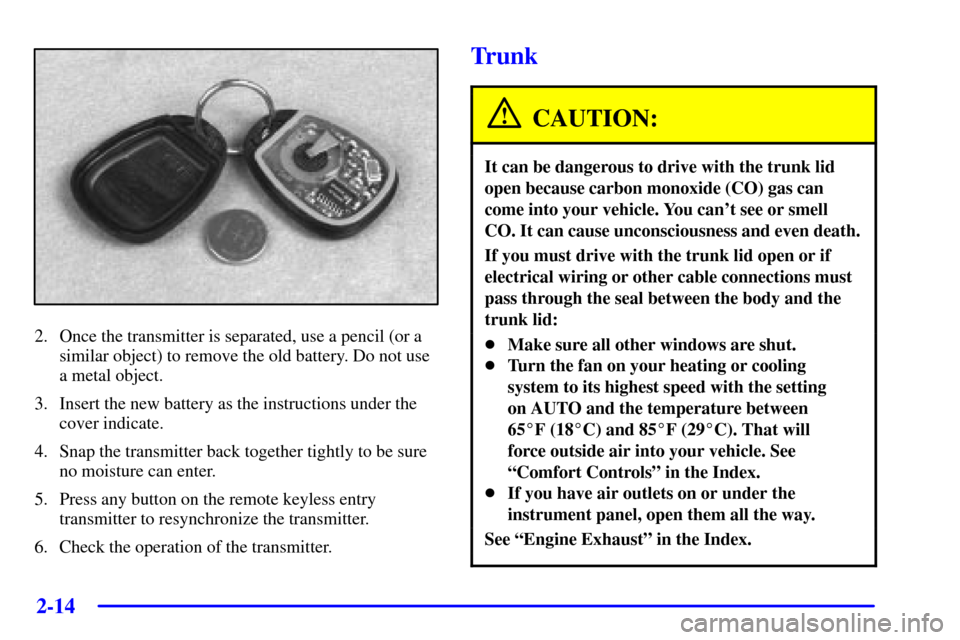
2. Once the transmitter is separated, use a pencil (or a
similar object) to remove the old battery. Do not use
a metal object.
3. Insert the new battery as the instructions under the
cover indicate.
4. Snap the transmitter back together tightly to be sure
no moisture can enter.
5. Press any button on the remote keyless entry
transmitter to resynchronize the transmitter.
6. Check the operation of the transmitter.
Trunk
CAUTION:
It can be dangerous to drive with the trunk lid
open because carbon monoxide (CO) gas can
come into your vehicle. You can't see or smell
CO. It can cause unconsciousness and even death.
If you must drive with the trunk lid open or if
electrical wiring or other cable connections must
pass through the seal between the body and the
trunk lid:
�Make sure all other windows are shut.
�Turn the fan on your heating or cooling
system to its highest speed with the setting
on AUTO and the temperature between
65�F (18�C) and 85�F (29�C). That will
force outside air into your vehicle. See
ªComfort Controlsº in the Index.
�If you have air outlets on or under the
instrument panel, open them all the way.
See ªEngine Exhaustº in the Index.
Page 82 of 371
2-15
Trunk Lock Release
The trunk lock release
button is located on the left
side of the instrument panel
below the lamp controls.
To use this feature, your vehicle must be in PARK (P) or
NEUTRAL (N) (if the ignition is on) and the valet
lockout switch must be in OFF.
To open the trunk, press the trunk lock release
button upward.
You can also press the trunk release button on the
Remote Keyless Entry (RKE) transmitter to access the
trunk compartment.
Rear Seat Pass-Through Door (If Equipped)
The rear seat pass-through release button is located in
the trunk. To release the pass
-through door, press the
PUSH button located in the center of the trunk panel.
The rear
-seat armrest must be down for the
pass
-through door to open. You may close the door from
inside the vehicle.
Page 89 of 371
2-22
New Vehicle ªBreak-Inº
NOTICE:
Your vehicle doesn't need an elaborate
ªbreak
-in.º But it will perform better in the long
run if you follow these guidelines:
�Don't drive at any one speed -- fast or
slow
-- for the first 500 miles (805 km).
Don't make full
-throttle starts.
�Avoid making hard stops for the first
200 miles (322 km) or so. During this time
your new brake linings aren't yet broken
in. Hard stops with new linings can mean
premature wear and earlier replacement.
Follow this breaking
-in guideline every
time you get new brake linings.
�Don't tow a trailer during break
-in.
See ªTowing a Trailerº in the Index for
more information.
Ignition Positions
With the key in the
ignition switch located
on the instrument panel,
you can turn the key to
four different positions:
OFF: This position lets you turn off the engine and
remove the key. This position also locks the steering
wheel and transaxle.
Page 97 of 371

2-30
FIRST (1): This position gives you even more power
than SECOND (2). You can use it on very steep hills,
or in deep snow or mud.
If the traction control switch is off, your vehicle will not
go into FIRST (1) gear and the vehicle will accelerate
from stop more slowly. This can help in deep snow or
mud conditions. When the traction control is turned
off, a message will be lit on the Driver Information
Center (DIC).
NOTICE:
If your front wheels can't rotate, don't try to
drive. This might happen if you were stuck in
very deep sand or mud or were up against a solid
object. You could damage your transaxle.
Also, if you stop when going uphill, don't hold
your vehicle there with only the accelerator
pedal. This could cause overheating and damage
the transaxle. Use your brakes to hold your
vehicle in position on a hill.
Performance Shift Display (STS Only)
When your vehicle detects a change in driving
conditions, it will automatically initiate the appropriate
performance shift mode. When this occurs, the gear
display on the instrument panel cluster will change to
indicate that the transaxle has shifted to a different gear.
For example, the gear display on the cluster may
indicate D, 3, 2, or 1 even though the gearshift lever is
still in OVERDRIVE (D). Once the performance shift
mode ends, the gear display on the cluster will return to
matching the gear shift lever indication.
Page 99 of 371
2-32
Reach under the driver's side of the instrument panel
and pull down on the manual release lever, which is
located behind the parking brake pedal. Pull down on
the yellow tab as shown by the arrow in the illustration.
If the parking brake does not release, you should have
your vehicle towed to your dealer for service.
NOTICE:
Driving with the parking brake on can cause
your rear brakes to overheat. You may have to
replace them and you could also damage other
parts of your vehicle.
If you are towing a trailer and are parking on a hill, see
ªTowing a Trailerº in the Index.
Page 106 of 371

2-39
Turn and Lane Change Signals
To signal a turn, move the lever on the left side of the
steering wheel all the way up or down. The lever returns
automatically when the turn is complete.
An arrow located on the
instrument panel cluster will
flash in the direction of the
turn or lane change.
Raise or lower the lever until the arrow starts to flash to
signal a lane change. Hold it there until the lane change
is complete. The lever returns when it is released.
If the turn signal is left on, a warning chime will sound
and the Driver Information Center (DIC) will display
TURN SIGNAL ON (after driving about a mile) to
remind you to turn it off.Arrows that flash rapidly when signaling for a turn or
lane change may be caused by a burned
-out signal bulb.
Other drivers won't see the turn signal.
Replace burned
-out bulbs to help avoid possible
accidents. Check the fuse (see ªFuses and Circuit
Breakersº in the Index) and check for burned
-out bulbs
if the arrow fails to work when signaling a turn.
Headlamp High/Low-Beam Changer
When the low-beam headlamps are on, push the turn
signal lever away from you to change the headlamps to
high beam.
This light on the instrument
panel cluster will be on,
indicating high
-beam usage.
Pull the turn signal lever toward you to return to
low
-beam headlamps.