2001 CADILLAC ELDORADO clock
[x] Cancel search: clockPage 5 of 335
Section
3
Comfort Controls and Audio Systems
Section
4
Your Driving and the Road
Section
5
Table of Contents (cont'd)
Defensive Driving
Drunken Driving
Control of a Vehicle
BrakingSteering
Driving Tips for Various Road Conditions
Loading Your Vehicle
Towing a Trailer Heating and Air Conditioning
Setting the Radio Clock
Radio/Cassette Player/CD Player (If Equipped)Radio Theft-Deterrent Feature
Steering Wheel Controls
Hazard Warning Flashers
Jump Starting
Towing Your VehicleEngine Overheating
Changing a Flat Tire
If You're Stuck
Problems on the Road
iii
Page 107 of 335

2-46
Interior Lamps
Instrument Panel
Intensity/Brightness Control
The digital displays automatically dim when it becomes
dark outside and your lights are on. When it's dark, the
brightness control can be manually adjusted by turning
the exterior lamps control knob counterclockwise to dim
and clockwise to brighten the lighting. The digital
displays automatically brighten when it becomes light
outside, although backlighting will remain active at the
selected brightness as long as the lights are on.
Illuminated Entry
The illuminated entry system turns on the courtesy
lamps and the backlighting to the door controls and to
the exterior lamps control knob when a door is opened
or if you press a remote keyless entry transmitter button.
Since the illuminated entry system has a photocell, this
means that it must be dark outside in order for the
courtesy lamps or backlighting to turn on. The courtesy
lamps turn off approximately 20 seconds after the last
door is closed or after the ignition is turned to RUN.
Parade Dimming
This feature prohibits the dimming of the instrument
panel lights during daylight while the headlamps are on.
This feature operates with the light sensor for the
Twilight Sentinel and is fully automatic. When the light
sensor reads darkness outside, the instrument panel
lights can be adjusted by turning the exterior lamps
control knob counterclockwise to dim and clockwise to
brighten lighting. Backlighting to the instrument panel
will turn on, regardless of light conditions.
Reading Lamps
The reading lamps are located either in the headliner or
above the windows if you have a sunroof. To turn them
on, turn the exterior lamps control knob all the way
clockwise. These lamps and the interior courtesy lamps
automatically come on when either door is opened and it
is dark outside. For manual operation, press the button
to turn them on. Press it again to turn them off.
If the reading lamps are left on, they automatically shut
off 10 minutes after the ignition has been turned off.
Page 112 of 335
2-51 Convex Outside Mirror
Your passenger's side mirror is convex. A convex
mirror's surface is curved so you can see more from
the driver's seat. This mirror does not have a
dimming feature.
CAUTION:
A convex mirror can make things (like other
vehicles) look farther away than they really are.
If you cut too sharply into the right lane, you
could hit a vehicle on your right. Check your
inside mirror or glance over your shoulder before
changing lanes.
Storage Compartments
Glove Box
The glove box is located in front of the passenger's seat.
To lock the glove box door, insert the oval key into the
lock cylinder and turn it clockwise. Turn the key
counterclockwise to unlock the door.
Overhead Console
Sunglasses Storage Compartment
This feature is on vehicles without the optional sunroof.
To gain access to this compartment, which is located
directly above the inside rearview mirror in the
headliner, push up on the compartment and the storage
area will open.
Map Pocket
The map/storage pockets are located on each front
door as well as on the passenger's and driver's
front seatbacks.
Page 113 of 335
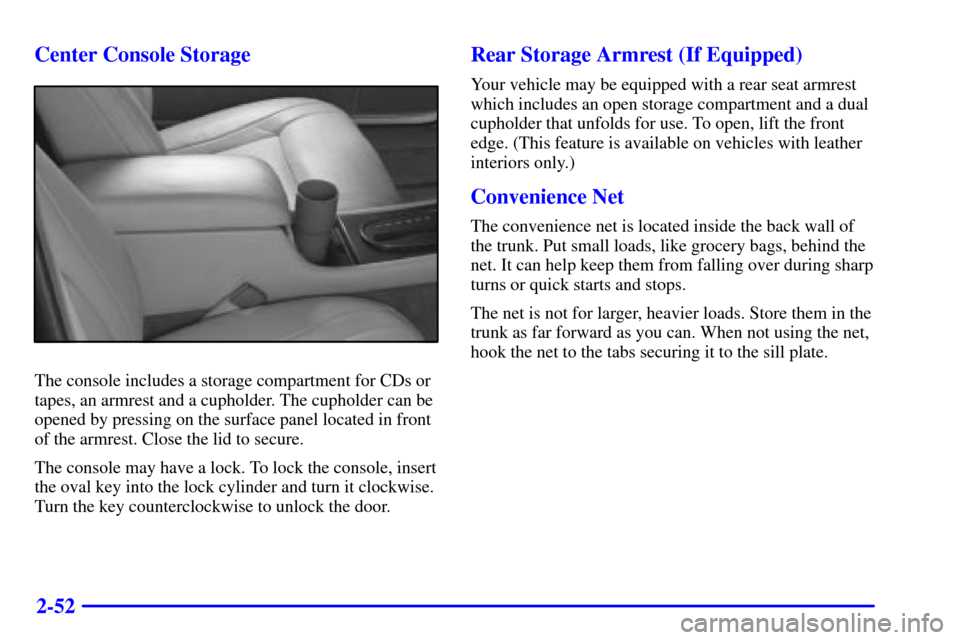
2-52 Center Console Storage
The console includes a storage compartment for CDs or
tapes, an armrest and a cupholder. The cupholder can be
opened by pressing on the surface panel located in front
of the armrest. Close the lid to secure.
The console may have a lock. To lock the console, insert
the oval key into the lock cylinder and turn it clockwise.
Turn the key counterclockwise to unlock the door.
Rear Storage Armrest (If Equipped)
Your vehicle may be equipped with a rear seat armrest
which includes an open storage compartment and a dual
cupholder that unfolds for use. To open, lift the front
edge. (This feature is available on vehicles with leather
interiors only.)
Convenience Net
The convenience net is located inside the back wall of
the trunk. Put small loads, like grocery bags, behind the
net. It can help keep them from falling over during sharp
turns or quick starts and stops.
The net is not for larger, heavier loads. Store them in the
trunk as far forward as you can. When not using the net,
hook the net to the tabs securing it to the sill plate.
Page 138 of 335

2-77
FUEL DOOR: Press this button to open the fuel
door. (This feature will work only when the shift lever
is in PARK (P) regardless of whether or not the vehicle
is running.)
TRUNK: Press this button to open the trunk.
(This feature will work only when the shift lever is
in PARK (P) regardless of whether or not the vehicle
is running.)
MPG AVG (Reset): Press the INFO (SKIP) button to
display the MPG AVG (Average Fuel Economy), then
press and hold the NO INFO RESET button until 0.0
MPG AVG is displayed.
GAL FUEL USED (Reset): Press the INFO (SKIP)
button to display the GAL FUEL USED on the Driver
Information Center (DIC), then press and hold the
INFO RESET (NO) button until 0.0 GAL FUEL USED
is displayed.
AVG MPH (Reset): Press the INFO (SKIP) button to
display the AVG MPH (Average Speed), then press and
hold the INFO RESET (NO) button until 0.0 AVG MPH
is displayed.TIMER: This feature is like a stopwatch, in that
you can clock the time it takes to get from one point
to another.
To operate, press the INFO (SKIP) button to display
TIMER. Each of the fields for the hours, minutes and
seconds are two numeric digits.
Once TIMER OFF 00:00:00 is displayed, press the INFO
RESET (NO) button to start the timing feature. Press the
INFO RESET (NO) button again to stop it. If you will be
starting and stopping your vehicle
-- during a trip for
instance
-- the TIMER feature will automatically start
timing where it left off when you last stopped. To reset it,
press and hold the INFO RESET (NO) button until the
display reads TIMER 00:00:00. Press the INFO (SKIP)
button to exit from the TIMER function.
OIL LIFE LEFT (Reset): Press the INFO (SKIP)
button to display the OIL LIFE LEFT, then press and
hold the INFO RESET (NO) button until 100% OIL
LIFE LEFT is displayed. (This only needs to be reset
after you have had the oil changed.)
ENGLISH/METRIC (Reset): Press the INFO
(SKIP) button to display ENGLISH/METRIC RESET,
then press the INFO RESET (NO) button to select.
The display will change from English (miles) to
metric (kilometers).
Page 153 of 335

3-
3-1
Section 3 Comfort Controls and Audio Systems
In this section, you'll find out how to operate the comfort control and audio systems offered with your vehicle.
Be sure to read about the particular systems supplied with your vehicle.
3
-2 Comfort Controls
3
-2 Climate Control Panel
3
-6 Electronic Solar Sensor
3
-6 Air Conditioning
3
-7 Heating
3
-7 Defrosting
3
-7 Rear Window Defogger
3
-8 Ventilation System
3
-9 HVAC Steering Wheel Controls
3
-10 Climate Control Personalization (If Equipped)
3
-10 Audio Systems
3
-10 Setting the Clock
3
-10 AM-FM Stereo with Cassette Tape Player
3
-14 AM-FM Stereo with Cassette Tape and
Compact Disc Player with Radio Data
Systems (RDS) and Digital Signal
Processing (DPS) (If Equipped)3
-24 Radio Data Systems (RDS) Program
Type (PTY) Selections
3
-25 CD Adapter Kits
3
-25 Trunk Mounted CD Changer (Option)
3
-29 Radio Personalization with Home and Away
Feature (If Equipped)
3
-30 Theft-Deterrent Feature
3
-31 Audio Steering Wheel Controls
3
-31 Understanding Radio Reception
3
-32 Tips About Your Audio System
3
-33 Care of Your Cassette Tape Player
3
-34 Care of Your Compact Discs
3
-34 Care of Your Compact Disc Player
3
-35 Power Antenna Mast Care
Page 154 of 335
3-2
Comfort Controls
This section tells you how to make your air system
work for you.
With the ECC system, you can control the heating,
cooling and ventilation in your vehicle. Your vehicle
also has a flow
-through ventilation system described
later in this section.
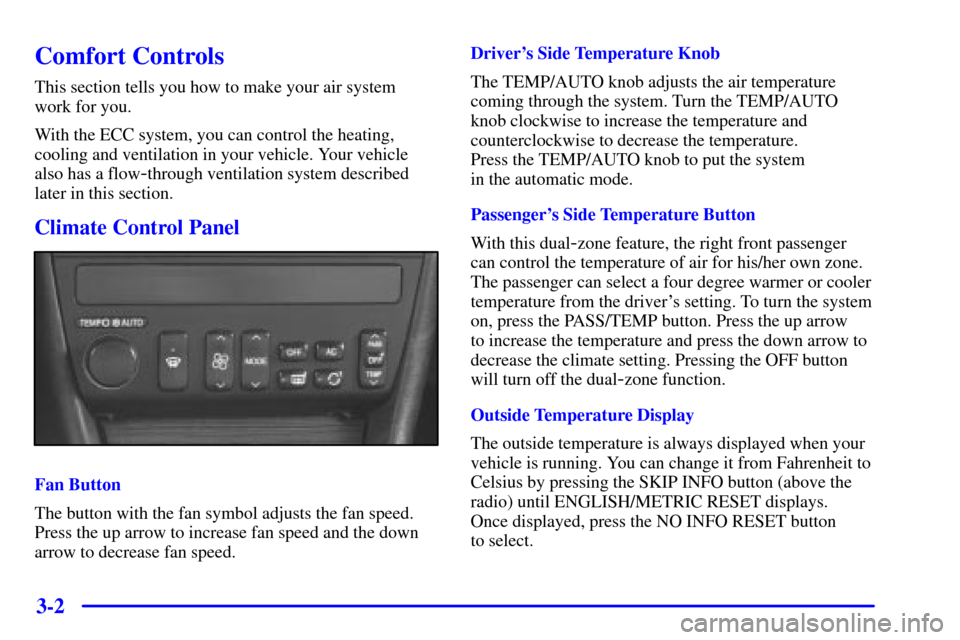
Climate Control Panel
Fan Button
The button with the fan symbol adjusts the fan speed.
Press the up arrow to increase fan speed and the down
arrow to decrease fan speed.Driver's Side Temperature Knob
The TEMP/AUTO knob adjusts the air temperature
coming through the system. Turn the TEMP/AUTO
knob clockwise to increase the temperature and
counterclockwise to decrease the temperature.
Press the TEMP/AUTO knob to put the system
in the automatic mode.
Passenger's Side Temperature Button
With this dual
-zone feature, the right front passenger
can control the temperature of air for his/her own zone.
The passenger can select a four degree warmer or cooler
temperature from the driver's setting. To turn the system
on, press the PASS/TEMP button. Press the up arrow
to increase the temperature and press the down arrow to
decrease the climate setting. Pressing the OFF button
will turn off the dual
-zone function.
Outside Temperature Display
The outside temperature is always displayed when your
vehicle is running. You can change it from Fahrenheit to
Celsius by pressing the SKIP INFO button (above the
radio) until ENGLISH/METRIC RESET displays.
Once displayed, press the NO INFO RESET button
to select.
Page 162 of 335
3-10 Climate Control Personalization
(If Equipped)
This feature allows both driver's (driver 1 or 2 depending
on the number on the back of your remote keyless entry
transmitter) to personalize their own climate control
settings. For more information, see ªMemory and
Personalization Featuresº in the Index.
Audio Systems
Your audio system has been designed to operate easily
and give years of listening pleasure. You will get the
most enjoyment out of it if you acquaint yourself with it
first. Find out what your audio system can do and how
to operate all its controls, to be sure you're getting the
most out of the advanced engineering that went into it.
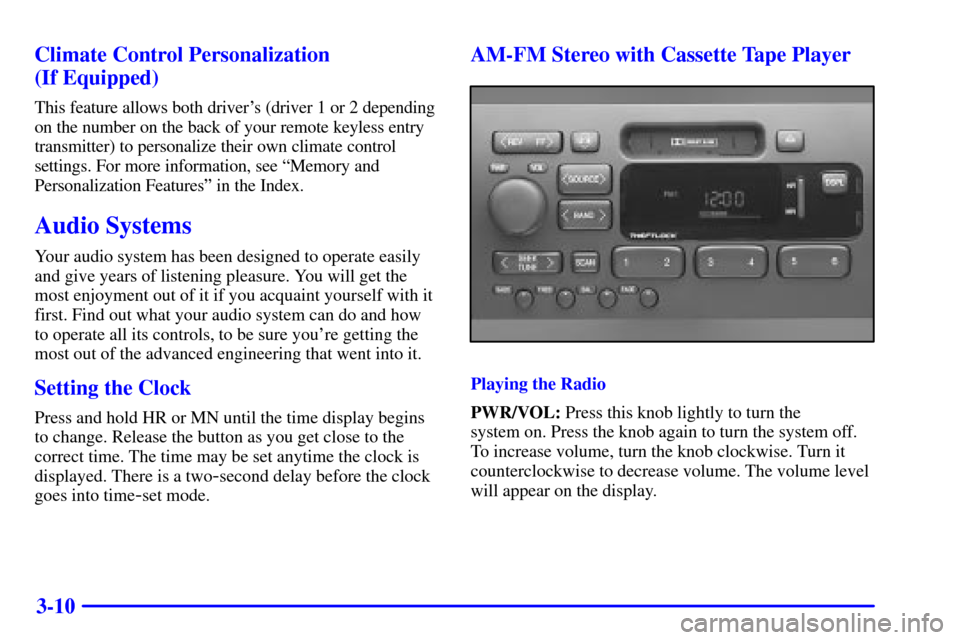
Setting the Clock
Press and hold HR or MN until the time display begins
to change. Release the button as you get close to the
correct time. The time may be set anytime the clock is
displayed. There is a two
-second delay before the clock
goes into time
-set mode.
AM-FM Stereo with Cassette Tape Player
Playing the Radio
PWR/VOL: Press this knob lightly to turn the
system on. Press the knob again to turn the system off.
To increase volume, turn the knob clockwise. Turn it
counterclockwise to decrease volume. The volume level
will appear on the display.