Page 6 of 335
Fuel
Checking Fluids and Lubricants
GM Oil Life System™
Engine Air Cleaner/Filter
Brakes
Bulb ReplacementWindshield Wiper Blade Replacement
Tires and Wheels
Appearance Care
Electrical System/Fuses and Circuit Breakers
Capacities and Specifications
Normal Maintenance Replacement Parts
Table of Contents (cont'd)
Maintenance Schedule Service and Appearance Care
Section
6
Scheduled Maintenance
Owner Checks and Services
Periodic Maintenance InspectionsRecommended Fluids and Lubricants
Maintenance Records
See separate Maintenance Schedule Booklet
iv
Page 255 of 335

6-
6-1
Section 6 Service and Appearance Care
Here you will find information about the care of your vehicle. This section begins with service and fuel information,
and then it shows how to check important fluid and lubricant levels. There is also technical information about your
vehicle, and a part devoted to its appearance care.
6
-2 Service
6
-3 Fuel
6
-5 Fuels in Foreign Countries
6
-5 Filling Your Tank
6
-8 Filling a Portable Fuel Container
6
-8 Checking Things Under the Hood
6
-11 Engine Oil
6
-16 Engine Air Cleaner/Filter
6
-19 Automatic Transaxle Fluid
6
-22 Engine Coolant
6
-28 Windshield Washer Fluid
6
-29 Brakes
6
-32 Battery
6
-33 Bulb Replacement
6
-39 Windshield Wiper Blade Replacement
6
-40 Tires
6
-49 Appearance Care
6
-49 Cleaning the Inside of Your Vehicle6
-51 Care of Safety Belts
6
-51 Cleaning Glass Surfaces
6
-51 Cleaning the Outside of the Windshield and
Wiper Blades
6
-52 Weatherstrips
6
-52 Cleaning the Outside of Your Vehicle
6
-53 Cleaning Aluminum or Chrome-Plated
Wheels (If Equipped)
6
-54 Cleaning Tires
6
-54 Sheet Metal Damage
6
-55 Underbody Maintenance
6
-55 Chemical Paint Spotting
6
-56 GM Vehicle Care/Appearance Materials
6
-57 Vehicle Identification Number (VIN)
6
-58 Electrical System
6
-67 Replacement Bulbs
6
-67 Capacities and Specifications
6
-67 Normal Maintenance Replacement Parts
Page 264 of 335
6-10 Engine Compartment Overview
When you open the hood, you'll see:
A. Battery
B. Engine Coolant Surge Tank
C. Power Steering Fluid
D. Engine Oil Fill LocationE. Engine Oil Dipstick
F. Brake Master Cylinder
G. Transaxle Dipstick/Fluid
Fill LocationH. Engine Air Cleaner/Filter
I. Windshield Washer
Fluid Reservoir
Page 270 of 335
6-16
Engine Air Cleaner/Filter
The engine air cleaner/filter is located next to the
windshield washer fluid reservoir on the driver's side of
the engine. For more information on location, see
ªEngine Compartment Overviewº in the Index. Be sure
the engine has cooled before following these steps to
replace the engine air cleaner/filter:
1. With a screwdriver,
loosen the air duct
clamp, which is located
at the mass airflow
sensor end of the
air duct.
2. Disconnect the air duct from the mass airflow sensor.
Page 271 of 335
6-17
3. Unhook both engine air cleaner/filter cover latches.
One latch is located near the radiator hose (not shown)
and the other latch is located next to the IAT sensor.
4. Pivot the air cleaner and air duct assembly toward
the front of the vehicle. Remove the cover.5. Take out the engine air cleaner/filter and remove any
loose debris that may be found in the base.
6. Install a new engine air cleaner/filter element. See
ªNormal Maintenance Replacement Partsº in the Index.
Page 272 of 335

6-18
Follow these steps to reinstall the engine air
cleaner/filter assembly:
1. Slide the lid into the slots in the front edge
of the base.
2. Pivot the cover and the air duct assembly
downward. Make sure that both latches are secure
and fully engaged.
3. Reinstall the clean air duct over the mass airflow
sensor. Make sure that the duct is secure around the
entire outer edge of the sensor.
4. Tighten the air duct clamp.
5. Reconnect the IAT sensor.
Refer to the Maintenance Schedule to determine when to
replace the air filter.
See ªScheduled Maintenance Servicesº in the
Maintenance Schedule booklet.
CAUTION:
Operating the engine with the air cleaner/filter
off can cause you or others to be burned. The air
cleaner not only cleans the air, it stops flame if
the engine backfires. If it isn't there, and the
engine backfires, you could be burned. Don't
drive with it off, and be careful working on the
engine with the air cleaner/filter off.
NOTICE:
If the air cleaner/filter is off, a backfire can cause
a damaging engine fire. And, dirt can easily
get into your engine, which will damage it.
Always have the air cleaner/filter in place when
you're driving.
Page 274 of 335

6-20
To get the right reading, the fluid should be at
normal operating temperature, which is 180�F to
200�F (82�C to 93�C).
Get the vehicle warmed up by driving about
15 miles (24 km) when outside temperatures are above
50�F (10�C). If it's colder than 50�F (10�C), you
may have to drive longer.
Checking the Fluid Level
Prepare your vehicle as follows:
�Park your vehicle on a level place. Keep the
engine running.
�With the parking brake applied, place the shift lever
in PARK (P).
�With your foot on the brake pedal, move the shift
lever through each gear range, pausing for about
three seconds in each range. Then, position the shift
lever in PARK (P).
�Let the engine run at idle for three to five minutes.Then, without shutting off the engine, follow these steps:
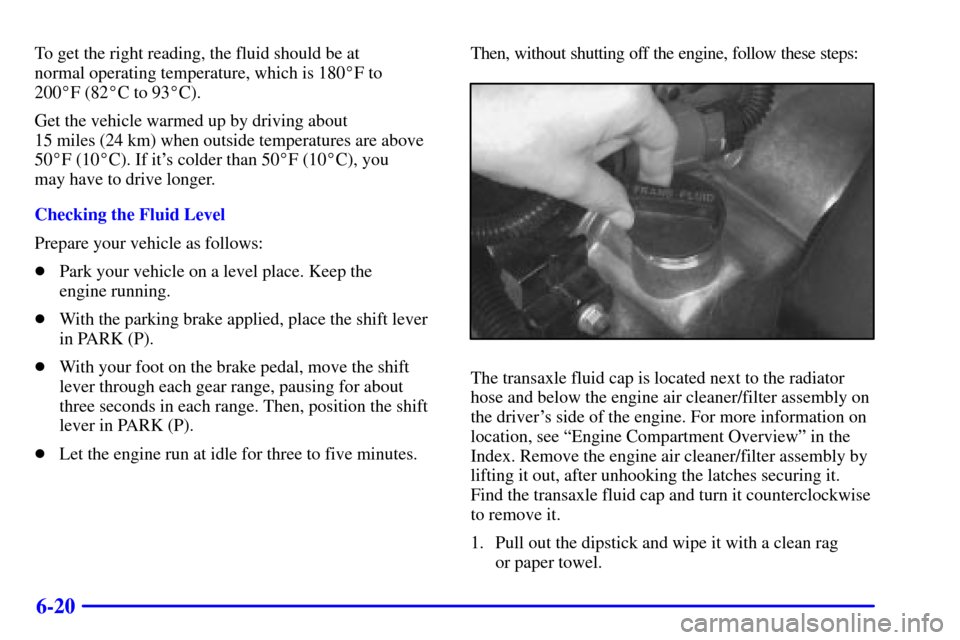
The transaxle fluid cap is located next to the radiator
hose and below the engine air cleaner/filter assembly on
the driver's side of the engine. For more information on
location, see ªEngine Compartment Overviewº in the
Index. Remove the engine air cleaner/filter assembly by
lifting it out, after unhooking the latches securing it.
Find the transaxle fluid cap and turn it counterclockwise
to remove it.
1. Pull out the dipstick and wipe it with a clean rag
or paper towel.
Page 275 of 335

6-21
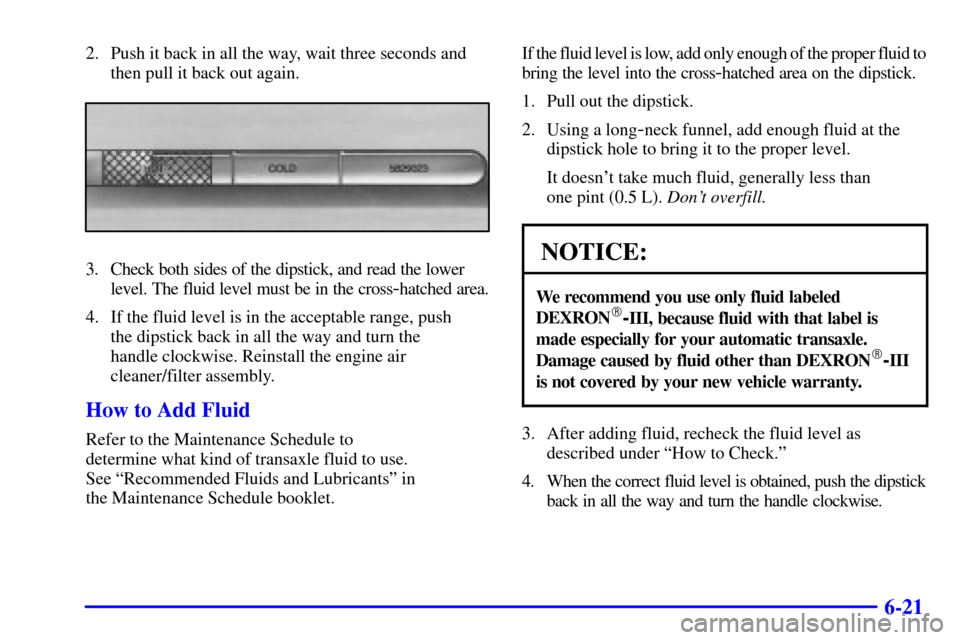
2. Push it back in all the way, wait three seconds and
then pull it back out again.
3. Check both sides of the dipstick, and read the lower
level. The fluid level must be in the cross
-hatched area.
4. If the fluid level is in the acceptable range, push
the dipstick back in all the way and turn the
handle clockwise. Reinstall the engine air
cleaner/filter assembly.
How to Add Fluid
Refer to the Maintenance Schedule to
determine what kind of transaxle fluid to use.
See ªRecommended Fluids and Lubricantsº in
the Maintenance Schedule booklet.If the fluid level is low, add only enough of the proper fluid to
bring the level into the cross
-hatched area on the dipstick.
1. Pull out the dipstick.
2. Using a long
-neck funnel, add enough fluid at the
dipstick hole to bring it to the proper level.
It doesn't take much fluid, generally less than
one pint (0.5 L). Don't overfill.
NOTICE:
We recommend you use only fluid labeled
DEXRON�-III, because fluid with that label is
made especially for your automatic transaxle.
Damage caused by fluid other than DEXRON
�-III
is not covered by your new vehicle warranty.
3. After adding fluid, recheck the fluid level as
described under ªHow to Check.º
4. When the correct fluid level is obtained, push the dipstick
back in all the way and turn the handle clockwise.