Page 6 of 328
Fuel
Checking Fluids and Lubricants
Engine Air Cleaner/Filter
Brakes
Bulb Replacement
Windshield Wiper Blade ReplacementTires and Wheels
Appearance Care
Electrical System/Fuses and Circuit Breakers
Capacities and Specifications
Normal Maintenance Replacement Parts
Table of Contents (cont'd)
Maintenance Schedule Service and Appearance Care
Section
6
Scheduled Maintenance
Owner Checks and Services
Periodic Maintenance InspectionsRecommended Fluids and Lubricants
Maintenance Records
See separate Maintenance Schedule Booklet
iv
Page 11 of 328

ix
For example,
these symbols
are used on an
original battery:
CAUTION
POSSIBLE
INJURY
PROTECT
EYES BY
SHIELDING
CAUSTIC
BATTERY
ACID COULD
CAUSE
BURNS
AVOID
SPARKS OR
FLAMES
SPARK OR
FLAME
COULD
EXPLODE
BATTERY
These symbols
are important for
you and your
passengers
whenever your
vehicle is driven:
CHILD
RESTRAINT
TOP STRAP
ANCHOR
DOOR LOCK
UNLOCK
FASTEN
SEAT
BELTS
POWER
WINDOW
AIR BAG
These symbols
have to do with
your lamps:
MASTER
LIGHTING
SWITCH
TURN
SIGNALS
PARKING
LAMPS
HAZARD
WARNING
FLASHER
DAYTIME
RUNNING
LAMPS
FOG LAMPS
These symbols
are on some of
your controls:
WINDSHIELD
WIPER
WINDSHIELD
WASHER
WINDSHIELD
DEFROSTER
REAR
WINDOW
DEFOGGER
VENTILATING
FAN
These symbols
are used on
warning and
indicator lights:
ENGINE
COOLANT
TEMP
BATTERY
CHARGING
SYSTEM
BRAKE
COOLANT
ENGINE OIL
PRESSURE
ANTI-LOCK
BRAKES
Here are some
other symbols
you may see:
FUSE
LIGHTER
HORN
FUEL
Vehicle Symbols
These are some of the symbols you may find on your vehicle. Also see ªWarning Lights and Gagesº in the Index.
Page 14 of 328
1-2
Seats and Seat Controls
This section tells you about the seats -- how to adjust
them, and also about reclining front seatbacks, lumbar
adjustments, heated seats and head restraints.
Manual Front Seat
CAUTION:
You can lose control of the vehicle if you try to
adjust a manual driver's seat while the vehicle is
moving. The sudden movement could startle and
confuse you, or make you push a pedal when you
don't want to. Adjust the driver's seat only when
the vehicle is not moving.
Lift the bar located under the front seat to unlock it.
Slide the seat to where you want it and release the bar.
Try to move the seat with your body to be sure the seat
is locked into place.
To tilt the front portion of the seat cushion up or down,
lift the seat lever located on the outboard side of the seat
cushion. Release the lever to lock the seat into place.
Page 85 of 328

2-18
Remember, the theft-deterrent system won't activate if
you lock the doors with a key or use the manual door
lock. It activates only if you use a power door lock
switch or the remote keyless entry transmitter.
To avoid activating the alarm by accident:
�The vehicle should be locked with the key after the
doors are closed if you don't want to activate the
theft
-deterrent system.
�Always unlock a door with a key or use the remote
keyless entry transmitter. (Pressing the unlock button
on the remote keyless entry transmitter disables the
theft
-deterrent system.) Unlocking a door any other
way will activate the alarm. Cycling the ignition
without disarming the theft
-deterrent system will
also activate the alarm.
If you activate the alarm by accident, unlock the driver's
door with your key. You can also turn off the alarm by
using the remote keyless entry transmitter. The alarm
won't stop if you try to unlock a door in any other way.
Testing the Alarm
1. From inside the vehicle, roll down the window, then
get out of the vehicle, keeping the door open.
2. From outside the vehicle, with the door open, lock
the vehicle using the power door lock or the remote
keyless entry transmitter and close the door. Wait
30 seconds until the SECURITY light stops flashing.
3. Reach in and unlock the door using the manual lock
and open the door. The horn will sound and the
headlamps will flash.
If the alarm does not sound when it should, check to
see if the horn works. The horn fuse may be blown.
To replace the fuse, see ªFuses and Circuit Breakersº in
the Index. If the fuse does not need to be replaced, you
may need to have your vehicle serviced.
To reduce the possibility of theft, always activate
the optional theft
-deterrent system when leaving
your vehicle.
Page 105 of 328

2-38 Turn and Lane Change Signals
To signal a turn, move the turn signal/multifunction
lever all the way up or down. The lever returns
automatically when the turn is complete.
This arrow on the
instrument panel cluster
will flash in the direction of
the turn or lane change.
Raise or lower the lever until the arrow starts to flash to
signal a lane change. Hold it there until the lane change
is complete. The lever returns when it is released.
Arrows that flash rapidly when signaling for a turn or
lane change may be caused by a burned
-out front signal
bulb. (This does not occur with a burned
-out rear bulb).
Other drivers won't see the turn signal. Replace
burned
-out bulbs to help avoid possible accidents.
Check the fuse (see ªFuses and Circuit Breakersº in the
Index) and for burned
-out bulbs if the arrow fails to
work when signaling a turn.
Headlamp High/Low Beam
With the Twilight Sentinel� on or with the lamp
control dial turned to the headlamp position, push the
turn signal/multifunction lever on the driver's side of
the steering wheel away from you to turn on the
high
-beam headlamps.
This light on the instrument
panel cluster will be on,
indicating high
-beam usage.
Pull the lever back to the original position to return to
low
-beam headlamps. For more information, see
ªHeadlampsº in the Index.
Flash-To-Pass
This feature uses the high-beam headlamps to signal the
driver in front of you that you want to pass. This feature
will work with either the headlamps on or off.
To use, pull the turn signal lever toward you and release.
Page 123 of 328

2-56 Rear Power Sunshade (Option)
The power rear sunshade helps reduce the amount of
heat and light from the sun entering through the rear
window. The sunshade increases the comfort level of the
rear seat passengers as well as keeping your vehicle a
little cooler when it's parked in a sunny area.
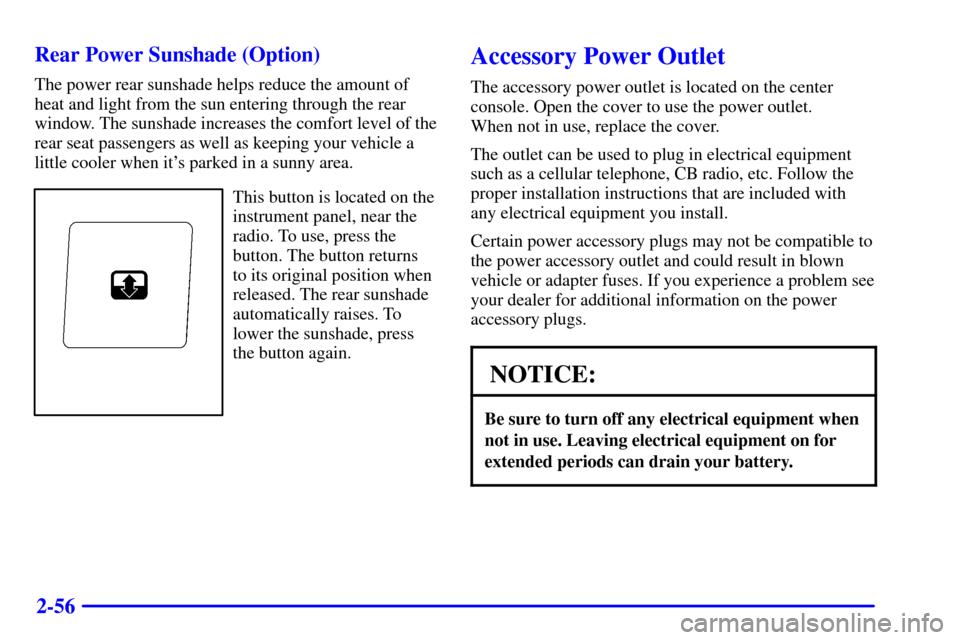
This button is located on the
instrument panel, near the
radio. To use, press the
button. The button returns
to its original position when
released. The rear sunshade
automatically raises. To
lower the sunshade, press
the button again.
Accessory Power Outlet
The accessory power outlet is located on the center
console. Open the cover to use the power outlet.
When not in use, replace the cover.
The outlet can be used to plug in electrical equipment
such as a cellular telephone, CB radio, etc. Follow the
proper installation instructions that are included with
any electrical equipment you install.
Certain power accessory plugs may not be compatible to
the power accessory outlet and could result in blown
vehicle or adapter fuses. If you experience a problem see
your dealer for additional information on the power
accessory plugs.
NOTICE:
Be sure to turn off any electrical equipment when
not in use. Leaving electrical equipment on for
extended periods can drain your battery.
Page 226 of 328

5-5
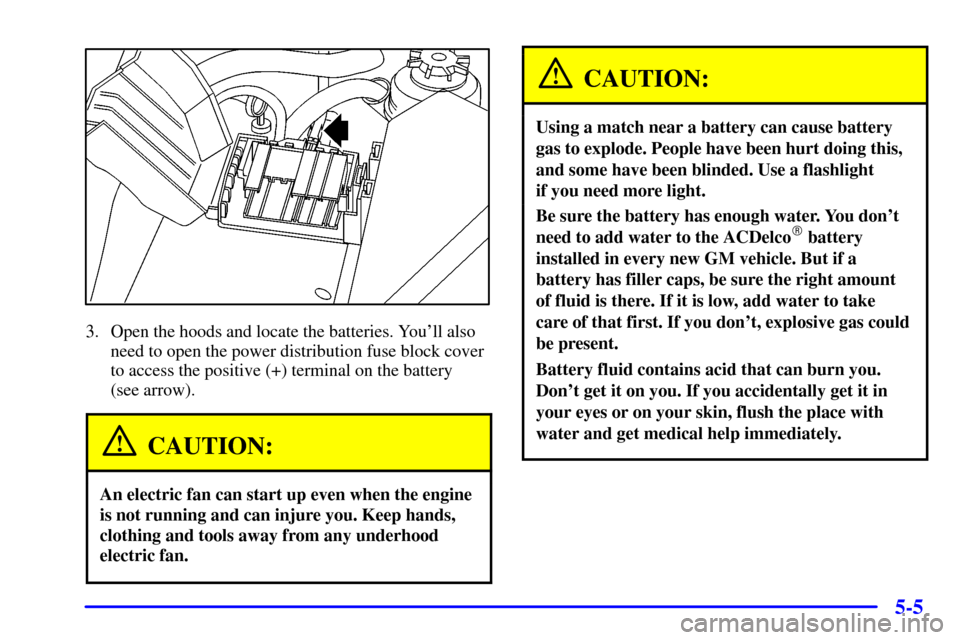
3. Open the hoods and locate the batteries. You'll also
need to open the power distribution fuse block cover
to access the positive (+) terminal on the battery
(see arrow).
CAUTION:
An electric fan can start up even when the engine
is not running and can injure you. Keep hands,
clothing and tools away from any underhood
electric fan.
CAUTION:
Using a match near a battery can cause battery
gas to explode. People have been hurt doing this,
and some have been blinded. Use a flashlight
if you need more light.
Be sure the battery has enough water. You don't
need to add water to the ACDelco� battery
installed in every new GM vehicle. But if a
battery has filler caps, be sure the right amount
of fluid is there. If it is low, add water to take
care of that first. If you don't, explosive gas could
be present.
Battery fluid contains acid that can burn you.
Don't get it on you. If you accidentally get it in
your eyes or on your skin, flush the place with
water and get medical help immediately.
Page 254 of 328

6-3
CAUTION:
You can be injured and your vehicle could be
damaged if you try to do service work on a
vehicle without knowing enough about it.
�Be sure you have sufficient knowledge,
experience, the proper replacement parts
and tools before you attempt any vehicle
maintenance task.
�Be sure to use the proper nuts, bolts and
other fasteners. ªEnglishº and ªmetricº
fasteners can be easily confused. If you use
the wrong fasteners, parts can later break
or fall off. You could be hurt.
Adding Equipment to the Outside of
Your Vehicle
Things you might add to the outside of your vehicle can
affect the airflow around it. This may cause wind noise
and affect windshield washer performance. Check with
your dealer before adding equipment to the outside of
your vehicle.
Fuel
Use premium unleaded gasoline rated at 91 octane or
higher for best performance. You may use middle grade
or regular unleaded gasolines, but your vehicle's
acceleration may be slightly reduced.
It is recommended that the gasoline meet specifications
which were developed by the American Automobile
Manufacturers Association (AAMA) and endorsed by
the Canadian Motor Vehicle Manufacturers Association
for better vehicle performance and engine protection.
Gasolines meeting the AAMA specification could
provide improved driveability and emission control
system performance compared to other gasolines.
In Canada, look for the
ªAuto Makers' Choiceº
label on the fuel pump.
Canada Only