2001 BMW M ROADSTER COUPE brake
[x] Cancel search: brakePage 123 of 171
123n
IndexDataTechnologyRepairsCar careControlsOverview
Storing your vehicle
If you intend to store the vehicle
for longer than three months, have
the maintenance operations described
on this page performed.<
Preparation for storageHave the following operations
performed by your BMW center:
1 Clean and apply a rustproofing agent
or other treatment to the engine,
engine compartment, undercarriage,
axles and major components in
accordance with approved repair
procedures. Wash the vehicle, clean
the interior and treat painted and
chromed parts. Clean the rubber
seals around the hood, luggage
compartment and doors.
2 Change the engine oil and oil filter
with the engine at operating tempera-
ture. As an additional corrosion
protection measure, a corrosion
inhibitor can be added to the engine
in accordance with the manufac-
turer's instructions.
3 Check the coolant level and concen-
tration and top up if necessary.
4 Check the fluid level of the wind-
shield washer fluid reservoir; top up if
necessary.
5 Fill the fuel tank completely to
prevent the formation of condensa-
tion.
6 Increase the tire inflation pressure to
51 psi (350 kPa).Before parking the vehicle for
storage1 Dry the parking brake and footbrake
by brake applications to prevent the
brake discs and drums from
corroding.
2 Park the vehicle in a covered, dry,
and well-ventilated room. Place the
transmission in 1st gear. Chock the
wheels to prevent the vehicle from
rolling if necessary. Do not apply the
parking brake.
3 Remove the battery, charge it
completely and store it in a cool (but
frost-free) room.
M roadster:
4 Remove the hardtop
* and store it
separately. Refer to page 97.
5 Close the convertible top.
During storageRecharge the battery every six months.
If it is not recharged, it will not be
serviceable. Every time the battery is
discharged, especially over extended
periods, its service life is reduced.Removing the vehicle from
storageRecharge the battery if the "Magic Eye"
turns black. Refer to page 141.
Then have Inspection I performed by
your BMW center, including a brake
fluid replacement if necessary. Refer to
the Service Manual.
ProCarManuals.com
Page 131 of 171
131n
IndexDataTechnologyRepairsCar careControlsOverview
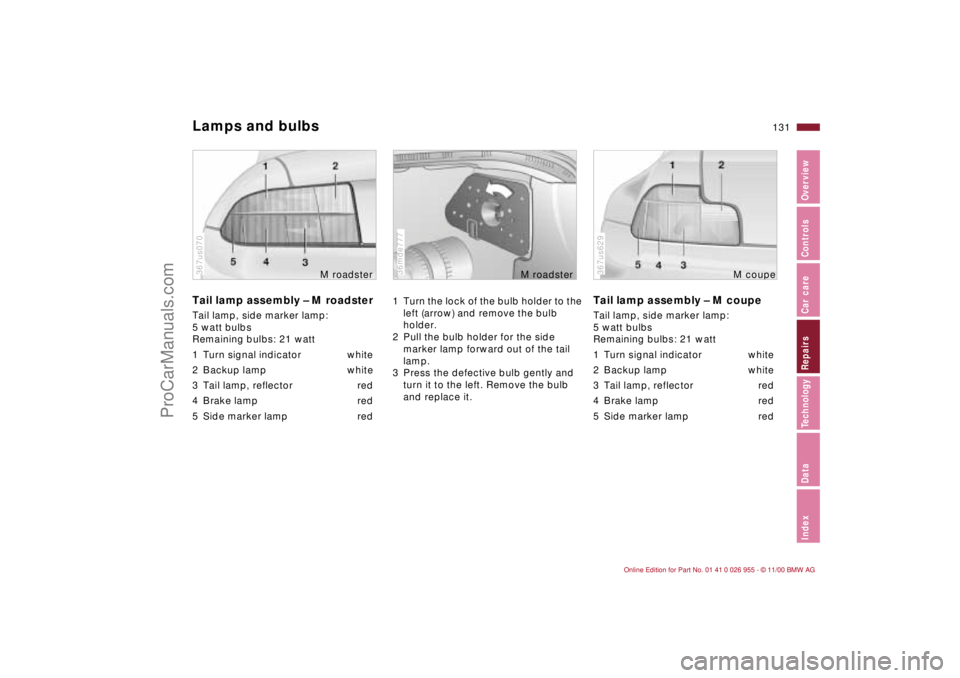
Lamps and bulbsTail lamp assembly – M roadsterTail lamp, side marker lamp:
5 watt bulbs
Remaining bulbs: 21 watt
1 Turn signal indicator white
2 Backup lamp white
3 Tail lamp, reflector red
4 Brake lamp red
5 Side marker lamp red367us070
M roadster
1 Turn the lock of the bulb holder to the
left (arrow) and remove the bulb
holder.
2 Pull the bulb holder for the side
marker lamp forward out of the tail
lamp.
3 Press the defective bulb gently and
turn it to the left. Remove the bulb
and replace it.36mde777
M roadster
Tail lamp assembly – M coupeTail lamp, side marker lamp:
5 watt bulbs
Remaining bulbs: 21 watt
1 Turn signal indicator white
2 Backup lamp white
3 Tail lamp, reflector red
4 Brake lamp red
5 Side marker lamp red367us629
M coupe
ProCarManuals.com
Page 132 of 171
132n
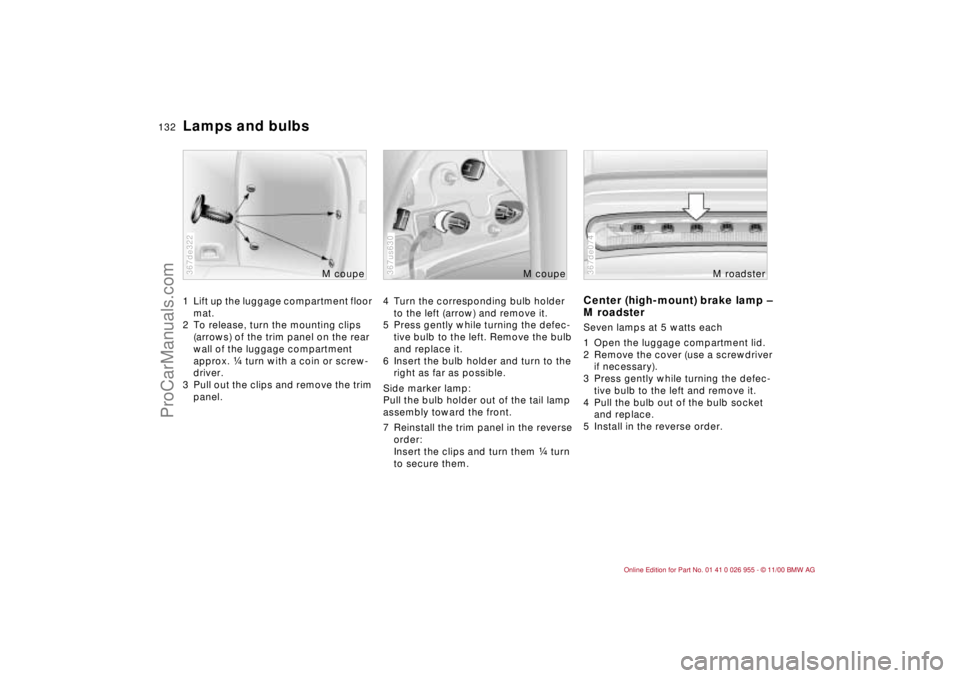
Lamps and bulbs1 Lift up the luggage compartment floor
mat.
2 To release, turn the mounting clips
(arrows) of the trim panel on the rear
wall of the luggage compartment
approx. f turn with a coin or screw-
driver.
3 Pull out the clips and remove the trim
panel.367de322
M coupe
4 Turn the corresponding bulb holder
to the left (arrow) and remove it.
5 Press gently while turning the defec-
tive bulb to the left. Remove the bulb
and replace it.
6 Insert the bulb holder and turn to the
right as far as possible.
Side marker lamp:
Pull the bulb holder out of the tail lamp
assembly toward the front.
7 Reinstall the trim panel in the reverse
order:
Insert the clips and turn them f turn
to secure them.367us630
M coupe
Center (high-mount) brake lamp –
M roadsterSeven lamps at 5 watts each
1 Open the luggage compartment lid.
2 Remove the cover (use a screwdriver
if necessary).
3 Press gently while turning the defec-
tive bulb to the left and remove it.
4 Pull the bulb out of the bulb socket
and replace.
5 Install in the reverse order.367de074
M roadster
ProCarManuals.com
Page 133 of 171
133n
IndexDataTechnologyRepairsCar careControlsOverview
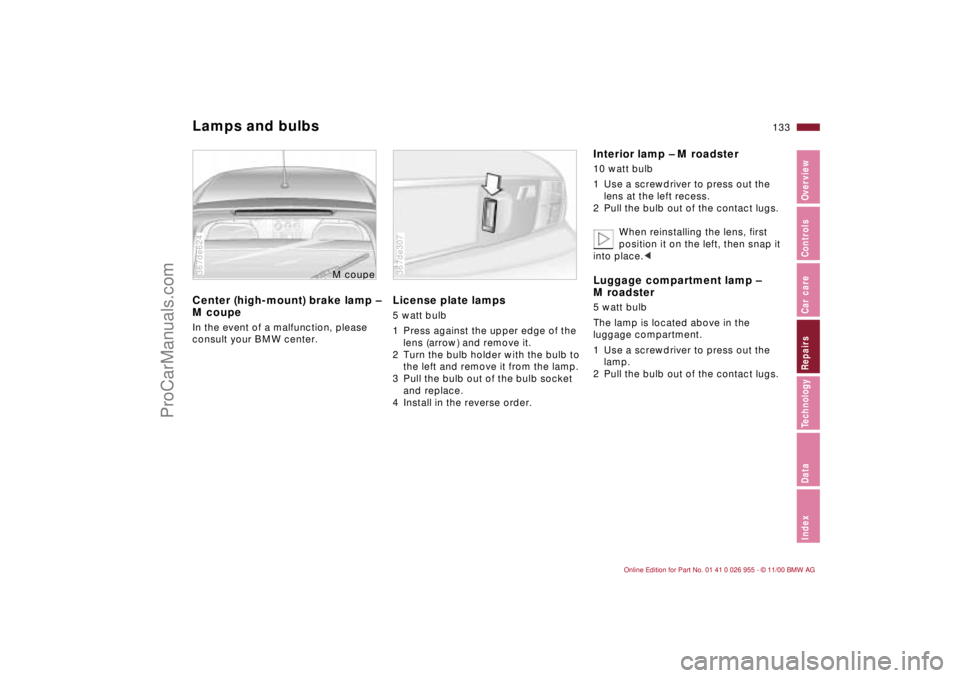
Lamps and bulbsCenter (high-mount) brake lamp –
M coupeIn the event of a malfunction, please
consult your BMW center.367de624
M cou
pe
License plate lamps5 watt bulb
1 Press against the upper edge of the
lens (arrow) and remove it.
2 Turn the bulb holder with the bulb to
the left and remove it from the lamp.
3 Pull the bulb out of the bulb socket
and replace.
4 Install in the reverse order.367de307
Interior lamp – M roadster10 watt bulb
1 Use a screwdriver to press out the
lens at the left recess.
2 Pull the bulb out of the contact lugs.
When reinstalling the lens, first
position it on the left, then snap it
into place.< Luggage compartment lamp –
M roadster5 watt bulb
The lamp is located above in the
luggage compartment.
1 Use a screwdriver to press out the
lamp.
2 Pull the bulb out of the contact lugs.
ProCarManuals.com
Page 135 of 171
135n
IndexDataTechnologyRepairsCar careControlsOverview
Changing a wheel Repairing a flat tireThe M roadster and M coupe are deliv-
ered from the factory without a jack and
lug wrench.
Please have your BMW center switch
the tires on your vehicle from summer
to winter tires, or the reverse.
To repair a flat tire, refer to the following
pages.Safety measures in the event of a
flat tire:
Stop the vehicle as far as possible from
the flow of traffic. Turn on the hazard
warning flashers.
Turn the steering wheel to the straight-
ahead position and engage the steering
lock, engage the parking brake and
shift into 1st or reverse gear.
All passengers should be outside the
vehicle and well away from your imme-
diate working area (for instance, behind
the guardrail).
If a warning triangle or portable hazard
warning lamp is available, set it up on
the roadside at an appropriate distance
from the rear of the vehicle. Comply
with all safety guidelines and regula-
tions.<
M Mobility SystemYou will find an M Mobility system in the
M roadster and M coupe, for repairing
flat tires. With the aid of this system,
you can apply a liquid sealant to the
inside of the tire, thereby sealing off the
damaged area, and then continue
driving.
The M Mobility system makes trans-
porting a spare wheel superfluous,
thereby reducing the amount of weight
you have to carry around.
ProCarManuals.com
Page 146 of 171
146n
Towing the vehicle
The towed vehicle should always
be the lighter of the two vehicles.
If this is not the case, it will not be
possible to control vehicle handling.<
Tow-startingFor instructions on jump-starting, refer
to page 144.
Never attempt to use your vehicle to
push another vehicle, since damage to
the energy-absorbing bumpers could
result.
Towing a vehicle 1 Put the manual-shift gear lever in
neutral.
2 Towing speed:
45 mph (70 km/h) maximum.
3 Towing distance:
95 miles (150 km) maximum.
4 Leave the ignition key at position 1 to
ensure that brake lamps, turn signal
indicators, horn and windshield
wipers remain operative, and to
prevent the steering lock from
engaging.
5 Switch on the hazard warning
flashers (observe applicable legal
regulations).
Find some means of identifying the
vehicle in tow, for instance, place a sign
or warning triangle in the rear window.
Make sure that the ignition key
remains in position 1 even when
the electrical system has failed to
prevent the steering lock from
engaging.
The steering and brakes are without
power assist when the engine is off.
This means that increased effort is
required for steering and braking.<
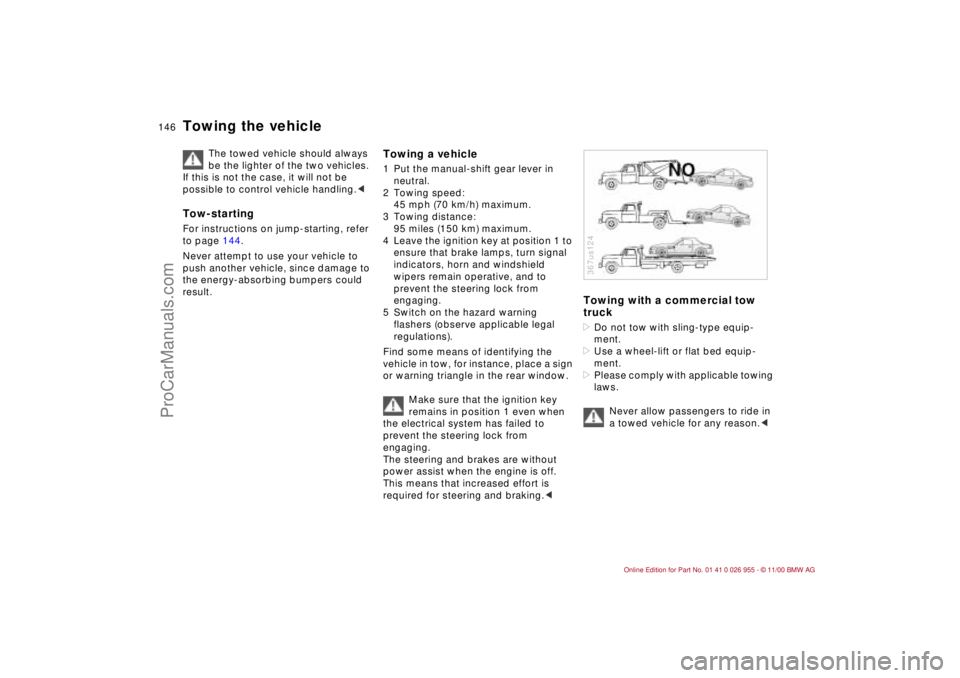
Towing with a commercial tow
truck>Do not tow with sling-type equip-
ment.
>Use a wheel-lift or flat bed equip-
ment.
>Please comply with applicable towing
laws.
Never allow passengers to ride in
a towed vehicle for any reason.< 367us124
ProCarManuals.com
Page 151 of 171
151n
IndexDataTechnologyRepairsCar careControlsOverview
Highly sensitive sensors monitor the
number of revolutions of the wheels,
steering angle, lateral acceleration,
brake pressure and the movement of
the vehicle around its vertical axis.
If differences in wheel revolutions
should occur, the system will recognize
the potential danger this loss of traction
can cause and reduces the drive torque
going to the wheels. The system will
also apply the brakes to all four wheels,
if necessary.
In addition, DSC permanently monitors
the vehicle's current operating condi-
tion and compares it with an ideal
condition that is calculated from the
sensor's signals.
If conditions such as understeering or
oversteering should occur, DSC will
help stabilize the vehicle in fractions of
a second by reducing engine power
output, and applying the brakes to indi-
vidual wheels.
As a result, many dangerous skids can
be prevented even as they are just
beginning, within physically feasible
limits.You may need some time to become
accustomed to this system's interven-
tion. However, it provides optimum
drive force and vehicle stability.
The braking intervention may be
accompanied by a certain degree of
noise.
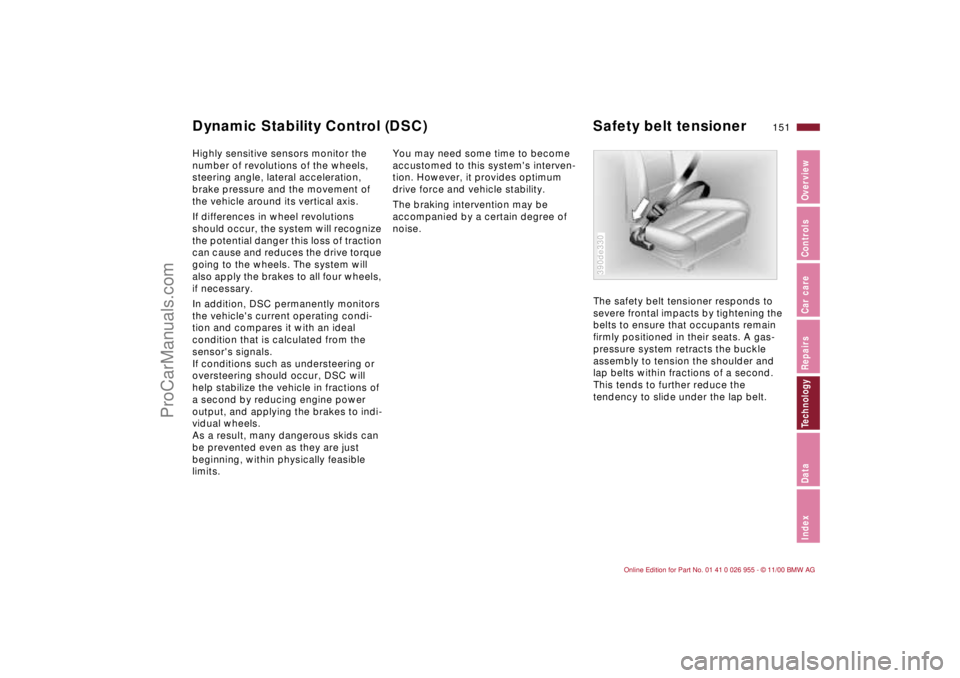
The safety belt tensioner responds to
severe frontal impacts by tightening the
belts to ensure that occupants remain
firmly positioned in their seats. A gas-
pressure system retracts the buckle
assembly to tension the shoulder and
lap belts within fractions of a second.
This tends to further reduce the
tendency to slide under the lap belt.
390de330
Dynamic Stability Control (DSC) Safety belt tensioner
ProCarManuals.com
Page 164 of 171
Everything from A to ZAABS (Antilock Brake
System)89
Accessories6
Adding
brake fluid112t
engine coolant112t
engine oil109
washer fluid108t
Additional storage areas78
Adjusting
backrest47
mirrors47
seat46
washer nozzles108t
Air conditioner74
Air distribution74
Air outlets72
ventilation73
Air pressure26, 98
checking26t
Air vents72
Airbags21, 51, 122, 150
Airflow rate74
Antenna95
Antifreeze112
Antifreeze protection,
radiator93, 112, 112t
Antilock Brake System
(ABS)89
Anti-theft protection32Approved gross vehicle
weight158
Aquaplaning87, 98
Ashtray79
Automatic car washes115
Automatic cruise control61
Automatic dimming, interior
rearview mirror48
Automatic rear window
washer59
Automatic windshield
washer108
Axle weights158
BBackrest, adjusting47
Backup lamps58
bulb replacement131t
Battery140, 160
capacity160
charge condition141
charging141
discharged144
disposal141t
removal and
installation142
Battery change, keys134t
Battery safety terminal142
Beverage holder79
BMW High Performance
Synthetic Oil110
Body-cavity protectant118Brake fluid112
adding112t
disposal113t
Brake hydraulic system20
Brake lamps, bulb replace-
ment131t
Brake pads22, 92
Brake system92
add brake fluid112t
brake fluid112
fluid level92
Brakes
malfunctions92
winter road conditions93
Break-in procedure86
Bulb replacement129t
Bulbs and lamps129
CCalifornia Proposition
65 Warning124
Capacities159
Car care
exterior115
interior120
Car keys30
Car radio
reception95, 150
refer also to the separate
Owner's Manual
Car wash systems115, 117Care
exterior119
interior120
leather121
paint119
upholstery materials121
windows and glass120
Cargo loading82
Caring for the vehicle
finish119
Cassette mode, refer to the
Radio Owner's Manual
Catalytic converter88
CBC (Cornering Brake
Control)90
Cellular phone95
refer also to the separate
Owner's Manual
Central locking system32
Charge condition of the
battery141t
Charge indicator lamp20
Charging the battery141t
Chassis number113
Checking oil level109t
Checking tire
pressure26t, 98
Child restraint system53
installation54
M coupe with tether
strap54
Child seat53
ProCarManuals.com