2001 BMW 540I SEDAN change wheel
[x] Cancel search: change wheelPage 73 of 238
IndexDataTechnologyRepairsCar careControlsOverview
73n
Automatic transmission
*
Before leaving the vehicle when
the engine is running, shift the
selector lever to the "Park" or "Neutral"
position and apply the parking brake.
The vehicle could move if this is not
done.
Never leave the vehicle unattended
with the engine running. An unattended
vehicle with a running engine repre-
sents a potential safety hazard.
If you should accidentally select
"Neutral" while traveling at high speed,
remove your foot from the accelerator
pedal immediately. Allow the engine
speed to drop to idle before selecting
the desired drive position. Damage
could otherwise occur due to excessive
engine speed.<
P ParkSelect "Park" only when the vehicle is
stationary. The transmission locks to
prevent the rear wheels from turning.R ReverseSelect "Reverse" only when the vehicle
is stationary.
N NeutralSelect "Neutral" only if your journey is
interrupted for a long period.D Drive
(automatic shift program)This position is designed for driving
under all normal operating conditions.
All forward gears are available.4 – Sport ProgramThis position is recommended if you
wish to select a performance-oriented
driving style.
3 and 2 – shift limiterSelect this range when you wish to limit
gear changes (on steep uphill or down-
hill slopes, for instance). The transmis-
sion shifts up only as far as the selected
gear."Kickdown" In the "Kickdown" mode, you achieve
maximum performance.
To activate this mode, depress the
accelerator pedal beyond the full-
throttle position, at which a resistance
point must be overcome.
Page 76 of 238
76n
Automatic transmission with Steptronic
*
Before leaving the vehicle when
the engine is running, shift the se-
lector lever to the "Park" or "Neutral"
position and apply the parking brake.
The vehicle could move if this is not
done. Do not leave the car unattended
with the engine running. An unattended
vehicle with a running engine repre-
sents a potential safety hazard.
If you should inadvertently select "Neu-
tral" while traveling at high speed, re-
move your foot from the accelerator
pedal immediately. Allow the engine
speed to drop to idle before selecting
the desired drive position. Damage
could otherwise occur due to excessive
engine speed.<
P ParkSelect "Park" only when the vehicle is
stationary. The transmission locks to
prevent the rear wheels from turning.R ReverseSelect "Reverse" only when the vehicle
is stationary.N NeutralSelect "Neutral" only if your journey is
interrupted for a long period.
D Drive
(automatic shift program)This position is designed for driving un-
der all normal operating conditions. All
forward gears are available."Kickdown" In the "Kickdown" mode, you achieve
maximum performance.
To activate this mode, depress the ac-
celerator pedal beyond the full-throttle
position, at which a resistance point
must be overcome.
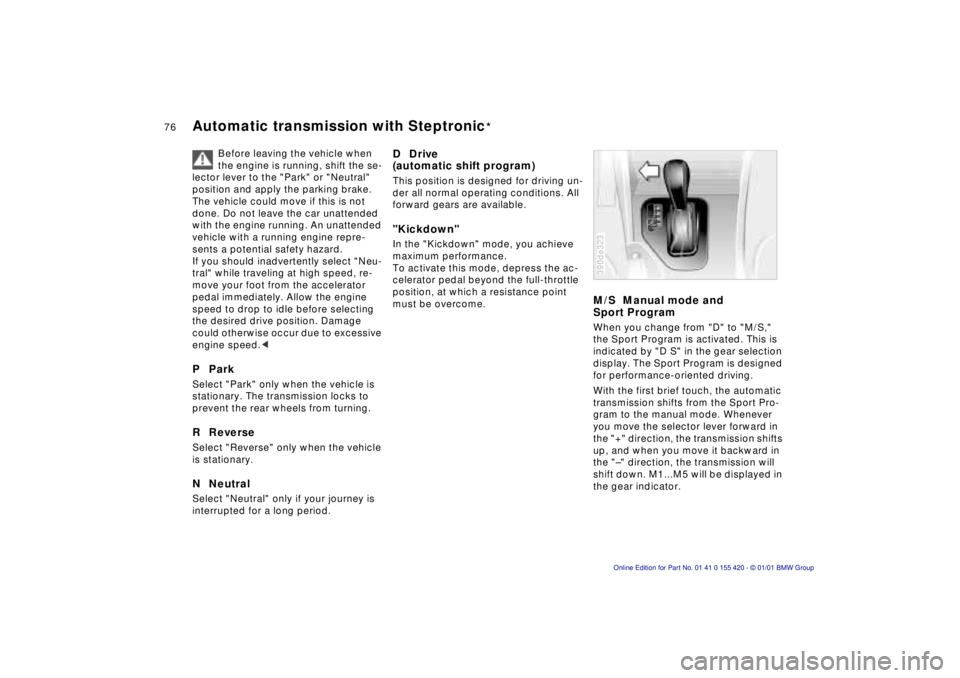
M/S Manual mode and
Sport ProgramWhen you change from "D" to "M/S,"
the Sport Program is activated. This is
indicated by "D S" in the gear selection
display. The Sport Program is designed
for performance-oriented driving.
With the first brief touch, the automatic
transmission shifts from the Sport Pro-
gram to the manual mode. Whenever
you move the selector lever forward in
the "+" direction, the transmission shifts
up, and when you move it backward in
the "–" direction, the transmission will
shift down. M1...M5 will be displayed in
the gear indicator.390de323
Page 104 of 238
104n
Tire Pressure Control (RDC)
*
Loss of tire pressureIf, after a certain period of time, the air
pressure has gone down significantly
(which is normal for any tire), the yellow
indicator lamp comes on or the mes-
sage "CHECK TIRE PRESSURE" ap-
pears in the Check Control.
This alerts you that you should have the
tires inflated to the specified pressures
as soon as possible.
If you are prompted to check the
tire pressure shortly after a cor-
rection has been made, this indicates
that the corrected values were not ac-
curate. Please check the inflation pres-
sure again and make corrections ac-
cording to the inflation pressure table.<
Flat tireIf there is a tire failure with a loss of air
pressure, the red indicator lamp comes
on or the message "TIRE DEFECT" ap-
pears in the Check Control. In addition,
a gong sounds.
If this occurs, reduce vehicle speed im-
mediately and stop the vehicle in a safe
location. Avoid hard brake applications.
Do not oversteer. Replace the flat tire.
The spare tire which is available in
your vehicle as standard equip-
ment is equipped with the electronics
required for RDC and, following activa-
tion of the system, is also monitored af-
ter it is mounted.<
The RDC cannot alert you to se-
vere and sudden tire damage
caused by external factors.<
Have the tires changed by your
authorized BMW center.
Your BMW center has the information
needed for working with RDC and is
equipped with the necessary special
tools.<
System interferenceDuring the period of the malfunction,
the yellow indicator lamp comes on
or the message "TIRECONTROL
INACTIVE" appears in the Check
Control.
You will also see the same message
>in the event of a system fault
>if a wheel is mounted without the
RDC electronics
>if, in addition to the spare tire,
additional wheels with RDC
electronics are on board.
Please contact your BMW center for
additional information.
Page 111 of 238
IndexDataTechnologyRepairsCar careControlsOverview
111n
Air conditionerRecirculated air mode
If there are unpleasant
odors in the outside air, you
can temporarily block the flow of air.
The system then recirculates the air
currently within the vehicle
If you have a multifunction steering
wheel with the button for recirculated
air, you can also use this button to
switch to the recirculated air mode
(refer to page 25).
If the windows fog over in the re-
circulated air mode, switch the re-
circulated air off and increase the air
supply as required.<
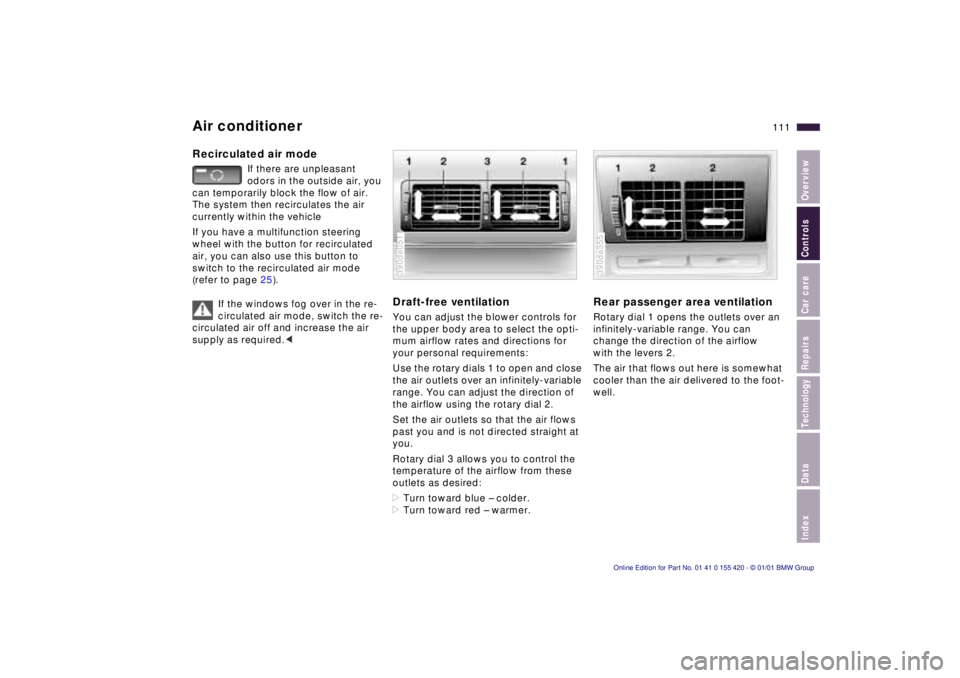
Draft-free ventilation You can adjust the blower controls for
the upper body area to select the opti-
mum airflow rates and directions for
your personal requirements:
Use the rotary dials 1 to open and close
the air outlets over an infinitely-variable
range. You can adjust the direction of
the airflow using the rotary dial 2.
Set the air outlets so that the air flows
past you and is not directed straight at
you.
Rotary dial 3 allows you to control the
temperature of the airflow from these
outlets as desired:
>Turn toward blue – colder.
>Turn toward red – warmer.390de051
Rear passenger area ventilationRotary dial 1 opens the outlets over an
infinitely-variable range. You can
change the direction of the airflow
with the levers 2.
The air that flows out here is somewhat
cooler than the air delivered to the foot-
well.390de355
Page 118 of 238
118n
Automatic climate control
*
>Left-hand indicator lamp on – AUC
mode: the system recognizes pollut-
ants in the outside air and blocks the
flow of air when necessary. The sys-
tem then recirculates the air currently
within the vehicle.
Depending on the air quality, the au-
tomatic system then switches back
and forth between outside air supply
and recirculation of the air within the
vehicle.
>Right-hand indicator lamp on: the
flow of external air into the vehicle is
permanently blocked. The system
then recirculates the air currently
within the vehicle.
If you have a multifunction steering
wheel with the recirculated-air button
(refer to page 25), you can also use it to
switch between "Off" and the recircu-
lated-air mode or AUC and the recircu-
lated-air mode.
If the windows should fog over in
the recirculated air mode, switch
the recirculated air mode off and in-
crease the air supply as required.<
Rear window defroster
When the rear window de-
froster is activated, the indica-
tor lamp comes on. The rear window
defroster switches off automatically.
Residual heating mode
The heat which is stored in
the engine is utilized for
heating the interior when the engine
has been switched off (while waiting at
a railroad crossing, for instance).
In ignition key position 1, you can alter
the settings of the automatic climate
control. In ignition key position 0, the
system automatically directs heated air
to the windshield, side windows and
footwells.
This function may be activated
when the outside temperature is
below approx. 597 (156), the engine
is at operating temperature, and the
battery is adequately charged. The LED
on the button will light up when all con-
ditions have been met.<
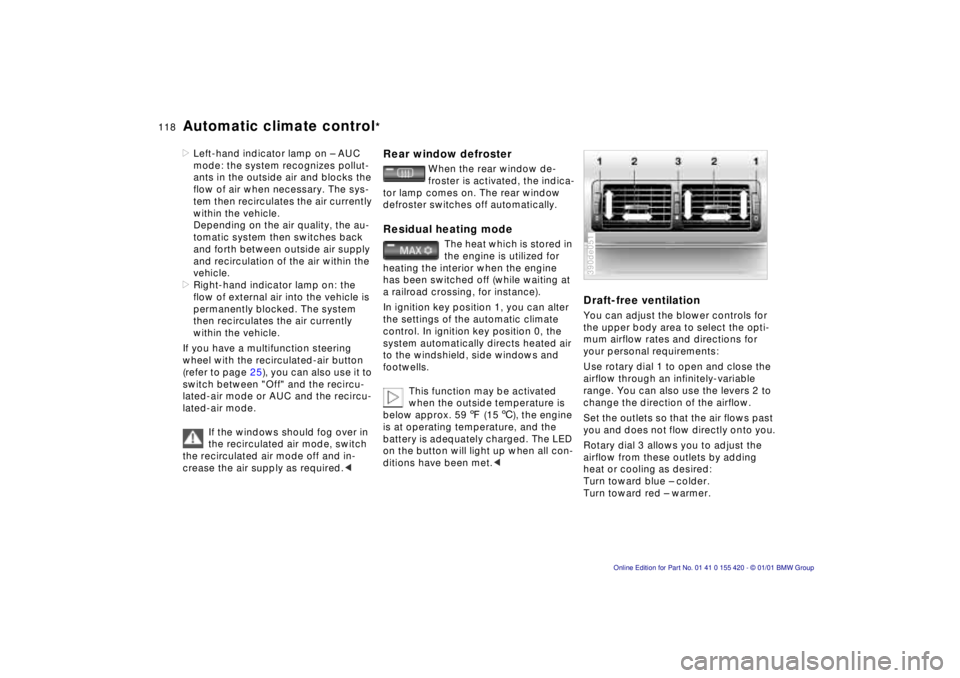
Draft-free ventilationYou can adjust the blower controls for
the upper body area to select the opti-
mum airflow rates and directions for
your personal requirements:
Use rotary dial 1 to open and close the
airflow through an infinitely-variable
range. You can also use the levers 2 to
change the direction of the airflow.
Set the outlets so that the air flows past
you and does not flow directly onto you.
Rotary dial 3 allows you to adjust the
airflow from these outlets by adding
heat or cooling as desired:
Turn toward blue – colder.
Turn toward red – warmer.390de051
Page 155 of 238

Index
Data
Technology
Repairs
Car care
Controls
Overview
155nWinter tires Snow chains*
Do not exceed specified
maximum speeds
Never exceed the maximum
speed for which the tires are
rated.
Unprofessional attempts by laymen to
service tires can lead to damage and
accidents.
Have this work performed by skilled
professionals only. Any BMW center
has the required technical knowledge
and the proper equipment and will be
happy to assist you. <
Tire condition, tire pressure
Winter tires display a perceptible loss in
their ability to cope with winter driving
conditions once the tread wears to be-
low 0.16 in (4 mm), and should thus be
replaced.
Comply with the specified tire inflation
pressures – and be sure to have the
wheel and tire assemblies balanced
every time you change the tires.
Storage
Store tires in a cool, dry place, away
from light whenever possible. Protect
the tires against contact with oil, grease
and fuel. Use narrow-link BMW snow chains
on
summer or winter tires only in pairs and
only on the rear wheels. Comply with all
manufacturer's safety precautions
when mounting the chains.
It is not possible to mount snow
chains on tires with 17-inch
wheels. <
Page 190 of 238

190nChanging a wheel
Safety measures in the event of a
flat tire or wheel change:
Stop the vehicle as far as possible from
passing traffic. Park on a firm, flat,
surface. Switch on the hazard warning
flashers.
Turn the steering wheel to the straight-
ahead position, remove the key and
engage the steering lock. Shift into 1st
or reverse (selector lever in Park with
automatic transmission) and engage
the parking brake.
All passengers should be outside the
vehicle and well away from your imme-
diate working area (behind a guardrail,
for instance).
If necessary, set up your warning trian-
gle or portable hazard warning lamp on
the roadside at an appropriate distance
from the rear of the vehicle. Comply
with all safety guidelines and regula-
tions.
Change the wheel only on a level, firm
surface which is not slippery. Avoid
jacking the vehicle on a soft or slippery
support surface (snow, ice, loose
gravel, etc.), since it could slide side-
ways.Position the jack on a firm support
surface.
Do not place wooden blocks or similar
objects under the jack. If this is done,
the jack might not be able to reach its
full support capacity because of the
limited height.
Do not lie under the vehicle or start the
engine when the vehicle is supported
by the jack – risk of fatal injury. <
What you will need
In order to avoid rattling noises later,
note the position of the tools when you
remove them and return them to their
original position when you are through
using them.
> Car jack
sedan: fold back the luggage com-
partment floor mat for access, then
unscrew the wingnut to release the
jack (arrow).
sport wagon: raise the floor panel
and spare tire cover (refer to
page 134).
When you have completed work,
screw the jack all the way back
down. Fold the handle back and in-
sert it in its holder
> Wedge (wheel chock)
Located next to the jack. Loosen the
wing nut to remove it
394de090
Page 191 of 238
Index
Data
Technology
Repairs
Car care
Controls
Overview
191nChanging a wheel
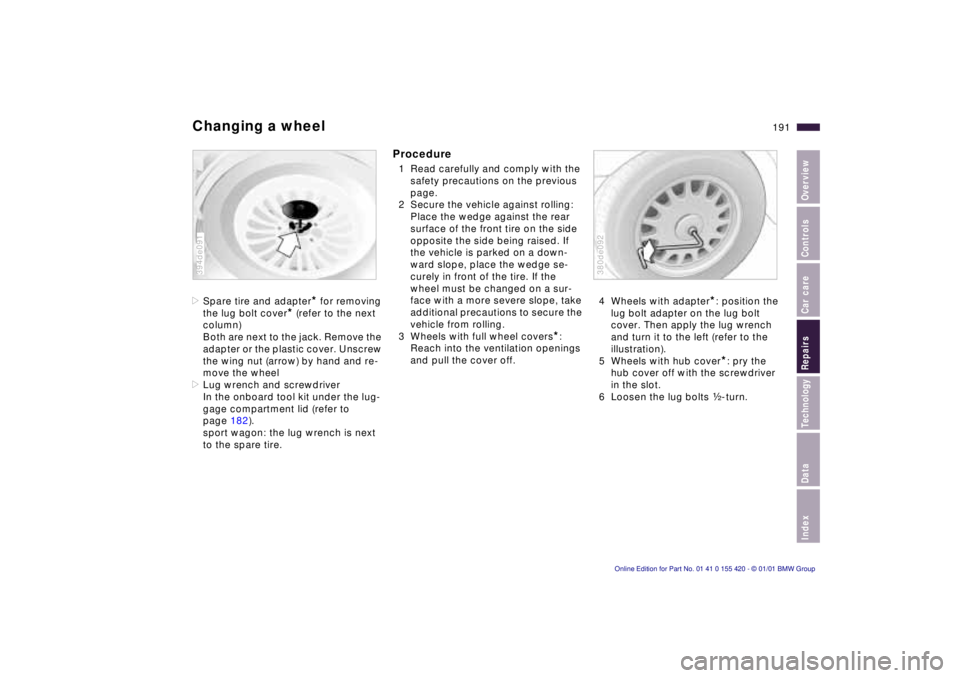
>Spare tire and adapter* for removing
the lug bolt cover
* (refer to the next
column)
Both are next to the jack. Remove the
adapter or the plastic cover. Unscrew
the wing nut (arrow) by hand and re-
move the wheel
> Lug wrench and screwdriver
In the onboard tool kit under the lug-
gage compartment lid (refer to
page 182).
sport wagon: the lug wrench is next
to the spare tire.
394de091
Procedure
1 Read carefully and comply with the safety precautions on the previous
page.
2 Secure the vehicle against rolling: Place the wedge against the rear
surface of the front tire on the side
opposite the side being raised. If
the vehicle is parked on a down-
ward slope, place the wedge se-
curely in front of the tire. If the
wheel must be changed on a sur-
face with a more severe slope, take
additional precautions to secure the
vehicle from rolling.
3 Wheels with full wheel covers
*:
Reach into the ventilation openings
and pull the cover off. 4 Wheels with adapter
*: position the
lug bolt adapter on the lug bolt
cover. Then apply the lug wrench
and turn it to the left (refer to the
illustration).
5 Wheels with hub cover
*: pry the
hub cover off with the screwdriver
in the slot.
6 Loosen the lug bolts g-turn.
380de092