Page 12 of 238

Contents
Operation, care and maintenance
Owner service procedures
Advanced technology
Under the hood:
Hood159
Engine compartment160
Washer fluids164
Washer nozzles164
Engine oil165
Coolant167
Brake fluid168
Vehicle Identification
Number169
Care and maintenance:
The BMW Maintenance
System170
Caring for your car171
Airbags176
Vehicle storage176
Laws and regulations:
Technical modifications177
California Proposition
65 Warning177
OBD interface socket178
Replacement procedures:
Onboard tool kit182
Wiper blades182
Lamps and bulbs183
Changing a wheel190
Battery193
Fuses196
In case of electrical
malfunction:
Fuel filler door198
Sliding/Tilt sunroof198
Tailgate199
Assistance, giving and
receiving:
Jump-starting200
Towing the vehicle201Airbags206
Adaptive Transmission Control
(ATC)207
Automatic Stability Control plus
Traction (ASC+T)/Dynamic
Stability Control (DSC)208
BMW active seat210
Safety belt tensioner210
DSP sound system211
Mirrors with automatic
dimmer211
Rain sensor212
Tire Pressure Control (RDC)213
Integrated rear suspension214
Level control system214
Xenon lamps215
Page 88 of 238

88n
Check Control>CHECK LOWBEAM LIGHTS
CHECK SIDE LIGHTS
CHECK REAR LIGHTS
CHECK FRONT FOGLAMPS
CHECK LICPLATE LIGHT
CHECK HIGHBEAM LIGHTS
CHECK BACK UP LIGHTS
Defective bulb or circuit. Refer to
pages 183 and 196 or consult your
BMW center.
>TRANS. FAILSAFE PROG
Please consult the nearest BMW
center. Refer to pages 74, 77.
>CHECK BRAKE LININGS
Have the brake pads inspected by
your BMW center. Refer to page 146.
>CHECK COOLANT LEVEL
Coolant too low, top up at the next
opportunity. Refer to page 167.
>ENGINE FAILSAFE PROG
*
The electronics allow for continued
driving with reduced engine output or
rpms.
Please have the system inspected by
your BMW center.
Displays after completion of tripAll of the malfunctions registered during
the trip appear consecutively when the
key is turned to position 0.
One of the following displays may ap-
pear:
>LIGHTS ON
>KEY IN IGNITION LOCK
>CHECK ENGINE OIL LEV
Add engine oil at the next opportunity
(next stop for fuel). Refer to page 16 5.
Display appears when you open the
driver's door after parking the vehicle.
A supplementary gong is also heard.
Status reports remain available for a
period of approx. three minutes after
the display goes out and the key is re-
moved from the ignition. Press the
CHECK button. If there were multiple
reports, press the CHECK button re-
peatedly to view them all in sequence.
To check the Check ControlPress the CHECK button 3 with the
ignition key in position 2:
CHECK CONTROL OK appears in the
display.
No malfunctions are present in the
monitored systems.
You can have the Check Control
messages displayed in a different
language.<
Page 181 of 238
Index
Data
Technology
Repairs
Car care
Controls
Overview
Overview
Controls and features Operation, care
and maintenance
Owner service procedures
Technical dataIndex
Advanced technology
181
n
Replacement procedures:
Onboard tool kit 182
Wiper blades 182
Lamps and bulbs 183
Changing a wheel 190
Battery 193
Fuses 196
In case of electrical
malfunction:
Fuel filler door 198
Sliding/Tilt sunroof 198
Tailgate 199
Assistance, giving and
receiving:
Jump-starting 200
Towing the vehicle 201
Page 183 of 238

Index
Data
Technology
Repairs
Car care
Controls
Overview
183nLamps and bulbs
The lamps and bulbs make essential
contributions to the safety of your vehi-
cle. For this reason, follow the instruc-
tions below carefully when replacing a
bulb. If you are not familiar with any of
the procedures, consult your BMW
center.
Do not touch the glass portion of a
new bulb with your bare hands
since even small amounts of impurities
burn into the surface and reduce the
service life of the bulb. Use a clean
cloth, paper napkin, or a similar mate-
rial, or hold the bulb by its metallic
base. <
A replacement bulb set is available from
your BMW center.
Whenever working on the electri-
cal system, switch off the electri-
cal accessory you are working on or
disconnect the cable from the negative
terminal of the battery. Failure to do this
could result in short circuits.
To prevent injuries and damage, com-
ply with any instructions provided by
the bulb manufacturer. <
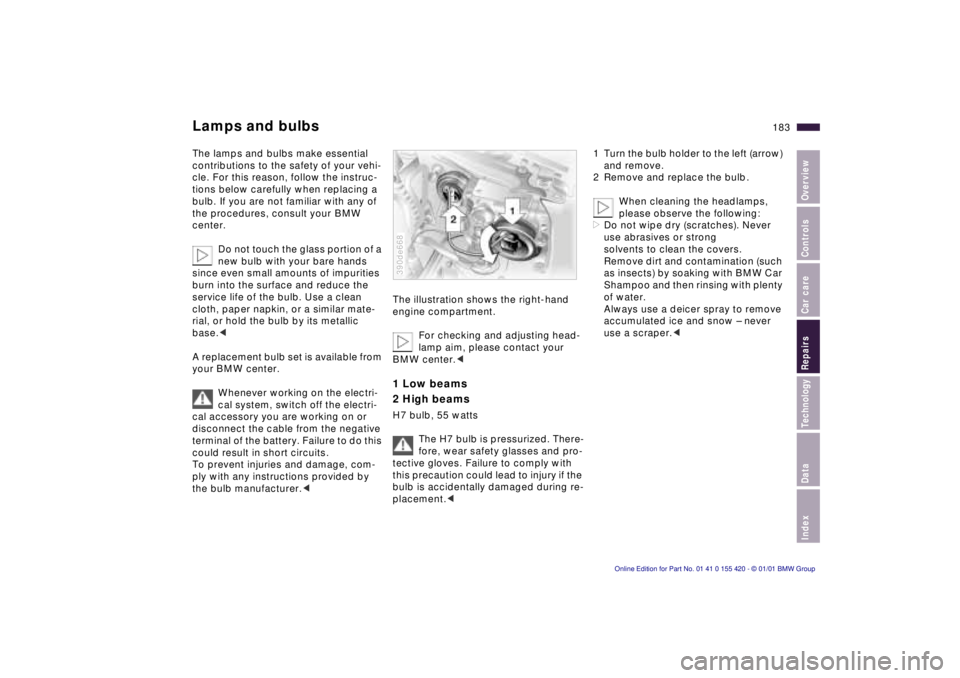
The illustration shows the right-hand
engine compartment.
For checking and adjusting head-
lamp aim, please contact your
BMW center. <
1 Low beams
2 High beams
H7 bulb, 55 watts
The H7 bulb is pressurized. There-
fore, wear safety glasses and pro-
tective gloves. Failure to comply with
this precaution could lead to injury if the
bulb is accidentally damaged during re-
placement. <
390de668
1 Turn the bulb holder to the left (arrow)
and remove.
2 Remove and replace the bulb.
When cleaning the headlamps,
please observe the following:
> Do not wipe dry (scratches). Never
use abrasives or strong
solvents to clean the covers.
Remove dirt and contamination (such
as insects) by soaking with BMW Car
Shampoo and then rinsing with plenty
of water.
Always use a deicer spray to remove
accumulated ice and snow – never
use a scraper. <
Page 184 of 238

184nLamps and bulbs
Xenon lamps*
The operating life of these lamp units is
extremely long and the likelihood of fail-
ure very low, provided that they are not
switched on and off a very great num-
ber of times. If one of these bulbs
should nevertheless fail, it is possible to
continue driving with great caution us-
ing the fog lamps, provided traffic laws
in your area do not prohibit this.
Because of the extremely high
voltages involved, any work on the
lighting system should be carried out by
technically-qualified personnel only.
Otherwise, there is a risk of fatal in-
jury. <
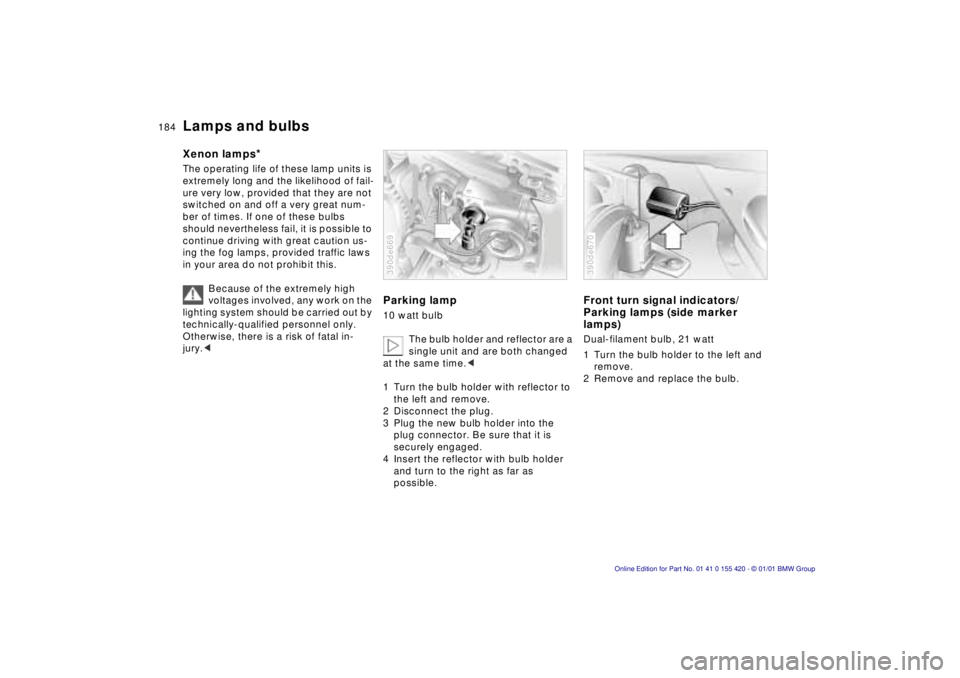
Parking lamp
10 watt bulb
The bulb holder and reflector are a
single unit and are both changed
at the same time. <
1 Turn the bulb holder with reflector to the left and remove.
2 Disconnect the plug.
3 Plug the new bulb holder into the plug connector. Be sure that it is
securely engaged.
4 Insert the reflector with bulb holder and turn to the right as far as
possible.
390de669
Front turn signal indicators/
Parking lamps (side marker
lamps)
Dual-filament bulb, 21 watt
1 Turn the bulb holder to the left and
remove.
2 Remove and replace the bulb.
390de670
Page 185 of 238
Index
Data
Technology
Repairs
Car care
Controls
Overview
185nLamps and bulbs
Side turn signal indicators
5 watt bulb
1 Use finger pressure against the rear
end of the lens (arrow) to press it for-
ward for removal.
2 Press gently on the bulb and turn it to the left to remove it.
390de106
Front fog lamps
H8 bulb, 35 watt
The bulb is pressurized. There-
fore, wear safety glasses and pro-
tective gloves. Failure to comply with
this precaution could lead to injury if the
bulb is accidentally damaged during re-
placement. <
1 Using a screwdriver, remove the mounting clip for the air grill (arrow)
and remove the grill by bringing it
toward the front.
390de671
2 Loosen both screws (arrows).
3 Take off the cover panel next to the headlamp.
4 Turn the headlamp 90 3 to the left and
remove it by bringing it toward the
front.
5 Disconnect the plug.
6 Turn the lamp to the left and remove it.
390de672
Page 186 of 238
186nLamps and bulbs
Tail lamps – sedan
Rear lamp/side marker lamps: LEDs
Remaining bulbs: 21 watts
1 Turn signal indicator yellow
2 Rear lamp/side marker lamps red
3 Backup lamp white
4 Brake lamp red
5 Reflector red
Please contact your BMW center
if there is a defect in the rear
lamp/side marker lamp assembly. <
394us721
1 Use the upper handle to fold down
the side panel in the luggage com-
partment.
2 Turn the corresponding bulb holder to the left (arrow) and remove it.
3 Press the defective bulb gently and turn it to the left. Remove the bulb
and replace it.
4 Insert the bulb holder and turn to the right as far as possible.
394de767
Tail lamps – sport wagon
Rear lamp/side marker lamps: LEDs
Remaining bulbs: 21 watts
1 Turn signal indicator yellow
2 Rear lamp/side marker lamps red
3 Backup lamp white
4 Brake lamps, reflector red
5 Reflector red
Please contact your BMW center
if there is a defect in the rear
lamp/side marker lamp assembly. <
392us722
Page 187 of 238

Index
Data
Technology
Repairs
Car care
Controls
Overview
187nLamps and bulbs
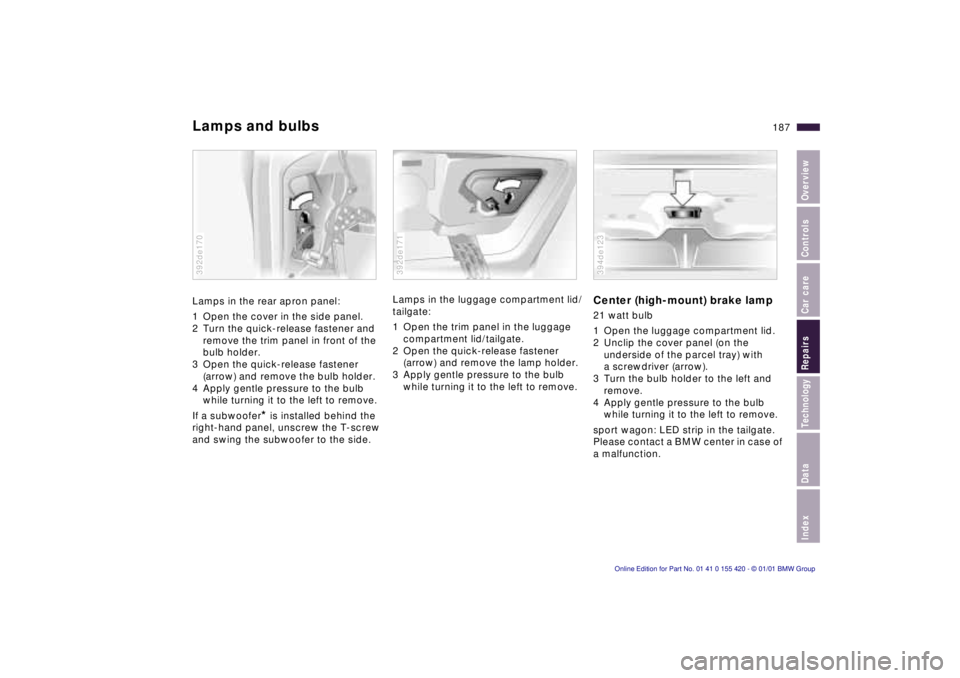
Lamps in the rear apron panel:
1 Open the cover in the side panel.
2 Turn the quick-release fastener and
remove the trim panel in front of the
bulb holder.
3 Open the quick-release fastener (arrow) and remove the bulb holder.
4 Apply gentle pressure to the bulb while turning it to the left to remove.
If a subwoofer
* is installed behind the
right-hand panel, unscrew the T-screw
and swing the subwoofer to the side.
392de170
Lamps in the luggage compartment lid/
tailgate:
1 Open the trim panel in the luggage compartment lid/tailgate.
2 Open the quick-release fastener (arrow) and remove the lamp holder.
3 Apply gentle pressure to the bulb while turning it to the left to remove.
392de171
Center (high-mount) brake lamp
21 watt bulb
1 Open the luggage compartment lid.
2 Unclip the cover panel (on the underside of the parcel tray) with
a screwdriver (arrow).
3 Turn the bulb holder to the left and remove.
4 Apply gentle pressure to the bulb while turning it to the left to remove.
sport wagon: LED strip in the tailgate.
Please contact a BMW center in case of
a malfunction.
394de123