2001 BMW 330i TOURING key
[x] Cancel search: keyPage 100 of 203
100n
Automatic climate control
*
Seat heating
*
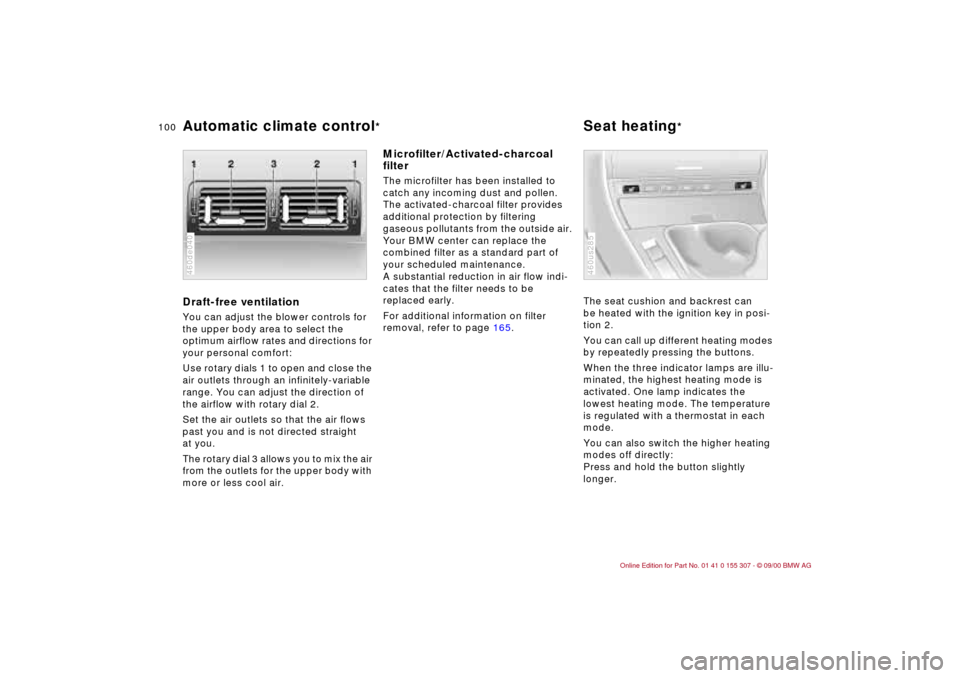
Draft-free ventilation You can adjust the blower controls for
the upper body area to select the
optimum airflow rates and directions for
your personal comfort:
Use rotary dials 1 to open and close the
air outlets through an infinitely-variable
range. You can adjust the direction of
the airflow with rotary dial 2.
Set the air outlets so that the air flows
past you and is not directed straight
at you.
The rotary dial 3 allows you to mix the air
from the outlets for the upper body with
more or less cool air.460de040
Microfilter/Activated-charcoal
filterThe microfilter has been installed to
catch any incoming dust and pollen.
The activated-charcoal filter provides
additional protection by filtering
gaseous pollutants from the outside air.
Your BMW center can replace the
combined filter as a standard part of
your scheduled maintenance.
A substantial reduction in air flow indi-
cates that the filter needs to be
replaced early.
For additional information on filter
removal, refer to page 165.The seat cushion and backrest can
be heated with the ignition key in posi-
tion 2.
You can call up different heating modes
by repeatedly pressing the buttons.
When the three indicator lamps are illu-
minated, the highest heating mode is
activated. One lamp indicates the
lowest heating mode. The temperature
is regulated with a thermostat in each
mode.
You can also switch the higher heating
modes off directly:
Press and hold the button slightly
longer.
460us285
Page 101 of 203
101n
IndexDataTechnologyRepairsCar careControlsOverview
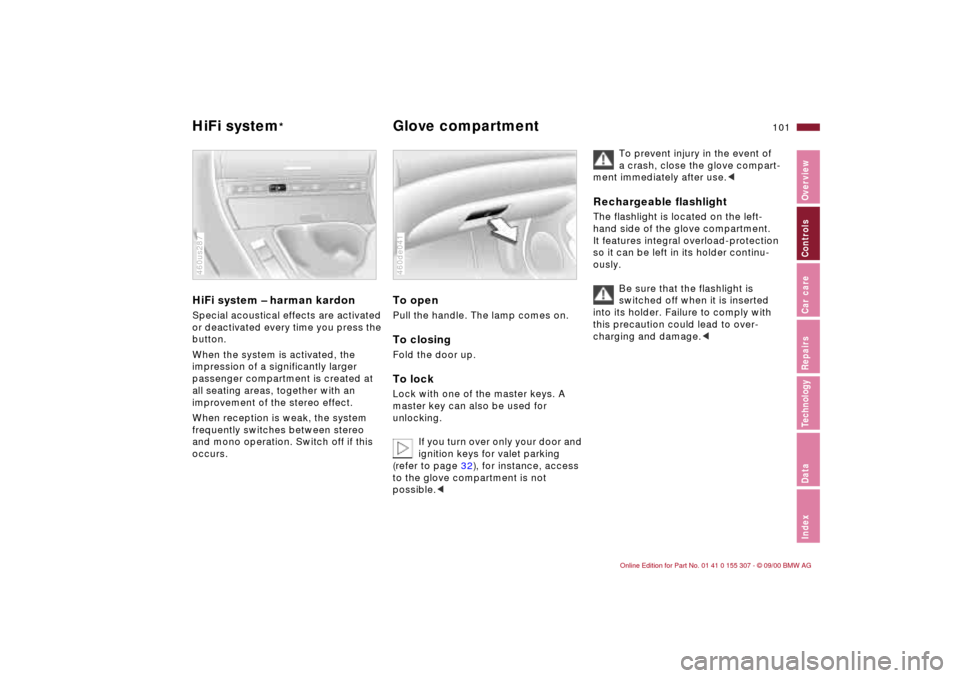
HiFi system Ð harman kardonSpecial acoustical effects are activated
or deactivated every time you press the
button.
When the system is activated, the
impression of a significantly larger
passenger compartment is created at
all seating areas, together with an
improvement of the stereo effect.
When reception is weak, the system
frequently switches between stereo
and mono operation. Switch off if this
occurs.460us287
To open Pull the handle. The lamp comes on.To closingFold the door up.To lockLock with one of the master keys. A
master key can also be used for
unlocking.
If you turn over only your door and
ignition keys for valet parking
(refer to page 32), for instance, access
to the glove compartment is not
possible.<460de041
To prevent injury in the event of
a crash, close the glove compart-
ment immediately after use.<
Rechargeable flashlightThe flashlight is located on the left-
hand side of the glove compartment.
It features integral overload-protection
so it can be left in its holder continu-
ously.
Be sure that the flashlight is
switched off when it is inserted
into its holder. Failure to comply with
this precaution could lead to over-
charging and damage.<
HiFi system
*
Glove compartment
Page 104 of 203
104n
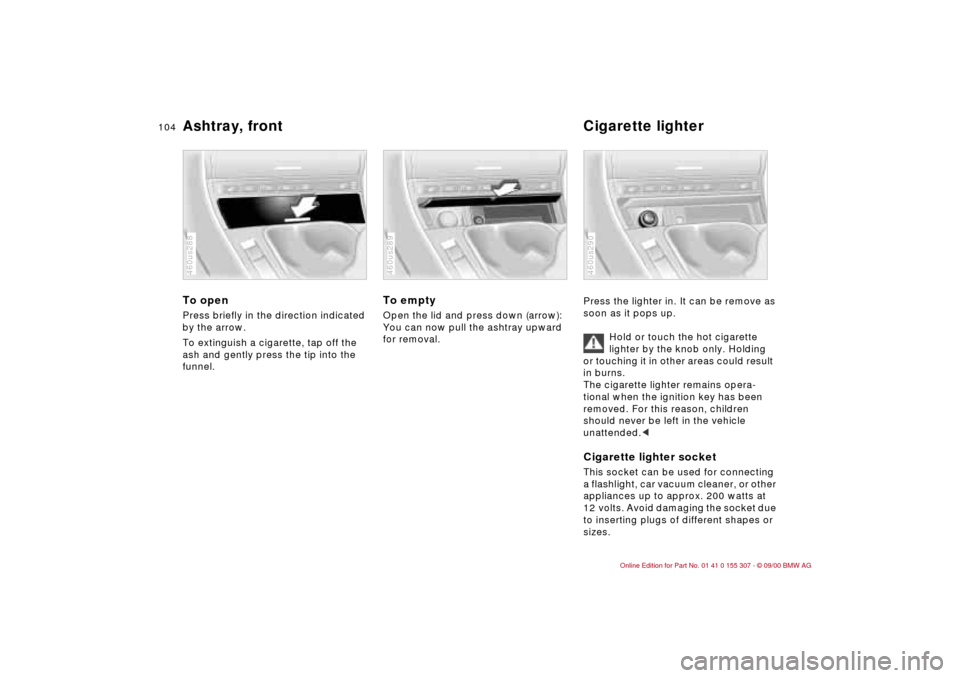
Ashtray, front Cigarette lighterTo open Press briefly in the direction indicated
by the arrow.
To extinguish a cigarette, tap off the
ash and gently press the tip into the
funnel.460us288
To emptyOpen the lid and press down (arrow):
You can now pull the ashtray upward
for removal.460us289
Press the lighter in. It can be remove as
soon as it pops up.
Hold or touch the hot cigarette
lighter by the knob only. Holding
or touching it in other areas could result
in burns.
The cigarette lighter remains opera-
tional when the ignition key has been
removed. For this reason, children
should never be left in the vehicle
unattended.
appliances up to approx. 200 watts at
12 volts. Avoid damaging the socket due
to inserting plugs of different shapes or
sizes.460us290
Page 159 of 203
159n
IndexDataTechnologyRepairsCar careControlsOverview
Changing a wheel
Take these precautionary mea-
sures if you have either a flat tire or
are changing a wheel.
Stop the vehicle as far as possible from
passing traffic. Park on a firm, flat
surface. Switch on the hazard warning
flashers. Turn the steering wheel to the
straight-ahead position, remove the key
and engage the steering lock. Shift into
1st gear or reverse (selector lever in
"Park" with automatic transmission)
and engage the parking brake.
All passengers should be outside the
vehicle and well away from your imme-
diate working area (behind a guardrail,
for instance).
If a warning triangle or portable hazard
warning lamp is available, set it up on
the roadside at an appropriate distance
from the rear of the vehicle. Comply with
all safety guidelines and regulations.
Change the wheel only on a level, firm
surface that is not slippery. Avoid jack-
ing the vehicle on a soft or slippery
support surface (snow, ice, loose gravel,
etc.), as it could slide sideways.
Position the jack on a firm support
surface.
Do not place wooden blocks or similar
objects under the jack, otherwise, the
jack might not be able to reach its full
support capacity because of the limited
height.
Do not lie under the vehicle or start the
engine when the vehicle is supported by
the jack. Failure to comply with this
creates a risk of fatal injury.<
Your BMW has either a spare tire or
space-saver tire for temporary use to
ensure your mobility.
To remove the spare wheel, lift out
the floor panel in the luggage
compartment completely (refer to
page 109.<
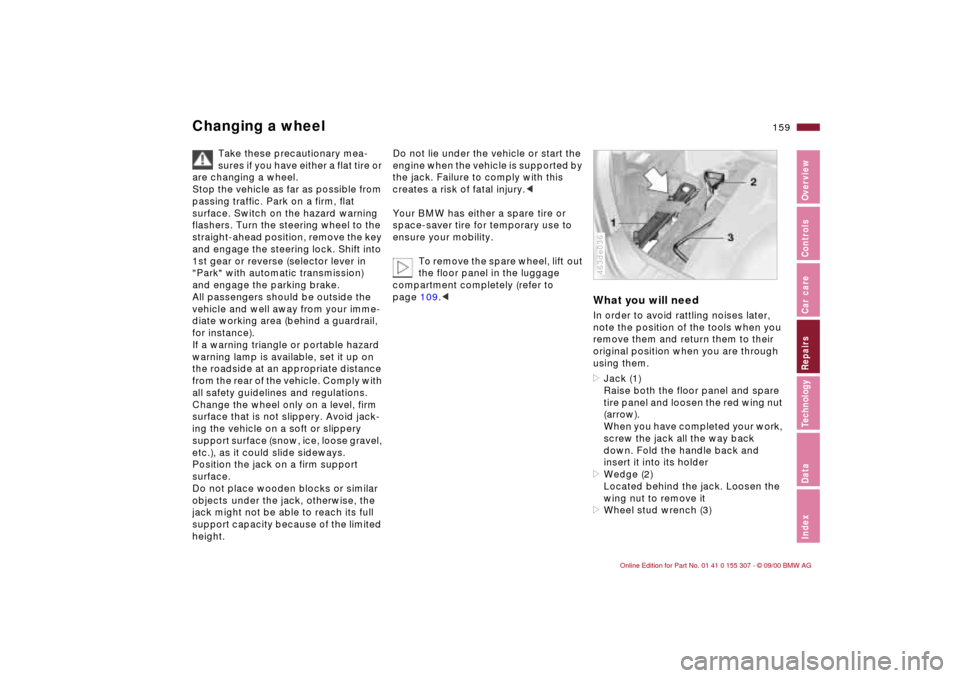
What you will needIn order to avoid rattling noises later,
note the position of the tools when you
remove them and return them to their
original position when you are through
using them.
>Jack (1)
Raise both the floor panel and spare
tire panel and loosen the red wing nut
(arrow).
When you have completed your work,
screw the jack all the way back
down. Fold the handle back and
insert it into its holder
>Wedge (2)
Located behind the jack. Loosen the
wing nut to remove it
>Wheel stud wrench (3) 463de036
Page 163 of 203
163n
IndexDataTechnologyRepairsCar careControlsOverview
BatteryBattery careThe battery is completely maintenance-
free. That means that the original acid
will normally last for the service life of
the battery under temperate climatic
conditions.
For all questions that regard the
battery, please consult your BMW
center. Since the battery is absolutely
maintenance-free, the following is for
your information only.
please be cautious whenever you work
with or near the battery.
Before handling the battery,
please read the following infor-
mation.
Wear eye protection. Do not al-
low particles containing battery
acid or lead to come into con-
tact with your eyes, your skin, or your
clothing.
Battery acid is extremely corro-
sive. Wear eye protection and
protective gloves. Do not tip the
battery. Battery acid can leak from the
ventilation openings.
Do not allow children to have
access to batteries and battery
acid.
Never allow sparks or open
flame near the battery. Do
not smoke in the vicinity of the
battery. Avoid sparks from electrical
cables or electrical equipment. Turn the
key to position 0 in the steering lock
when disconnecting or connecting the
battery. Never short-circuit the battery
terminals. This creates a risk of injury
from high-energy sparks.
A highly explosive gas is gener-
ated when the battery is
charged.
If you happen to get acid in
your eyes, rinse thoroughly for
15 minutes with clear water.
Consult a physician immediately. If you
get acid spray on your skin or clothing,
rinse with plenty of water. If acid is
accidentally swallowed, consult a
physician immediately.
In order to protect the battery
case from ultraviolet radiation,
do not place it in direct sunlight.
A discharged battery can freeze. Store
the battery in areas where temperature
remains above freezing.
Removal and installation
Do not disconnect the battery
while the engine is running.
Disconnecting the battery cable when
the engine is running will cause a
voltage surge which will damage the
vehicle's onboard electronics.
Do not make any modifications in the
wires to the positive terminal. If you do
so, the protective function of the safety
battery terminal is no longer ensured.
Repairs and disposal may only be per-
formed by specially trained personnel.<
When removing the battery, disconnect
the cable on the negative terminal first,
then the cable on the positive terminal.
Loosen the center adjusting screw on
the battery retaining strap (use the
screwdriver included with the onboard
tool kit) and disconnect the strap.
When installing a battery, connect the
positive terminal first, then connect the
negative terminal.
When installing a battery, be sure
that it is mounted properly and that
the retaining strap is installed using the
center adjustment screw, otherwise, the
battery will not be secure enough in
case of an accident.<
Page 166 of 203
166n
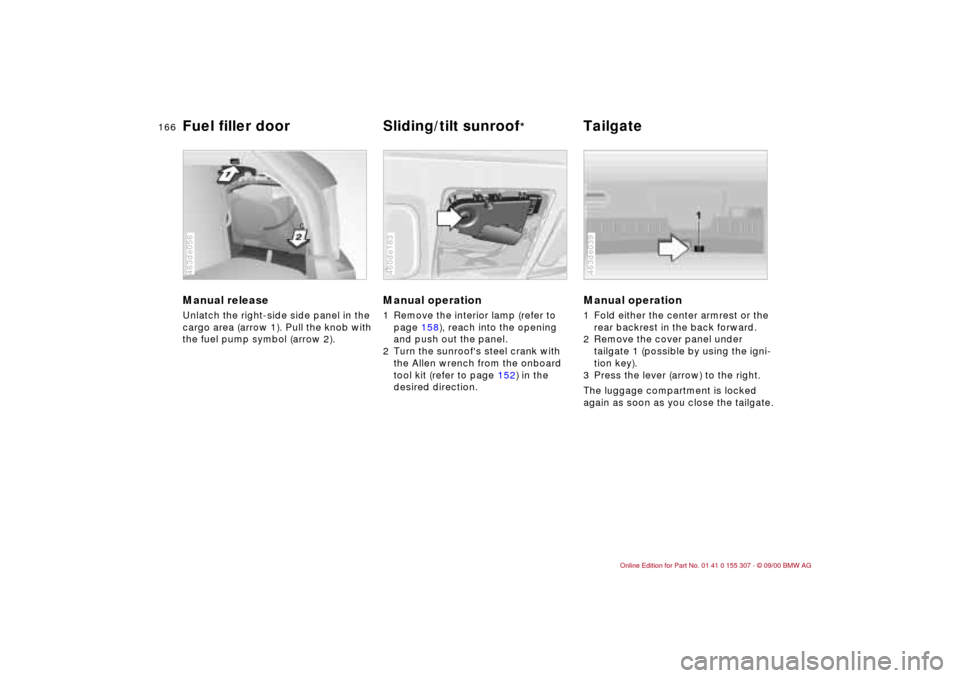
Manual release Unlatch the right-side side panel in the
cargo area (arrow 1). Pull the knob with
the fuel pump symbol (arrow 2). 463de056
Manual operation 1 Remove the interior lamp (refer to
page 158), reach into the opening
and push out the panel.
2 Turn the sunroof's steel crank with
the Allen wrench from the onboard
tool kit (refer to page 152) in the
desired direction.460de183
Manual operation1 Fold either the center armrest or the
rear backrest in the back forward.
2 Remove the cover panel under
tailgate 1 (possible by using the igni-
tion key).
3 Press the lever (arrow) to the right.
The luggage compartment is locked
again as soon as you close the tailgate.463de039
Fuel filler door Sliding/tilt sunroof
* Tailgate
Page 193 of 203

Everything from A to Z
193n
IndexDataTechnologyRepairsCar careControlsOverview
Changing a wheel159
Charge indicator lamp20
Check air pressure28
Check Control75
Check engine oil level135
Child restraint
systems54,60
Child-safety locks58
Child's seat54
Cigarette lighter104
Cleaning windshield68
Clock75
refer also to the Radio or
Computer Owner's Manual
Cockpit16
Coin holder102
Combination switch68
Compression184
Computer76
Configure settings52
Consumption77
display74
Contents10
Control elements20
Coolant121,137,187
antifreeze121
Coolant temperature
gauge74
Cooling system187
Copyright4
Cornering Brake Control
(CBC)21,117 Cruise control71
Cruising range77
Cup holder, refer to
beverage holder102
Curb weight186
Current check indicator20
D
Dashboard16
Data
dimensions185
engine184
technical184
weights186
Daytime-driving lamp
switch87
DBC (Dynamic Brake
Control)118
Defrost position94,98
Defrostable rear window99
Defrosting
rear window92
windows94,98
Digital clock75
Dimensions185
Dipstick, engine oil135
Disc brakes118
Displacement184
Display lighting87
Displays18
Distance warning78 Diversity Antenna
system174
Door key32,35
Door locks, care121
Doors
child-safety locks58
emergency operation34
unlocking and locking34
DOT Quality Grades125
Draft-free ventilation93
Drive belts188
Driving hints115
Driving in winter121
Driving lamps87
DSC (Dynamic Stability
Control)81,173
Dynamic Brake Control
(DBC)118
Dynamic Stability Control
(DSC)22,81,173
E
Electric power seat48
Electric power windows43
Electrical accessories,
failure164
Electrical system188
Electronic vehicle
immobilizer33
Elements of operation16 Emergency operation,
doors34
Energy Control73
Engine
coolant137,187
data184
starting61
Engine oil
capacity187
consumption135
pressure20
quality136
specifications136
viscosity136
Engine speed184
Exterior mirrors51
F
Failure messages75
Fault displays75
Fault, ABS117
Filler cap cover27
Filling capacities187
Filling the washer
reservoir187
First-aid kit26
Fittings, tow starting and
towing168
Flashlight101
Flat tire124,159
Fog lamps88
Page 194 of 203

Everything from A to ZFolding rear backrest108
Footbrake118
Footwell lamps88
bulb replacement158
Four-wheel drive175
Front fog lamps, bulb
replacement155
Front seat adjustment46
Frost protection,
radiator137
Fuel28
consumption77
consumption display74
gauge74
preparation184
quality28
Fuel filler door
releasing following an
electrical malfunction166
Fuel reserve indicator
lamp74
Fuel tank capacity187
Fuel tank gauge74
Functional status179
Fuses164 G
Gasoline28
Gasoline gauge74
Gasoline quality28
Glove compartment101 Glove compartment lamp,
bulb replacement158
Gross vehicle weight186
H
Handbrake63
Hands-free system103
Hazard warning flashers26
Hazard warning triangle26
Head restraint47
Headlamp covers,
care141,153
Headlamp flasher88
Headlamp washer
system70,134,187
Heated seats100
Heating, rapid94
Heavy loads110
Height185
HiFi system101
High beams23,68,88
bulb replacement153
High Performance Synthetic
Oils136
High-mount brake lamp157
Hood release130
Horn17
Hubcap160
Hydraulic Brake assistant,
refer to DBC118
I
Ice warning76
Icy roads76,121
Identification, tires127
Ignition key32,35
Ignition lock61
Imprint4
Indicator lamps20
Inflation pressure28,124
monitoring85,178
INSPECTION74
Installation child restraint
systems60
Instrument cluster18
Instrument lighting87
Interaxle tire rotation126
Interface socket for Onboard
Diagnostics149
Interference, cellular
phone123
Interior lamps36,88
bulb replacement158
remote control36
Interior motion sensor41
Interior rearview mirror51
automatic dimming
feature52,176
Interlock61
Intermittent wipe68
J
Jack159
Jump-starting167 K
Key32,35
Key Memory52 L
Lamps and bulbs153
Lashing eyes110
LATCH attachment of the
child seat58
Leather care145
Length185
License plate lamp
bulb replacement157
Light switch87
Light-alloy wheels129
Lighter104
Load-securing devices110
Louvers90,96
Low beam headlamps87
bulb replacement153
Lug bolts160
Lug wrench159