2001 BMW 330i TOURING engine
[x] Cancel search: enginePage 138 of 203
138n
Coolant Brake fluidAdding coolant Wait until the engine cools before
removing the cap from the expansion
tank. The needle of the coolant gauge
in the instrument cluster must be
located in the blue zone. If it is not,
there is a danger of scalding.
1 Turn the cap slightly counterclock-
wise in order to allow accumulated
pressure to escape, then open.
2 If the coolant is low, slowly add
coolant until the correct level is
reached Ð do not overfill.
The coolant is a mixture of water and
extended-duty antifreeze with corrosion
inhibitor. Always maintain the
prescribed all-season 50:50 mixture
ratio for year-round protection against
internal corrosion. No other additives
are required.
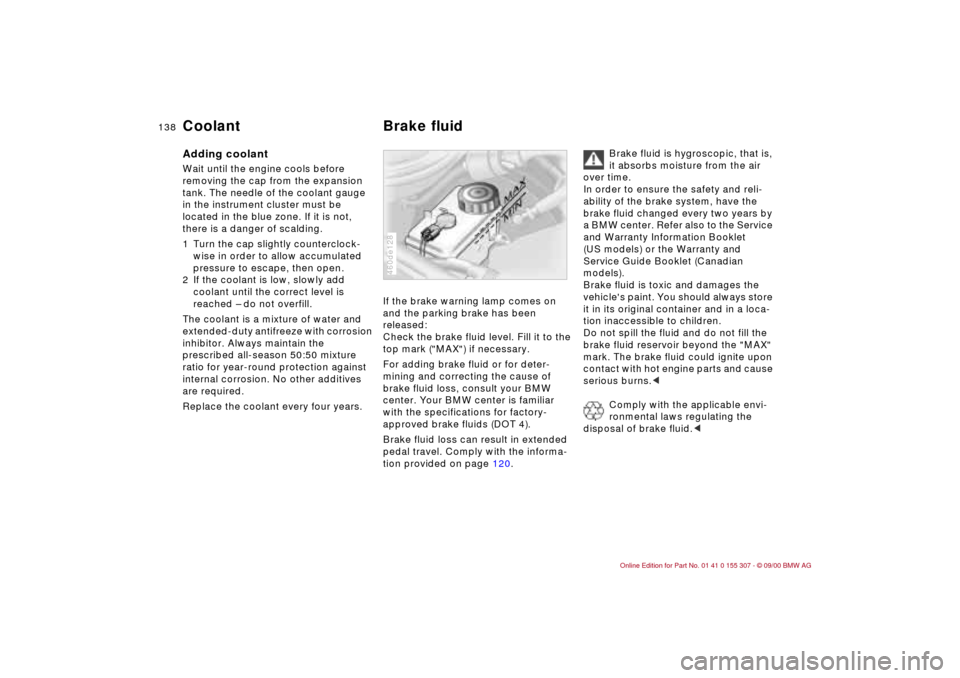
Replace the coolant every four years.If the brake warning lamp comes on
and the parking brake has been
released:
Check the brake fluid level. Fill it to the
top mark ("MAX") if necessary.
For adding brake fluid or for deter-
mining and correcting the cause of
brake fluid loss, consult your BMW
center. Your BMW center is familiar
with the specifications for factory-
approved brake fluids (DOT 4).
Brake fluid loss can result in extended
pedal travel. Comply with the informa-
tion provided on page 120.
460de128
Brake fluid is hygroscopic, that is,
it absorbs moisture from the air
over time.
In order to ensure the safety and reli-
ability of the brake system, have the
brake fluid changed every two years by
a BMW center. Refer also to the Service
and Warranty Information Booklet
(US models) or the Warranty and
Service Guide Booklet (Canadian
models).
Brake fluid is toxic and damages the
vehicle's paint. You should always store
it in its original container and in a loca-
tion inaccessible to children.
Do not spill the fluid and do not fill the
brake fluid reservoir beyond the "MAX"
mark. The brake fluid could ignite upon
contact with hot engine parts and cause
serious burns.<
Comply with the applicable envi-
ronmental laws regulating the
disposal of brake fluid.<
Page 139 of 203
139n
IndexDataTechnologyRepairsCar careControlsOverview
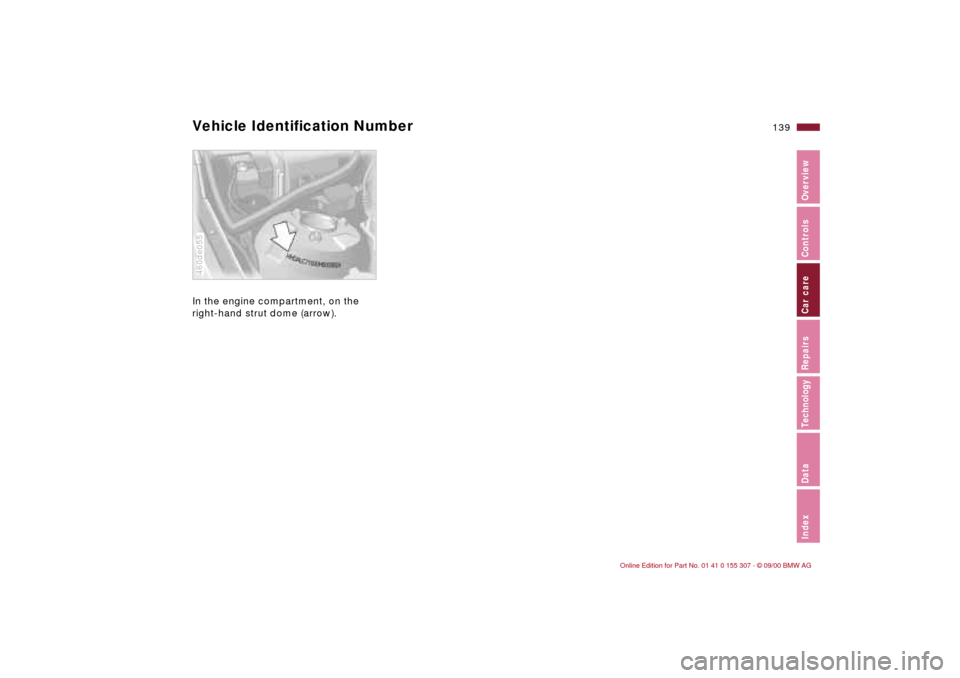
Vehicle Identification NumberIn the engine compartment, on the
right-hand strut dome (arrow). 460de055
Page 140 of 203
140n
The BMW Maintenance System has
been designed as a reliable means for
providing maximum driving and operat-
ing safety Ð and as cost effectively as
possible for you.
Please keep in mind that regular main-
tenance is not only necessary for the
safety of your vehicle, but also plays a
significant role in maintaining the resale
value of the vehicle.
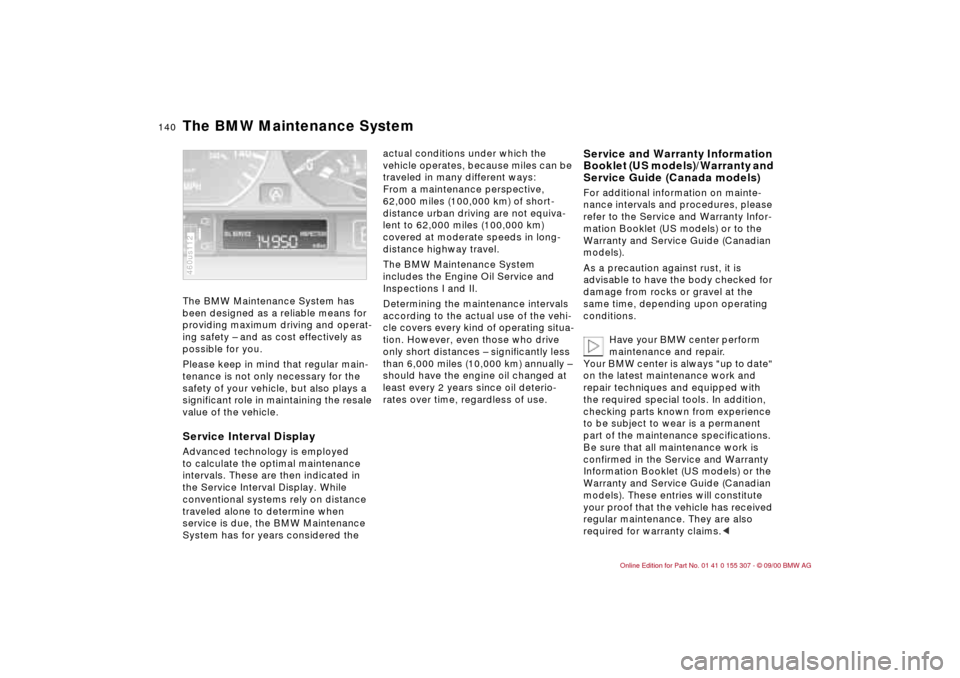
Service Interval DisplayAdvanced technology is employed
to calculate the optimal maintenance
intervals. These are then indicated in
the Service Interval Display. While
conventional systems rely on distance
traveled alone to determine when
service is due, the BMW Maintenance
System has for years considered the 460us112
actual conditions under which the
vehicle operates, because miles can be
traveled in many different ways:
From a maintenance perspective,
62,000 miles (100,000 km) of short-
distance urban driving are not equiva-
lent to 62,000 miles (100,000 km)
covered at moderate speeds in long-
distance highway travel.
The BMW Maintenance System
includes the Engine Oil Service and
Inspections I and II.
Determining the maintenance intervals
according to the actual use of the vehi-
cle covers every kind of operating situa-
tion. However, even those who drive
only short distances Ð significantly less
than 6,000 miles (10,000 km) annually Ð
should have the engine oil changed at
least every 2 years since oil deterio-
rates over time, regardless of use.
Service and Warranty Information
Booklet (US models)/Warranty and
Service Guide (Canada models)For additional information on mainte-
nance intervals and procedures, please
refer to the Service and Warranty Infor-
mation Booklet (US models) or to the
Warranty and Service Guide (Canadian
models).
As a precaution against rust, it is
advisable to have the body checked for
damage from rocks or gravel at the
same time, depending upon operating
conditions.
Have your BMW center perform
maintenance and repair.
Your BMW center is always "up to date"
on the latest maintenance work and
repair techniques and equipped with
the required special tools. In addition,
checking parts known from experience
to be subject to wear is a permanent
part of the maintenance specifications.
Be sure that all maintenance work is
confirmed in the Service and Warranty
Information Booklet (US models) or the
Warranty and Service Guide (Canadian
models). These entries will constitute
your proof that the vehicle has received
regular maintenance. They are also
required for warranty claims.<
The BMW Maintenance System
Page 148 of 203

148n
Technical modifications California Proposition 65 WarningAny BMW center will be glad to advise
you concerning the advisability, legal
implications and factory recommenda-
tions for technical modifications to the
vehicle. For this purpose, the BMW cen-
ter will require the Vehicle Identification
Number and, in some cases, the engine
number as well. Light-Emitting Diodes (LEDs)Light-emitting diodes installed behind
translucent lenses serve as the light
source for many of the controls and dis-
plays in your vehicle. The concept be-
hind their operation is related to that
employed for lasers.
Do not remove the protective lens
and avoid staring directly at the
unfiltered beam for extended periods
(several hours). To do so could result in
inflammation of the iris.<
California laws require us to state the
following warning:
Engine exhaust, some of its con-
stituents, and certain vehicle com-
ponents contain or emit chemicals
known to the State of California to
cause cancer and birth defects or other
reproductive harm.<
Page 149 of 203

149n
IndexDataTechnologyRepairsCar careControlsOverview
OBD interface socket The interface socket for onboard diag-
nostics is located on the driver's side at
the left-hand bottom of the dashboard
and under a cover. The cover has the
letters "OBD" on it.
The purpose of the OBD system is to
ensure proper emission control system
operation for the vehicle's lifetime by
monitoring emission-related compo-
nents and systems for deterioration
and malfunction.460us250
An illuminated indicator informs
you of the need for service, not
that you need to stop the
vehicle. Your system should be
checked, however, at the earliest possi-
ble opportunity.
If the indicator blinks or flashes, this
indicates a high level of engine misfire.
Reduce speed and contact your near-
est BMW center immediately. Severe
engine misfire over even a short period
of time can seriously damage emission
control components, especially the
catalytic converter.
Service Engine Soon warning
lamp for Canadian models.
If the fuel filler cap is not properly
tightened, the OBD system can
detect leaking vapor and the indicator
will light up. If the fuel filler cap is then
tightened, the indicator will usually go
out after a short period of time.<
Page 153 of 203
153n
IndexDataTechnologyRepairsCar careControlsOverview
Lamps and bulbs The lamps and bulbs are essential
factors contributing to the safety of your
vehicle. Therefore, comply fully with the
following instructions during bulb
replacement. If you are not familiar with
any of the procedures, consult your
BMW center.
Do not touch the glass portion of
a new bulb with your bare hands
since even small amounts of impurities
burn into the surface and reduce the
service life of the bulb. Use a clean
cloth, paper napkin, or a similar mate-
rial, or hold the bulb by its metallic
base.<
A replacement bulb set is available from
your BMW center.
Whenever working on the
electrical system, switch off the
electrical accessory you are working on
or disconnect the cable from the nega-
tive terminal of the battery. Failure to do
this could result in short circuits.
To prevent injuries and damage,
comply with any instructions provided
by the bulb manufacturer.<
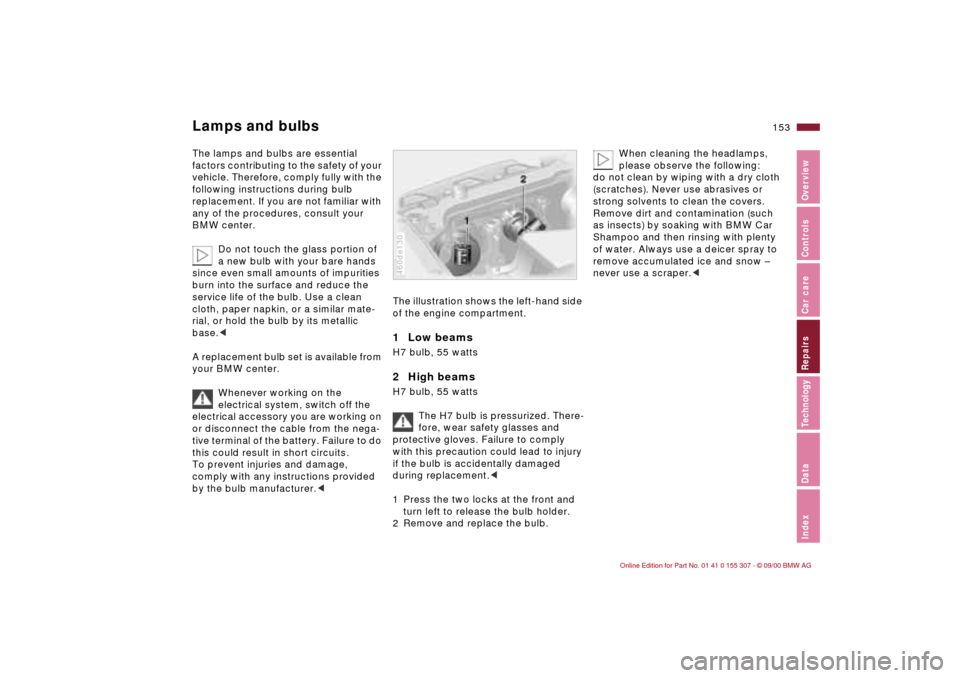
The illustration shows the left-hand side
of the engine compartment.1 Low beams H7 bulb, 55 watts2 High beamsH7 bulb, 55 watts
The H7 bulb is pressurized. There-
fore, wear safety glasses and
protective gloves. Failure to comply
with this precaution could lead to injury
if the bulb is accidentally damaged
during replacement.<
1 Press the two locks at the front and
turn left to release the bulb holder.
2 Remove and replace the bulb.460de130
When cleaning the headlamps,
please observe the following:
do not clean by wiping with a dry cloth
(scratches). Never use abrasives or
strong solvents to clean the covers.
Remove dirt and contamination (such
as insects) by soaking with BMW Car
Shampoo and then rinsing with plenty
of water. Always use a deicer spray to
remove accumulated ice and snow Ð
never use a scraper.<
Page 154 of 203
154n
Lamps and bulbsXenon lamps
*
The service life of these bulbs is very
long and the probability of a failure is
very low, provided that they are not
switched on and off an unusual number
of times. If one of these bulbs should
nevertheless fail, it is possible to con-
tinue driving with great caution using
the fog lamps, provided traffic laws in
your area do not prohibit this.
Because of the extremely high
voltages involved, any work on
the xenon lighting system and bulb
replacement should be performed only
by technicians with the appropriate
qualifications. Failure to comply with
this creates a risk of fatal injury.<
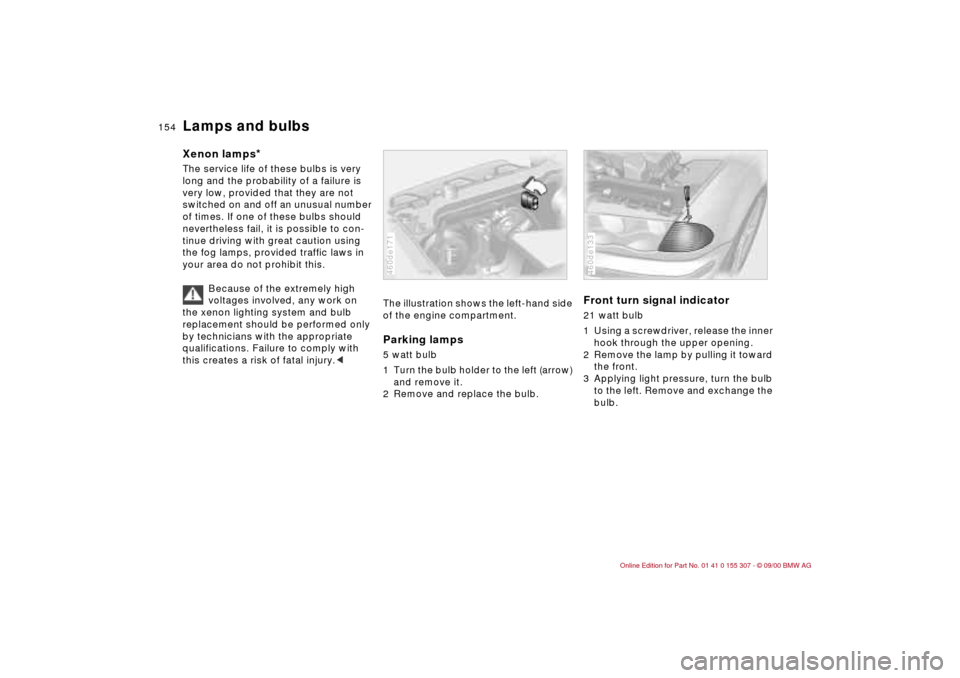
The illustration shows the left-hand side
of the engine compartment.Parking lamps5 watt bulb
1 Turn the bulb holder to the left (arrow)
and remove it.
2 Remove and replace the bulb.460de171
Front turn signal indicator 21 watt bulb
1 Using a screwdriver, release the inner
hook through the upper opening.
2 Remove the lamp by pulling it toward
the front.
3 Applying light pressure, turn the bulb
to the left. Remove and exchange the
bulb.460de133
Page 159 of 203
159n
IndexDataTechnologyRepairsCar careControlsOverview
Changing a wheel
Take these precautionary mea-
sures if you have either a flat tire or
are changing a wheel.
Stop the vehicle as far as possible from
passing traffic. Park on a firm, flat
surface. Switch on the hazard warning
flashers. Turn the steering wheel to the
straight-ahead position, remove the key
and engage the steering lock. Shift into
1st gear or reverse (selector lever in
"Park" with automatic transmission)
and engage the parking brake.
All passengers should be outside the
vehicle and well away from your imme-
diate working area (behind a guardrail,
for instance).
If a warning triangle or portable hazard
warning lamp is available, set it up on
the roadside at an appropriate distance
from the rear of the vehicle. Comply with
all safety guidelines and regulations.
Change the wheel only on a level, firm
surface that is not slippery. Avoid jack-
ing the vehicle on a soft or slippery
support surface (snow, ice, loose gravel,
etc.), as it could slide sideways.
Position the jack on a firm support
surface.
Do not place wooden blocks or similar
objects under the jack, otherwise, the
jack might not be able to reach its full
support capacity because of the limited
height.
Do not lie under the vehicle or start the
engine when the vehicle is supported by
the jack. Failure to comply with this
creates a risk of fatal injury.<
Your BMW has either a spare tire or
space-saver tire for temporary use to
ensure your mobility.
To remove the spare wheel, lift out
the floor panel in the luggage
compartment completely (refer to
page 109.<
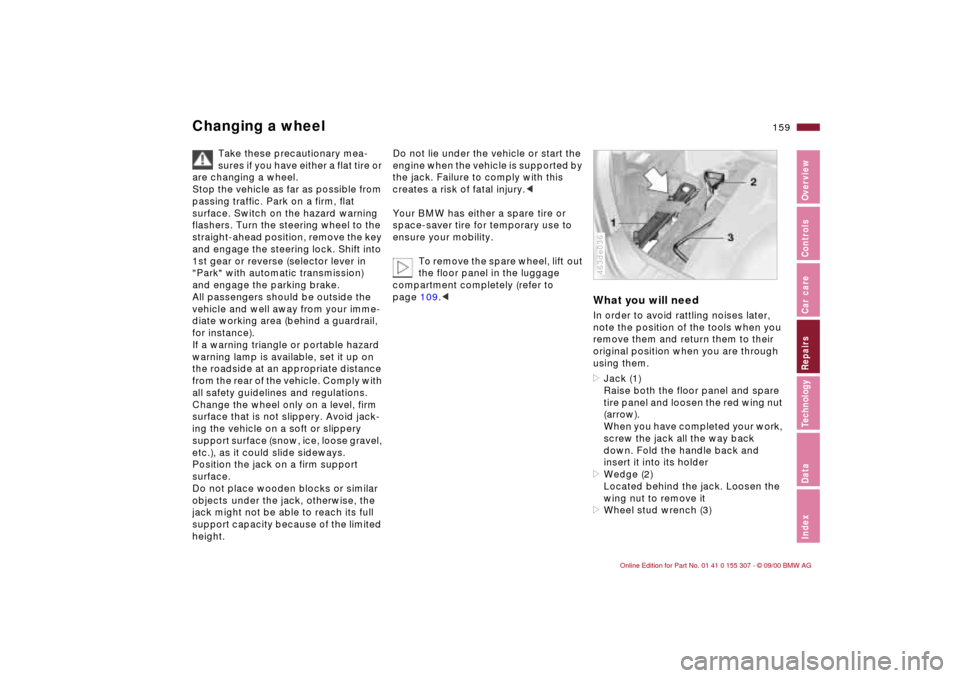
What you will needIn order to avoid rattling noises later,
note the position of the tools when you
remove them and return them to their
original position when you are through
using them.
>Jack (1)
Raise both the floor panel and spare
tire panel and loosen the red wing nut
(arrow).
When you have completed your work,
screw the jack all the way back
down. Fold the handle back and
insert it into its holder
>Wedge (2)
Located behind the jack. Loosen the
wing nut to remove it
>Wheel stud wrench (3) 463de036