2001 BMW 330i TOURING service
[x] Cancel search: servicePage 143 of 203
143n
IndexDataTechnologyRepairsCar careControlsOverview
Caring for your vehicleCaring for the vehicle finish Regular washing is a preventive
measure against long-term effects from
substances that are harmful to the
vehicle's finish, especially if you drive
your vehicle in areas with high levels of
air pollution or aggressive natural
substances (tree resins, pollen).
Nevertheless, you should immediately
remove especially aggressive
substances. Failure to do so can lead to
changes in the paint's chemical
structure or to discoloration. Gasoline
spilled during refueling, oil, grease and
brake fluid should always be cleaned
away immediately, as should bird
droppings.
Any contamination remaining on the
surface of the vehicle will be especially
conspicuous after washing. Use
cleaning fluid or alcohol with a clean
cloth or cotton pad to remove. Remove
tar spots with tar remover. After clean-
ing, the affected areas should be waxed
to ensure continued protection.
Use the cleaning and car-care
products available at your BMW
center.<
Waxing your vehicle Protect the finish using only carnauba
or synthetic-based waxes.
The best way to determine when the
finish needs to be waxed is by noting
when water stops beading on the
surface.
You can use a glass cleaner to remove
any wax or silicone that may have been
left on the windows during waxing.
Use the cleaning and car-care
products available at your BMW
center.<
Paint damageYou can touch up small areas of paint
damage with a BMW spray paint or a
BMW touchup stick.
The paint color code for your car is
provided on a sticker located on the
righthand side under the hood and on
the first page of your Service and
Warranty Information Booklet
(US models) or Warranty and Service
Guide (Canadian models).
Damage caused by flying stones,
scratches, etc., must be touched up
without delay to prevent rust from
forming.
If corrosion has started to form in an
area with paint damage, remove all rust
and clean the area. Then prime the
area with a BMW Primer Stick. Finally,
apply the finish coat. Wait a few days,
then polish the repaired area. Finish by
applying a wax preservative.
More extensive paint damage should
be repaired professionally in accor-
dance with the manufacturer's instruc-
tions. Your BMW center uses original
BMW finish materials in accordance
with approved repair procedures.
Page 147 of 203
147n
IndexDataTechnologyRepairsCar careControlsOverview
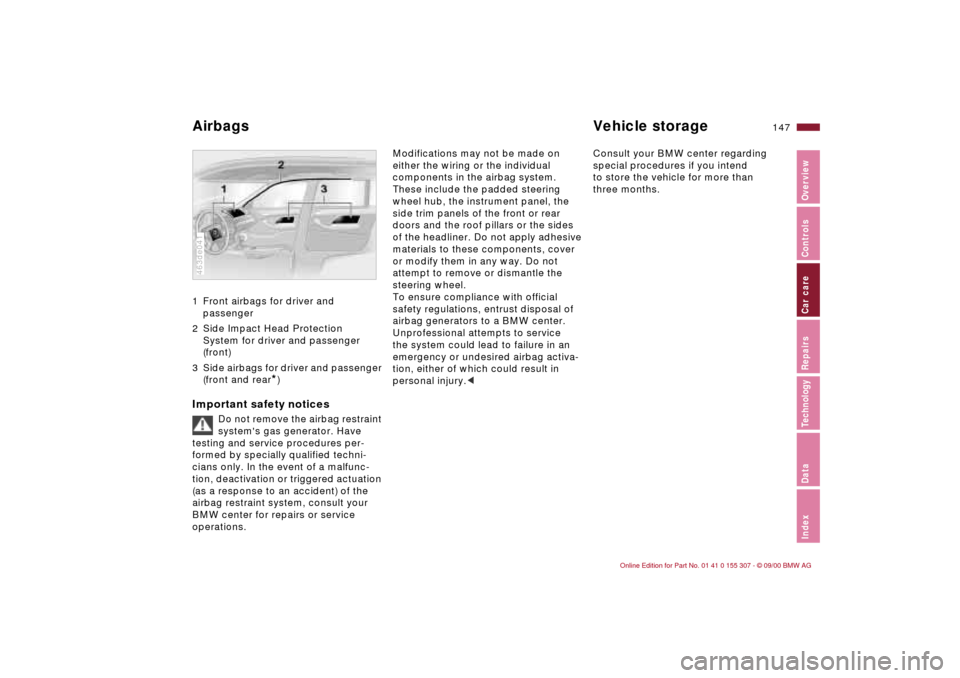
Airbags Vehicle storage1 Front airbags for driver and
passenger
2 Side Impact Head Protection
System for driver and passenger
(front)
3 Side airbags for driver and passenger
(front and rear
*)
Important safety notices
Do not remove the airbag restraint
system's gas generator. Have
testing and service procedures per-
formed by specially qualified techni-
cians only. In the event of a malfunc-
tion, deactivation or triggered actuation
(as a response to an accident) of the
airbag restraint system, consult your
BMW center for repairs or service
operations.
463de041
Modifications may not be made on
either the wiring or the individual
components in the airbag system.
These include the padded steering
wheel hub, the instrument panel, the
side trim panels of the front or rear
doors and the roof pillars or the sides
of the headliner. Do not apply adhesive
materials to these components, cover
or modify them in any way. Do not
attempt to remove or dismantle the
steering wheel.
To ensure compliance with official
safety regulations, entrust disposal of
airbag generators to a BMW center.
Unprofessional attempts to service
the system could lead to failure in an
emergency or undesired airbag activa-
tion, either of which could result in
personal injury.
to store the vehicle for more than
three months.
Page 149 of 203

149n
IndexDataTechnologyRepairsCar careControlsOverview
OBD interface socket The interface socket for onboard diag-
nostics is located on the driver's side at
the left-hand bottom of the dashboard
and under a cover. The cover has the
letters "OBD" on it.
The purpose of the OBD system is to
ensure proper emission control system
operation for the vehicle's lifetime by
monitoring emission-related compo-
nents and systems for deterioration
and malfunction.460us250
An illuminated indicator informs
you of the need for service, not
that you need to stop the
vehicle. Your system should be
checked, however, at the earliest possi-
ble opportunity.
If the indicator blinks or flashes, this
indicates a high level of engine misfire.
Reduce speed and contact your near-
est BMW center immediately. Severe
engine misfire over even a short period
of time can seriously damage emission
control components, especially the
catalytic converter.
Service Engine Soon warning
lamp for Canadian models.
If the fuel filler cap is not properly
tightened, the OBD system can
detect leaking vapor and the indicator
will light up. If the fuel filler cap is then
tightened, the indicator will usually go
out after a short period of time.<
Page 151 of 203

Overview
Controls and features
Operation, care
and maintenance
Owner service procedures
Technical data
Index Advanced technology
151n
IndexDataTechnologyRepairsCar careControlsOverview
Replacement procedures:
Onboard tool kit152
Windshield wiper blades152
Lamps and bulbs153
Changing a wheel159
Battery162
Fuses164
Microfilter/Activated-charcoal
filter165
In case of electrical
malfunction:
Fuel filler door166
Sliding/Tilt sunroof166
Tailgate166
Assistance, giving and
receiving:
Jump-starting167
Towing the vehicle168
Repairs
Page 153 of 203
153n
IndexDataTechnologyRepairsCar careControlsOverview
Lamps and bulbs The lamps and bulbs are essential
factors contributing to the safety of your
vehicle. Therefore, comply fully with the
following instructions during bulb
replacement. If you are not familiar with
any of the procedures, consult your
BMW center.
Do not touch the glass portion of
a new bulb with your bare hands
since even small amounts of impurities
burn into the surface and reduce the
service life of the bulb. Use a clean
cloth, paper napkin, or a similar mate-
rial, or hold the bulb by its metallic
base.<
A replacement bulb set is available from
your BMW center.
Whenever working on the
electrical system, switch off the
electrical accessory you are working on
or disconnect the cable from the nega-
tive terminal of the battery. Failure to do
this could result in short circuits.
To prevent injuries and damage,
comply with any instructions provided
by the bulb manufacturer.<
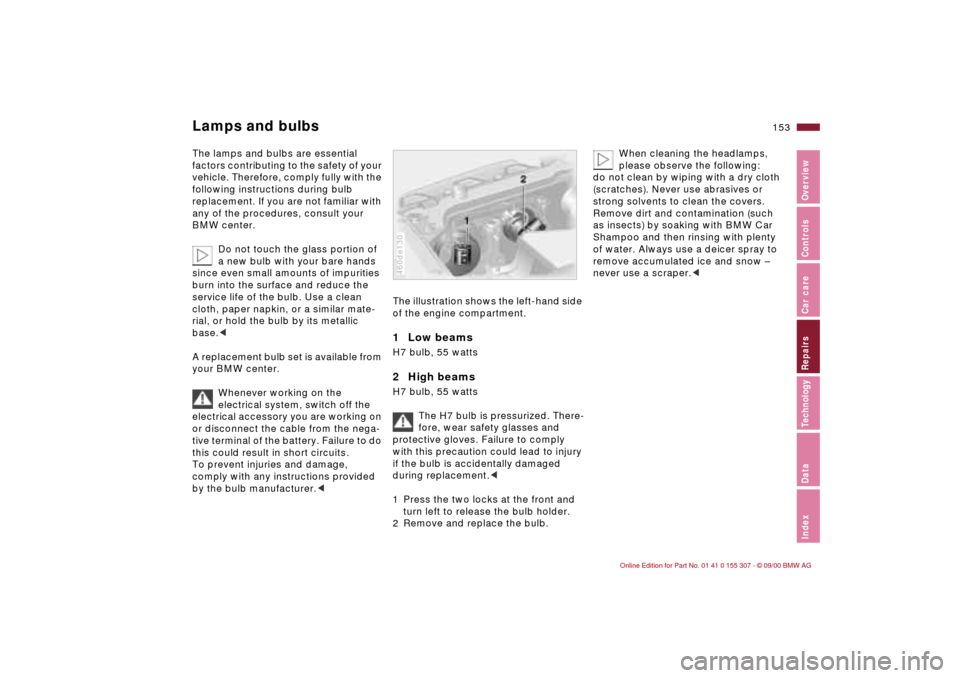
The illustration shows the left-hand side
of the engine compartment.1 Low beams H7 bulb, 55 watts2 High beamsH7 bulb, 55 watts
The H7 bulb is pressurized. There-
fore, wear safety glasses and
protective gloves. Failure to comply
with this precaution could lead to injury
if the bulb is accidentally damaged
during replacement.<
1 Press the two locks at the front and
turn left to release the bulb holder.
2 Remove and replace the bulb.460de130
When cleaning the headlamps,
please observe the following:
do not clean by wiping with a dry cloth
(scratches). Never use abrasives or
strong solvents to clean the covers.
Remove dirt and contamination (such
as insects) by soaking with BMW Car
Shampoo and then rinsing with plenty
of water. Always use a deicer spray to
remove accumulated ice and snow Ð
never use a scraper.<
Page 154 of 203
154n
Lamps and bulbsXenon lamps
*
The service life of these bulbs is very
long and the probability of a failure is
very low, provided that they are not
switched on and off an unusual number
of times. If one of these bulbs should
nevertheless fail, it is possible to con-
tinue driving with great caution using
the fog lamps, provided traffic laws in
your area do not prohibit this.
Because of the extremely high
voltages involved, any work on
the xenon lighting system and bulb
replacement should be performed only
by technicians with the appropriate
qualifications. Failure to comply with
this creates a risk of fatal injury.<
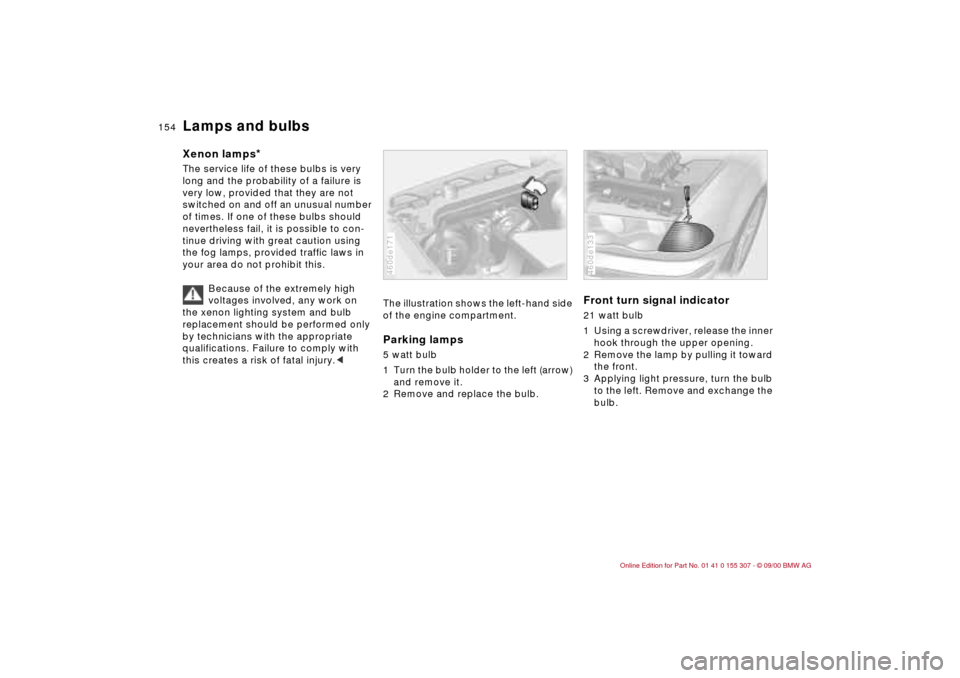
The illustration shows the left-hand side
of the engine compartment.Parking lamps5 watt bulb
1 Turn the bulb holder to the left (arrow)
and remove it.
2 Remove and replace the bulb.460de171
Front turn signal indicator 21 watt bulb
1 Using a screwdriver, release the inner
hook through the upper opening.
2 Remove the lamp by pulling it toward
the front.
3 Applying light pressure, turn the bulb
to the left. Remove and exchange the
bulb.460de133
Page 162 of 203
162n
Changing a wheel Battery Driving with the space-saver tireDrive cautiously. Do not exceed a speed
of 50 mph (80 km/h).
You can anticipate changes in vehicle
handling such as delayed braking re-
sponse, longer braking distances and
changes in self-steering properties in
marginal stability limits.
The changes in handling characteristics
will be even more pronounced in
conjunction with winter tires.
Only one space-saver tire may be
mounted at one time. Reinstall
wheels and tires of the same size and
specification as soon as possible.
Maintain correct tire pressures. Refer to
page 29.<
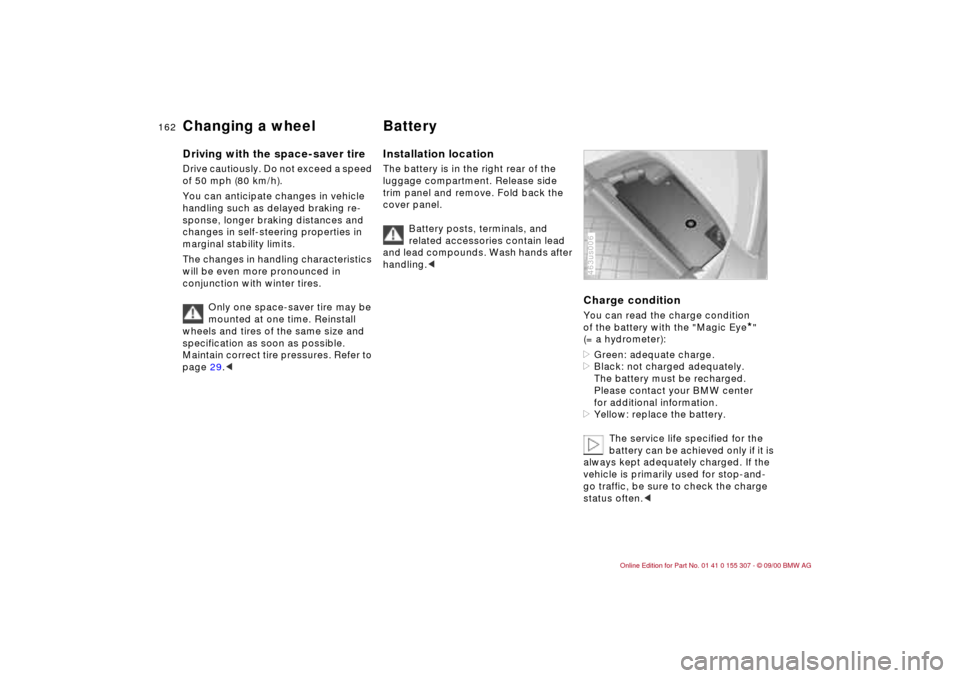
Installation locationThe battery is in the right rear of the
luggage compartment. Release side
trim panel and remove. Fold back the
cover panel.
Battery posts, terminals, and
related accessories contain lead
and lead compounds. Wash hands after
handling.<
Charge conditionYou can read the charge condition
of the battery with the "Magic Eye
*"
(= a hydrometer):
>Green: adequate charge.
>Black: not charged adequately.
The battery must be recharged.
Please contact your BMW center
for additional information.
>Yellow: replace the battery.
The service life specified for the
battery can be achieved only if it is
always kept adequately charged. If the
vehicle is primarily used for stop-and-
go traffic, be sure to check the charge
status often.<
463us006
Page 163 of 203
163n
IndexDataTechnologyRepairsCar careControlsOverview
BatteryBattery careThe battery is completely maintenance-
free. That means that the original acid
will normally last for the service life of
the battery under temperate climatic
conditions.
For all questions that regard the
battery, please consult your BMW
center. Since the battery is absolutely
maintenance-free, the following is for
your information only.
please be cautious whenever you work
with or near the battery.
Before handling the battery,
please read the following infor-
mation.
Wear eye protection. Do not al-
low particles containing battery
acid or lead to come into con-
tact with your eyes, your skin, or your
clothing.
Battery acid is extremely corro-
sive. Wear eye protection and
protective gloves. Do not tip the
battery. Battery acid can leak from the
ventilation openings.
Do not allow children to have
access to batteries and battery
acid.
Never allow sparks or open
flame near the battery. Do
not smoke in the vicinity of the
battery. Avoid sparks from electrical
cables or electrical equipment. Turn the
key to position 0 in the steering lock
when disconnecting or connecting the
battery. Never short-circuit the battery
terminals. This creates a risk of injury
from high-energy sparks.
A highly explosive gas is gener-
ated when the battery is
charged.
If you happen to get acid in
your eyes, rinse thoroughly for
15 minutes with clear water.
Consult a physician immediately. If you
get acid spray on your skin or clothing,
rinse with plenty of water. If acid is
accidentally swallowed, consult a
physician immediately.
In order to protect the battery
case from ultraviolet radiation,
do not place it in direct sunlight.
A discharged battery can freeze. Store
the battery in areas where temperature
remains above freezing.
Removal and installation
Do not disconnect the battery
while the engine is running.
Disconnecting the battery cable when
the engine is running will cause a
voltage surge which will damage the
vehicle's onboard electronics.
Do not make any modifications in the
wires to the positive terminal. If you do
so, the protective function of the safety
battery terminal is no longer ensured.
Repairs and disposal may only be per-
formed by specially trained personnel.<
When removing the battery, disconnect
the cable on the negative terminal first,
then the cable on the positive terminal.
Loosen the center adjusting screw on
the battery retaining strap (use the
screwdriver included with the onboard
tool kit) and disconnect the strap.
When installing a battery, connect the
positive terminal first, then connect the
negative terminal.
When installing a battery, be sure
that it is mounted properly and that
the retaining strap is installed using the
center adjustment screw, otherwise, the
battery will not be secure enough in
case of an accident.<