2001 BMW 330Ci COUPE light
[x] Cancel search: lightPage 163 of 203

163n
IndexDataTechnologyRepairsCar careControlsOverview
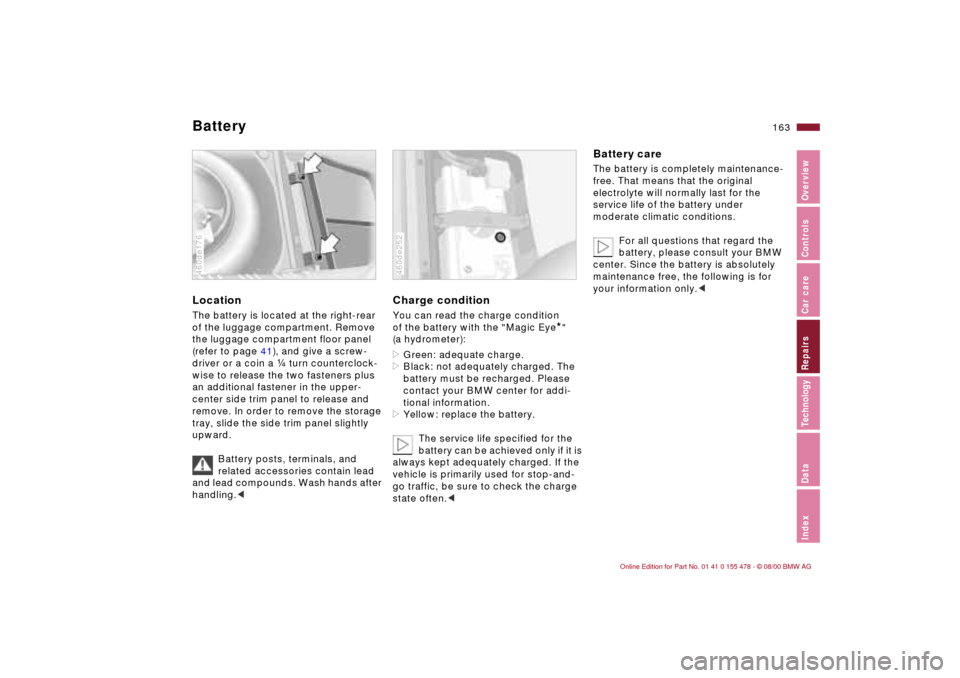
Battery LocationThe battery is located at the right-rear
of the luggage compartment. Remove
the luggage compartment floor panel
(refer to page 41), and give a screw-
driver or a coin a f turn counterclock-
wise to release the two fasteners plus
an additional fastener in the upper-
center side trim panel to release and
remove. In order to remove the storage
tray, slide the side trim panel slightly
upward.
Battery posts, terminals, and
related accessories contain lead
and lead compounds. Wash hands after
handling.<460de176
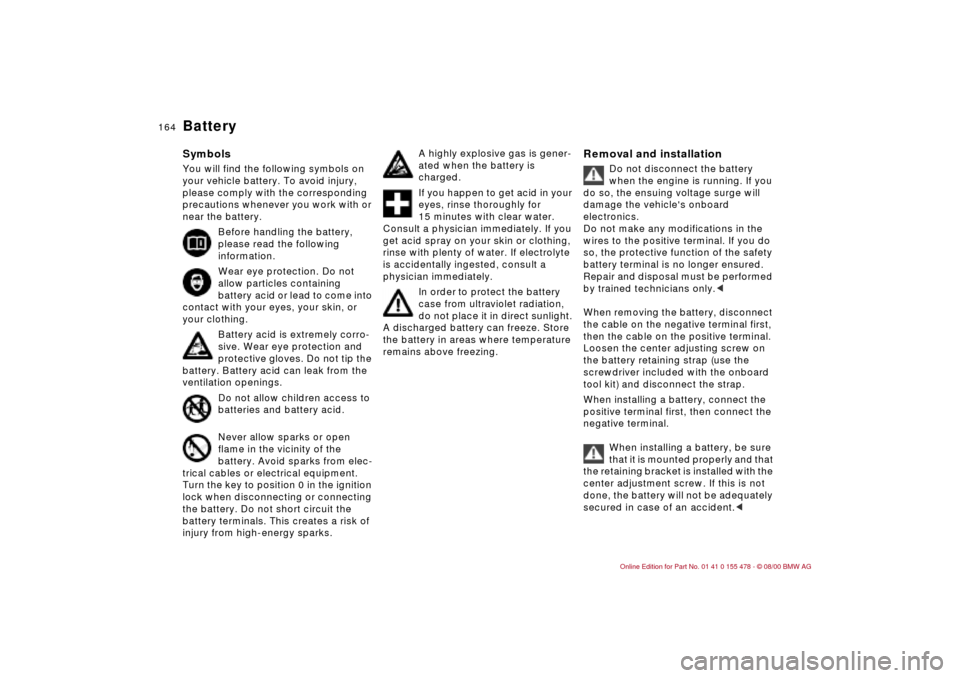
Charge conditionYou can read the charge condition
of the battery with the "Magic Eye
*"
(a hydrometer):
>Green: adequate charge.
>Black: not adequately charged. The
battery must be recharged. Please
contact your BMW center for addi-
tional information.
>Yellow: replace the battery.
The service life specified for the
battery can be achieved only if it is
always kept adequately charged. If the
vehicle is primarily used for stop-and-
go traffic, be sure to check the charge
state often.<
460de252
Battery careThe battery is completely maintenance-
free. That means that the original
electrolyte will normally last for the
service life of the battery under
moderate climatic conditions.
For all questions that regard the
battery, please consult your BMW
center. Since the battery is absolutely
maintenance free, the following is for
your information only.<
Page 164 of 203

164n
BatterySymbolsYou will find the following symbols on
your vehicle battery. To avoid injury,
please comply with the corresponding
precautions whenever you work with or
near the battery.
Before handling the battery,
please read the following
information.
Wear eye protection. Do not
allow particles containing
battery acid or lead to come into
contact with your eyes, your skin, or
your clothing.
Battery acid is extremely corro-
sive. Wear eye protection and
protective gloves. Do not tip the
battery. Battery acid can leak from the
ventilation openings.
Do not allow children access to
batteries and battery acid.
Never allow sparks or open
flame in the vicinity of the
battery. Avoid sparks from elec-
trical cables or electrical equipment.
Turn the key to position 0 in the ignition
lock when disconnecting or connecting
the battery. Do not short circuit the
battery terminals. This creates a risk of
injury from high-energy sparks.
A highly explosive gas is gener-
ated when the battery is
charged.
If you happen to get acid in your
eyes, rinse thoroughly for
15 minutes with clear water.
Consult a physician immediately. If you
get acid spray on your skin or clothing,
rinse with plenty of water. If electrolyte
is accidentally ingested, consult a
physician immediately.
In order to protect the battery
case from ultraviolet radiation,
do not place it in direct sunlight.
A discharged battery can freeze. Store
the battery in areas where temperature
remains above freezing.
Removal and installation
Do not disconnect the battery
when the engine is running. If you
do so, the ensuing voltage surge will
damage the vehicle's onboard
electronics.
Do not make any modifications in the
wires to the positive terminal. If you do
so, the protective function of the safety
battery terminal is no longer ensured.
Repair and disposal must be performed
by trained technicians only.<
When removing the battery, disconnect
the cable on the negative terminal first,
then the cable on the positive terminal.
Loosen the center adjusting screw on
the battery retaining strap (use the
screwdriver included with the onboard
tool kit) and disconnect the strap.
When installing a battery, connect the
positive terminal first, then connect the
negative terminal.
When installing a battery, be sure
that it is mounted properly and that
the retaining bracket is installed with the
center adjustment screw. If this is not
done, the battery will not be adequately
secured in case of an accident.<
Page 168 of 203

168n
Do not use spray starter fluids.
If the battery is discharged, the engine
can be started with the use of two
jumper cables and the battery of
another vehicle. Use only jumper cables
with fully insulated grips on the terminal
clamps.
Do not touch the parts conducting
electrical current while the engine
is running. Failure to comply with this
creates a risk of fatal injury.<
Carefully comply with the following
instructions to avoid personal injury or
damage to one or both vehicles:
1 Be sure that the battery on the
support vehicle is also rated at
12 volts, and that the capacities of
the two batteries (Ah) are roughly
comparable (printed on casing).
2 Leave your battery connected to the
vehicle electrical system.
3 Make sure that there is no contact
between the bodywork of the two
vehicles Ð this creates a risk of short
circuits.
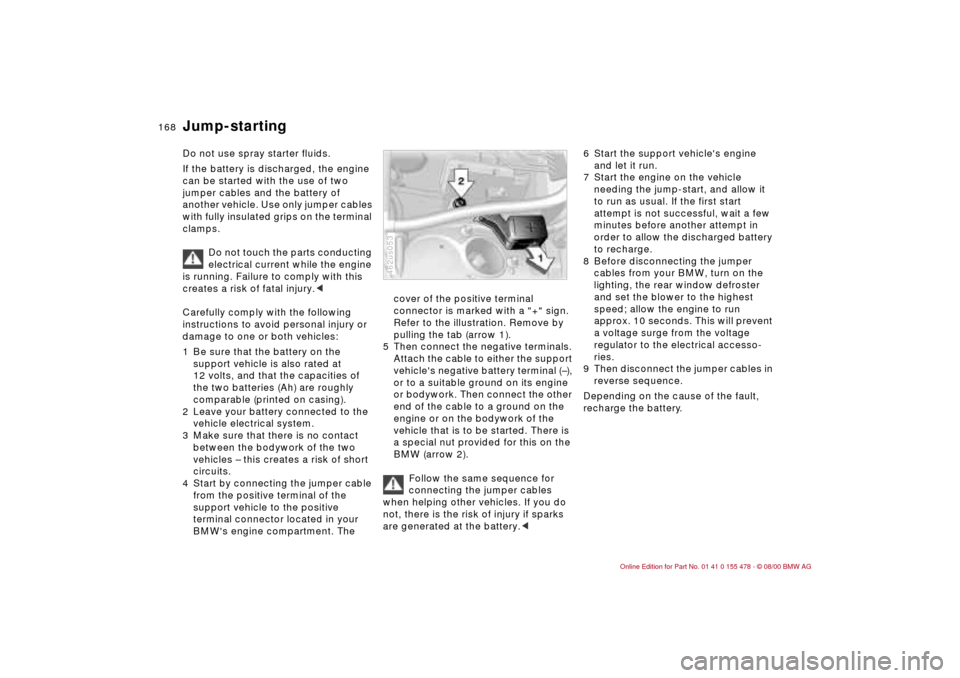
4 Start by connecting the jumper cable
from the positive terminal of the
support vehicle to the positive
terminal connector located in your
BMW's engine compartment. The
cover of the positive terminal
connector is marked with a "+" sign.
Refer to the illustration. Remove by
pulling the tab (arrow 1).
5 Then connect the negative terminals.
Attach the cable to either the support
vehicle's negative battery terminal (Ð),
or to a suitable ground on its engine
or bodywork. Then connect the other
end of the cable to a ground on the
engine or on the bodywork of the
vehicle that is to be started. There is
a special nut provided for this on the
BMW (arrow 2).
Follow the same sequence for
connecting the jumper cables
when helping other vehicles. If you do
not, there is the risk of injury if sparks
are generated at the battery.<462us053
6 Start the support vehicle's engine
and let it run.
7 Start the engine on the vehicle
needing the jump-start, and allow it
to run as usual. If the first start
attempt is not successful, wait a few
minutes before another attempt in
order to allow the discharged battery
to recharge.
8 Before disconnecting the jumper
cables from your BMW, turn on the
lighting, the rear window defroster
and set the blower to the highest
speed; allow the engine to run
approx. 10 seconds. This will prevent
a voltage surge from the voltage
regulator to the electrical accesso-
ries.
9 Then disconnect the jumper cables in
reverse sequence.
Depending on the cause of the fault,
recharge the battery.
Jump-starting
Page 177 of 203

177n
IndexDataTechnologyRepairsCar careControlsOverview
Interior rearview mirror with automatic dimming feature
*
The interior rearview mirror with auto-
matic dimming feature reduces blinding
from following traffic by adapting the
intensity of the reflected images to
correspond to levels of light registered
by the unit's sensors. The mirror reverts
to its undimmed setting as soon as the
light source disappears. One lamp
sensor is mounted on the front of the
mirror housing. This sensor, which is
directed forward, measures light inten-
sity in the area ahead of the vehicle.
The second sensor is integrated within
the mirror's glass. The electronic
control system compares the light
intensity from front and rear. The differ-
ence provides the basic parameter
used to modulate an electrical current
and induce chemical changes in a
semisolid layer incorporated in the lens.463us013
The semisolid reacts chemically to this
electrical current, thus providing
dimming of the mirror through an infi-
nitely-variable range (electrochromic
technology).
As a result, it is no longer necessary to
dim the mirror manually, and the driver
can concentrate completely on traffic
conditions.
Page 178 of 203

178n
Rain sensor
*
Depending on the degree of wetness
on the windshield, the rain sensor
controls the operation of the windshield
wipers.
Infrared light is carried along the
surface of the windshield in an optical
conductor in such a manner that it is
reflected completely when the wind-
shield is dry. The quantity of reflected
light is measured.
If there is moisture on the glass, the
amount of light reflected is reduced
since the infrared light at the surface of
the windshield can escape. The quan-
tity of reflected light is thus a means of
gauging the degree of wetness on the
windshield.390de133
When the system is set to the "Inter-
mittent" wiper speed, the wipers react
immediately Ð if water is splashed onto
the windshield by vehicles traveling
ahead of you, for example. As a result,
the rain sensor provides a contribution
to driving safety and comfort.
Page 181 of 203

181n
IndexDataTechnologyRepairsCar careControlsOverview
Xenon lamps
*
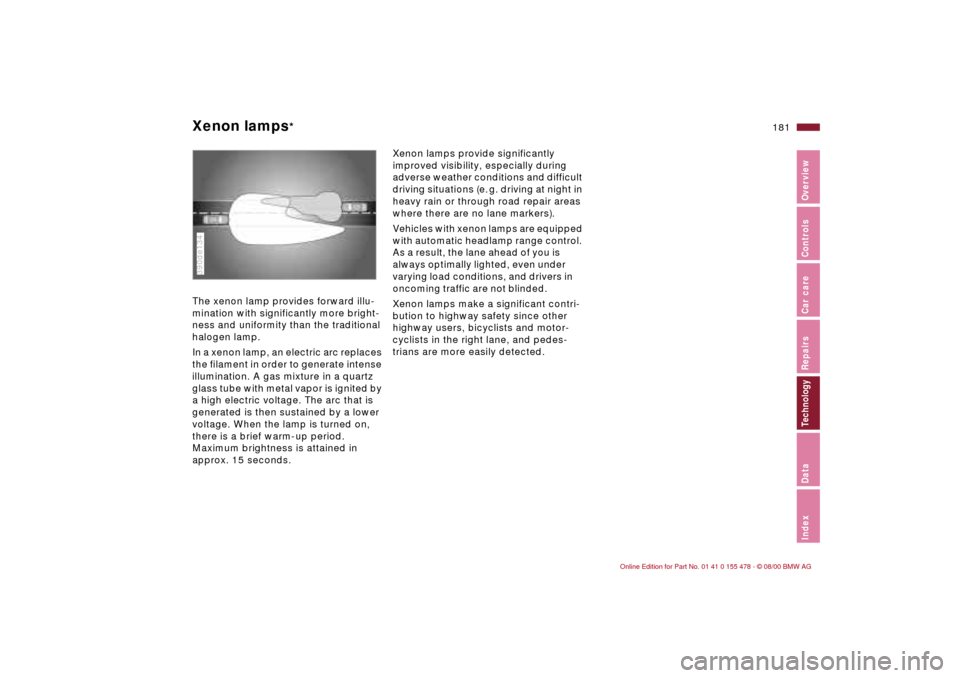
The xenon lamp provides forward illu-
mination with significantly more bright-
ness and uniformity than the traditional
halogen lamp.
In a xenon lamp, an electric arc replaces
the filament in order to generate intense
illumination. A gas mixture in a quartz
glass tube with metal vapor is ignited by
a high electric voltage. The arc that is
generated is then sustained by a lower
voltage. When the lamp is turned on,
there is a brief warm-up period.
Maximum brightness is attained in
approx. 15 seconds.390de134
Xenon lamps provide significantly
improved visibility, especially during
adverse weather conditions and difficult
driving situations (e. g. driving at night in
heavy rain or through road repair areas
where there are no lane markers).
Vehicles with xenon lamps are equipped
with automatic headlamp range control.
As a result, the lane ahead of you is
always optimally lighted, even under
varying load conditions, and drivers in
oncoming traffic are not blinded.
Xenon lamps make a significant contri-
bution to highway safety since other
highway users, bicyclists and motor-
cyclists in the right lane, and pedes-
trians are more easily detected.
Page 193 of 203

Everything from A to Z
193n
IndexDataTechnologyRepairsCar careControlsOverview
Cargo
loading108
securing108
Caring for the vehicle's
finish143
Cassette operation, refer to
the Radio Owner's Manual
Catalytic converter113
CBC (Cornering Brake
Control)21,116
CD operation, refer to the
Radio Owner's Manual
Cellular phone104,121
refer also to the separate
Owner's Manual
Center (high-mount) brake
lamp157
Center 3-point-safety belt in
the rear106
Center armrest102
Central locking system34
button38
Changing a wheel159
Changing tires159
Check Control77
Child restraint systems56
Child seat56
Child seat security62
Cigarette lighter105
Cleaning headlamps72
Cleaning windshield71
Clock78 Clock, refer also to the Radio
or Onboard Monitor
Owner's Manual
Clothes hooks105
Cockpit16
Code, refer to the Radio
Owner's Manual
Coin box, cup holder103
Combination switch70
Compression184
Computer77
Computer, refer also to the
Onboard Monitor Owner's
Manual
Configure settings54
Consumption79
Consumption display76
Contents10
Convenience operation
sliding/tilt sunroof34
windows34
Coolant119,137,187
antifreeze119
Coolant temperature
gauge76
Cooling system187
Copyright4
Cornering Brake Control
(CBC)21,116
Cruise control73
Cruising range79
Curb weight186
Current, check indicator20
D
Data
dimensions185
engine184
technical184
weights186
Daytime-driving lamp87
DBC (Dynamic Brake
Control)116
Deep water113
Defroster, rear
window92,100
Defrosting the
windows94,99
Digital clock78
Dimensions185
Dipstick135
Disc brakes117
Displacement184
Display lighting87
Displays18
Distance warning81
Diversity Antenna
system176
Divided rear backrest106
Door key32
Door locks, care119
Doors
emergency operation34
remote control35
unlocking and locking34
DOT Quality Grades123 Draft-free
ventilation93,100
Drive belts188
Driving hints113
Driving in winter119
Driving lamps87
DSC (Dynamic Stability
Control)22,82,175
Dynamic Brake Control
(DBC)116
Dynamic Stability Control
(DSC)22,82,175
E
Electric power seat50
Electric power windows44
Electrical accessories,
failure166
Electrical system188
Electronic vehicle
immobilizer33
Elements of operation16
Emergency operation
doors34
fuel filler door167
slidling/tilt sunrrof167
Energy Control75
Engine compartment132
Engine coolant137,187
Engine data184
Page 194 of 203

Everything from A to ZEngine oil135
adding135
capacity187
consumption135
level check135
pressure20
quality136
specifications136
viscosity136
Engine speed184
Engine, starting63
Engine, switching off64
Entry to the rear49
Exterior mirrors52
Eyelets, towing169 F
Failure messages77
Fault displays77
Fault, ABS116
Filling capacities187
Filling the washer
reservoir187
First-aid kit25
Fittings, towing and tow
starting169
Flashlight102
Flat tire122,159
Floor mat41
Floor panel, lift and hook41
Fog lamps88 Folding rear backrest106
Follow-Me-Home lamps87
Footbrake117
Footwell lamps88
bulb replacement158
Front fog lamps, bulb
replacement155
Front seat, adjusting47
Frost protection,
radiator137
Fuel27
Fuel consumption79
Fuel consumption
display76
Fuel filler cap26
Fuel filler door26
unlock in case of electrical
fault167
Fuel gauge76
Fuel quality27
Fuel reserve indicator
lamp76
Fuel specifications27
Fuel tank capacity187
Fuel tank gauge76
Functional status180
Fuses166
G
Gasoline27
Gasoline gauge76
Glove compartment102
Glove compartment lamp
bulb replacement158
Gross vehicle weight186 H
Handbrake65
Handsfree system104
Hazard warning flashers25
Hazard warning triangle25
Head restraints48
Headlamp cover,
care141,153
Headlamp flasher70,88
Headlamp washer
system72,134,187
Headlamps87
Heated seats101
Heating, rapid94
Heavy loads108
Height185
HiFi system Ð harman
kardon101
High beams23,70,88
bulb replacement153
High Performance Synthetic
Oil136
High-mount brake lamp157 Hood130
release130
Horn17
Hubcap161
Hydraulic Brake assistent,
refer to DBC
I
Ice warning79
Icy roads79
Identification,
tires125,127
Ignition key32
Ignition lock63
Imprint4
Indicator lamps20
Inflation
pressure27,85,122
monitoring27,85,179
INSPECTION76
Instrument cluster18
Instrument panel16,18
Instrument panel lighting87
Interaxle tire rotation124
Interface socket for Onboard
Diagnostics149
Interference, cellular
phones121
Interior lamps36,88
bulb replacement157
remote control36