Page 122 of 203

122n
Information for your safetyThe factory-approved radial tires are
matched to the vehicle and have been
selected to provide optimum safety and
driving comfort on your vehicle.
It is not merely the tire's service life, but
also driving comfort and Ð above all else
Ð driving safety that depend on the con-
dition of the tires and the maintenance
of the specified tire pressure.
Incorrect inflation pressure is a frequent
cause of tire damage. It also signifi-
cantly influences the roadholding ability
of your BMW.
Be sure to check the tire inflation
pressure Ð including the space-
saver spare tire or the spare tire Ð on a
regular basis, at least twice a month
and before doing any extended driving.
Refer to page 27. If this is not done, in-
correct tire pressures can cause driving
instability and tire damage, ultimately
resulting in an accident.<
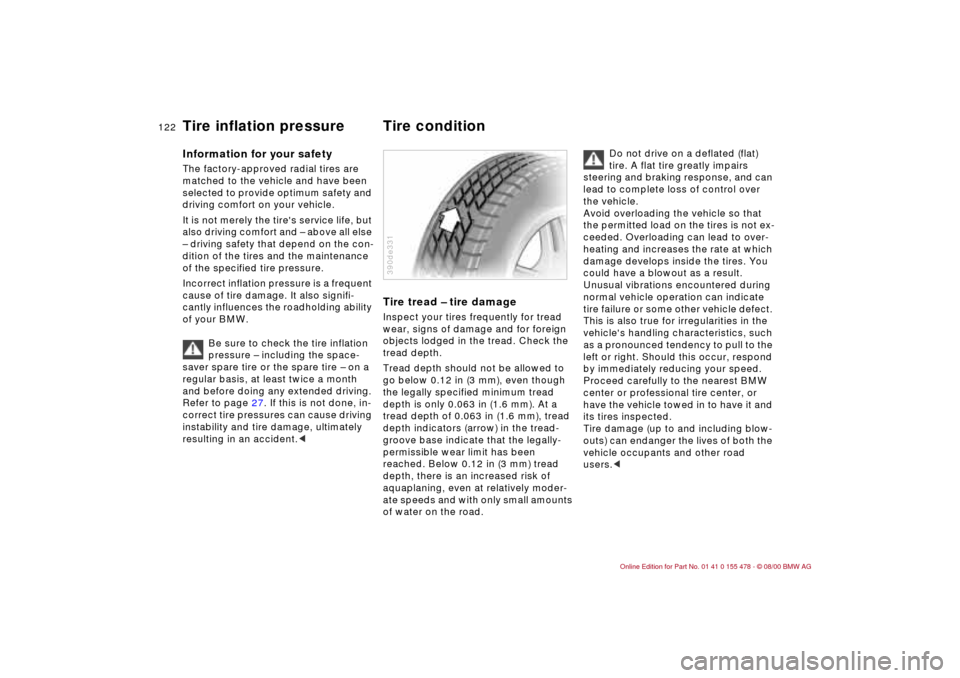
Tire tread Ð tire damageInspect your tires frequently for tread
wear, signs of damage and for foreign
objects lodged in the tread. Check the
tread depth.
Tread depth should not be allowed to
go below 0.12 in (3 mm), even though
the legally specified minimum tread
depth is only 0.063 in (1.6 mm). At a
tread depth of 0.063 in (1.6 mm), tread
depth indicators (arrow) in the tread-
groove base indicate that the legally-
permissible wear limit has been
reached. Below 0.12 in (3 mm) tread
depth, there is an increased risk of
aquaplaning, even at relatively moder-
ate speeds and with only small amounts
of water on the road.390de331
Do not drive on a deflated (flat)
tire. A flat tire greatly impairs
steering and braking response, and can
lead to complete loss of control over
the vehicle.
Avoid overloading the vehicle so that
the permitted load on the tires is not ex-
ceeded. Overloading can lead to over-
heating and increases the rate at which
damage develops inside the tires. You
could have a blowout as a result.
Unusual vibrations encountered during
normal vehicle operation can indicate
tire failure or some other vehicle defect.
This is also true for irregularities in the
vehicle's handling characteristics, such
as a pronounced tendency to pull to the
left or right. Should this occur, respond
by immediately reducing your speed.
Proceed carefully to the nearest BMW
center or professional tire center, or
have the vehicle towed in to have it and
its tires inspected.
Tire damage (up to and including blow-
outs) can endanger the lives of both the
vehicle occupants and other road
users.<
Tire inflation pressure Tire condition
Page 135 of 203

135n
IndexDataTechnologyRepairsCar careControlsOverview
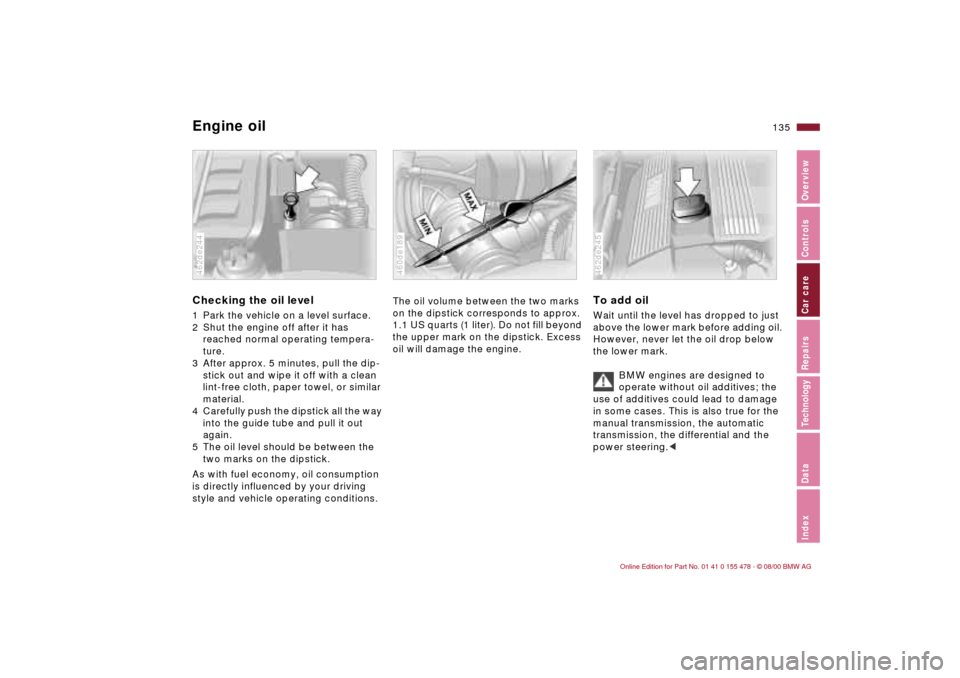
Engine oilChecking the oil level 1 Park the vehicle on a level surface.
2 Shut the engine off after it has
reached normal operating tempera-
ture.
3 After approx. 5 minutes, pull the dip-
stick out and wipe it off with a clean
lint-free cloth, paper towel, or similar
material.
4 Carefully push the dipstick all the way
into the guide tube and pull it out
again.
5 The oil level should be between the
two marks on the dipstick.
As with fuel economy, oil consumption
is directly influenced by your driving
style and vehicle operating conditions.462de244
The oil volume between the two marks
on the dipstick corresponds to approx.
1.1 US quarts (1 liter). Do not fill beyond
the upper mark on the dipstick. Excess
oil will damage the engine.460de189
To add oil Wait until the level has dropped to just
above the lower mark before adding oil.
However, never let the oil drop below
the lower mark.
BMW engines are designed to
operate without oil additives; the
use of additives could lead to damage
in some cases. This is also true for the
manual transmission, the automatic
transmission, the differential and the
power steering.<462de245
Page 151 of 203
Overview
Controls and features
Operation, care
and maintenance
Owner service procedures
Technical data
Index Advanced technology
151n
IndexDataTechnologyRepairsCar careControlsOverview
Replacement procedures:
Onboard tool kit152
Windshield wiper blades152
Lamps and bulbs152
Changing a wheel159
Battery163
Fuses166
Microfilter/Activated-charcoal
filter166
In case of electrical
malfunction:
Fuel filler door167
Sliding/tilt sunroof167
Assistance, giving and
receiving:
Jump-starting168
Towing the vehicle169
Repairs
Page 152 of 203

152n
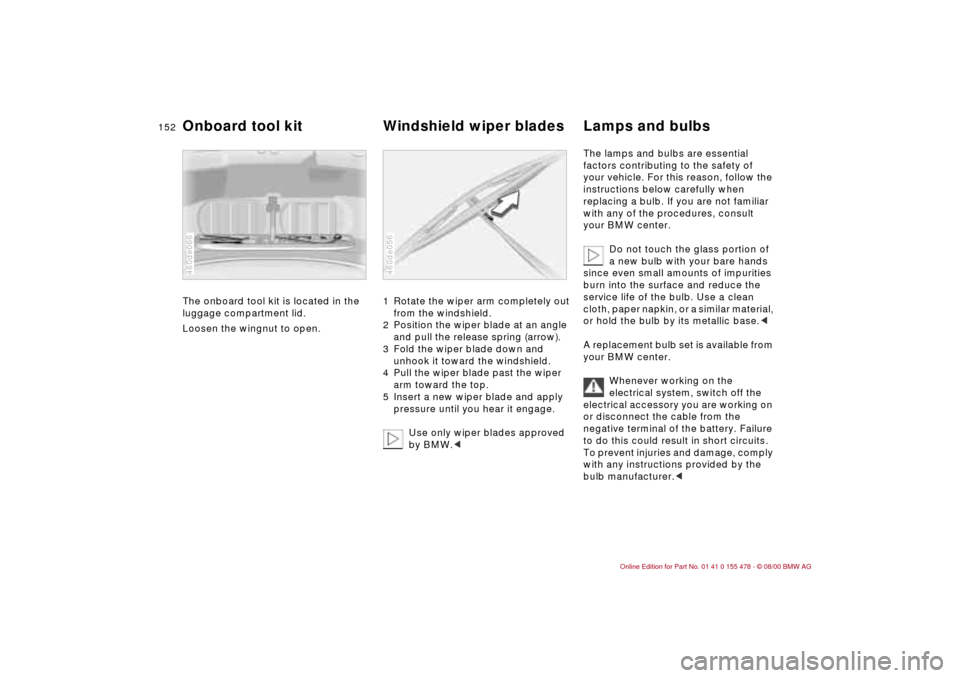
The onboard tool kit is located in the
luggage compartment lid.
Loosen the wingnut to open.
460de066
1 Rotate the wiper arm completely out
from the windshield.
2 Position the wiper blade at an angle
and pull the release spring (arrow).
3 Fold the wiper blade down and
unhook it toward the windshield.
4 Pull the wiper blade past the wiper
arm toward the top.
5 Insert a new wiper blade and apply
pressure until you hear it engage.
Use only wiper blades approved
by BMW.<460de056
The lamps and bulbs are essential
factors contributing to the safety of
your vehicle. For this reason, follow the
instructions below carefully when
replacing a bulb. If you are not familiar
with any of the procedures, consult
your BMW center.
Do not touch the glass portion of
a new bulb with your bare hands
since even small amounts of impurities
burn into the surface and reduce the
service life of the bulb. Use a clean
cloth, paper napkin, or a similar material,
or hold the bulb by its metallic base.<
A replacement bulb set is available from
your BMW center.
Whenever working on the
electrical system, switch off the
electrical accessory you are working on
or disconnect the cable from the
negative terminal of the battery. Failure
to do this could result in short circuits.
To prevent injuries and damage, comply
with any instructions provided by the
bulb manufacturer.<
Onboard tool kit Windshield wiper blades Lamps and bulbs
Page 154 of 203
154n
Lamps and bulbsThe illustration shows the left-hand side
of the engine compartment.Parking lamps5 watt bulb
1 Turn the bulb holder to the left (arrow)
and remove it.
2 Remove and replace the bulb.460de171
Front turn signal indicators 21 watt bulb
1 Using a screwdriver, release the inner
hook through the upper opening.
2 Remove lamp by pulling it out toward
the front.
3 Applying light pressure, turn the bulb
to the left. Remove and exchange the
bulb.462de261
4 Insert the 2 pins on the lamp into the
guides on the vehicle.
5 Push the lamp in. Carefully apply
pressure until you hear it snap into
place.462de262
Page 157 of 203
157n
IndexDataTechnologyRepairsCar careControlsOverview
Lamps and bulbsCenter (high-mount) brake lampLED light bar on the rear window.
Please contact a BMW center in the
event of a malfunction.462de268
License plate lamps 5 watt bulb
1 Place a screwdriver in the slot and
press toward the left (arrow) to
release the lens.
2 Replace the bulb.460de047
Interior lamps Front:
Interior lamp (6 watt bulb)
Reading lamps (2 x 6 watt bulbs)
1 Using a screwdriver, press the lamp
out toward the front.
2 Turn the bulb holder to the left and
remove it.
3 Remove and replace the bulb.460de182
Page 167 of 203
167n
IndexDataTechnologyRepairsCar careControlsOverview
Microfilter Fuel filler door Sliding/tilt sunroof
*
4 Remove the filter by pulling toward
the front and installing a new one.
5 Position the filter cover and secure it
with the three fasteners.460de157
Manual release Pull the knob with the fuel pump symbol
(arrow) on the right trim panel of the
luggage compartment. 460de178
Manual operation 1 Remove the interior lamp (refer to
page 157), reaching into the opening
and pushing out the panel.
2 Use an Allen wrench from the
onboard tool kit (refer to page 152) to
turn the sunroof's steel crank in the
desired direction.460de183
Page 169 of 203

169n
IndexDataTechnologyRepairsCar careControlsOverview
Towing the vehicleTow fittingThe screw-in tow fitting is stored in the
onboard tool kit; be sure that it remains
in the vehicle at all times. This fitting is
designed for installation in the tow
sockets located at the front and rear of
the vehicle. It is intended for towing on
paved road surfaces only. This fitting
should not be used to pull a vehicle out
of deep snow, mud, sand, etc.
Always comply with all applicable
towing laws and regulations.
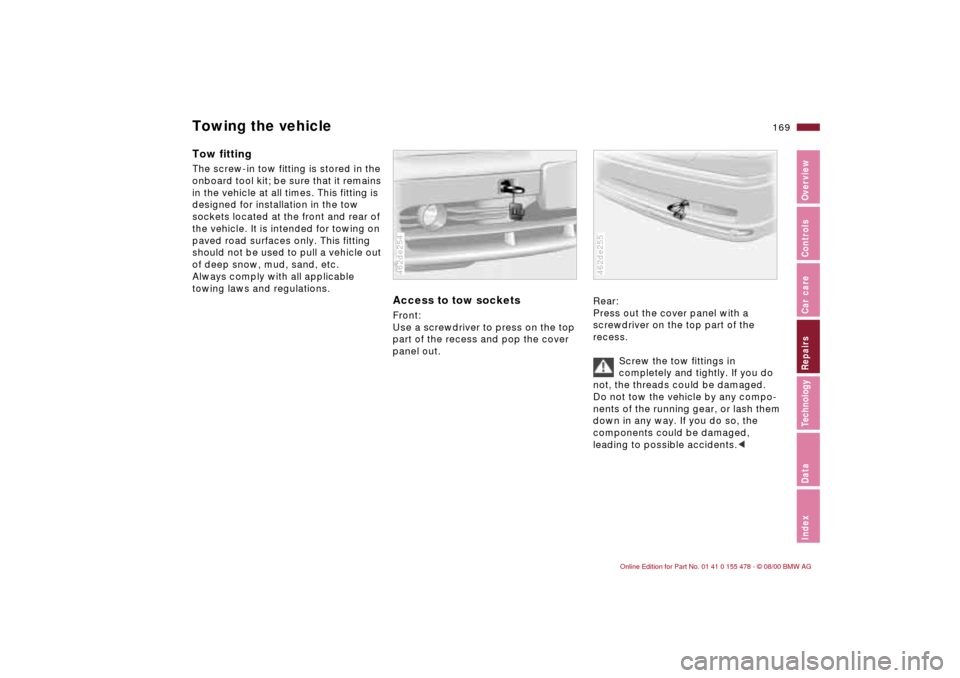
Access to tow socketsFront:
Use a screwdriver to press on the top
part of the recess and pop the cover
panel out.462de254
Rear:
Press out the cover panel with a
screwdriver on the top part of the
recess.
Screw the tow fittings in
completely and tightly. If you do
not, the threads could be damaged.
Do not tow the vehicle by any compo-
nents of the running gear, or lash them
down in any way. If you do so, the
components could be damaged,
leading to possible accidents.<462de255