2001 BMW 330Ci COUPE roof
[x] Cancel search: roofPage 43 of 203

43n
IndexDataTechnologyRepairsCar careControlsOverview
Alarm system
*
>If the indicator lamp flashes for
10 seconds when the system is
disarmed: an attempted entry has
been detected in the period since the
system was armed.
Following triggering of an alarm, the
indicator lamp will flash continuously.
Avoiding an unintentional alarm The tilt alarm sensor and interior motion
sensor may be switched off at the same
time. You can do this to prevent a false
alarm from being triggered (in garages
with elevator ramps, for instance), or
when the vehicle is transported by
trailer or train:
Locking the vehicle twice (= arming the
system). Press button 2 on the remote
control twice in succession or lock the
vehicle twice with the key. Refer to
page 34.
The indicator lamp lights up briefly and
then flashes continuously. The tilt alarm
sensor and the interior motion sensor
are deactivated as long as the system is
armed.
Reset the alarm to reactivate the tilt
alarm sensor and the interior motion
sensor.
Interior motion sensorThe transmitter and receiver of the inte-
rior motion sensor are located in a trim
panel in the vehicle's roof.
For the interior motion sensor to func-
tion properly, the windows and sliding/
tilt sunroof must be closed.
However, you should switch off the
interior motion sensor (see previous
column) if you wish to leave the
windows or sliding/tilt sunroof open.460de159
Page 45 of 203
45n
IndexDataTechnologyRepairsCar careControlsOverview
Sliding/tilt sunroof
*
Exercise care when closing the
sliding/tilt sunroof and keep it in
your field of vision until it is completely
closed. Failure to do so can result in
injuries.
Remove the key from the ignition lock
and close the doors when you leave the
vehicle so that children cannot operate
the sunroof and possibly injure them-
selves.<
Avoid low air pressure or drafts in the
passenger compartment whenever the
sunroof is open or up by keeping the
vent outlets on the instrument panel
open, and if necessary, by increasing
the air supply. Refer to page 92 or 99.
If the sunroof is completely open, air
disturbances may be caused in the
vehicle when you are driving at higher
speeds. Close the roof as far as neces-
sary until this natural phenomenon
ceases.
To operate the door lock or the remote
control by using the convenience oper-
ating mode, refer to page 34 or 36.
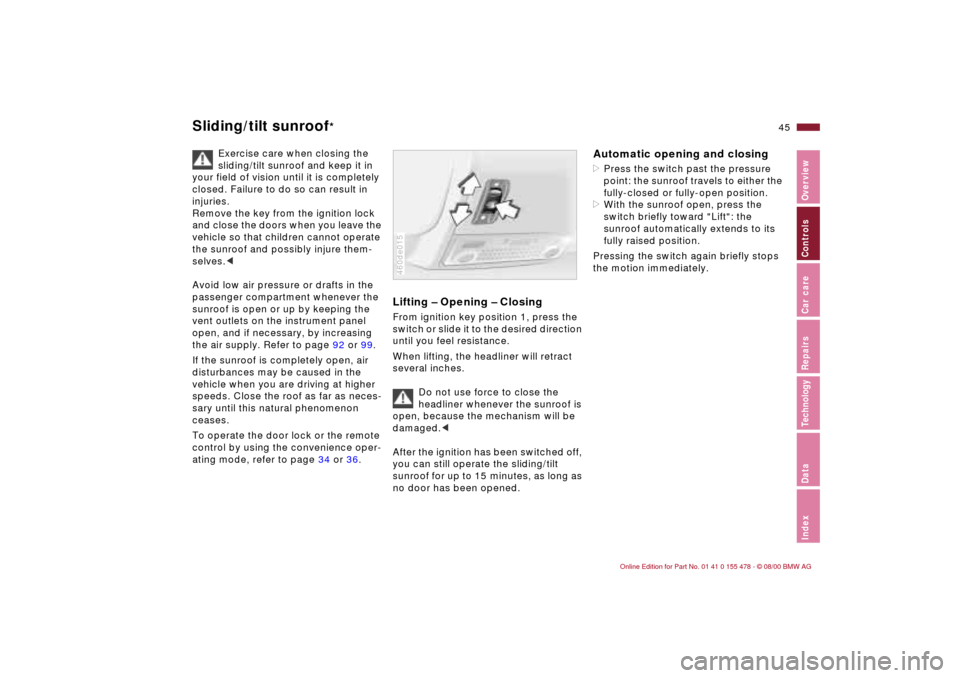
Lifting Ð Opening Ð ClosingFrom ignition key position 1, press the
switch or slide it to the desired direction
until you feel resistance.
When lifting, the headliner will retract
several inches.
Do not use force to close the
headliner whenever the sunroof is
open, because the mechanism will be
damaged.<
After the ignition has been switched off,
you can still operate the sliding/tilt
sunroof for up to 15 minutes, as long as
no door has been opened.460de015
Automatic opening and closing>Press the switch past the pressure
point: the sunroof travels to either the
fully-closed or fully-open position.
>With the sunroof open, press the
switch briefly toward "Lift": the
sunroof automatically extends to its
fully raised position.
Pressing the switch again briefly stops
the motion immediately.
Page 46 of 203
46n
Sliding/tilt sunroof
*
Safety featureIf the sliding/tilt sunroof encounters
resistance at a point roughly past the
middle of its travel when it is closing,
the closing cycle is interrupted and the
sunroof will retract slightly.
At any rate, even with this safety
function, make sure that the
closing path is clear, otherwise, in
borderline cases (e. g. with thin
objects), the limit for triggering the
sunrooof's closing force cannot be
guaranteed. You can override this
safety feature by pressing the switch
beyond the pressure point and holding
it.<
Power loss or malfunctionIn the event of an electrical malfunction,
you can operate the sliding/tilt sunroof
manually, refer to page 167.
Page 58 of 203
58n
AirbagsSitting correctly with airbags
For your safety, comply with the
following instructions for the
airbags. If you do not, the airbags may
not be able to provide their maximum
protection. All passengers in the vehicle
should be aware of and comply with
this information:
The airbags are supplemental restraint
devices designed to provide extra
protection; they are not a substitute for
safety belts. Wear your safety belt at all
times. The airbags will not be triggered
in the event of a minor accident, a
vehicle roll-over, or collisions from the
rear. In these instances, the safety belt
provides optimal protection.
Airbags are located under cover panels
in the steering wheel, in the instrument
panel, in the side trim panels in the
front and rear
*, in the roof panels, and
in the sides of the inside roof lining.
Adjust your seat to a position that
provides maximum distance between
you and the steering wheel, the instru-
ment panel and the door while still
allowing comfortable and safe access
to all vehicle controls.
To avoid sustaining hand and arm inju-
ries, always grasp the steering wheel
on the rim with the hands at the 9 and
3 o'clock positions. Do not place your
hands on the center pad.
Never allow any objects to obstruct the
area between the airbag and an occu-
pant.
Do not use the cover panel above the
passenger-side airbag as a storage
area.
Do not apply adhesive materials to the
cover panels of the airbags, cover them
or modify them in any other way.
Do not install a rear-facing child
restraint system in the front passenger
seat of this vehicle.
Children under 13 years of age and
children less than 5 feet (150 cm) tall
should ride only in the rear seat.
Infants or small children should never
be held on the lap of a passenger.
If your vehicle is equipped with side
airbags in the rear passenger area
*, be
sure that child restraints are mounted
correctly and provided with the
greatest-possible distance between the
airbags in the side trim panels. Do not
allow children to lean out of the child's
seat in the direction of the side trim
panels. If they do so, serious injuries
can occur if the airbag is triggered.
(infants and small children in appro-
priate child restraint systems; larger
children and adults using the safety
belts). Never let an occupant's head
rest near or on a side airbag because
the inflating airbag could cause a
serious or fatal injury. Please note that
the word "Airbag" imprinted on the door
trim panel indicates the airbag's loca-
tion.
Accident research shows that the
safest place for children in an automo-
bile is in the rear seat. However, a child
sitting in the rear seat and not properly
restrained may place his or her head on
or near the airbag, if so equipped. For
example, a child Ñ even though belted
Ñ may fall asleep with his or her head
against the side airbag. It may be diffi-
cult for a driver to ensure that children
in the rear seat will remain properly
positioned at all times and not place
their heads on or near the side airbag.
Therefore, we recommend that the rear
seat side airbags, if so equipped, be
deactivated if children will travel in the
rear seat.
The rear seat side airbags may already
have been deactivated, either at the
time of manufacture or by a BMW
Page 109 of 203

109n
IndexDataTechnologyRepairsCar careControlsOverview
Cargo loading Roof-mounted luggage rack
*
Always position and secure the
load correctly. If you do not, it can
endanger the passengers during
braking or evasive maneuvers.
Do not exceed the permissible gross
weight and axle loads (refer to
page 186), otherwise the vehicle's oper-
ating safety is no longer assured and
you are in violation of the law.
Do not stow heavy or hard objects in
the passenger compartment without
securing them. Otherwise they would
be thrown around during braking and
evasive maneuvers and endanger the
occupants.<
AnchorsAccess to the anchors:
To open the cover (arrow) please use
the tool included with the roof-rack
system.
A special roof-rack system is available
for your BMW as an optional extra.
Please comply with the precautions
included with the installation instruc-
tions.
Because roof racks raise the center of
gravity of the vehicle when loaded, they
exercise a major effect on its handling
and steering response.
You should therefore always remember
not to exceed the approved roof
weight, the approved gross vehicle
weight or the axle loads when loading
the rack. Pertinent specifications are 462de271
listed under "Technical Data,"
page 186.
Make sure that the load is not too
heavy, and attempt to distribute it
evenly.
Always load the heaviest pieces first (on
the bottom). Be sure that adequate
clearance is maintained for raising the
sliding/tilt sunroof, and that objects do
not project into the opening path of the
luggage compartment lid.
Secure the roof luggage correctly and
securely to prevent it from shifting or
being lost during driving (danger to
following traffic).
Drive smoothly and avoid sudden
acceleration or braking. Do not corner
at high speeds.
The roof load increases aerodynamic
resistance, which in turn increases fuel
consumption and places additional
stress on the vehicle itself.
Page 147 of 203
147n
IndexDataTechnologyRepairsCar careControlsOverview
Airbags Vehicle storageImportant safety notices
Do not attempt to remove the gas
generators of the airbag supple-
mental restraint system from the
vehicle. Testing and servicing must be
performed by trained technicians only.
In the event of a malfunction, deactiva-
tion, or triggered actuation (as a
response to an accident) of the airbag
restraint system, consult your BMW
center for repairs or service operations.
Do not modify or tamper with either the
wiring or the individual components in
the airbag system. These include the
padded steering wheel hub, the instru-
ment panel, the side trim panels of the
front or rear doors and the roof pillars or
the sides of the headliner. Do not apply
adhesive materials to these compo-
nents or cover them over or alter them
in any other way. Do not attempt to
remove or dismantle the steering
wheel.
To ensure compliance with official
safety regulations, entrust disposal of
airbag generators to a BMW center.
Unprofessional attempts to service the
system could lead to failure in an emer-
gency or undesired airbag activation,
either of which could result in personal
injury.<
Consult your BMW center regarding
special procedures if you intend to
store the vehicle for more than three
months.
Page 151 of 203

Overview
Controls and features
Operation, care
and maintenance
Owner service procedures
Technical data
Index Advanced technology
151n
IndexDataTechnologyRepairsCar careControlsOverview
Replacement procedures:
Onboard tool kit152
Windshield wiper blades152
Lamps and bulbs152
Changing a wheel159
Battery163
Fuses166
Microfilter/Activated-charcoal
filter166
In case of electrical
malfunction:
Fuel filler door167
Sliding/tilt sunroof167
Assistance, giving and
receiving:
Jump-starting168
Towing the vehicle169
Repairs
Page 167 of 203
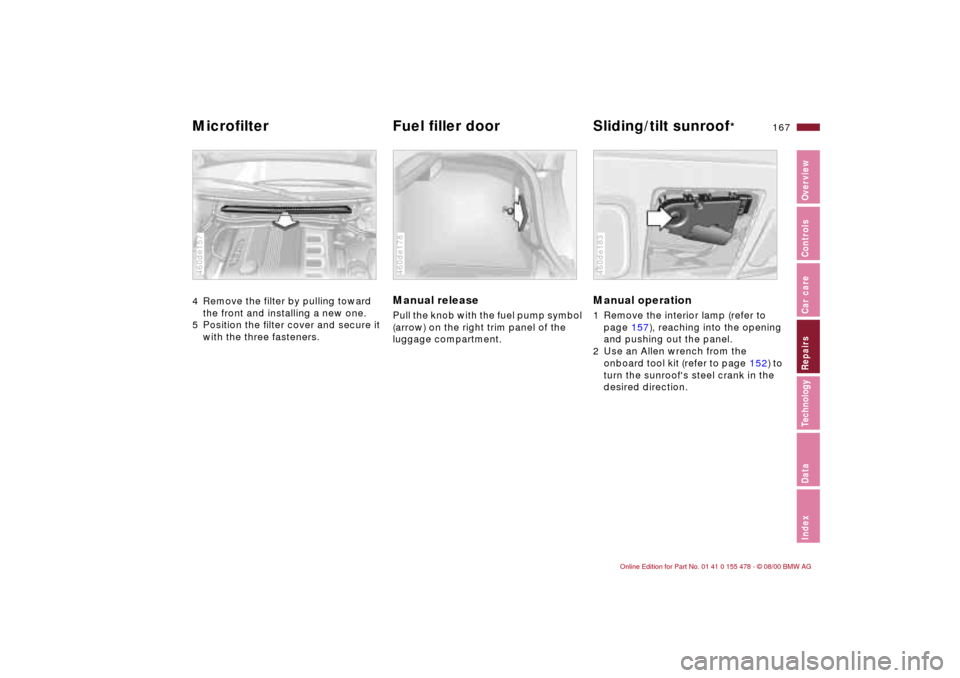
167n
IndexDataTechnologyRepairsCar careControlsOverview
Microfilter Fuel filler door Sliding/tilt sunroof
*
4 Remove the filter by pulling toward
the front and installing a new one.
5 Position the filter cover and secure it
with the three fasteners.460de157
Manual release Pull the knob with the fuel pump symbol
(arrow) on the right trim panel of the
luggage compartment. 460de178
Manual operation 1 Remove the interior lamp (refer to
page 157), reaching into the opening
and pushing out the panel.
2 Use an Allen wrench from the
onboard tool kit (refer to page 152) to
turn the sunroof's steel crank in the
desired direction.460de183