Page 174 of 215

174n
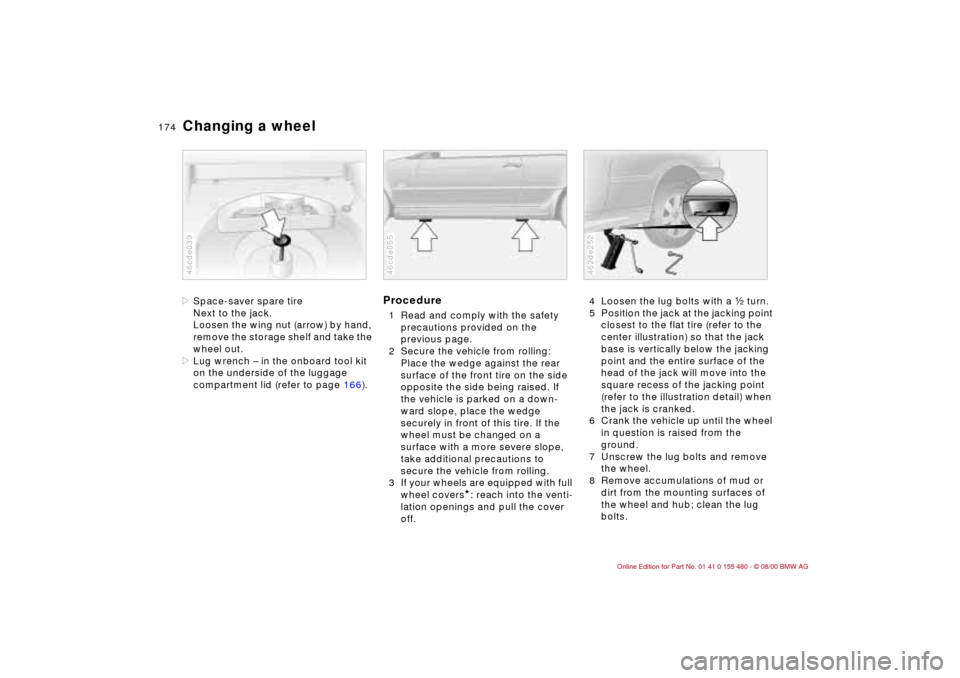
Changing a wheel>Space-saver spare tire
Next to the jack.
Loosen the wing nut (arrow) by hand,
remove the storage shelf and take the
wheel out.
>Lug wrench Ð in the onboard tool kit
on the underside of the luggage
compartment lid (refer to page 166).46cde039
Procedure1 Read and comply with the safety
precautions provided on the
previous page.
2 Secure the vehicle from rolling:
Place the wedge against the rear
surface of the front tire on the side
opposite the side being raised. If
the vehicle is parked on a down-
ward slope, place the wedge
securely in front of this tire. If the
wheel must be changed on a
surface with a more severe slope,
take additional precautions to
secure the vehicle from rolling.
3 If your wheels are equipped with full
wheel covers
*: reach into the venti-
lation openings and pull the cover
off.
46cde055
4 Loosen the lug bolts with a g turn.
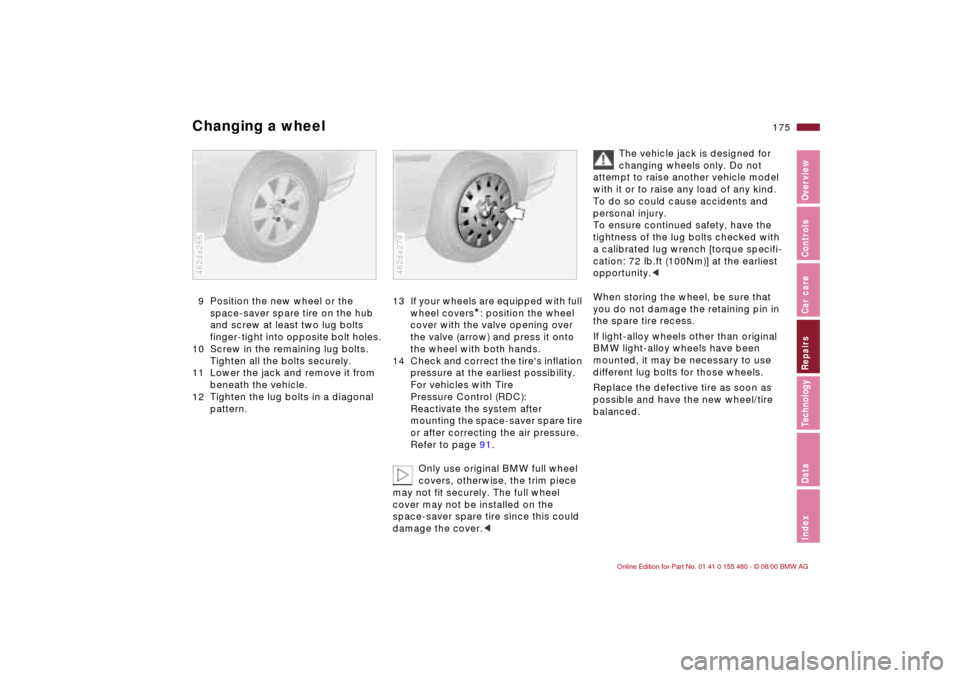
5 Position the jack at the jacking point
closest to the flat tire (refer to the
center illustration) so that the jack
base is vertically below the jacking
point and the entire surface of the
head of the jack will move into the
square recess of the jacking point
(refer to the illustration detail) when
the jack is cranked.
6 Crank the vehicle up until the wheel
in question is raised from the
ground.
7 Unscrew the lug bolts and remove
the wheel.
8 Remove accumulations of mud or
dirt from the mounting surfaces of
the wheel and hub; clean the lug
bolts.462de252
Page 175 of 215

175n
IndexDataTechnologyRepairsCar careControlsOverview
Changing a wheel9 Position the new wheel or the
space-saver spare tire on the hub
and screw at least two lug bolts
finger-tight into opposite bolt holes.
10 Screw in the remaining lug bolts.
Tighten all the bolts securely.
11 Lower the jack and remove it from
beneath the vehicle.
12 Tighten the lug bolts in a diagonal
pattern.462de266
13 If your wheels are equipped with full
wheel covers
*: position the wheel
cover with the valve opening over
the valve (arrow) and press it onto
the wheel with both hands.
14 Check and correct the tire's inflation
pressure at the earliest possibility.
For vehicles with Tire
Pressure Control (RDC):
Reactivate the system after
mounting the space-saver spare tire
or after correcting the air pressure.
Refer to page 91.
Only use original BMW full wheel
covers, otherwise, the trim piece
may not fit securely. The full wheel
cover may not be installed on the
space-saver spare tire since this could
damage the cover.<
462de279
The vehicle jack is designed for
changing wheels only. Do not
attempt to raise another vehicle model
with it or to raise any load of any kind.
To do so could cause accidents and
personal injury.
To ensure continued safety, have the
tightness of the lug bolts checked with
a calibrated lug wrench [torque specifi-
cation: 72 lb.ft (100Nm)] at the earliest
opportunity.<
When storing the wheel, be sure that
you do not damage the retaining pin in
the spare tire recess.
If light-alloy wheels other than original
BMW light-alloy wheels have been
mounted, it may be necessary to use
different lug bolts for those wheels.
Replace the defective tire as soon as
possible and have the new wheel/tire
balanced.
Page 176 of 215

176n
Changing a wheel Battery Driving with the space-saver
spare tireDrive cautiously and do not exceed a
speed of 50 mph (80 km/h).
Be aware that vehicle handling will be
altered. Slower brake response time,
longer braking distances and changed
steering characteristics may be
anticipated when approaching limit
conditions.
The changes in handling characteristics
will be even more pronounced in
conjunction with winter tires.
Only one space-saver spare tire
*
may be mounted at a time. Mount
a wheel and tire with the same size
and specifications as the others at the
earliest possible opportunity. Maintain
correct tire pressures. Refer to
page 28.<
LocationThe battery is located at the right-rear
of the luggage compartment. Remove
the luggage compartment floor panel
(refer to page 40), and give a screw-
driver or a coin a f-turn counter-clock-
wise to release and remove the two
fasteners, plus an additional fastener in
the top center side trim panel. In order
to remove the storage tray, slide the
side trim panel slightly upward.
Battery posts, terminals, and
related accessories contain lead
and lead compounds. Wash hands after
handling.<46cde045
Charge conditionYou can read the charge condition of
the battery with the "Magic Eye"
*
(a hydrometer):
>Green: adequate charge.
>Black: not adequately charged. The
battery must be recharged. Please
contact your BMW center for addi-
tional information.
>Yellow: replace the battery.
The service life specified for the
battery can be achieved only if it is
always kept adequately charged. If the
vehicle is primarily used for stop-and-
go traffic, be sure to check the charge
state more often.<
46cde044
Page 208 of 215

Everything from A to ZPDC (Park Distance
Control)87
Performance196
Phone, mobile129
Pocket flashlight107
Pollen99,106
Power steering129
Power windows44
convenience operation34
Pressure monitoring,
tires91,192
Pressure, tires27,132 Q
Quality Grades133 R
Radiator199
Radio
reception129,190
refer also to the separate
Owner's Manual
Radio Data System
(RDS)190
Rain sensor77,191
RDC (Tire Pressure
Control)91,192
RDS (Radio Data
System)190
Rear lamps169
Rear window
defroster78,98,106
Rear-entry assist55 Rearview mirror57
Recirculated air mode98
Reclining seat52
Refueling26
Remote control35
Remove condensation,
windows105
Replacement keys32
Reporting safety defects7
Restraint system61,64
Reverse17,72
Rollover protection
system67,68,193
Roof load capacity198
Roof-mounted luggage
rack116
Rubber seals and
components127
S
Safety belt tensioner190
Safety belts60
Safety buttons38
Safety defects, reporting7
Seat adjustment52
Seat heating107
Seat memory57
Seat-integrated safety
belts55
Seats52
Securing cargo114
Securing loads114 Selector lever, automatic
transmission73
Self-defrosting mirrors57
Self-diagnostics192
Service and Warranty
Information Booklet150
Service Interval
Display82,150
Shiftlock73
Side airbags61
Side impact Head Protection
System61
Side lamps93
bulb replacement168
Sitting properly with
airbag62
Ski bag113
Skid control128
Slippery roads127
Snow
chains127,136,137
Socket112
for flashlight112
for power supplies112
for vacuum cleaner112
Spare key32
Spare tire173
Spark plugs200
Speaker111
Specifications, fuel27
Speed, average86
Speedometer18
Sports seat54 Starting
problems121,183
Starting the engine69
Steel wheels137
Steering129
Steering lock69
Steering wheel57
adjusting57
Steptronic73
Stopping the vehicle70
Storage compartments110
Storage facilities110
Storing your vehicle160
Stroke196
Summer tires135
Sun visors58
Switching off the engine70
Symbols4,177
Synthetic oils146
T
Tachometer81
Tail lamp assembly, bulb
replacement169
Tank capacity199
Tank cover
unlock in case of electrical
fault180
Technical data196
Technical
modifications6,161
Telephone hookup111
Page 211 of 215

Owner service procedures
211n
IndexDataTechnologyRepairsCar careControlsOverview
O
Oil
level145
quality146
specifications146
viscosity146
Onboard tool kit166 P
Parking lamps, bulb
replacement168
Pressure, tires27 R
Rear lamps169
Releasing the fuel filler door
following an electrical
malfunction180
Releasing the hood140
Removing condensation
from the
windows100,105
Replacement key32
Replacing bulbs166
Replacing windshield wiper
blades166
Return used batteries178
Rotating the tires173
S
Space-saver spare tire173
Spare key32
Spare tire173
Starting problems70,121
Switching off the tilt sensor
alarm system43 T
Tail lamp assembly, bulb
replacement169
Tail lamps, bulb
replacement169
Tilt alarm, switching off43
Tire damage132
Tires, changing27,173
Tools166
Towing eyelets184
Towing the vehicle184
Turn signal indicator
bulb replacement168 U
Use of antifreeze,
radiator148
W
Warning lamps20
Washer fluid, adding144
Washer nozzles,
adjusting144
Washer reservoir, filling144
Wheel lug wrench173
Wheel, changing173
Windows,
defrosting100,105
Windshield washer,
filling144
Windshield wiper blades,
replacing166
Work in the engine
compartment140