2001 BMW 325i SEDAN engine
[x] Cancel search: enginePage 160 of 211
160n
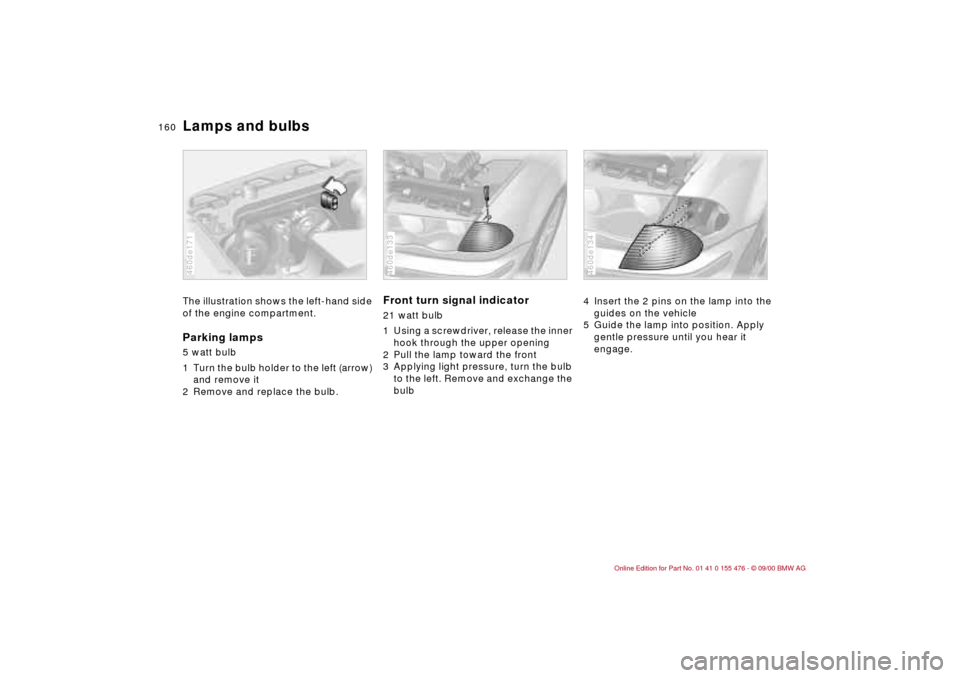
Lamps and bulbsThe illustration shows the left-hand side
of the engine compartment.Parking lamps 5 watt bulb
1 Turn the bulb holder to the left (arrow)
and remove it
2 Remove and replace the bulb.460de171
Front turn signal indicator 21 watt bulb
1 Using a screwdriver, release the inner
hook through the upper opening
2 Pull the lamp toward the front
3 Applying light pressure, turn the bulb
to the left. Remove and exchange the
bulb460de133
4 Insert the 2 pins on the lamp into the
guides on the vehicle
5 Guide the lamp into position. Apply
gentle pressure until you hear it
engage.460de134
Page 165 of 211
165n
IndexDataTechnologyRepairsCar careControlsOverview
Changing a wheel
Take these precautionary
measures if you have either a flat
tire or are changing the tire:
Stop the vehicle as far as possible from
passing traffic. Park on a firm, flat
surface. Switch on the hazard flashers.
Turn the steering wheel to the straight-
ahead position, remove the key and
engage the steering lock. Shift into 1st
or reverse (selector lever in "Park" with
automatic) and engage the parking
brake.
Have all passengers leave the vehicle
and remain well away from your imme-
diate working area (behind a guardrail,
for instance).
If a warning triangle or portable hazard
warning lamp is available, set it up on
the roadside at an appropriate distance
from the rear of the vehicle. Comply
with all applicable safety guidelines and
regulations.
Change the wheel only on a level, firm
surface that is not slippery. Avoid
jacking the vehicle on a soft or slippery
support surface (snow, ice, loose
gravel, etc.), as it could slide sideways.
Position the jack on a firm support
surface.
Do not place wooden blocks or similar
objects under the jack. If you do so, the
jack might not be able to reach its full
support capacity because of the limited
height.
Do not lie under the vehicle or start the
engine when the vehicle is supported
by the jack. Failure to comply with this
creates a risk of fatal injury.<
Your BMW has either a spare wheel or
a space-saver spare tire for temporary
use and to ensure your mobility.
To remove the spare wheel, lift out
the floor panel in the luggage
compartment completely (refer to
page 41).<
You will need the followingIn order to avoid rattling noises later,
note the position of the tools when you
remove them and return them to their
original position when you are through
using them.
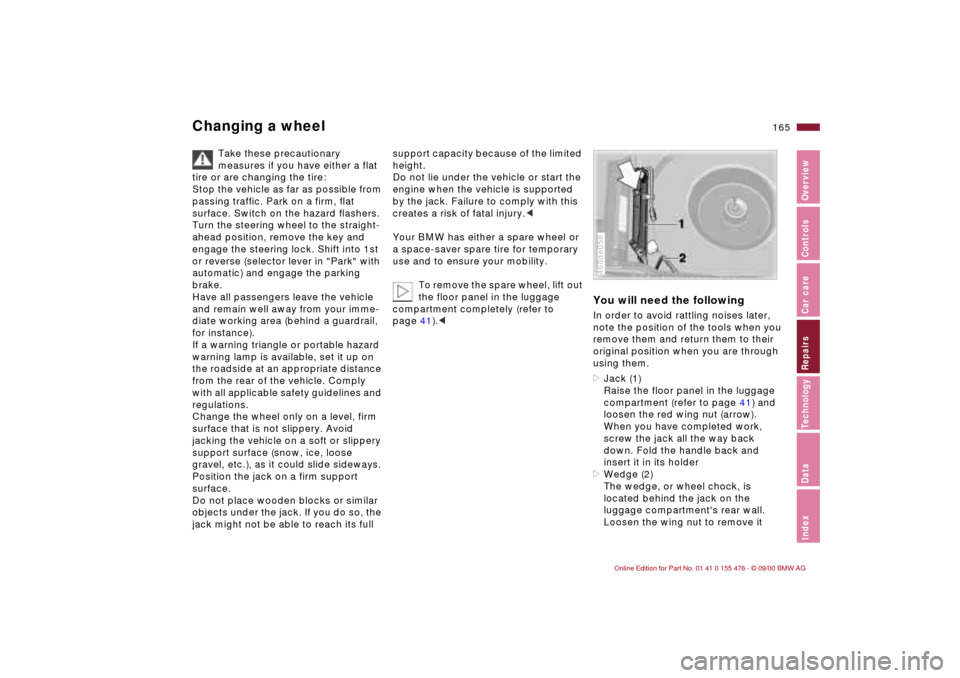
>Jack (1)
Raise the floor panel in the luggage
compartment (refer to page 41) and
loosen the red wing nut (arrow).
When you have completed work,
screw the jack all the way back
down. Fold the handle back and
insert it in its holder
>Wedge (2)
The wedge, or wheel chock, is
located behind the jack on the
luggage compartment's rear wall.
Loosen the wing nut to remove it460de058
Page 169 of 211
169n
IndexDataTechnologyRepairsCar careControlsOverview
BatteryBattery careThe battery is absolutely maintenance-
free, that is, the original electrolyte will
normally last for the service life of the
battery under moderate climatic condi-
tions.
For all questions that regard the
battery, please consult your BMW
center. Since the battery is mainte-
nance-free, the following is for your
information only.
please comply with the corresponding
precautions whenever you work with or
near the battery.
Before handling the battery,
please read the following infor-
mation.
Wear eye protection. Do not
allow particles containing
battery acid or lead to come into
contact with your eyes, your skin, or
your clothing.
Battery acid is extremely corro-
sive. Wear eye protection and
protective gloves. Do not tip the
battery. Battery acid can leak from the
ventilation openings.
Do not allow children access to
batteries and battery acid.
Never allow sparks or open
flame in the vicinity of the
battery. Avoid sparks from elec-
trical cables or electrical equipment.
Turn the key to position 0 in the
steering lock when disconnecting or
connecting the battery. Do not short-
circuit the battery terminals. This
creates a risk of injury from high-energy
sparks.
A highly explosive gas is gener-
ated when the battery is charged.
If battery acid is splashed into
your eyes, immediately rinse
them with clear water for
15 minutes. Consult a physician imme-
diately. If your skin or clothing are
splashed by acid, rinse immediately
with ample clear water. If battery acid is
accidentally swallowed, consult a
physician immediately.
In order to protect the battery
case from ultraviolet radiation,
do not place it in direct sunlight.
A discharged battery can freeze. Store
the battery in areas where temperature
remains above freezing.
Removal and installation
Do not disconnect the battery
when the engine is running. If you
do so, the ensuing voltage surge will
damage the vehicle's onboard elec-
tronics.
Do not make any modifications in the
wires to the positive terminal. If you do
so, the protective function of the safety
battery terminal is no longer ensured.
Repair and disposal must be performed
by trained technicians only.<
When removing the battery, disconnect
the cable on the negative terminal first,
then the cable on the positive terminal.
Loosen the center adjusting screw on
the battery retaining strap (use the
screwdriver included with the onboard
tool kit) and disconnect the strap.
When installing a battery, connect the
positive terminal first, then connect the
negative terminal.
When installing a battery, be sure
that it is mounted properly and
that the retaining bracket is installed
with the center adjustment screw. If this
is not done, the battery will not be
adequately secured in case of an acci-
dent.<
Page 170 of 211
170n
Battery FusesCharging the battery Charge the battery in the vehicle only
when the engine is not running.
Before doing any work on the elec-
trical system, be sure to unclamp
the cable from the battery's negative
terminal. Failure to do so can result in
short-circuits, a fire or personal injury.<
If the vehicle is to be parked longer than
four weeks, disconnect the battery from
the vehicle's electrical system by
disconnecting the negative terminal
cable and then recharge using a suit-
able charging device.
If you intend to store your vehicle for
longer than twelve weeks: remove the
battery, charge it and store it in a cool
(but frost-and dust-free) room. Every
three months and before reinstalling the
battery, have it recharged. If it is not
recharged, it will not be serviceable.
Every time the battery is discharged,
especially over extended periods, its
service life is reduced.
Return used batteries to a recy-
cling center or your BMW center.
Maintain the battery in an upright posi-
tion for transport and storage. Secure
the battery to prevent it from tilting
during transport.<
Storage periods during which the
battery is disconnected are not
taken into consideration by the Service
Interval Display for changing the brake
fluid.
For this reason, be sure that the brake
fluid is changed every two years,
regardless of the information displayed.
Read and comply with the information
on page 143 covering this subject.<
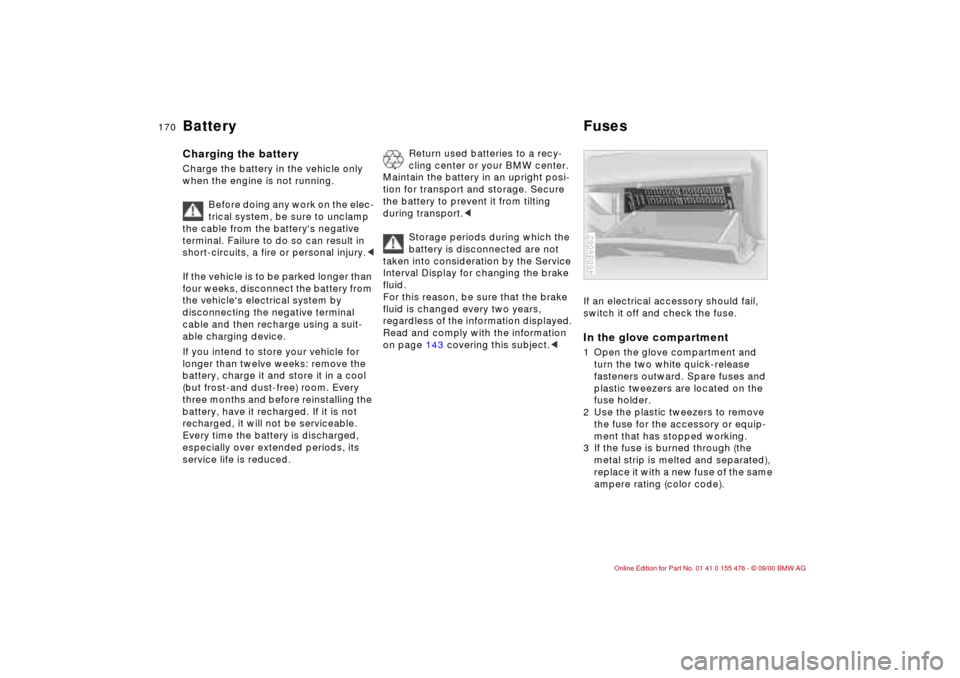
If an electrical accessory should fail,
switch it off and check the fuse. In the glove compartment1 Open the glove compartment and
turn the two white quick-release
fasteners outward. Spare fuses and
plastic tweezers are located on the
fuse holder.
2 Use the plastic tweezers to remove
the fuse for the accessory or equip-
ment that has stopped working.
3 If the fuse is burned through (the
metal strip is melted and separated),
replace it with a new fuse of the same
ampere rating (color code).460de062
Page 173 of 211
173n
IndexDataTechnologyRepairsCar careControlsOverview
Do not use spray starter fluids.
If the battery is discharged, the engine
can be started with the use of two
jumper cables and the battery of
another vehicle. Use only jumper cables
with fully insulated grips on the terminal
clamps.
Do not touch the parts conducting
electrical current while the engine
is running. Failure to comply with this
creates a risk of fatal injury.<
Carefully comply with the following
instructions to avoid personal injury or
damage to one or both vehicles:
1 Be sure that the battery on the
support vehicle is also rated at
12 volts, and that the capacities of
the two batteries (Ah) are roughly
comparable (printed on casing)
2 Leave the discharged battery
connected to the vehicle's electrical
system
3 Make sure that there is no contact
between the bodywork of the two
vehicles Ð this creates a risk of short
circuits
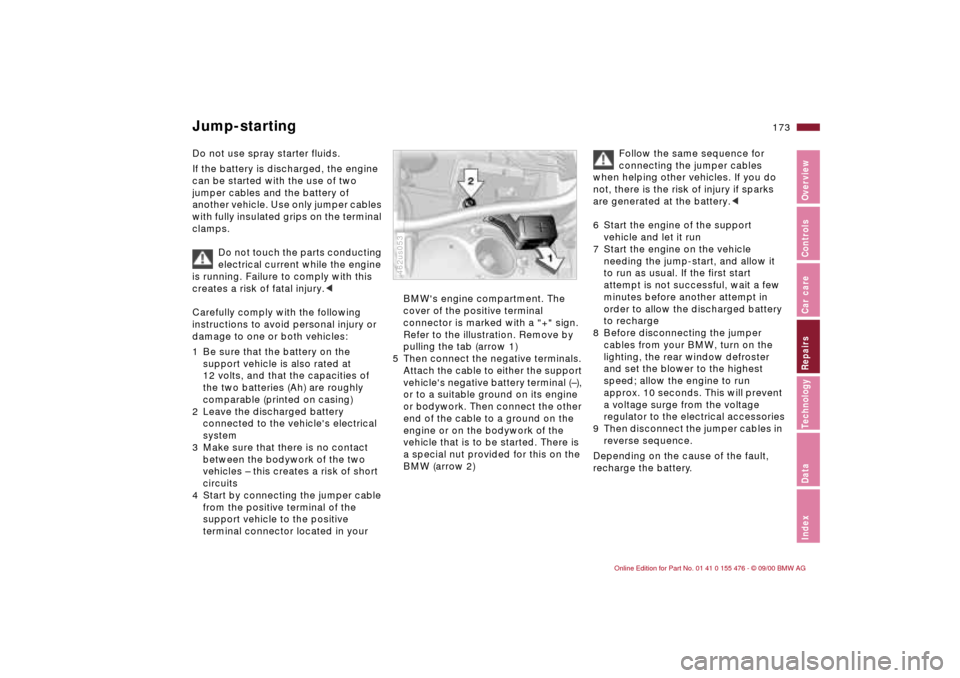
4 Start by connecting the jumper cable
from the positive terminal of the
support vehicle to the positive
terminal connector located in your
BMW's engine compartment. The
cover of the positive terminal
connector is marked with a "+" sign.
Refer to the illustration. Remove by
pulling the tab (arrow 1)
5 Then connect the negative terminals.
Attach the cable to either the support
vehicle's negative battery terminal (Ð),
or to a suitable ground on its engine
or bodywork. Then connect the other
end of the cable to a ground on the
engine or on the bodywork of the
vehicle that is to be started. There is
a special nut provided for this on the
BMW (arrow 2)462us053
Follow the same sequence for
connecting the jumper cables
when helping other vehicles. If you do
not, there is the risk of injury if sparks
are generated at the battery.<
6 Start the engine of the support
vehicle and let it run
7 Start the engine on the vehicle
needing the jump-start, and allow it
to run as usual. If the first start
attempt is not successful, wait a few
minutes before another attempt in
order to allow the discharged battery
to recharge
8 Before disconnecting the jumper
cables from your BMW, turn on the
lighting, the rear window defroster
and set the blower to the highest
speed; allow the engine to run
approx. 10 seconds. This will prevent
a voltage surge from the voltage
regulator to the electrical accessories
9 Then disconnect the jumper cables in
reverse sequence.
Depending on the cause of the fault,
recharge the battery.
Jump-starting
Page 175 of 211
175n
IndexDataTechnologyRepairsCar careControlsOverview
Towing the vehicleBMW 325xi, 330xi: towing the
vehicle with one raised axle only 1 Place the gearshift lever or selector
lever in "Neutral"
2 Switching off the engine
3 Towing speed:
Max. 30 mph (50 km/h)
4 Towing distance:
Max. 95 miles (150 km)
Remove the rear driveshaft for
towing over longer distances with
the front axle lifted; remove the front
driveshaft for towing over longer
distances with the rear axle lifted.
Failure to comply with this will result in
damage to the transfer box.<
Page 178 of 211
178n
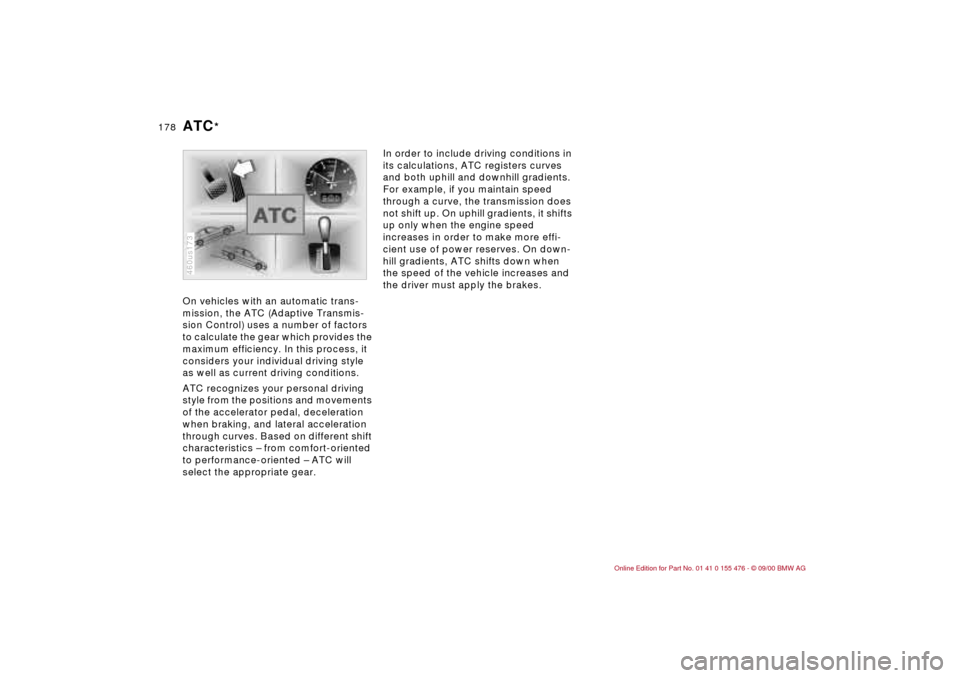
On vehicles with an automatic trans-
mission, the ATC (Adaptive Transmis-
sion Control) uses a number of factors
to calculate the gear which provides the
maximum efficiency. In this process, it
considers your individual driving style
as well as current driving conditions.
ATC recognizes your personal driving
style from the positions and movements
of the accelerator pedal, deceleration
when braking, and lateral acceleration
through curves. Based on different shift
characteristics Ð from comfort-oriented
to performance-oriented Ð ATC will
select the appropriate gear.
460us173
In order to include driving conditions in
its calculations, ATC registers curves
and both uphill and downhill gradients.
For example, if you maintain speed
through a curve, the transmission does
not shift up. On uphill gradients, it shifts
up only when the engine speed
increases in order to make more effi-
cient use of power reserves. On down-
hill gradients, ATC shifts down when
the speed of the vehicle increases and
the driver must apply the brakes.
ATC
*
Page 180 of 211

180n
ASC+T/DSC
*
Highly sensitive sensors monitor the
number of revolutions of the wheels.
When equipped with DSC, they also
monitor steering angle, lateral accelera-
tion, brake pressure and the movement
of the vehicle around its vertical axis.
If differences in the wheel speeds occur,
ASC+T counteracts the danger of
wheelspin by reducing engine torque; if
necessary, ASC will also respond by
applying the brakes to the rear wheels.
In addition, DSC permanently monitors
the vehicle's current operating condition
and compares it with an ideal condition
that is calculated from the sensor's
signals. If deviations from this occur
(understeering or oversteering, for
instance), DSC can stabilize the vehicle
in fractions of a second by reducing
engine output and with the assistance of
braking intervention at individual
wheels. As a result, dangerous skids can
be prevented even as they are just
beginning, but only within the laws of
physics.
You may need some time to become
accustomed to this system's interven-
tion. However, it provides optimum
drive force and driving stability.
The braking intervention may be
accompanied by sounds specific to the
system.