2001 BMW 325Ci COUPE light
[x] Cancel search: lightPage 83 of 203

83n
IndexDataTechnologyRepairsCar careControlsOverview
ASC+T DSC
*
Reactivating the ASC+TPress the button again; the indicator
lamp goes out.
The laws of physics cannot be
repealed, even with ASC+T. It will
always be the driver's responsibility to
drive in a manner that matches road
conditions. We therefore urge you to
avoid using the additional safety margin
of the system as an excuse for taking
risks.<
For additional details concerning
ASC+T, please refer to the chapter
"Advanced Technology" on page 175.
The ConceptDSC maintains vehicle stability, even in
critical driving situations.
The system optimizes vehicle stability
during acceleration and when starting
from a full stop, as well as optimizing
traction. In addition, it recognizes
unstable vehicle conditions, such as
understeering or oversteering, and, as
far as is possible within the laws of
physics, helps keep the car on a steady
course by reducing the engine spped
and brake applications to the individual
wheels.
The DSC is operational every time you
start the engine. DSC contains the
functions of ADB and CBC, refer to
page 116.
The ADB (automatic differential braking)
copies the function of conventional
differential and transverse lock through
brake intervention, and increases trac-
tion whenever conditions merit, e. g.
when driving on snow-covered roads.
If the DSC is switched off the ADB will
still be in ready mode.
Indicator lamp
The indicator lamp on the instru-
ment panel will go out shortly
after the ignition has been
started. Refer to pages 21 and 22.
If the indicator lamp flashes:
ASC+T or DSC control the drive and
braking forces.
The indicator lamp stays lit:
DSC has been switched off via the
button; ADB is operational.
ADB intervention not indicated.
The indicator lamp and the
brake warning lamp will light up
continously:
The DSC, ADB and DBC have
been turned off with the switch
or are defective.
The vehicle will remain completely
operational, however, without DSC. In
the event of a fault, please see your
BMW center. Refer to pages 21 and 22.
Indicator and warning lamps for
Canadian models.
Page 84 of 203

84n
DSC
*
Switch off the DSC/Activate the
ADBPress the DSC button briefly; the indi-
cator lamp lights up continously.
The DSC has been switched off; ADB is
operational.
In the following exceptional circum-
stances, it may be effective to deacti-
vate the DSC for a short period:
>When rocking the vehicle or starting
off in deep snow or on loose surfaces
>When driving on snow-covered.
grades, in deep snow, or on a snow-
covered surface that has been
packed down from being driven on.
>When driving with snow chains.
Refer also to page 119.
The gain in traction is achieved by a
reduction in stabilizing intervention.462de301
Switch the DSC and ADB offHold down the DSC switch for at least
3 seconds. The indicator and the yellow
brake warning lamps will remain on the
entire time.
In this case, no interventions to
increase stability and traction for
engine and brakes are carried out.
To maintain vehicle stability,
always drive with the DSC on
whenever possible.<
Switch the DSC and ADB back onPress the button again; the indicator
lamp or the indicator lamps will go out.
The laws of physics cannot be
repealed, even with DSC. It will
always be the driver's responsibility to
drive in a manner that matches road
conditions. We therefore urge you to
avoid using the additional safety margin
of the system as an excuse for taking
risks.
Whenever the ADB has been activated,
the DSC is deactivated and will not
perform any stabilizing intervention.
Do not make any modifications to the
DSC system. Allow only authorized
technicians to perform work on the
DSC.<
For additional details concerning DSC,
please refer to the chapter "Advanced
Technology" on page 175.
Page 85 of 203

85n
StichworteDatenTechnikSelbsthilfeWartungBedienung†berblick
Tire Pressure Control (RDC)
*
The concept
RDC monitors the tire pressures at all
four wheels, even when the vehicle is
moving. The system provides an alert
whenever the inflation pressure drops
significantly below the specified pres-
sure in one or more tires.
In order for the system to "learn" the
correct tire inflation pressure, check the
inflation pressure in all tires according
to the inflation pressure table (page 28)
and make corrections as necessary.
Then activate the system.
This indicator lamp in the instru-
ment cluster will inform you if
the tire pressure is not correct.
Depending on the type of equipment,
the switch either has the letters RDC on
it or the RDC-symbol.
Activate the system
1 Turn ignition key to position 2 (do not
start the engine).
2 Press the switch long enough for the
yellow indicator lamp in the instru-
ment cluster to light up for a few
seconds.
3 After a few minutes driving time, RDC
sets the current inflation pressure in
the tires as the target values to be
monitored.462de293
You will only have to repeat this proce-
dure following a correction of the tire
inflation pressure. Otherwise, RDC
functions automatically when the igni-
tion key is in position 2, and thus oper-
ates whenever the vehicle is driven.
In the event of tire pressure loss
If the inflation pressure has dropped
significantly over a long period of time
(which is normal for any tire), the indi-
cator lamp will come on with a yellow
lamp.
This alerts you to have the tires inflated
to the specified pressures as soon as
possible.
If you are prompted to check the
tire pressure shortly after a
correction has been made, this indi-
cates that the corrected values were
not accurate. Please check the inflation
pressure again and make corrections
according to the inflation pressure
table. Then activate the system once
again.
<
Page 87 of 203

87n
IndexDataTechnologyRepairsCar careControlsOverview
Side lamps
With the switch in this position,
the front, rear and side vehicle
lighting is switched on.
For lighting on one side for parking as
an additional feature, refer to page 88.
Low beam headlamps
When you switch the ignition off
with the low beam headlamps
on, only the side lamps will
remain on.
"Follow-me-home lamps:"
If you activate the headlamp
flasher after parking the vehicle, then
the low-beam headlamps will come on
for a short time. You can also have this
function deactivated.<
460us035
"LIGHTS ON" warningWhen you open the driver's door after
turning the ignition key to position 0,
buzzer sounds for a few seconds to
remind you that the headlamps have
not been switched off.Daytime-driving lamps
*
If you desire, the light switch can be left
in the second position:
When the ignition is switched off, the
external lighting is also switched off.
Turn the rotary dial to adjust the
illumination intensity.
460us036
Side lamps/Low beams
Instrument panel lighti
ng
Page 101 of 203

101n
IndexDataTechnologyRepairsCar careControlsOverview
The seat cushion and backrest can be
heated with ignition key in position 2.
You can call up different heating modes
by repeatedly pressing the button.
When the three indicator lamps are illu-
minated, the highest heating mode is
activated. One lamp indicates the
lowest heating mode. The temperature
is regulated with a thermostat in each
mode.
You can also switch the higher heating
modes off directly:
Press the button and hold it slightly
longer.462de295
To actuate, press the button briefly with
the ignition key in position 1.
The illustration depicts the arrangement
of the buttons if the vehicle is fully
equipped. This may vary, depending
on the equipment actually installed.462de296
HiFi system Ð harman kardonSpecial acoustical effects are activated
or deactivated every time you press the
button.
When the system is activated, the
impression of a significantly larger
passenger compartment is created at
all seating areas, together with an
improvement of the stereo effect.
When reception is weak, the system
frequently switches between stereo and
mono operation. Switch it off.462de297
Seat heating
*
Roller sun blind
*
HiFi system
*
Page 102 of 203

102n
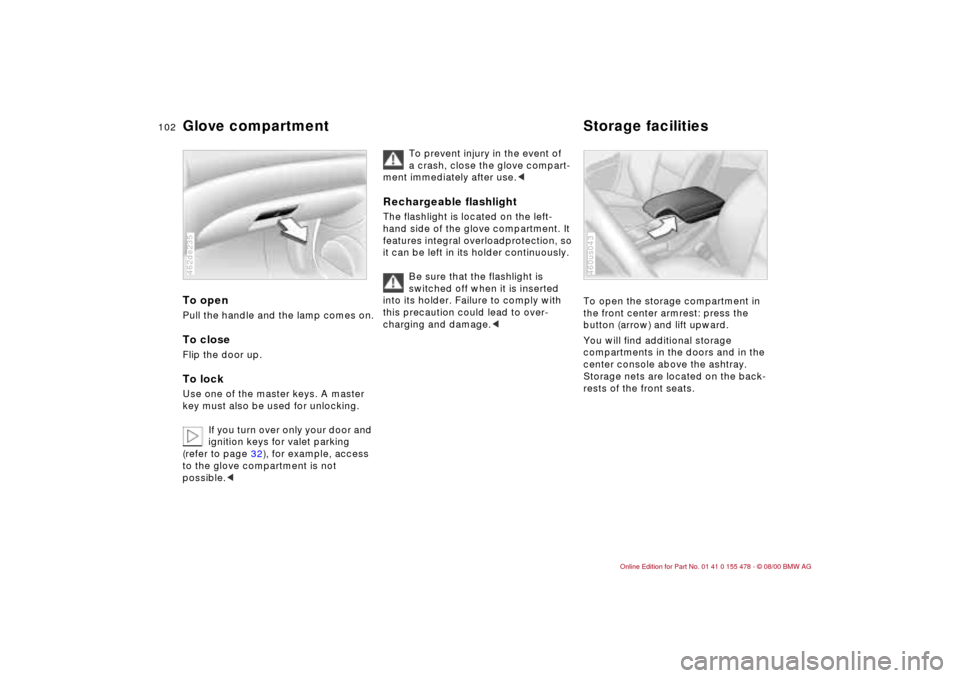
Glove compartment Storage facilities To openPull the handle and the lamp comes on.To closeFlip the door up.To lockUse one of the master keys. A master
key must also be used for unlocking.
If you turn over only your door and
ignition keys for valet parking
(refer to page 32), for example, access
to the glove compartment is not
possible.<462de235
To prevent injury in the event of
a crash, close the glove compart-
ment immediately after use.<
Rechargeable flashlightThe flashlight is located on the left-
hand side of the glove compartment. It
features integral overloadprotection, so
it can be left in its holder continuously.
Be sure that the flashlight is
switched off when it is inserted
into its holder. Failure to comply with
this precaution could lead to over-
charging and damage.<
To
open the storage compartment in
the front center armrest: press the
button (arrow) and lift upward.
You will find additional storage
compartments in the doors and in the
center console above the ashtray.
Storage nets are located on the back-
rests of the front seats.460us043
Page 105 of 203

105n
IndexDataTechnologyRepairsCar careControlsOverview
Cigarette lighter Ashtray, rear
Clothes hooks
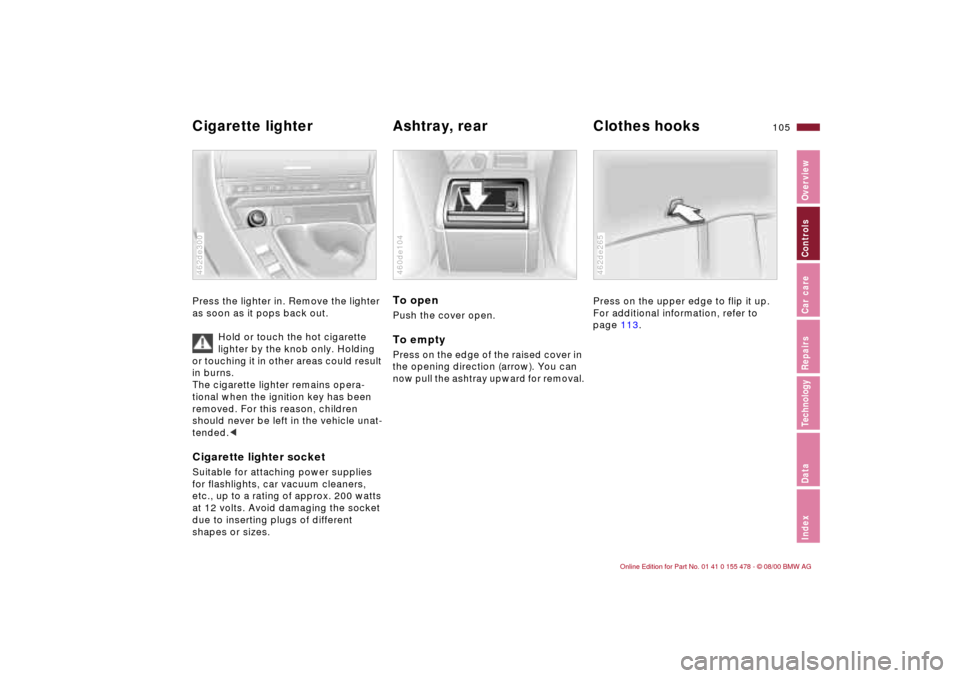
Press the lighter in. Remove the lighter
as soon as it pops back out.
Hold or touch the hot cigarette
lighter by the knob only. Holding
or touching it in other areas could result
in burns.
The cigarette lighter remains opera-
tional when the ignition key has been
removed. For this reason, children
should never be left in the vehicle unat-
tended.
etc., up to a rating of approx. 200 watts
at 12 volts. Avoid damaging the socket
due to inserting plugs of different
shapes or sizes.462de300
To openPush the cover open.To emptyPress on the edge of the raised cover in
the opening direction (arrow). You can
now pull the ashtray upward for removal.460de104
Press on the upper edge to flip it up.
For additional information, refer to
page 113.462de265
Page 106 of 203

106n
Through-loading systemThe rear backrest is divided into two
sections (one-third and two-thirds of
the width of the seat). For carrying
longer objects, you can fold down
either section of the backrest sepa-
rately.
To unlock, pull the lever corresponding
to the section (arrow).460de154
The rear backrest section will move
forward slightly when it is unlocked.
Reach into the gap and pull the
backrest down.
When you fold back the backrest,
be sure that the retainer engages
correctly. If it is not correctly engaged,
transported cargo could enter the pas-
senger compartment from the luggage
compartment during brake applications
or evasive maneuvers and endanger the
vehicle occupants.<
The fittings at the inner corners of the
luggage compartment provide you with
a convenient means of attaching
luggage nets
* and flexible straps for
securing suitcases and luggage. Refer
also to "Cargo loading" on page 108.
462de240
Center 3-point-safety belt in the
rear
*
You can retract the 3-point-safety belt
in the rear, before folding the through-
loading system back:
Loosen the safety belt and put the
buckle latch that is on the end of the
safety belt into the bracket mounted on
the rear window shelf (arrow).
To install a child restraint system
always use the outer belts. The
centre seat belt should only be used
when it is necessary to secure three
child restraint systems.
Do not modify the child restraint system
in any way. If you do so, it will not
provide your child with maximum
protection.<462us054