2001 BMW 325Ci COUPE light
[x] Cancel search: lightPage 37 of 203

37n
IndexDataTechnologyRepairsCar careControlsOverview
Opening and closing Ð from the outsideTo open the luggage
compartment lidPress button 3.
The luggage compartment lid will open
slightly, regardless of whether the lid
was previously locked or unlocked.
Before and after a trip, be sure
that the luggage compartment lid
was not opened unintentionally.<46cde058
Panic-Mode (triggering alarm)By pressing button 3 for two to
five seconds, the alarm can be sounded
in the event of danger, if it has been
armed ahead of time.
Pressing on button 1 will turn the alarm
off.
The LED (light-emitting diode) will light
up briefly whenever you press on the
individual buttons.Non-BMW systemsThe proper functioning of the remote
control system may be affected by
other devices or equipment operating in
the immediate vicinity of your vehicle.
If this should occur, you can still open
and close the vehicle using the master
key in either the door or luggage
compartment locks.
For US owners onlyThe transmitter and receiver units
comply with part 15 of the FCC (Federal
Communication Commission) regula-
tions. Operation is governed by the
following:
FCC ID: LX8EWS
LX8FZVS
LX8FZVE
Compliance statement:
This device complies with part 15 of the
FCC Rules. Operation is subject to the
following two conditions:
>This device may not cause harmful
interference, and
>this device must accept any interfer-
ence received, including interference
that may cause undesired operation.
Any unauthorized modifications or
changes to these devices could
void the user's authority to operate this
equipment.<
Page 39 of 203

39n
IndexDataTechnologyRepairsCar careControlsOverview
Luggage compartment lid The lock Only the master keys (refer to page 32)
fit in the lock for the luggage compart-
ment lid.462de273
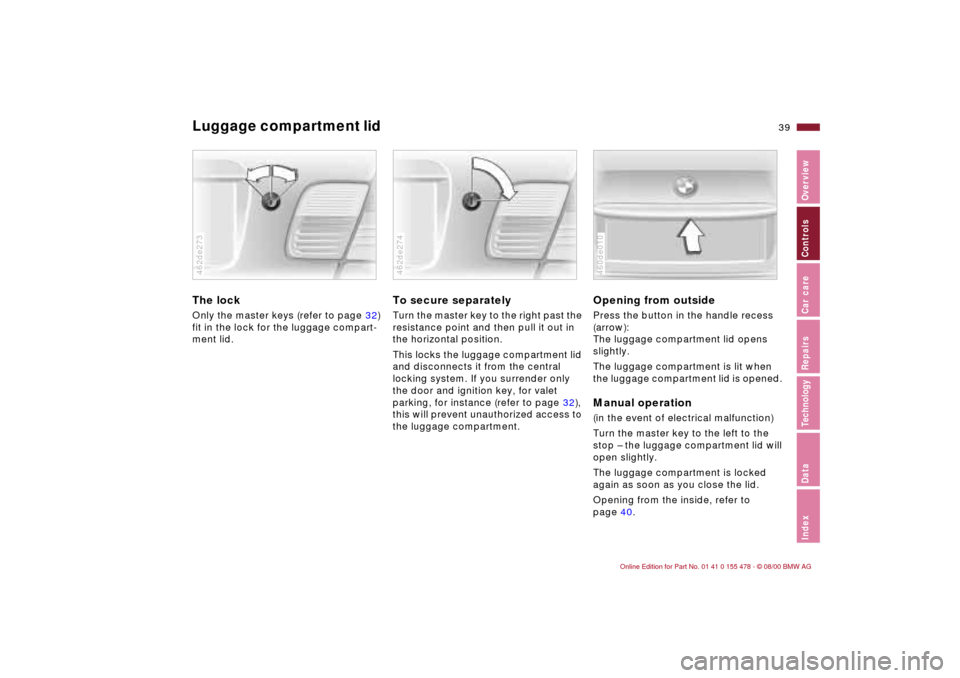
To secure separatelyTurn the master key to the right past the
resistance point and then pull it out in
the horizontal position.
This locks the luggage compartment lid
and disconnects it from the central
locking system. If you surrender only
the door and ignition key, for valet
parking, for instance (refer to page 32),
this will prevent unauthorized access to
the luggage compartment.46cde001462de274
Opening from outsidePress the button in the handle recess
(arrow):
The luggage compartment lid opens
slightly.
The luggage compartment is lit when
the luggage compartment lid is opened. Manual operation(in the event of electrical malfunction)
Turn the master key to the left to the
stop Ð the luggage compartment lid will
open slightly.
The luggage compartment is locked
again as soon as you close the lid.
Opening from the inside, refer to
page 40.06cde010460de010
Page 43 of 203

43n
IndexDataTechnologyRepairsCar careControlsOverview
Alarm system
*
>If the indicator lamp flashes for
10 seconds when the system is
disarmed: an attempted entry has
been detected in the period since the
system was armed.
Following triggering of an alarm, the
indicator lamp will flash continuously.
Avoiding an unintentional alarm The tilt alarm sensor and interior motion
sensor may be switched off at the same
time. You can do this to prevent a false
alarm from being triggered (in garages
with elevator ramps, for instance), or
when the vehicle is transported by
trailer or train:
Locking the vehicle twice (= arming the
system). Press button 2 on the remote
control twice in succession or lock the
vehicle twice with the key. Refer to
page 34.
The indicator lamp lights up briefly and
then flashes continuously. The tilt alarm
sensor and the interior motion sensor
are deactivated as long as the system is
armed.
Reset the alarm to reactivate the tilt
alarm sensor and the interior motion
sensor.
Interior motion sensorThe transmitter and receiver of the inte-
rior motion sensor are located in a trim
panel in the vehicle's roof.
For the interior motion sensor to func-
tion properly, the windows and sliding/
tilt sunroof must be closed.
However, you should switch off the
interior motion sensor (see previous
column) if you wish to leave the
windows or sliding/tilt sunroof open.460de159
Page 44 of 203

44n
Electric power windowsOpen and close the windowsFrom ignition key position 1:
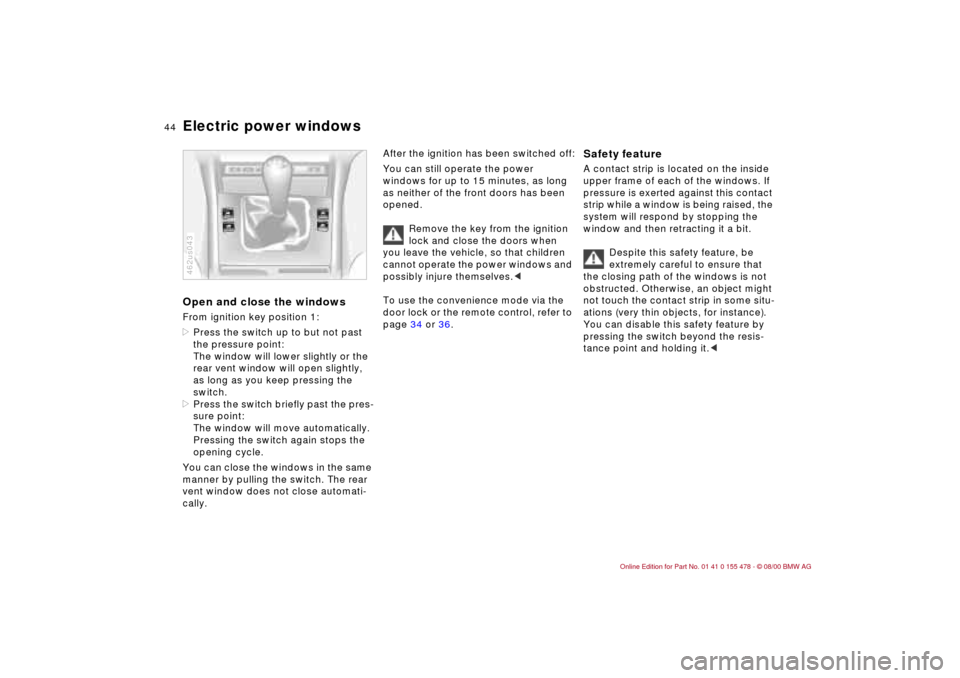
>Press the switch up to but not past
the pressure point:
The window will lower slightly or the
rear vent window will open slightly,
as long as you keep pressing the
switch.
>Press the switch briefly past the pres-
sure point:
The window will move automatically.
Pressing the switch again stops the
opening cycle.
You can close the windows in the same
manner by pulling the switch. The rear
vent window does not close automati-
cally.462us043
After the ignition has been switched off:
You can still operate the power
windows for up to 15 minutes, as long
as neither of the front doors has been
opened.
Remove the key from the ignition
lock and close the doors when
you leave the vehicle, so that children
cannot operate the power windows and
possibly injure themselves.<
To use the convenience mode via the
door lock or the remote control, refer to
page 34 or 36.
Safety feature A contact strip is located on the inside
upper frame of each of the windows. If
pressure is exerted against this contact
strip while a window is being raised, the
system will respond by stopping the
window and then retracting it a bit.
Despite this safety feature, be
extremely careful to ensure that
the closing path of the windows is not
obstructed. Otherwise, an object might
not touch the contact strip in some situ-
ations (very thin objects, for instance).
You can disable this safety feature by
pressing the switch beyond the resis-
tance point and holding it.<
Page 46 of 203

46n
Sliding/tilt sunroof
*
Safety featureIf the sliding/tilt sunroof encounters
resistance at a point roughly past the
middle of its travel when it is closing,
the closing cycle is interrupted and the
sunroof will retract slightly.
At any rate, even with this safety
function, make sure that the
closing path is clear, otherwise, in
borderline cases (e. g. with thin
objects), the limit for triggering the
sunrooof's closing force cannot be
guaranteed. You can override this
safety feature by pressing the switch
beyond the pressure point and holding
it.<
Power loss or malfunctionIn the event of an electrical malfunction,
you can operate the sliding/tilt sunroof
manually, refer to page 167.
Page 47 of 203

47n
IndexDataTechnologyRepairsCar careControlsOverview
For your personal safety when adjusting
the seat position, please follow the
instructions below carefully:
Never try to adjust your seat while
driving the vehicle. The seat could
respond with an unexpected move-
ment, and the ensuing loss of vehicle
control could lead to an accident.
Be sure that the safety belt remains
firmly against your body at all times. In
the event of a frontal impact, a loose lap
belt could slide over the hips, leading to
abdominal injury. In addition, the safety
belt's restraint effectiveness is reduced
if the belt is worn loosely.
Never ride with the backrest reclined to
an extreme angle (especially important
for the front passenger to remember),
otherwise, you run the risk that you will
slide under the safety belt during an
accident, thus negating the protection
the safety belt provides.<
Correct sitting postureTo reduce strain on the spinal column,
sit all the way back in the seat and rest
your back fully against the backrest.
The ideal sitting posture is achieved
with your head extending from your
spine in a straight line.
For long-distance driving, you may wish
to increase the backrest angle slightly
to reduce muscular tension. You should
be able to grasp the steering wheel at
its highest point with your arms slightly
bent.
After a seat adjustment, adjust the
height of the safety belt also. Refer to
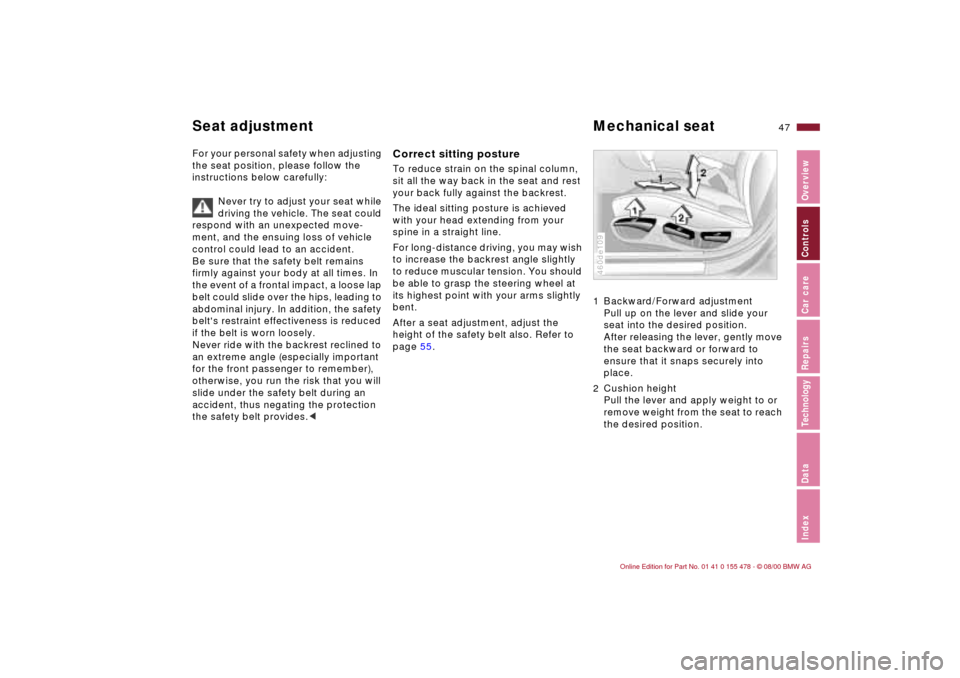
page 55.1 Backward/Forward adjustment
Pull up on the lever and slide your
seat into the desired position.
After releasing the lever, gently move
the seat backward or forward to
ensure that it snaps securely into
place.
2 Cushion height
Pull the lever and apply weight to or
remove weight from the seat to reach
the desired position.
460de109
Seat adjustment Mechanical seat
Page 51 of 203

51n
IndexDataTechnologyRepairsCar careControlsOverview
Seat and mirror memory*
You can store and recall three different
driver's seat and outside mirror posi-
tions.
The adjustment setting of the lumbar
support is not saved in the memory.To store1 Turn the key to ignition key position 1
or 2.
2 Adjust your seat and outside mirrors
to the desired position.
3 Press the
M
EMORY button: the indi-
cator lamp in the button lights up.
4 Press memory button 1, 2 or 3, as
desired: indicator lamp goes out.
46cde014
To select a stored settingConvenience function:
1 Open the driver's door after
unlocking or turn the ignition key in
posi-tion 1.
2 Briefly press memory button 1, 2 or 3,
as desired.
The adjustment cycle is canceled
immediately if you press a seat
adjustment switch or one of the
memory buttons.
Security function:
1 With the driver's door closed and the
ignition key either removed or in posi-
tion 0 or 2
2 Maintain pressure on the desired
memory button (1, 2 or 3) until the
adjustment process is completed.
If you accidentally press the
M
EMORY
button: press the button again; the
indicator lamp goes out.
Do not select a memory position
while the vehicle is moving. If you
do so, there is a risk of accident from
unexpected seat movement.<
Your BMW center can adjust your
vehicle's systems in such a
manner that your personalized settings
are automatically set for the seat and
outside mirror positions when you
unlock the vehicle with your personal
remote control.<
If you make use of this method of
adjustment, be sure that the foot-
well behind the driver's seat is unob-
structed before unlocking the vehicle.
If you fail to do so, persons or objects
could be injured or damaged if the seat
should move backward.<
Page 53 of 203

53n
IndexDataTechnologyRepairsCar careControlsOverview
MirrorsYou can also adjust the mirrors manu-
ally by pressing against the outer edges
of their lenses.
The mirror on the passenger's
side features a lens with a more
convex surface than the mirror installed
on the driver's side. When estimating
the distance between yourself and
other traffic, bear in mind that the
objects reflected in the mirror are closer
than they appear. Estimations of the
distance to following traffic should
therefore not be regarded as precise.
position 2.
Interior rearview mirror To reduce glare from vehicles behind
you when you are driving at night, tilt
the mirror by turning the button.Lighted vanity mirror
*
Fold down the sun visor and slide the
cover panel to the side as required.
The mirror lamps operate from ignition
key position 1.Sun visorsThese can be folded down toward the
windshield or swiveled out against the
side window.463us011
Interior rearview mirror with
automatic dimming feature
*
By responding to the effects of ambient
light and the glare from following traffic,
this mirror automatically dims through
an infinitely-variable range.
The mirror switches to its clear,
undimmed mode whenever the trans-
mission is placed in reverse gear
(selector lever in "Reverse").
To ensure that the mirror continues to
operate properly, keep the two photo-
cells clean and unobstructed. One
photocell (arrow) is in the mirror glass,
while the other is offset somewhat on
the other side of the mirror.
For an explanation of the electro-
chromic technology used in this mirror,
refer to page 177.460de020