Page 47 of 97

6-1
6
EAU00462
6-PERIODIC MAINTENANCE AND MINOR REPAIR
EAU00464
Periodic inspection, adjustment and lu-
brication will keep your motorcycle in
the safest and most efficient condition
possible. Safety is an obligation of the
motorcycle owner. The maintenance
and lubrication schedule chart should
be considered strictly as a guide to
general maintenance and lubrication
intervals. YOU MUST TAKE INTO
CONSIDERATION THAT WEATHER,
TERRAIN, GEOGRAPHICAL LOCA-
TIONS, AND A VARIETY OF INDIVID-
UAL USES ALL TEND TO DEMAND
THAT EACH OWNER ALTER THIS
TIME SCHEDULE TO SHORTER IN-
TERVALS TO MATCH THE ENVI-
RONMENT. The most important points
of motorcycle inspection, adjustment,
and lubrication are explained in the fol-
lowing pages.
EW000060
WARNING
@ If you are not familiar with motor-
cycle service, this work should be
done by a Yamaha dealer. @
EAU00469
Tool kitThe service information included in this
manual is intended to provide you, the
owner, with the necessary information
for completing some of your own pre-
ventive maintenance and minor re-
pairs. The tools provided in the owner’s
tool kit are to assist you in the perfor-
mance of periodic maintenance. How-
ever, some other tools such as a torque
wrench are also necessary to perform
the maintenance correctly.
NOTE:@ If you do not have necessary tools re-
quired during a service operation, take
your motorcycle to a Yamaha dealer for
service. @
EW000063
WARNING
@ Modifications to this motorcycle not
approved by Yamaha may cause
loss of performance, and render it
unsafe for use. Consult a Yamaha
dealer before attempting any chang-
es. @
1. Tool kit
Page 53 of 97

PERIODIC MAINTENANCE AND MINOR REPAIR
6-7
6
EAU01880
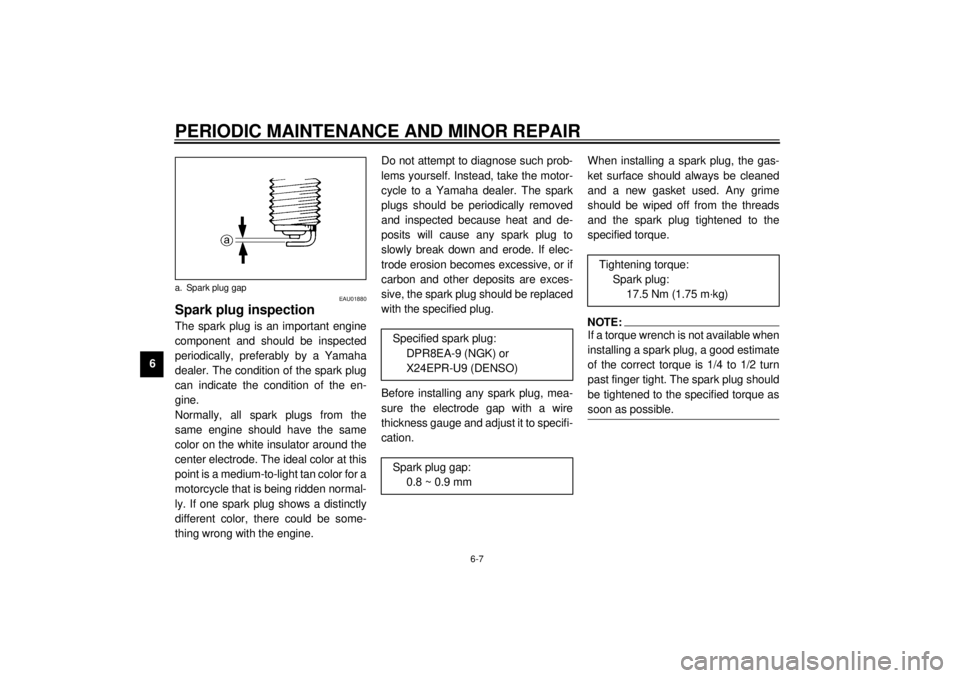
Spark plug inspectionThe spark plug is an important engine
component and should be inspected
periodically, preferably by a Yamaha
dealer. The condition of the spark plug
can indicate the condition of the en-
gine.
Normally, all spark plugs from the
same engine should have the same
color on the white insulator around the
center electrode. The ideal color at this
point is a medium-to-light tan color for a
motorcycle that is being ridden normal-
ly. If one spark plug shows a distinctly
different color, there could be some-
thing wrong with the engine.Do not attempt to diagnose such prob-
lems yourself. Instead, take the motor-
cycle to a Yamaha dealer. The spark
plugs should be periodically removed
and inspected because heat and de-
posits will cause any spark plug to
slowly break down and erode. If elec-
trode erosion becomes excessive, or if
carbon and other deposits are exces-
sive, the spark plug should be replaced
with the specified plug.
Before installing any spark plug, mea-
sure the electrode gap with a wire
thickness gauge and adjust it to specifi-
cation.When installing a spark plug, the gas-
ket surface should always be cleaned
and a new gasket used. Any grime
should be wiped off from the threads
and the spark plug tightened to the
specified torque.
NOTE:@ If a torque wrench is not available when
installing a spark plug, a good estimate
of the correct torque is 1/4 to 1/2 turn
past finger tight. The spark plug should
be tightened to the specified torque as
soon as possible. @
a. Spark plug gap
Specified spark plug:
DPR8EA-9 (NGK) or
X24EPR-U9 (DENSO)
Spark plug gap:
0.8 ~ 0.9 mm
Tightening torque:
Spark plug:
17.5 Nm (1.75 m·kg)
Page 55 of 97
PERIODIC MAINTENANCE AND MINOR REPAIR
6-9
63. Remove the drain bolt and drain
the oil.4. Remove the oil filter by using an oil
filter wrench.
NOTE:@ An oil filter wrench is available at a
nearby Yamaha dealer. @5. Install the drain bolt and tighten it
to the specified torque.6. Apply a light coat of engine oil to
the O-ring of the new oil filter.
NOTE:@ Make sure the O-ring is seated proper-
ly. @7. Install the new oil filter and tighten
it to the specified torque with an oil
filter wrench.NOTE:@ When installing the oil filter, tighten it to
the proper torque by using a torque
wrench. @
1. Engine oil drain bolt
1. Oil filter cartrige
2. Oil filter wrench
Tightening torque:
Drain bolt:
43 Nm (4.3 m·kg)
1. O-ring
Page 56 of 97
PERIODIC MAINTENANCE AND MINOR REPAIR
6-10
6 8. Fill the engine with sufficient oil to
reach the specified level. Install
the oil filler cap and tighten it.
EC000066
CAUTION:@ l
Do not put in any chemical addi-
tives. Engine oil also lubricates
the clutch and additives could
cause clutch slippage.
l
Be sure no foreign material en-
ters the crankcase.
@9. Start the engine and warm it up for
several minutes. While warming
up, check for oil leakage. If oil
leakage is found, stop the engine
immediately and check for the
cause.NOTE:@ After the engine is started, the oil level
indicator light should go off if the oil is at
the specified level. @
EC000067
CAUTION:@ If the indicator light flickers or re-
mains on, immediately stop the en-
gine and consult with a Yamaha
dealer. @
Tightening torque:
Oil filter:
17 Nm (1.7 m·kg)
Recommended oil:
See page 8-1.
Oil quantity:
Total amount:
4.4 L
Periodic oil change:
3.2 L
With oil filter replacement:
3.4 L
Page 57 of 97

PERIODIC MAINTENANCE AND MINOR REPAIR
6-11
6
EAU02975
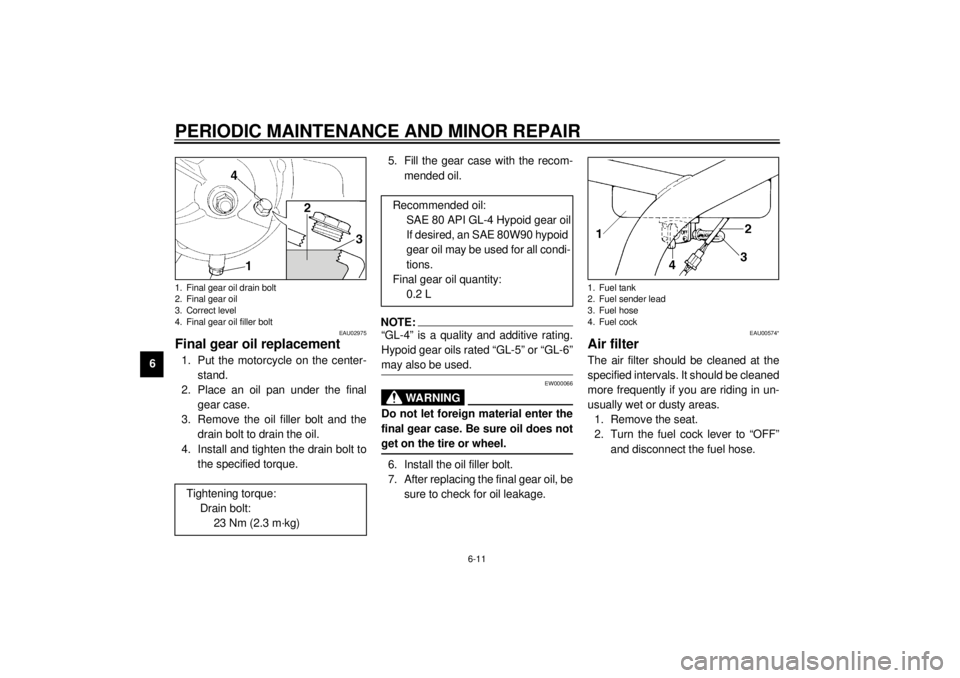
Final gear oil replacement1. Put the motorcycle on the center-
stand.
2. Place an oil pan under the final
gear case.
3. Remove the oil filler bolt and the
drain bolt to drain the oil.
4. Install and tighten the drain bolt to
the specified torque.5. Fill the gear case with the recom-
mended oil.
NOTE:@ “GL-4” is a quality and additive rating.
Hypoid gear oils rated “GL-5” or “GL-6”
may also be used. @
EW000066
WARNING
@ Do not let foreign material enter the
final gear case. Be sure oil does not
get on the tire or wheel. @6. Install the oil filler bolt.
7. After replacing the final gear oil, be
sure to check for oil leakage.
EAU00574*
Air filterThe air filter should be cleaned at the
specified intervals. It should be cleaned
more frequently if you are riding in un-
usually wet or dusty areas.
1. Remove the seat.
2. Turn the fuel cock lever to “OFF”
and disconnect the fuel hose.
1. Final gear oil drain bolt
2. Final gear oil
3. Correct level
4. Final gear oil filler boltTightening torque:
Drain bolt:
23 Nm (2.3 m·kg)
Recommended oil:
SAE 80 API GL-4 Hypoid gear oil
If desired, an SAE 80W90 hypoid
gear oil may be used for all condi-
tions.
Final gear oil quantity:
0.2 L
1. Fuel tank
2. Fuel sender lead
3. Fuel hose
4. Fuel cock
Page 75 of 97
PERIODIC MAINTENANCE AND MINOR REPAIR
6-29
6
EAU01469
Front wheel installation1. Install the speedometer gear unit
into the wheel hub. Make sure the
wheel hub and the speedometer
gear unit are installed with the pro-
jections meshed into the slots.
2. Lift up the wheel between the front
fork legs. Make sure the slot in the
speedometer gear unit fits over
the stopper on the front fork outer
tube.
3. Install the wheel axle and let the
motorcycle down.4. Install the calipers and caliper
bolts. Make sure there is enough
gap between the brake pads be-
fore installing the calipers onto the
brake discs.
5. Tighten the wheel axle, pinch bolt
and caliper bolts to the specified
torque.6. Push down hard on the handle-
bars several times to check for
proper fork operation.
7. Install the speedometer cable.
Tightening torque:
Wheel axle:
59 Nm (5.9 m·kg)
Pinch bolt:
19 Nm (1.9 m·kg)
Caliper bolt:
40 Nm (4.0 m·kg)
Page 76 of 97
PERIODIC MAINTENANCE AND MINOR REPAIR
6-30
6
EAU01557
Rear wheel removal
EW000122
WARNING
@ l
It is advisable to have a Yamaha
dealer service the wheel.
l
Securely support the motor-
cycle so there is no danger of it
falling over.
@1. Loosen the wheel axle nut and
pinch bolt.
2. Place the motorcycle on the cen-
terstand.3. Remove the caliper bolts and
wheel axle nut.
4. Remove the brake torque rod cot-
ter pin, nut and bolt.
5. While supporting the brake cali-
per, pull out the wheel axle.
6. Move the wheel to the right to sep-
arate it from the final gear case,
then remove the wheel.
NOTE:@ Do not depress the brake pedal when
the disc and caliper are separated. @
1. Axle nut
1. Pinch bolt
1. Nut
2. Brake torque rod
3. Cotter pin
4. Bolt (´ 2)
Page 77 of 97

PERIODIC MAINTENANCE AND MINOR REPAIR
6-31
6
EAU01558*
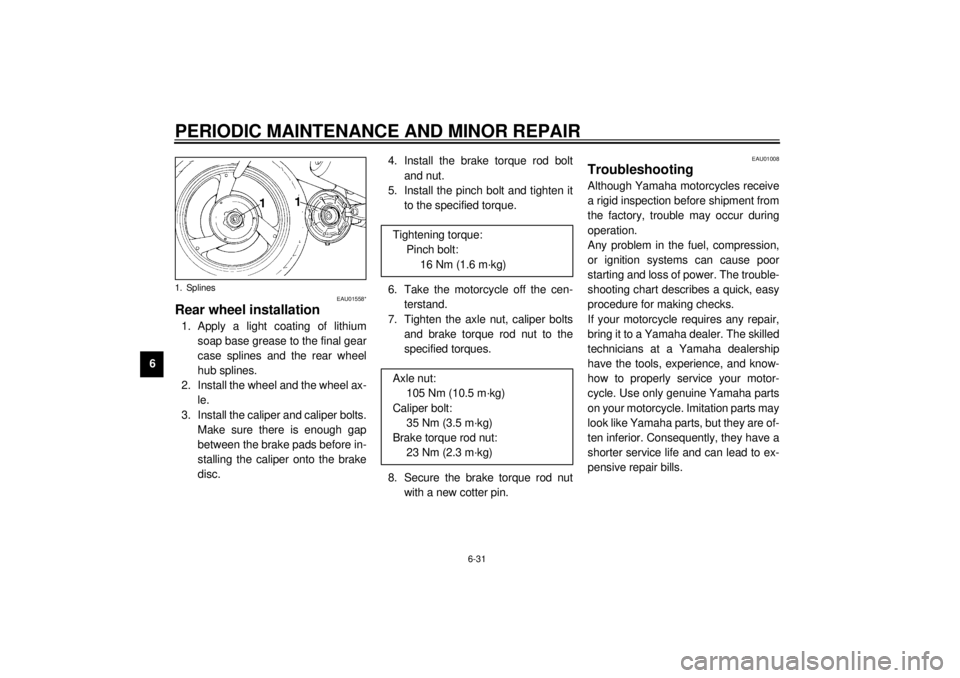
Rear wheel installation1. Apply a light coating of lithium
soap base grease to the final gear
case splines and the rear wheel
hub splines.
2. Install the wheel and the wheel ax-
le.
3. Install the caliper and caliper bolts.
Make sure there is enough gap
between the brake pads before in-
stalling the caliper onto the brake
disc.4. Install the brake torque rod bolt
and nut.
5. Install the pinch bolt and tighten it
to the specified torque.
6. Take the motorcycle off the cen-
terstand.
7. Tighten the axle nut, caliper bolts
and brake torque rod nut to the
specified torques.
8. Secure the brake torque rod nut
with a new cotter pin.
EAU01008
TroubleshootingAlthough Yamaha motorcycles receive
a rigid inspection before shipment from
the factory, trouble may occur during
operation.
Any problem in the fuel, compression,
or ignition systems can cause poor
starting and loss of power. The trouble-
shooting chart describes a quick, easy
procedure for making checks.
If your motorcycle requires any repair,
bring it to a Yamaha dealer. The skilled
technicians at a Yamaha dealership
have the tools, experience, and know-
how to properly service your motor-
cycle. Use only genuine Yamaha parts
on your motorcycle. Imitation parts may
look like Yamaha parts, but they are of-
ten inferior. Consequently, they have a
shorter service life and can lead to ex-
pensive repair bills.
1. Splines
Tightening torque:
Pinch bolt:
16 Nm (1.6 m·kg)
Axle nut:
105 Nm (10.5 m·kg)
Caliper bolt:
35 Nm (3.5 m·kg)
Brake torque rod nut:
23 Nm (2.3 m·kg)