2000 YAMAHA XJ900S maintenance
[x] Cancel search: maintenancePage 76 of 97
PERIODIC MAINTENANCE AND MINOR REPAIR
6-30
6
EAU01557
Rear wheel removal
EW000122
WARNING
@ l
It is advisable to have a Yamaha
dealer service the wheel.
l
Securely support the motor-
cycle so there is no danger of it
falling over.
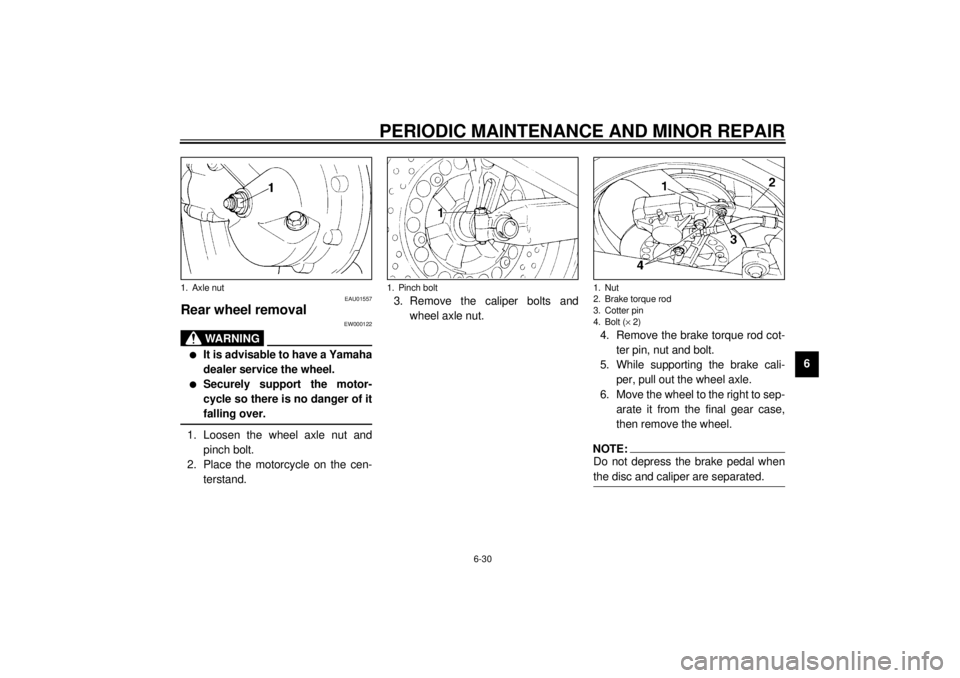
@1. Loosen the wheel axle nut and
pinch bolt.
2. Place the motorcycle on the cen-
terstand.3. Remove the caliper bolts and
wheel axle nut.
4. Remove the brake torque rod cot-
ter pin, nut and bolt.
5. While supporting the brake cali-
per, pull out the wheel axle.
6. Move the wheel to the right to sep-
arate it from the final gear case,
then remove the wheel.
NOTE:@ Do not depress the brake pedal when
the disc and caliper are separated. @
1. Axle nut
1. Pinch bolt
1. Nut
2. Brake torque rod
3. Cotter pin
4. Bolt (´ 2)
Page 77 of 97
PERIODIC MAINTENANCE AND MINOR REPAIR
6-31
6
EAU01558*
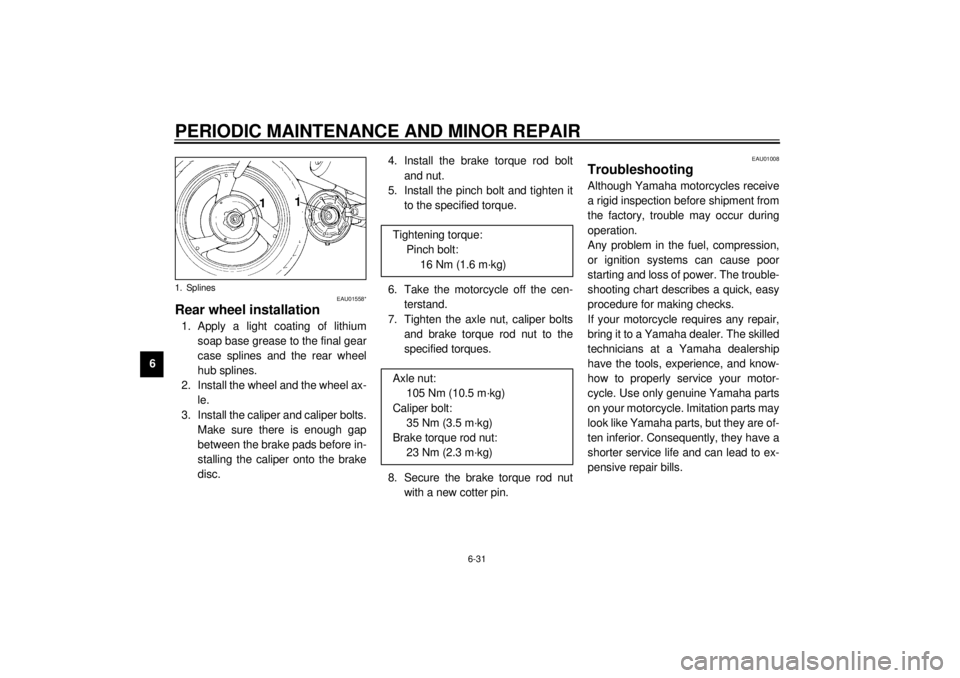
Rear wheel installation1. Apply a light coating of lithium
soap base grease to the final gear
case splines and the rear wheel
hub splines.
2. Install the wheel and the wheel ax-
le.
3. Install the caliper and caliper bolts.
Make sure there is enough gap
between the brake pads before in-
stalling the caliper onto the brake
disc.4. Install the brake torque rod bolt
and nut.
5. Install the pinch bolt and tighten it
to the specified torque.
6. Take the motorcycle off the cen-
terstand.
7. Tighten the axle nut, caliper bolts
and brake torque rod nut to the
specified torques.
8. Secure the brake torque rod nut
with a new cotter pin.
EAU01008
TroubleshootingAlthough Yamaha motorcycles receive
a rigid inspection before shipment from
the factory, trouble may occur during
operation.
Any problem in the fuel, compression,
or ignition systems can cause poor
starting and loss of power. The trouble-
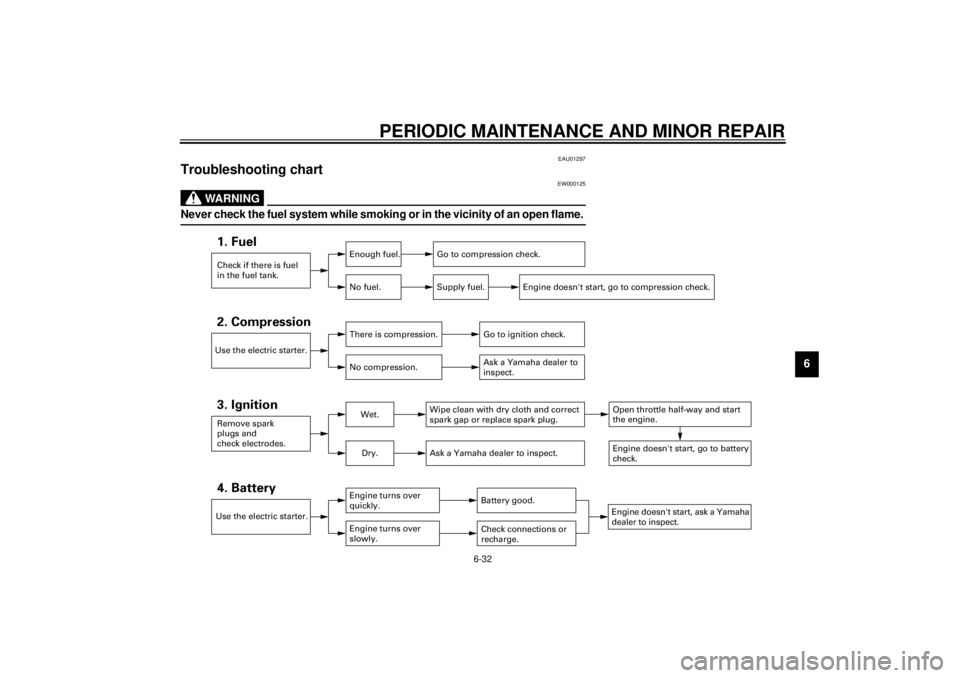
shooting chart describes a quick, easy
procedure for making checks.
If your motorcycle requires any repair,
bring it to a Yamaha dealer. The skilled
technicians at a Yamaha dealership
have the tools, experience, and know-
how to properly service your motor-
cycle. Use only genuine Yamaha parts
on your motorcycle. Imitation parts may
look like Yamaha parts, but they are of-
ten inferior. Consequently, they have a
shorter service life and can lead to ex-
pensive repair bills.
1. Splines
Tightening torque:
Pinch bolt:
16 Nm (1.6 m·kg)
Axle nut:
105 Nm (10.5 m·kg)
Caliper bolt:
35 Nm (3.5 m·kg)
Brake torque rod nut:
23 Nm (2.3 m·kg)
Page 78 of 97
PERIODIC MAINTENANCE AND MINOR REPAIR
6-32
6
EAU01297
Troubleshooting chart
EW000125
WARNING
@ Never check the fuel system while smoking or in the vicinity of an open flame. @
Check if there is fuel
in the fuel tank.1. Fuel
Enough fuel.
No fuel.
Go to compression check.
Supply fuel.
Use the electric starter.2. Compression
There is compression.
No compression.
Go to ignition check.
Ask a Yamaha dealer to
inspect.
Remove spark
plugs and
check electrodes.3. Ignition
Wet.
Dry.
Wipe clean with dry cloth and correct
spark gap or replace spark plug.
Ask a Yamaha dealer to inspect.
Engine doesn't start, go to battery
check.Open throttle half-way and start
the engine.
Use the electric starter.4. Battery
Engine turns over
quickly.
Engine turns over
slowly.
Battery good.Check connections or
recharge.
Engine doesn't start, ask a Yamaha
dealer to inspect.
Engine doesn't start, go to compression check.
Page 85 of 97
MOTORCYCLE CARE AND STORAGE
7-5
7a. Remove the spark plug caps and
spark plugs.
b. Pour a teaspoonful of engine oil
into each spark plug bore.
c. Install the spark plug caps onto the
spark plugs and place the spark
plugs on the cylinder head so that
the electrodes are grounded. (This
will limit sparking during the next
step.)
d. Turn the engine over several times
with the starter. (This will coat the
cylinder walls with oil.)
e. Remove the spark plug caps from
the spark plugs, install the spark
plugs and then the spark plug
caps.
EWA00003
WARNING
@ When turning the engine over, be
sure to ground the spark plug elec-
trodes to prevent damage or injury
from sparking. @
6. Lubricate all control cables and
the pivoting points of all levers and
pedals as well as of the sidestand/
centerstand.
7. Check and, if necessary, correct
the tire air pressure, then raise the
motorcycle so that both of its
wheels are off the ground. Alterna-
tively, turn the wheels a little every
month in order to prevent the tires
from becoming degraded in one
spot.
8. Cover up the muffler outlets with
plastic bags to prevent moisture
from entering.9. Remove the battery and fully
charge it. Store it in a cool, dry
place and recharge it once a
month. Do not store the battery in
an excessively cold or warm place
(less than 0 °C or more than
30 °C). For more information, see
“Battery storage” in the chapter
“PERIODIC MAINTENANCE AND
MINOR REPAIRS”.
NOTE:@ Make any necessary repairs before
storing the motorcycle. @
Page 95 of 97
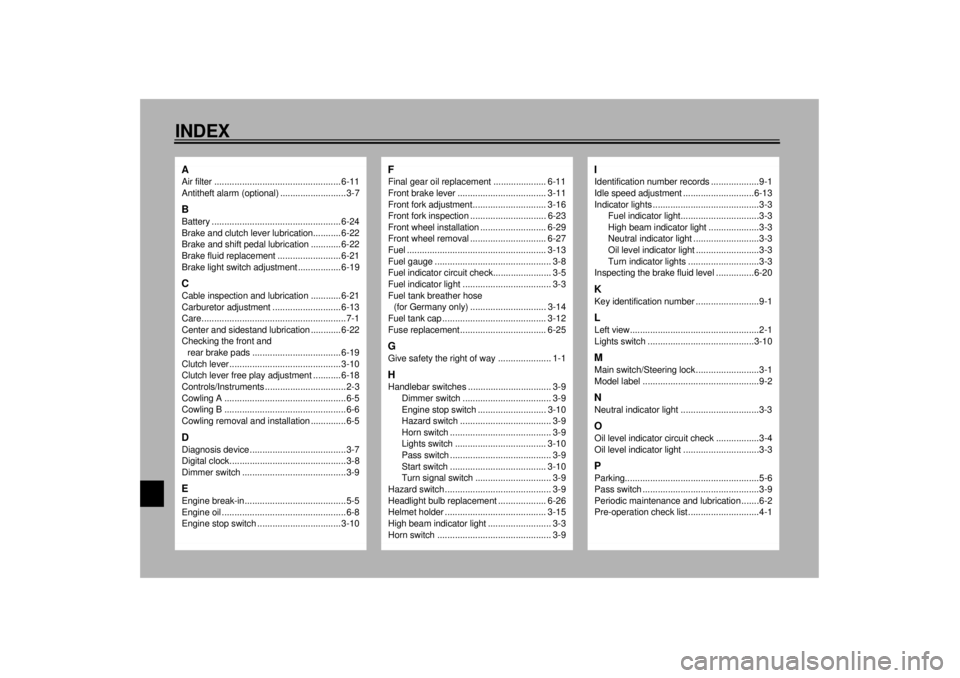
10-INDEXAAir filter .................................................. 6-11
Antitheft alarm (optional) ..........................3-7BBattery ................................................... 6-24
Brake and clutch lever lubrication........... 6-22
Brake and shift pedal lubrication ............ 6-22
Brake fluid replacement ......................... 6-21
Brake light switch adjustment ................. 6-19CCable inspection and lubrication ............ 6-21
Carburetor adjustment ........................... 6-13
Care.........................................................7-1
Center and sidestand lubrication ............ 6-22
Checking the front and
rear brake pads ................................... 6-19
Clutch lever ............................................ 3-10
Clutch lever free play adjustment ........... 6-18
Controls/Instruments ................................2-3
Cowling A ................................................6-5
Cowling B ................................................6-6
Cowling removal and installation ..............6-5DDiagnosis device......................................3-7
Digital clock..............................................3-8
Dimmer switch .........................................3-9EEngine break-in........................................5-5
Engine oil .................................................6-8
Engine stop switch ................................. 3-10
FFinal gear oil replacement ..................... 6-11
Front brake lever ................................... 3-11
Front fork adjustment............................. 3-16
Front fork inspection .............................. 6-23
Front wheel installation .......................... 6-29
Front wheel removal .............................. 6-27
Fuel ....................................................... 3-13
Fuel gauge .............................................. 3-8
Fuel indicator circuit check....................... 3-5
Fuel indicator light ................................... 3-3
Fuel tank breather hose
(for Germany only) .............................. 3-14
Fuel tank cap ......................................... 3-12
Fuse replacement.................................. 6-25GGive safety the right of way ..................... 1-1HHandlebar switches ................................. 3-9
Dimmer switch ................................... 3-9
Engine stop switch ........................... 3-10
Hazard switch .................................... 3-9
Horn switch ........................................ 3-9
Lights switch .................................... 3-10
Pass switch ........................................ 3-9
Start switch ...................................... 3-10
Turn signal switch .............................. 3-9
Hazard switch .......................................... 3-9
Headlight bulb replacement ................... 6-26
Helmet holder ........................................ 3-15
High beam indicator light ......................... 3-3
Horn switch ............................................. 3-9
IIdentification number records ...................9-1
Idle speed adjustment ............................6-13
Indicator lights ..........................................3-3
Fuel indicator light...............................3-3
High beam indicator light ....................3-3
Neutral indicator light ..........................3-3
Oil level indicator light .........................3-3
Turn indicator lights ............................3-3
Inspecting the brake fluid level ...............6-20KKey identification number .........................9-1LLeft view...................................................2-1
Lights switch ..........................................3-10MMain switch/Steering lock .........................3-1
Model label ..............................................9-2NNeutral indicator light ...............................3-3OOil level indicator circuit check .................3-4
Oil level indicator light ..............................3-3PParking.....................................................5-6
Pass switch ..............................................3-9
Periodic maintenance and lubrication .......6-2
Pre-operation check list ............................4-1