Page 15 of 97

3-1
3
EAU00027
3-INSTRUMENT AND CONTROL FUNCTIONS
EAU00029*
Main switch/steering lockThe main switch controls the ignition
and lighting systems. Its operation is
described below.
EAU00036
ON
Electrical circuits are switched on. The
engine can be started. The key cannot
be removed in this position.
EAU00038
OFF
All electrical circuits are switched off.
The key can be removed in this posi-
tion.
EAU00040
LOCK
The steering is locked in this position
and all electrical circuits are switched
off. The key can be removed in this po-
sition.
To lock the steering, turn the handle-
bars all the way to the left. While push-
ing the key into the main switch, turn it
from “OFF” to “LOCK” and remove it.
To release the lock, turn the key to
“OFF” while pushing.
EW000016
WARNING
@ Never turn the key to “OFF” or
“LOCK” when the motorcycle is
moving. The electrical circuits will
be switched off which may result in
loss of control or an accident. Be
sure the motorcycle is stopped be-
fore turning the key to “OFF” or
“LOCK”. @1. Push
2. Turn
Page 21 of 97

INSTRUMENT AND CONTROL FUNCTIONS
3-7
3
EAU01559*
Diagnosis deviceThis model is equipped with a diagno-
sis device for the following circuits.l
Throttle Position Sensor (T.P.S.)
l
Ignition circuit
If some trouble should occur in any of
these circuits, the tachometer will re-
peatedly display as follows:
CB-72EUse this chart to identify what circuit is
faulty according to the specified r/min
displayed.CB-73E
If the tachometer displays as described
above, take note of the specified r/min
and then take your motorcycle to a
Yamaha dealer for repair.
EC000004
CAUTION:@ To prevent engine damage, be sure
to consult a Yamaha dealer as soon
as possible if the tachometer dis-
plays a repeated change in r/min. @
EAU00109
Antitheft alarm (optional)An antitheft alarm can be equipped to
this motorcycle. Consult your Yamaha
dealer to obtain and install the alarm.
Specified r/min
Faulty circuit
10,000 r/min
Throttle Position Sensor
(T.P.S.)
9,000 r/min
Ignition circuitSpecified
r/min for the
faulty circuit
for 3 sec-
onds (see
chart below)
0 r/min for
3 seconds
Current en-
gine r/min for
3 seconds
Page 24 of 97

INSTRUMENT AND CONTROL FUNCTIONS
3-10
3
EAU00138
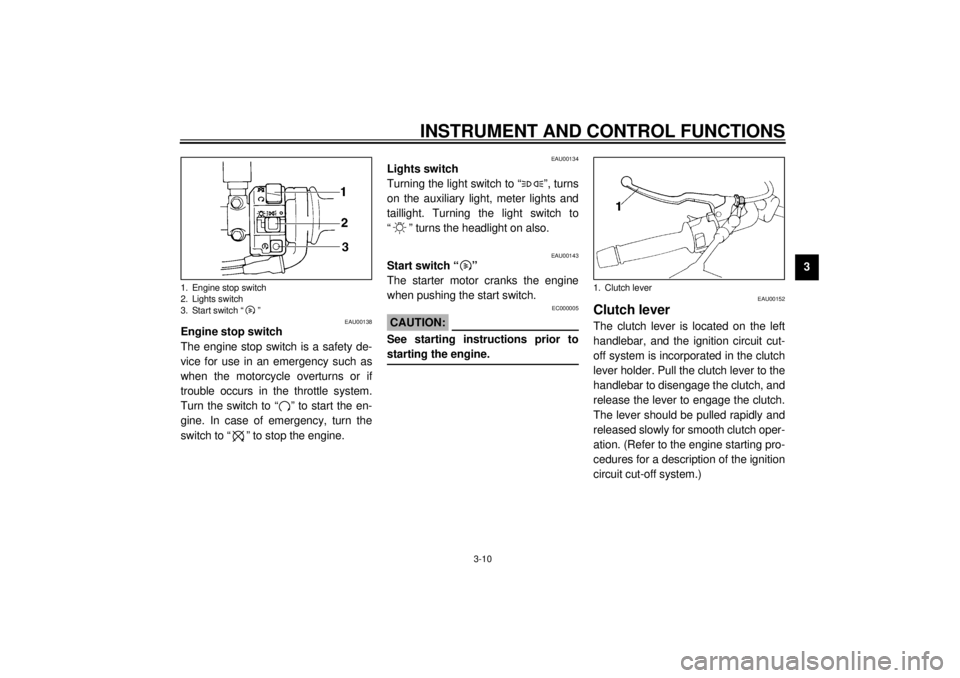
Engine stop switch
The engine stop switch is a safety de-
vice for use in an emergency such as
when the motorcycle overturns or if
trouble occurs in the throttle system.
Turn the switch to “ ” to start the en-
gine. In case of emergency, turn the
switch to “ ” to stop the engine.
EAU00134
Lights switch
Turning the light switch to “ ”, turns
on the auxiliary light, meter lights and
taillight. Turning the light switch to
“ ” turns the headlight on also.
EAU00143
Start switch “ ”
The starter motor cranks the engine
when pushing the start switch.
EC000005
CAUTION:@ See starting instructions prior to
starting the engine. @
EAU00152
Clutch leverThe clutch lever is located on the left
handlebar, and the ignition circuit cut-
off system is incorporated in the clutch
lever holder. Pull the clutch lever to the
handlebar to disengage the clutch, and
release the lever to engage the clutch.
The lever should be pulled rapidly and
released slowly for smooth clutch oper-
ation. (Refer to the engine starting pro-
cedures for a description of the ignition
circuit cut-off system.)
1. Engine stop switch
2. Lights switch
3. Start switch “ ”
1. Clutch lever
Page 32 of 97

INSTRUMENT AND CONTROL FUNCTIONS
3-18
3
EAU00330
SidestandThis model is equipped with an ignition
circuit cut-off system. The motorcycle
must not be ridden when the sidestand
is down. The sidestand is located on
the left side of the frame. (Refer to
page 5-1 for an explanation of this sys-
tem.)
EW000044
WARNING
@ This motorcycle must not be operat-
ed with the sidestand in the down
position. If the stand is not properly
retracted, it could contact the
ground and distract the operator, re-
sulting in a possible loss of control.
Yamaha has designed into this
motorcycle a lockout system to as-
sist the operator in fulfilling the re-
sponsibility of retracting the
sidestand. Please check carefully
the operating instructions listed be-
low and if there is any indication of a
malfunction, return the motorcycle
to a Yamaha dealer immediately for
repair. @
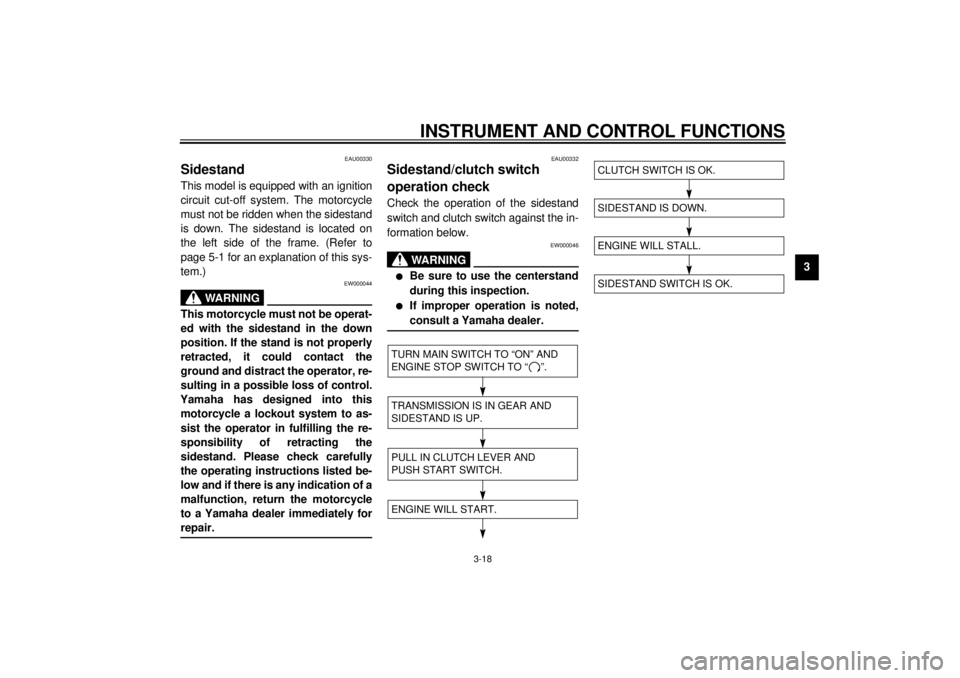
EAU00332
Sidestand/clutch switch
operation checkCheck the operation of the sidestand
switch and clutch switch against the in-
formation below.
EW000046
WARNING
@ l
Be sure to use the centerstand
during this inspection.
l
If improper operation is noted,
consult a Yamaha dealer.
@CD-08E
CD-08E
TURN MAIN SWITCH TO “ON” AND
ENGINE STOP SWITCH TO “ ”.TRANSMISSION IS IN GEAR AND
SIDESTAND IS UP.PULL IN CLUTCH LEVER AND
PUSH START SWITCH.ENGINE WILL START.
SIDESTAND IS DOWN.ENGINE WILL STALL.SIDESTAND SWITCH IS OK.CLUTCH SWITCH IS OK.
Page 44 of 97

OPERATION AND IMPORTANT RIDING POINTS
5-6
5
EAU00448
0 ~ 500 km
Avoid operation above 4,000 r/min.
Stop the engine and let it cool for 5 to
10 minutes after every hour of opera-
tion. Vary the speed of the motorcycle
from time to time. Do not operate it at
one set throttle position.
500 ~ 1,000 km
Avoid prolonged operation above
5,000 r/min. Rev the motorcycle freely
through the gears, but do not use full
throttle at any time.
EC000056
CAUTION:@ After 1,000 km of operation, be sure
to replace the engine oil, oil filter
and final gear oil. @1,000 km and beyond
Full throttle can be used.
EC000053
CAUTION:@ l
Never let engine speeds enter
the red zone.
l
If any engine trouble should oc-
cur during the break-in period,
consult a Yamaha dealer imme-
diately.
@
EAU00460
ParkingWhen parking the motorcycle, stop the
engine and remove the ignition key.
EW000058
WARNING
@ The exhaust system is hot. Park the
motorcycle in a place where pedes-
trians or children are not likely to
touch the motorcycle. Do not park
the motorcycle on a slope or soft
ground; the motorcycle may over-
turn. @
Page 71 of 97

PERIODIC MAINTENANCE AND MINOR REPAIR
6-25
6Battery storage
When the motorcycle is not used for a
month or longer, remove the battery,
fully charge it and store it in a cool, dry
place.
EC000102
CAUTION:@ l
Completely recharge the bat-
tery before storing. Storing a
discharged battery can cause
permanent battery damage.
l
Use a battery charger designed
for a sealed-type (MF) battery.
Using a conventional battery
charger will cause battery dam-
age. If you do not have a sealed-
type battery charger, contact
your Yamaha dealer.
l
Always make sure the connec-
tions are correct when reinstall-
ing the battery.
@
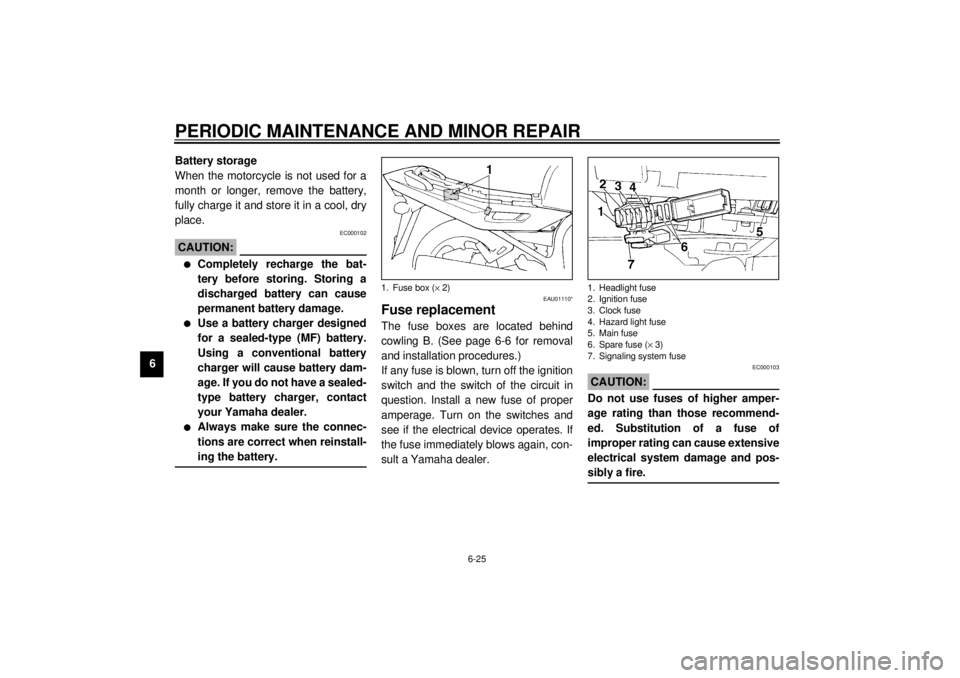
EAU01110*
Fuse replacementThe fuse boxes are located behind
cowling B. (See page 6-6 for removal
and installation procedures.)
If any fuse is blown, turn off the ignition
switch and the switch of the circuit in
question. Install a new fuse of proper
amperage. Turn on the switches and
see if the electrical device operates. If
the fuse immediately blows again, con-
sult a Yamaha dealer.
EC000103
CAUTION:@ Do not use fuses of higher amper-
age rating than those recommend-
ed. Substitution of a fuse of
improper rating can cause extensive
electrical system damage and pos-
sibly a fire. @
1. Fuse box (´ 2)
1. Headlight fuse
2. Ignition fuse
3. Clock fuse
4. Hazard light fuse
5. Main fuse
6. Spare fuse (´ 3)
7. Signaling system fuse
Page 72 of 97
PERIODIC MAINTENANCE AND MINOR REPAIR
6-26
6
EAU00829
Headlight bulb replacementThis motorcycle is equipped with a
quartz bulb headlight.
If a headlight bulb burns out, replace it
as follows:
1. Remove the headlight connector
and the bulb holder cover.2. Unhook the bulb holder and re-
move the defective bulb.
EW000119
WARNING
@ Keep flammable products and your
hands away from a bulb while it is
on, as it is hot. Do not touch a bulb
until it cools down. @
Specified fuses:
Main fuse: 30 A
Headlight fuse: 15 A
Signaling system fuse: 20 A
Hazard light fuse: 10 A
Ignition fuse: 10 A
Clock fuse: 10 A
1. Connector
2. Bulb holder cover
1. Bulb holder
Page 77 of 97

PERIODIC MAINTENANCE AND MINOR REPAIR
6-31
6
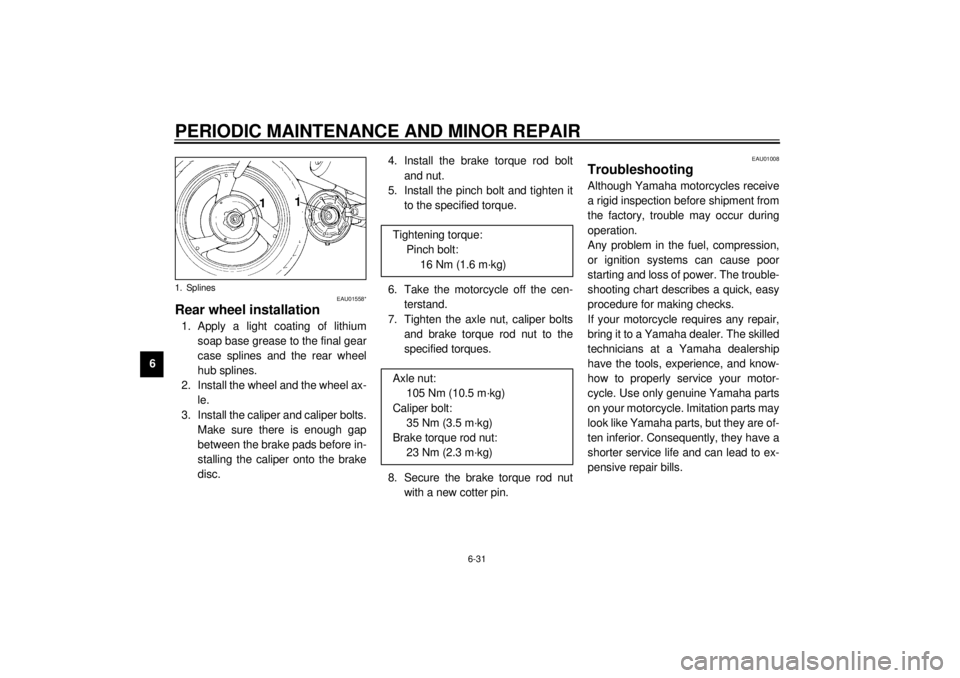
EAU01558*
Rear wheel installation1. Apply a light coating of lithium
soap base grease to the final gear
case splines and the rear wheel
hub splines.
2. Install the wheel and the wheel ax-
le.
3. Install the caliper and caliper bolts.
Make sure there is enough gap
between the brake pads before in-
stalling the caliper onto the brake
disc.4. Install the brake torque rod bolt
and nut.
5. Install the pinch bolt and tighten it
to the specified torque.
6. Take the motorcycle off the cen-
terstand.
7. Tighten the axle nut, caliper bolts
and brake torque rod nut to the
specified torques.
8. Secure the brake torque rod nut
with a new cotter pin.
EAU01008
TroubleshootingAlthough Yamaha motorcycles receive
a rigid inspection before shipment from
the factory, trouble may occur during
operation.
Any problem in the fuel, compression,
or ignition systems can cause poor
starting and loss of power. The trouble-
shooting chart describes a quick, easy
procedure for making checks.
If your motorcycle requires any repair,
bring it to a Yamaha dealer. The skilled
technicians at a Yamaha dealership
have the tools, experience, and know-
how to properly service your motor-
cycle. Use only genuine Yamaha parts
on your motorcycle. Imitation parts may
look like Yamaha parts, but they are of-
ten inferior. Consequently, they have a
shorter service life and can lead to ex-
pensive repair bills.
1. Splines
Tightening torque:
Pinch bolt:
16 Nm (1.6 m·kg)
Axle nut:
105 Nm (10.5 m·kg)
Caliper bolt:
35 Nm (3.5 m·kg)
Brake torque rod nut:
23 Nm (2.3 m·kg)