2000 YAMAHA TDR 125 brake
[x] Cancel search: brakePage 13 of 104
DESCRIPTION
1
2
3
4
5
6
7
8
9
2-2
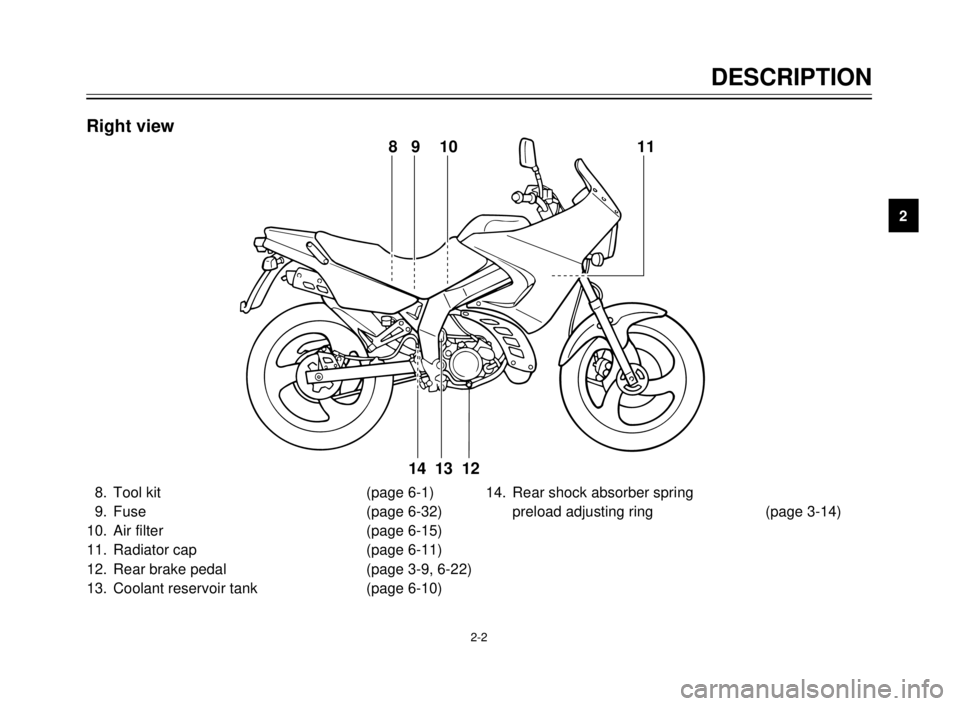
8. Tool kit (page 6-1)
9. Fuse (page 6-32)
10. Air filter (page 6-15)
11. Radiator cap (page 6-11)
12. Rear brake pedal (page 3-9, 6-22)
13. Coolant reservoir tank (page 6-10)14. Rear shock absorber spring
preload adjusting ring (page 3-14)
8 9 10 11
12
13 14
Right view
5AE-9-E3 (ENG) 4/11/0 11:06 AM Page 11
Page 14 of 104
1
2
3
4
5
6
7
8
9
DESCRIPTION
2-3
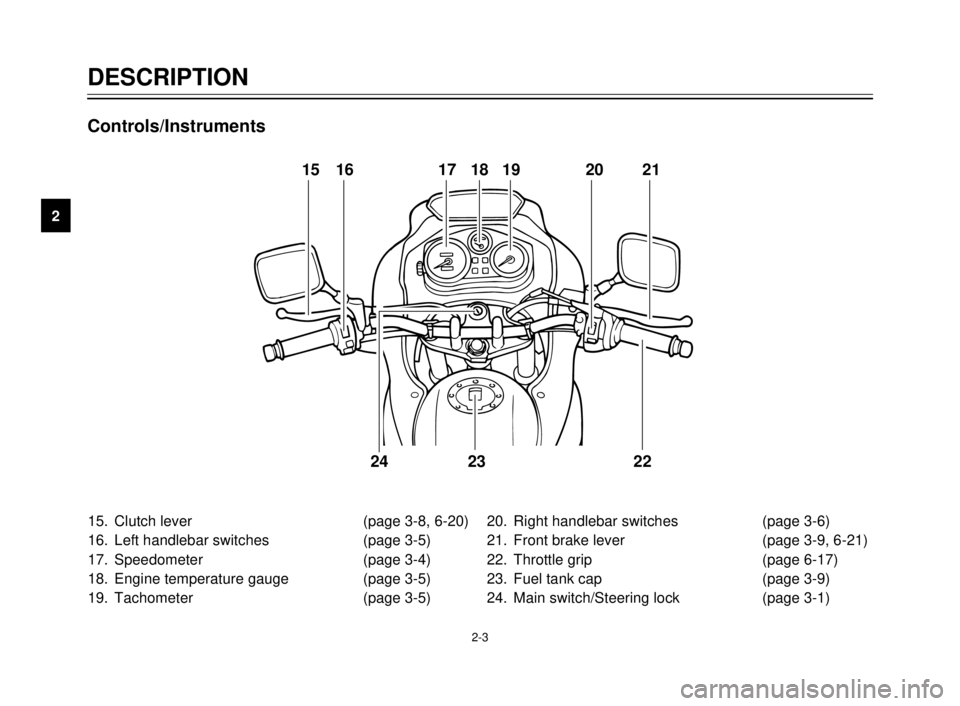
15. Clutch lever (page 3-8, 6-20)
16. Left handlebar switches (page 3-5)
17. Speedometer (page 3-4)
18. Engine temperature gauge (page 3-5)
19. Tachometer (page 3-5)20. Right handlebar switches (page 3-6)
21. Front brake lever (page 3-9, 6-21)
22. Throttle grip (page 6-17)
23. Fuel tank cap (page 3-9)
24. Main switch/Steering lock (page 3-1)
15 16 17 18 19 20 21
22 23 24
Controls/Instruments
5AE-9-E3 (ENG) 4/11/0 11:06 AM Page 12
Page 15 of 104

INSTRUMENT AND CONTROL FUNCTIONS
Main switch/steering lock........................................3-1
Indicator lights ........................................................3-2
Oil level indicator circuit check ...............................3-3
Speedometer ..........................................................3-4
Tachometer ............................................................3-4
Engine temperature gauge .....................................3-5
Handlebar switches ................................................3-5
Headlight beam variation ........................................3-6
Clutch lever.............................................................3-8
Shift pedal...............................................................3-8
Front brake lever ....................................................3-8
Rear brake pedal ....................................................3-9
Fuel tank cap ..........................................................3-9
Fuel.......................................................................3-10
Catalyzer (for Switzerland and Austria) ................3-11
Two-stroke engine oil ...........................................3-12
Fuel cock ..............................................................3-12
Starter (choke) “1” ..............................................3-13
Seat ......................................................................3-13
Helmet holder .......................................................3-14
Rear shock absorber adjustment..........................3-14
Note on handling of the Yamaha Energy
Induction System (Y.E.I.S.) ..................................3-15Y.P.V.S. (Yamaha Power Valve System) .............3-16
Sidestand..............................................................3-16
Sidestand/clutch switch operation check ..............3-17
3
5AE-9-E3 (ENG) 4/11/0 11:06 AM Page 13
Page 23 of 104
3-8
1
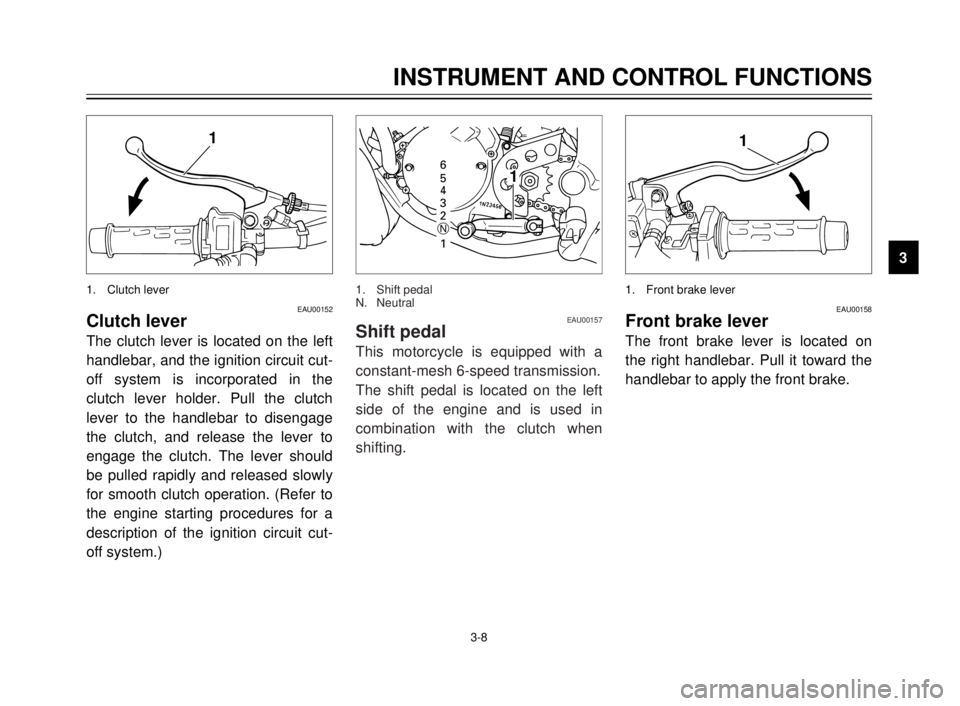
EAU00152Clutch lever
The clutch lever is located on the left
handlebar, and the ignition circuit cut-
off system is incorporated in the
clutch lever holder. Pull the clutch
lever to the handlebar to disengage
the clutch, and release the lever to
engage the clutch. The lever should
be pulled rapidly and released slowly
for smooth clutch operation. (Refer to
the engine starting procedures for a
description of the ignition circuit cut-
off system.)
EAU00158Front brake lever
The front brake lever is located on
the right handlebar. Pull it toward the
handlebar to apply the front brake.
1. Front brake lever
INSTRUMENT AND CONTROL FUNCTIONS
1
2
3
4
5
6
7
8
9
1
1. Clutch lever
6
5
4
3
2
1 N1
EAU00157Shift pedal
This motorcycle is equipped with a
constant-mesh 6-speed transmission.
The shift pedal is located on the left
side of the engine and is used in
combination with the clutch when
shifting.
1. Shift pedal
N. Neutral
5AE-9-E3 (ENG) 4/11/0 11:06 AM Page 21
Page 24 of 104

3-9
INSTRUMENT AND CONTROL FUNCTIONS
1
2
3
4
5
6
7
8
91
1. Rear brake pedal
EAU00162Rear brake pedal
The rear brake pedal is on the right
side of the motorcycle. Press down
on the brake pedal to apply the rear
brake.
NOTE:
This tank cap cannot be closed
unless the key is in the lock. The key
cannot be removed if the cap is not
locked properly.
EW000023
w
Be sure the cap is properly
installed and locked in place
before riding the motorcycle.
2
1
EAU02935
Fuel tank cap
To open
Open the lock cover. Insert the key
and turn it 1/4 turn clockwise. The
lock will be released and the cap can
be opened.
To close
Push the tank cap into position with
the key inserted. To remove the key,
turn it counterclockwise to the original
position. Then, close the lock cover.
1. Open
2. Unlock
5AE-9-E3 (ENG) 4/11/0 11:06 AM Page 22
Page 34 of 104

4-1
PRE-OPERATION CHECKS
1
2
3
4
5
6
7
8
9Owners are personally responsible for their vehicle’s condition. Your motorcycle/scooter’s vital functions can start to
deteriorate quickly and unexpectedly, even if it remains unused (for instance, if it is exposed to the elements). Any dam-
age, fluid leak or loss of tire pressure could have serious consequences. Therefore, it is very important that, in addition
to a thorough visual inspection, you check the following points before each ride.
EAU00340PRE-OPERATION CHECK LIST
ITEM CHECKS PAGE
Front brake9Check operation, free play, fluid level and vehicle for fluid leakage.
9Fill with DOT 4 (or DOT 3) brake fluid if necessary.
3-8~3-9, 6-21 ~ 6-24
Rear brake9Check operation, free play, fluid level and vehicle for fluid leakage.
9Fill with DOT 4 brake fluid if necessary.
Clutch9Check operation, condition and free play.
3-8, 6-20 ~ 6-21
9Adjust if necessary.
9Check for smooth operation.
Throttle grip and housing9Lubricate.6-17 ~ 6-18, 6-27
9Adjust throttle cable free play if necessary.
Engine oil9Check oil level.
3-12
9Fill with oil if necessary.
Transmission oil9Check oil level.
6-9 ~ 6-10
9Fill with oil if necessary.
Coolant9Check coolant level.
6-10 ~ 6-11
9Fill with coolant if necessary.
Drive chain9Check chain slack and condition.
6-25 ~ 6-26
9Adjust if necessary.
Wheels and tires9Check tire pressure, wear, damage. 6-18 ~ 6-20
Control and meter cable9Check for smooth operation.
6-27
9Lubricate if necessary.
EAU01114
5AE-9-E3 (ENG) 4/11/0 11:06 AM Page 32
Page 35 of 104
4-2
PRE-OPERATION CHECKS
1
2
3
4
5
6
7
8
9
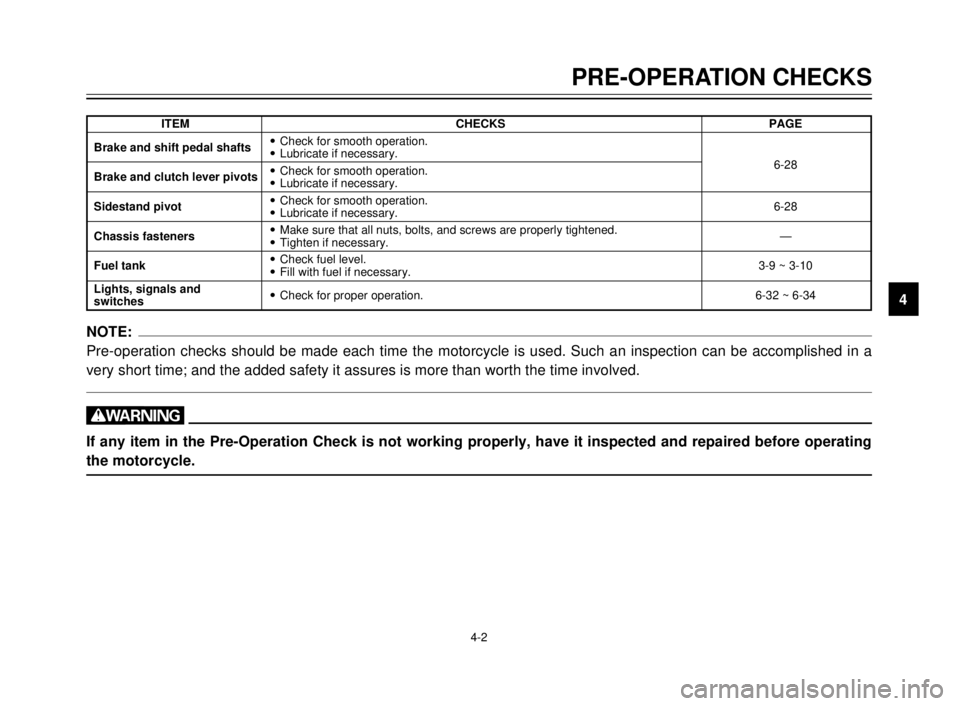
ITEM CHECKS PAGE
Brake and shift pedal shafts9Check for smooth operation.
6-28 9Lubricate if necessary.
Brake and clutch lever pivots9Check for smooth operation.
9Lubricate if necessary.
Sidestand pivot9Check for smooth operation.
6-28
9Lubricate if necessary.
Chassis fasteners9Make sure that all nuts, bolts, and screws are properly tightened.
—
9Tighten if necessary.
Fuel tank9Check fuel level.
3-9 ~ 3-10
9Fill with fuel if necessary.
Lights, signals and
9Check for proper operation. 6-32 ~ 6-34
switches
NOTE:
Pre-operation checks should be made each time the motorcycle is used. Such an inspection can be accomplished in a
very short time; and the added safety it assures is more than worth the time involved.
w
If any item in the Pre-Operation Check is not working properly, have it inspected and repaired before operating
the motorcycle.
5AE-9-E3 (ENG) 4/11/0 11:06 AM Page 33
Page 45 of 104
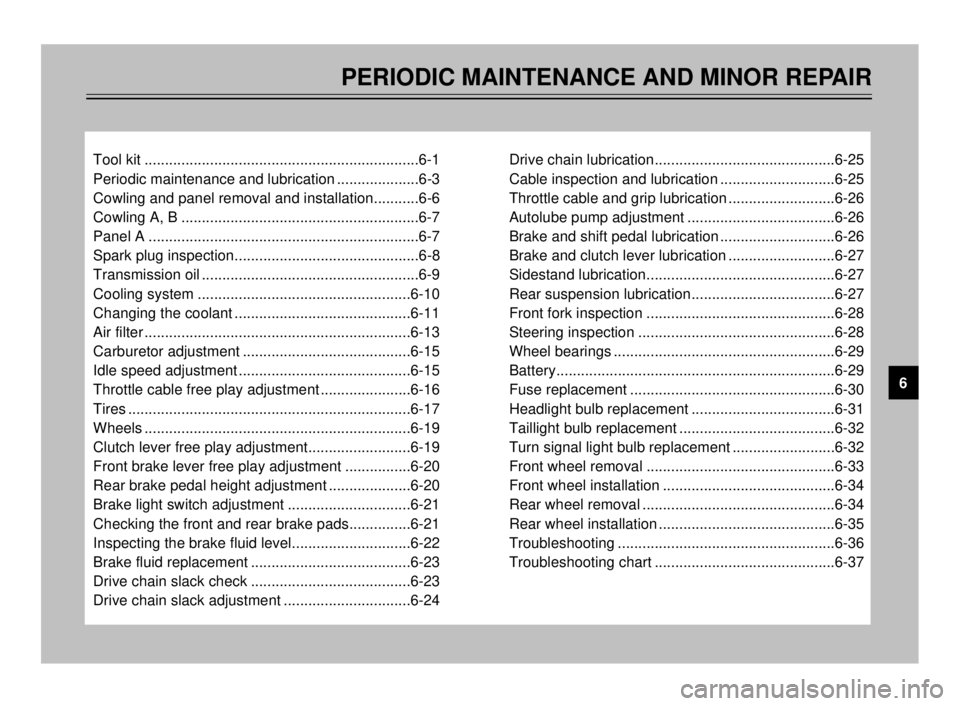
PERIODIC MAINTENANCE AND MINOR REPAIR
Tool kit ...................................................................6-1
Periodic maintenance and lubrication ....................6-3
Cowling and panel removal and installation...........6-6
Cowling A, B ..........................................................6-7
Panel A ..................................................................6-7
Spark plug inspection.............................................6-8
Transmission oil .....................................................6-9
Cooling system ....................................................6-10
Changing the coolant ...........................................6-11
Air filter .................................................................6-13
Carburetor adjustment .........................................6-15
Idle speed adjustment ..........................................6-15
Throttle cable free play adjustment ......................6-16
Tires .....................................................................6-17
Wheels .................................................................6-19
Clutch lever free play adjustment.........................6-19
Front brake lever free play adjustment ................6-20
Rear brake pedal height adjustment ....................6-20
Brake light switch adjustment ..............................6-21
Checking the front and rear brake pads...............6-21
Inspecting the brake fluid level.............................6-22
Brake fluid replacement .......................................6-23
Drive chain slack check .......................................6-23
Drive chain slack adjustment ...............................6-24Drive chain lubrication............................................6-25
Cable inspection and lubrication ............................6-25
Throttle cable and grip lubrication ..........................6-26
Autolube pump adjustment ....................................6-26
Brake and shift pedal lubrication ............................6-26
Brake and clutch lever lubrication ..........................6-27
Sidestand lubrication..............................................6-27
Rear suspension lubrication...................................6-27
Front fork inspection ..............................................6-28
Steering inspection ................................................6-28
Wheel bearings ......................................................6-29
Battery....................................................................6-29
Fuse replacement ..................................................6-30
Headlight bulb replacement ...................................6-31
Taillight bulb replacement ......................................6-32
Turn signal light bulb replacement .........................6-32
Front wheel removal ..............................................6-33
Front wheel installation ..........................................6-34
Rear wheel removal ...............................................6-34
Rear wheel installation ...........................................6-35
Troubleshooting .....................................................6-36
Troubleshooting chart ............................................6-37
6
5AE-9-E3 (ENG) 4/11/0 11:06 AM Page 43