Page 13 of 283

TUNDRA (34413U)
13
OPERATING THE PASSENGER'S
WINDOW
Use the switch on the passenger 's door
or the switch on the driver's door that
controls the passenger 's window.
The window moves as long as you hold
the switch.
To open: Push down the switch.
To close: Pull up the switch.
If you push in the window lock button on
the driver 's door, the passenger 's window
cannot be operated.CAUTION
To avoid serious personal injury, you
must do the following.
�Always make sure the head, hands
and other parts of the body of all
occupants are kept completely in-
side the vehicle before you close
the power windows. If someone's
neck, head or hands gets caught in
a closing window, it could result in
a serious injury. When anyone
closes the power windows, be sure
that they operate the windows safe-
ly.
�When small children are in the ve-
hicle, never let them use the power
window switches without supervi-
sion. Use the window lock button to
prevent them from making unex-
pected use of the switches.
�Never leave small children alone in
the vehicle, especially with the igni-
tion key still inserted. They could
use the power window switches and
get trapped in a window. Unat-
tended children can become in-
volved in serious accidents.
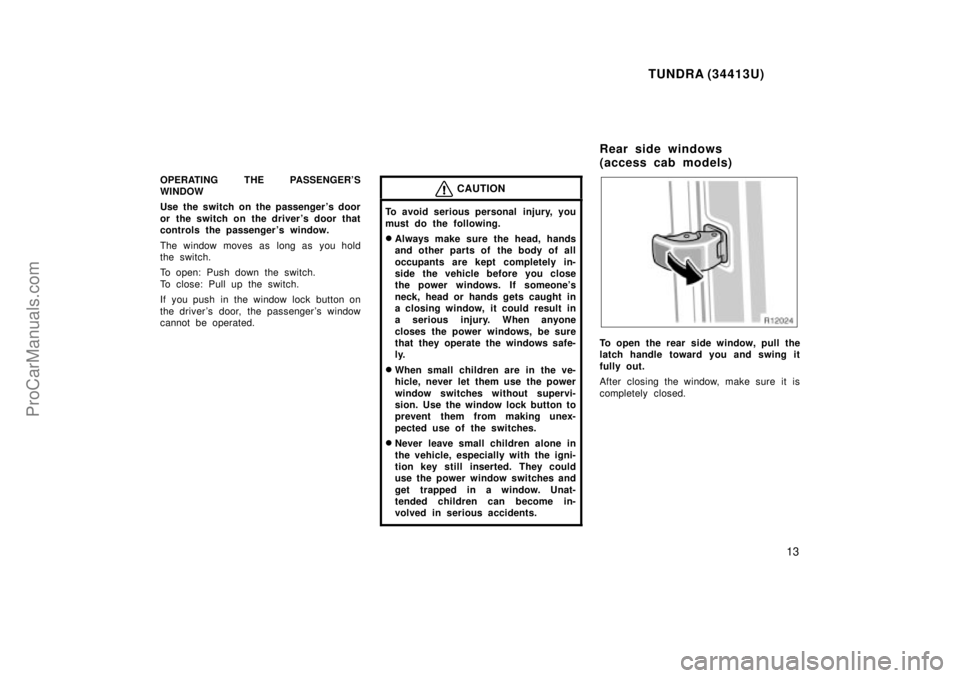
To open the rear side window, pull the
latch handle toward you and swing it
fully out.
After closing the window, make sure it is
completely closed.
Rear side windows
(access cab models)
ProCarManuals.com
Page 14 of 283
TUNDRA (34413U)
14
Rear window
To open the rear window, push the le-
ver and slide the window.
After closing the window, make sure it is
completely closed.
Tailgate
OPENING
To open the tailgate, pull the handle up.
The support cables will hold the tailgate
horizontal.
See Luggage stowage precautionsº in
Part 2 for precautions to observe for load-
ing luggage.
After closing the tailgate, try pulling and
pushing it to make sure it is securely
closed.
NOTICE
Avoid driving with the tailgate open.
Support cable bracket
REMOVAL1. Open the tailgate to the angle where you can release the brackets on the
support cables from the lugs on
both sides.
To release the support cable bracket, lift
it up and slide it off.
ProCarManuals.com
Page 25 of 283
TUNDRA (34413U)
25
1. Stow the rear seat belt and bucklesas shown in the illustration.
This prevents the belt and buckles from
falling out when you swing up the rear
seat.
NOTICE
The seat belt and buckles must be stowed before you swing up the rearseat.
2. Raise the bottom cushion while pushing the lock release lever.
CAUTION
When returning the bottom cushion to
its original position:
�Make sure the seat belts are not
twisted or caught under the bottom
cushion and are arranged in their
proper position and are ready to
use.
�Make sure the bottom cushion is
securely locked by trying to pull up
the edge of the bottom cushion.
Failure to do so will prevent seat
belt from proper operation.
Swing- up rear seats
(access cab models)
ProCarManuals.com
Page 31 of 283
TUNDRA (34413U)
31
To o h i g h
Adjust to a
snug fit
Keep as low on hips as possible
Remove excess length of the belt and
adjust the belt position.
To shorten the belt, pull the free end of
the belt.
Position the lap belt as low as possible
on your hipsÐnot on your waist, then ad-
just it to a snug fit.
CAUTION
High- positioned and loose- fitting lap
belts could cause serious injuries due
to sliding under the lap belt during a
collision or other unintended result.
Keep the lap belt positioned as low
on hips as possible.
To release the belt, press the buckle- re-
lease button.The rear seat belt and buckles can be
stowed when not in use.
Seat belt and buckles must be stowed
before you swing up the bottom cushion.
(See Swing- up rear seatsº in this chap-
ter.)
ÐStowing the rear seat belt
and buckles
(access cab models)
ProCarManuals.com
Page 71 of 283
TUNDRA (34413U)
71
3. Move the child restraint system tothe correct position.
Then fix the child restraint system
with the seat belt and tighten the
top strap.
CAUTION
Make sure the top strap is securely
latched, and check that the child re-
straint system is secure by pushing
and pulling it in different directions.
Tilt steering wheel
To change the steering wheel angle,
hold the steering wheel, pull the lock
release lever toward you, tilt the steer-
ing wheel to the desired angle and re-
lease the lever.
When the steering wheel is in a low posi-
tion, it will spring up as you release the
lock release lever.
CAUTION
�Do not adjust the steering wheel
while the vehicle is moving.
�After adjusting the steering wheel,
try moving it up and down to make
sure it is locked in position.
ProCarManuals.com
Page 82 of 283

TUNDRA (34413U)
82
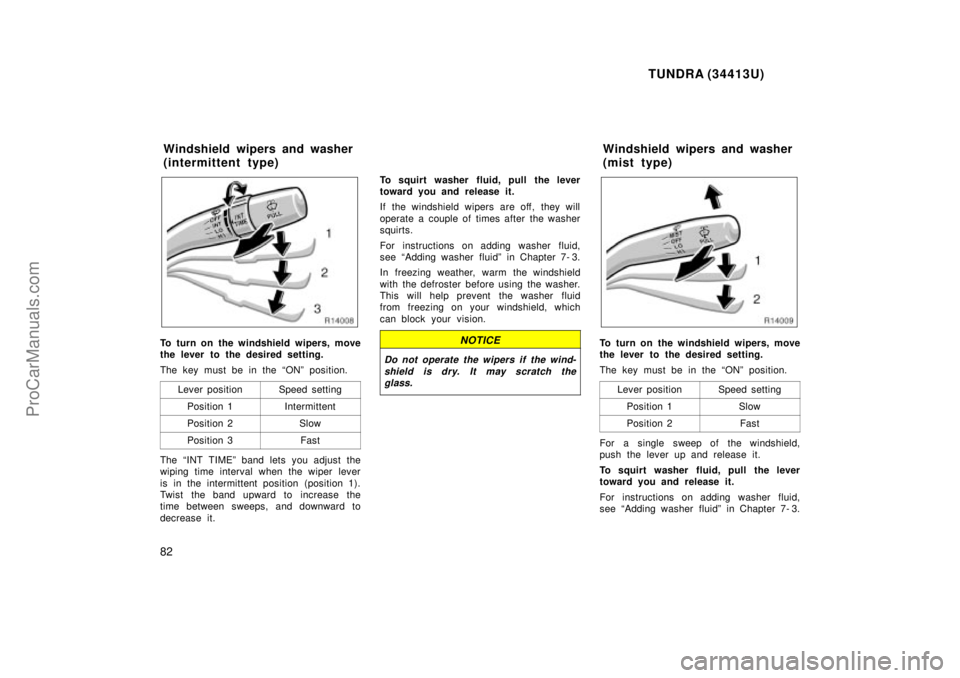
To turn on the windshield wipers, move
the lever to the desired setting.
The key must be in the ONº position.Lever position
Speed setting
Position 1Intermittent
Position 2Slow
Position 3Fast
The INT TIMEº band lets you adjust the
wiping time interval when the wiper lever
is in the intermittent position (position 1).
Twist the band upward to increase the
time between sweeps, and downward to
decrease it. To squirt washer fluid, pull the lever
toward you and release it.
If the windshield wipers are off, they will
operate a couple of times after the washer
squirts.
For instructions on adding washer fluid,
see Adding washer fluidº in Chapter 7- 3.
In freezing weather, warm the windshield
with the defroster before using the washer.
This will help prevent the washer fluid
from freezing on your windshield, which
can block your vision.
NOTICE
Do not operate the wipers if the wind-
shield is dry. It may scratch theglass.
To turn on the windshield wipers, move
the lever to the desired setting.
The key must be in the ONº position.
Lever position
Speed setting
Position 1Slow
Position 2Fast
For a single sweep of the windshield,
push the lever up and release it.
To squirt washer fluid, pull the lever
toward you and release it.
For instructions on adding washer fluid,
see Adding washer fluidº in Chapter 7- 3.
Windshield wipers and washer
(intermittent type) Windshield wipers and washer
(mist type)
ProCarManuals.com
Page 86 of 283

TUNDRA (34413U)
86
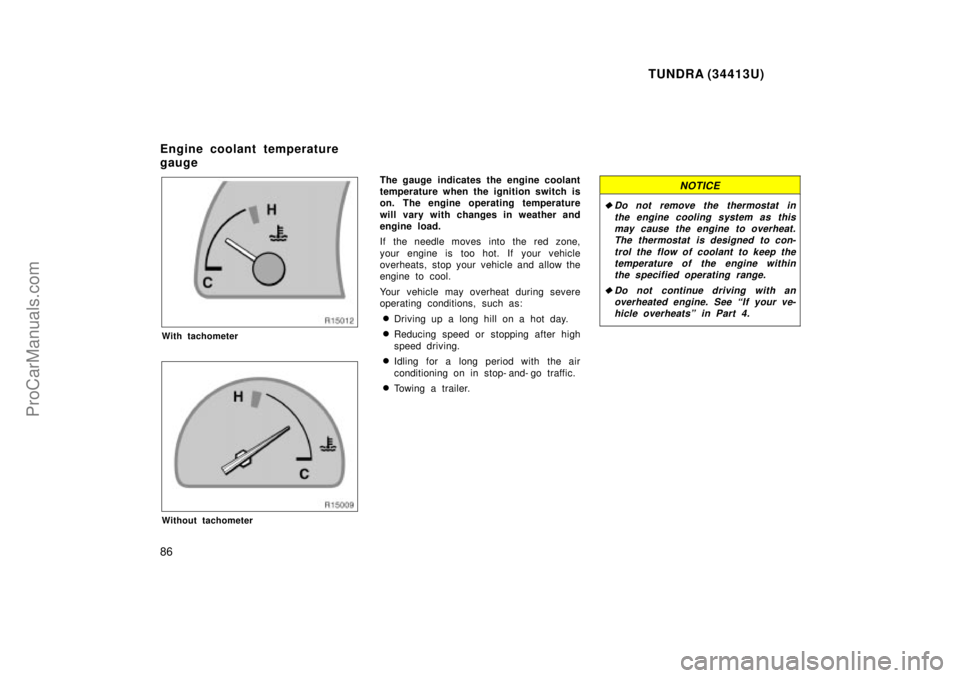
With tachometer
Without tachometer
The gauge indicates the engine coolant
temperature when the ignition switch is
on. The engine operating temperature
will vary with changes in weather and
engine load.
If the needle moves into the red zone,
your engine is too hot. If your vehicle
overheats, stop your vehicle and allow the
engine to cool.
Your vehicle may overheat during severe
operating conditions, such as:
�Driving up a long hill on a hot day.
�Reducing speed or stopping after high
speed driving.
�Idling for a long period with the air
conditioning on in stop- and- go traffic.
�Towing a trailer.
NOTICE
�Do not remove the thermostat inthe engine cooling system as thismay cause the engine to overheat.The thermostat is designed to con-
trol the flow of coolant to keep thetemperature of the engine withinthe specified operating range.
�Do not continue driving with anoverheated engine. See If your ve-hicle overheatsº in Part 4.
Engine coolant temperature
gauge
ProCarManuals.com
Page 90 of 283

TUNDRA (34413U)
90
(a) Brake System Warning Light
This light has the following functions:
Parking brake reminder
If this light is on, make sure the parking
brake is fully released. The light should
go off.
Low brake fluid level warning
If this light comes on and stays on while
you are driving, slow down and pull off
the road. Then stop the vehicle carefully.
Remember that stopping distance and ped-
al effort may be increased. There may be
a problem somewhere in the brake sys-
tem. Check the fluid level of the see-
through reservoir.
To make sure the parking brake has not
caused the warning light to come on,
check to see that the parking brake is
fully released.
If the brake fluid level is low...
At a safe place, test your brakes by start-
ing and stopping.
�If you judge that the brakes still work
adequately, drive cautiously to your
nearest dealer or shop for repairs.
�If the brakes are not working, have the
vehicle towed in for repairs. (For tow-
ing information, see Part 4.)
CAUTION
It is dangerous to continue driving
normally when the brake fluid level is
low.
If the brake fluid level is correct...
Have the warning system checked by your
Toyota dealer.
(b) Driver's Seat Belt Reminder Lightand Buzzer
This light and buzzer remind you to
buckle up the driver's seat belt.
Once the ignition key is turned to ONº or
STARTº, the reminder light flashes and
buzzer sounds if the driver 's seat belt is
not fastened. Unless the driver fastens the
belt, the light keeps flashing and the
buzzer stops after about 4 to 8 seconds.
(c) Front Passenger 's Seat Belt Re- minder Light
This light reminds you to buckle up the
front passenger 's seat belt. Once the ignition key is turned to ONº or
STARTº, the reminder light flashes if a
passenger sits in the front passenger seat
and does not fasten the seat belt. Unless
the front passenger fastens the belt, the
light keeps flashing.
If luggage load is placed on the front
passenger seat, depending on its weight
and how it is placed on the seat, built- in
sensors in the seat cushion may detect
the pressure, causing the reminder light to
keep flashing.
(d) Discharge Warning Light
This light warns that the battery is being
discharged.
If it comes on while you are driving, there
is a problem somewhere in the charging
system.
The engine ignition will continue to oper-
ate, however, until the battery is dis-
charged. Turn off the air conditioning,
blower, radio, etc., and drive directly to
the nearest Toyota dealer or repair shop.
NOTICE
Do not continue driving if the engine
drive belt is broken or loose.
ProCarManuals.com