Page 237 of 283
TUNDRA (34413U)
237
Checking brake fluid
Parts (if level is low):
�SAE J1703 or FMVSS No.116 DOT 3
brake fluid
Tools:
�Rag or paper towel
�Funnel (only for adding fluid)
Checking power steering fluid
Parts (if level is low):
�Automatic transmission fluid DEXRON� II
or III
Tools:
�Rag or paper towel
�Funnel (only for adding fluid)
Checking battery condition
Tools:
�Warm water
�Baking soda
�Grease
�Conventional wrench (for terminal
clamp bolts) Checking and replacing fuses
Parts (if replacement is necessary):
�Fuse with same amperage rating as
original
Adding washer fluid
Parts:
�Water
�Washer fluid containing antifreeze
(for winter use)
Tools:
�Funnel
Replacing light bulbs
Parts:
�Bulb with same number and wattage
rating as original (See charts in Re-
placing light bulbsº in Chapter 7- 3.)
Tools:
�Screwdriver
�Wrench
ProCarManuals.com
Page 239 of 283

TUNDRA (34413U)
239
Part 7
DO- IT- YOURSELF
MAINTENANCEÐ
Chapter 7- 2
Engine and Chassis
�Checking the engine oil level
� Checking the engine coolant
level
� Checking brake fluid
� Checking power steering fluid
� Checking tire pressure
� Checking and replacing tires
� Rotating tires
� Installing snow tires and chains
� Replacing wheels
� Aluminum wheel precautions
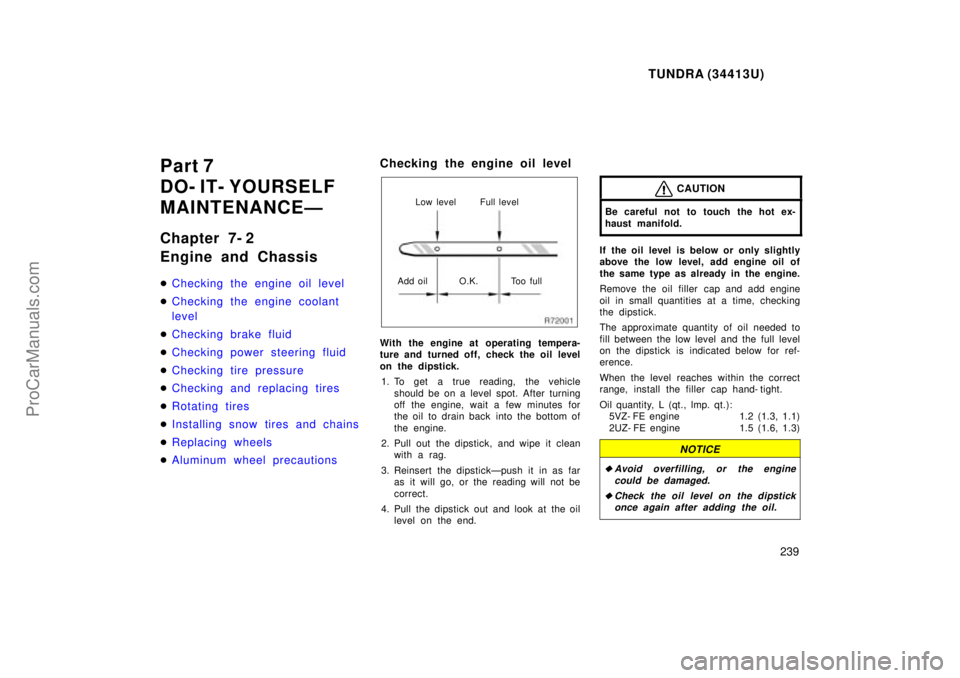
Checking the engine oil level
Low level Full level
Add oil O.K. Too full
With the engine at operating tempera-
ture and turned off, check the oil level
on the dipstick. 1. To get a true reading, the vehicle should be on a level spot. After turning
off the engine, wait a few minutes for
the oil to drain back into the bottom of
the engine.
2. Pull out the dipstick, and wipe it clean with a rag.
3. Reinsert the dipstickÐpush it in as far as it will go, or the reading will not be
correct.
4. Pull the dipstick out and look at the oil level on the end.
CAUTION
Be careful not to touch the hot ex-
haust manifold.
If the oil level is below or only slightly
above the low level, add engine oil of
the same type as already in the engine.
Remove the oil filler cap and add engine
oil in small quantities at a time, checking
the dipstick.
The approximate quantity of oil needed to
fill between the low level and the full level
on the dipstick is indicated below for ref-
erence.
When the level reaches within the correct
range, install the f iller cap hand- tight.
Oil quantity, L (qt., lmp. qt.): 5VZ- FE engine 1.2 (1.3, 1.1)
2UZ- FE engine 1.5 (1.6, 1.3)
NOTICE
�Avoid overfilling, or the engine
could be damaged.
�Check the oil level on the dipstickonce again after adding the oil.
ProCarManuals.com
Page 242 of 283

TUNDRA (34413U)
242
Checking brake fluid
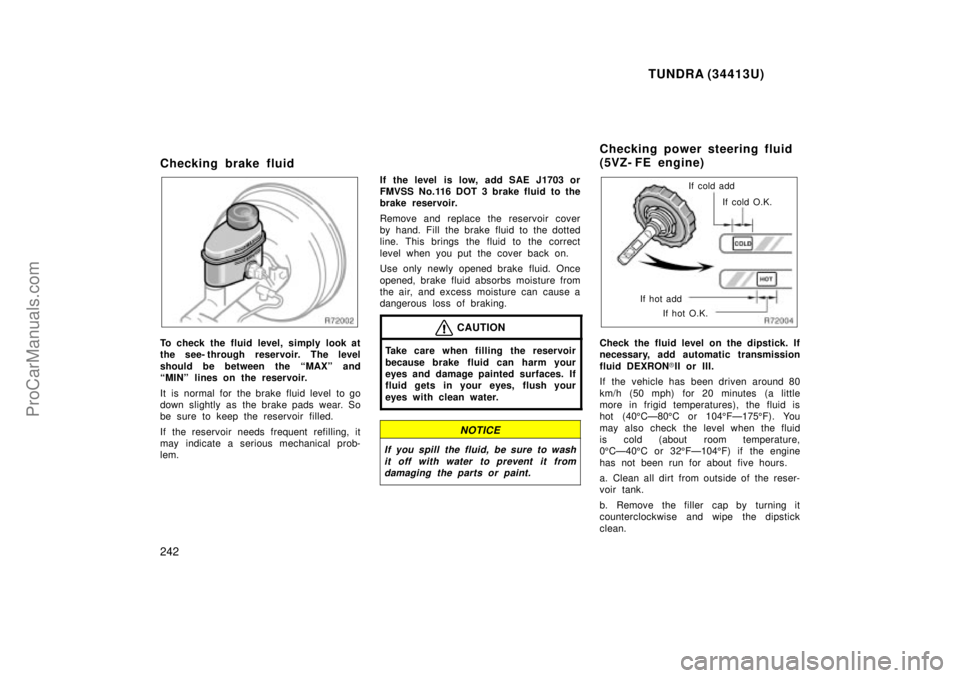
To check the fluid level, simply look at
the see- through reservoir. The level
should be between the MAXº and
MINº lines on the reservoir.
It is normal for the brake fluid level to go
down slightly as the brake pads wear. So
be sure to keep the reservoir filled.
If the reservoir needs frequent refilling, it
may indicate a serious mechanical prob-
lem. If the level is low, add SAE J1703 or
FMVSS No.116 DOT 3 brake fluid to the
brake reservoir.
Remove and replace the reservoir cover
by hand. Fill the brake fluid to the dotted
line. This brings the fluid to the correct
level when you put the cover back on.
Use only newly opened brake fluid. Once
opened, brake fluid absorbs moisture from
the air, and excess moisture can cause a
dangerous loss of braking.
CAUTION
Take care when filling the r
eservoir
because brake fluid can harm your
eyes and damage painted surfaces. If
fluid gets in your eyes, flush your
eyes with clean water.
NOTICE
If you spill the fluid, be sure to wash it off with water to prevent it fromdamaging the parts or paint.
If cold add
If cold O.K.
If hot add If hot O.K.
Check the fluid level on the dipstick. If
necessary, add automatic transmission
fluid DEXRON �II or III.
If the vehicle has been driven around 80
km/h (50 mph) for 20 minutes (a little
more in frigid temperatures), the fluid is
hot (40 5CÐ80 5C or 104 5FÐ175 5F). You
may also check the level when the fluid
is cold (about room temperature,
0 5CÐ40 5C or 32 5FÐ104 5F) if the engine
has not been run for about five hours.
a. Clean all dirt from outside of the reser-
voir tank.
b. Remove the filler cap by turning it
counterclockwise and wipe the dipstick
clean.
Checking power steering fluid
(5VZ- FE engine)
ProCarManuals.com
Page 247 of 283

TUNDRA (34413U)
247
CAUTION
�Do not exceed 50 km/h (30 mph) or
the chain manufacturer 's recom-
mended speed limit, whichever is
lower.
�Drive carefully avoiding bumps,
holes, and sharp turns, which may
cause the vehicle to bounce.
�Avoid sharp turns or locked- wheel
braking, as use of chains may ad-
versely affect vehicle handling.
Replacing wheels
WHEN TO REPLACE YOUR WHEELS
If you have wheel damage such as
bending, cracks or heavy corrosion, the
wheel should be replaced.
If you fail to replace damaged wheels, the
tire may slip off the wheel or they may
cause loss of handling control.
WHEEL SELECTION
When replacing wheels, care should be
taken to ensure that the wheels are re-
placed by ones with the same load ca-
pacity, diameter, rim width, and offset.
Correct replacement wheels are available
at your Toyota dealer.
A wheel of a different size or type may
adversely affect handling, wheel and bear-
ing life, brake cooling, speedometer/odom-
eter calibration, stopping ability, headlight
aim, bumper height, vehicle ground clear-
ance, and tire or snow chain clearance to
the body and chassis. Replacement with used wheels is not rec-
ommended as they may have been sub-
jected to rough treatment or high mileage
and could fail without warning. Also, bent
wheels which have been straightened may
have structural damage and therefore
should not be used. Never use an inner
tube in a leaking wheel which is designed
for a tubeless tire.
ProCarManuals.com
Page 271 of 283

TUNDRA (34413U)
271
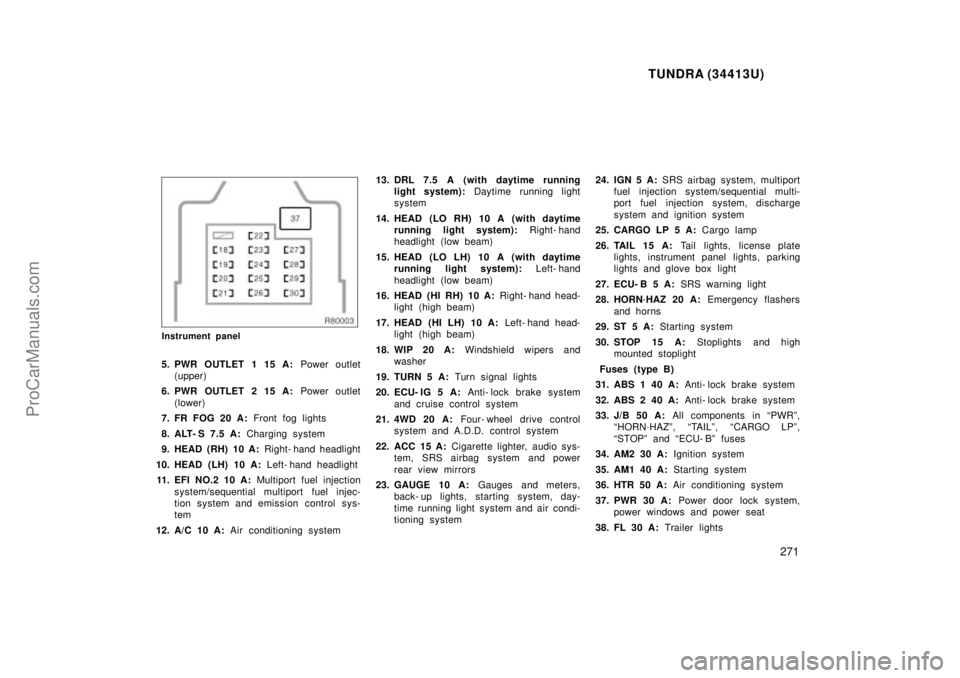
Instrument panel
5. PWR OUTLET 1 15 A: Power outlet
(upper)
6. PWR OUTLET 2 15 A: Power outlet
(lower)
7. FR FOG 20 A: Front fog lights
8. ALT- S 7.5 A: Charging system
9. HEAD (RH) 10 A: Right- hand headlight
10. HEAD (LH) 10 A: Left- hand headlight
11. EFI NO.2 10 A: Multiport fuel injection
system/s equential multiport fuel injec-
tion system and emission control sys-
tem
12. A/C 10 A: Air conditioning system 13. DRL 7.5 A (with daytime running
light system): Daytime running light
system
14. HEAD (LO RH) 10 A (with daytime running light system): Right- hand
headlight (low beam)
15. HEAD (LO LH) 10 A (with daytime running light system): Left- hand
headlight (low beam)
16. HEAD (HI RH) 10 A: Right- hand head- light (high beam)
17. HEAD (HI LH) 10 A: Left- hand head- light (high beam)
18. WIP 20 A: Windshield wipers and
washer
19. TURN 5 A: Turn signal lights
20. ECU- IG 5 A: Anti- lock brake system
and cruise control system
21. 4WD 20 A: Four- wheel drive control
system and A.D.D. control system
22. ACC 15 A: Cigarette lighter, audio sys-
tem, SRS airbag system and power
rear view mirrors
23. GAUGE 10 A: Gauges and meters,
back- up lights, starting system, day-
time running light system and air condi-
tioning system 24. IGN 5 A:
SRS airbag system, multiport
fuel injection system/sequential multi-
port fuel injection system, discharge
system and ignition system
25. CARGO LP 5 A: Cargo lamp
26. TAIL 15 A: Tail lights, license plate
lights, instrument panel lights, parking
lights and glove box light
27. ECU- B 5 A: SRS warning light
28. HORN´HAZ 20 A: Emergency flashers
and horns
29. ST 5 A: Starting system
30. STOP 15 A: Stoplights and high
mounted stoplight
Fuses (type B)
31. ABS 1 40 A: Anti- lock brake system
32. ABS 2 40 A: Anti- lock brake system
33. J/B 50 A: All components in PWRº,
HORN´HAZº, TAILº, CARGO LPº,
STOPº and ECU- Bº fuses
34. AM2 30 A: Ignition system
35. AM1 40 A: Starting system
36. HTR 50 A: Air conditioning system
37. PWR 30 A: Power door lock system,
power windows and power seat
38. FL 30 A: Trailer lights
ProCarManuals.com