Page 12 of 235
L/C 100_U
34 2000 L/C 100 (OM60866U)
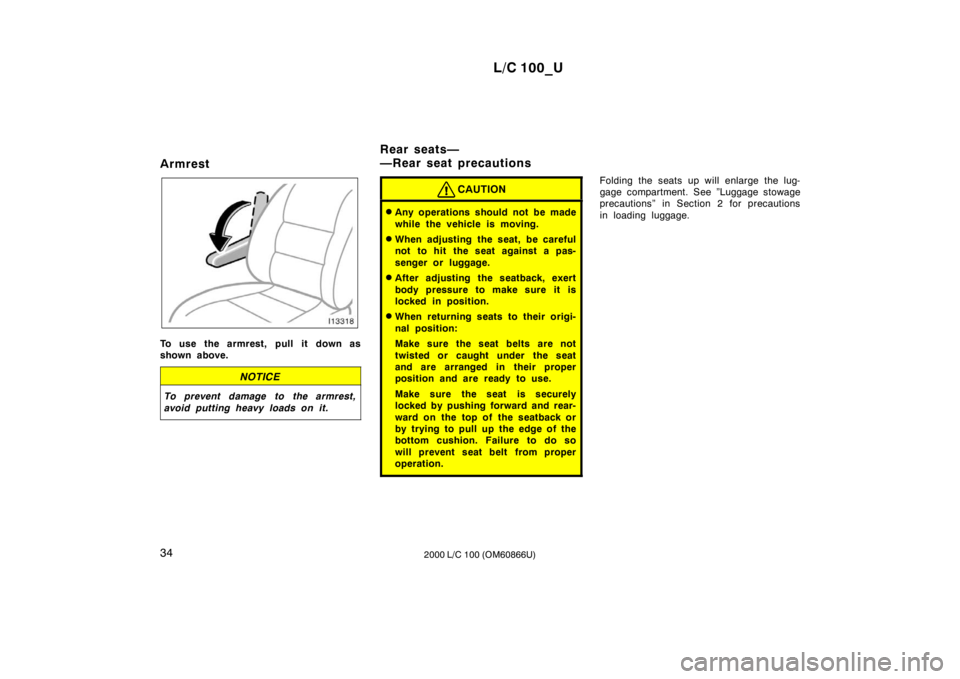
Armrest
To use the armrest, pull it down as
shown above.
NOTICE
To prevent damage to the armrest,
avoid putting heavy loads on it.
CAUTION
�
Any operations should not be made
while the vehicle is moving.
� When adjusting the seat, be careful
not to hit the seat against a pas-
senger or luggage.
� After adjusting the seatback, exert
body pressure to make sure it is
locked in position.
� When returning seats to their origi-
nal position:
Make sure the seat belts are not
twisted or caught under the seat
and are arranged in their proper
position and are ready to use.
Make sure the seat is securely
locked by pushing forward and rear-
ward on the top of the seatback or
by trying to pull up the edge of the
bottom cushion. Failure to do so
will prevent seat belt from proper
operation.
Folding the seats up will enlarge the lug-
gage compartment. See ”Luggage stowage
precautions” in Section 2 for precautions
in loading luggage.
Rear seats—
—Rear seat precautions
Page 13 of 235
L/C 100_U35
2000 L/C 100 (OM60866U)
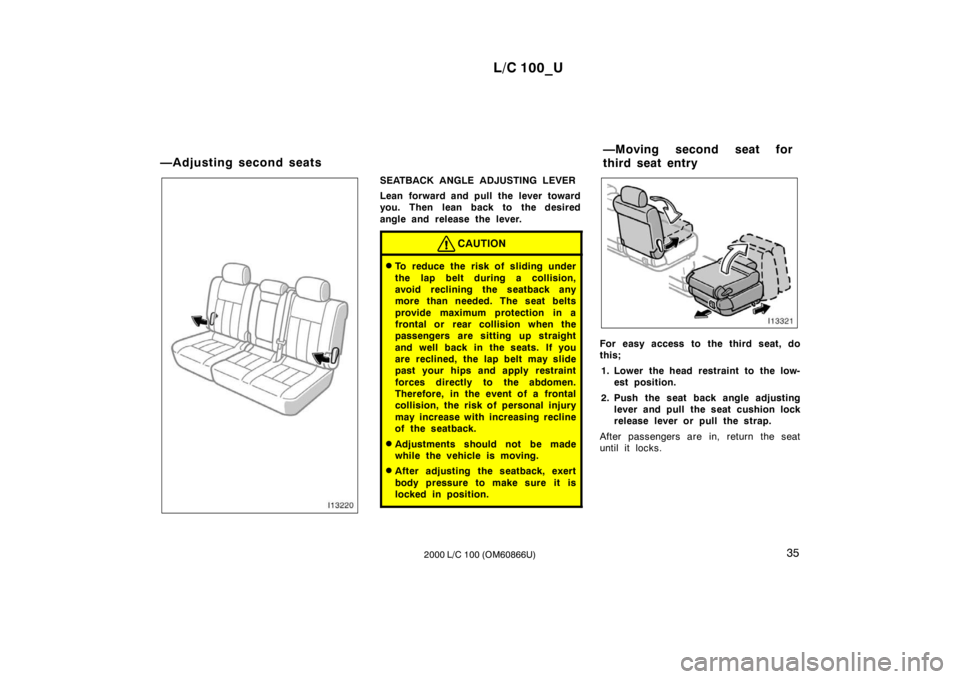
SEATBACK ANGLE ADJUSTING LEVER
Lean forward and pull the lever toward
you. Then lean back to the desired
angle and release the lever.
CAUTION
� To reduce the risk of sliding under
the lap belt during a collision,
avoid reclining the seatback any
more than needed. The seat belts
provide maximum protection in a
frontal or rear collision when the
passengers are sitting up straight
and well back in the seats. If you
are reclined, the lap belt may slide
past your hips and apply restraint
forces directly to the abdomen.
Therefore, in the event of a frontal
collision, the risk of personal injury
may increase with increasing recline
of the seatback.
� Adjustments should not be made
while the vehicle is moving.
� After adjusting the seatback, exert
body pressure to make sure it is
locked in position.
For easy access to the third seat, do
this;
1. Lower the head restraint to the low- est position.
2. Push the seat back angle adjusting lever and pull the seat cushion lock
release lever or pull the strap.
After passengers are in, return the seat
until it locks.
—Adjusting second seats
—Moving second seat for
third seat entry
Page 14 of 235
L/C 100_U
36 2000 L/C 100 (OM60866U)
CAUTION
After returning the seat, make sure
the seat is securely locked by push-
ing forward and rearward on the top
of the seatback or by trying to pull
up the edge of the bottom cushion.
—Folding up second seat
BEFORE FOLDING UP SECOND SEAT
1. Stow the second seat belt buckles as shown in the illustration.
This prevents the seat belt buckles from
falling out when you fold up the second
seat.
NOTICE
The seat belt buckles must be stowed
before you fold up the second seat.
2. Make sure the shoulder belt passes through the hanger when folding the
second seat.
This prevents the shoulder belt from being
damaged.
CAUTION
The seat belt must be removed from
the hanger when the seat belt is in use.
Page 15 of 235
L/C 100_U37
2000 L/C 100 (OM60866U)
FOLDING UP SECOND SEAT
1. Lower the outer head restraint to the lowest position and pull up the cen-
ter head restraint. Unlock the seat-
back and fold it down.
Vehicles without third seats—Folding up
the rear seats will enlarge the luggage
compartment. See ”Luggage stowage pre-
cautions” in Section 2 for precautions in
loading luggage.2. Unlock the seat cushion. Swing the whole seat up and forward.3. Hook the strap.
When returning the second seat to its
original position, put the holding strap into
the hole.
Page 17 of 235
L/C 100_U39
2000 L/C 100 (OM60866U)
—Adjusting third seats
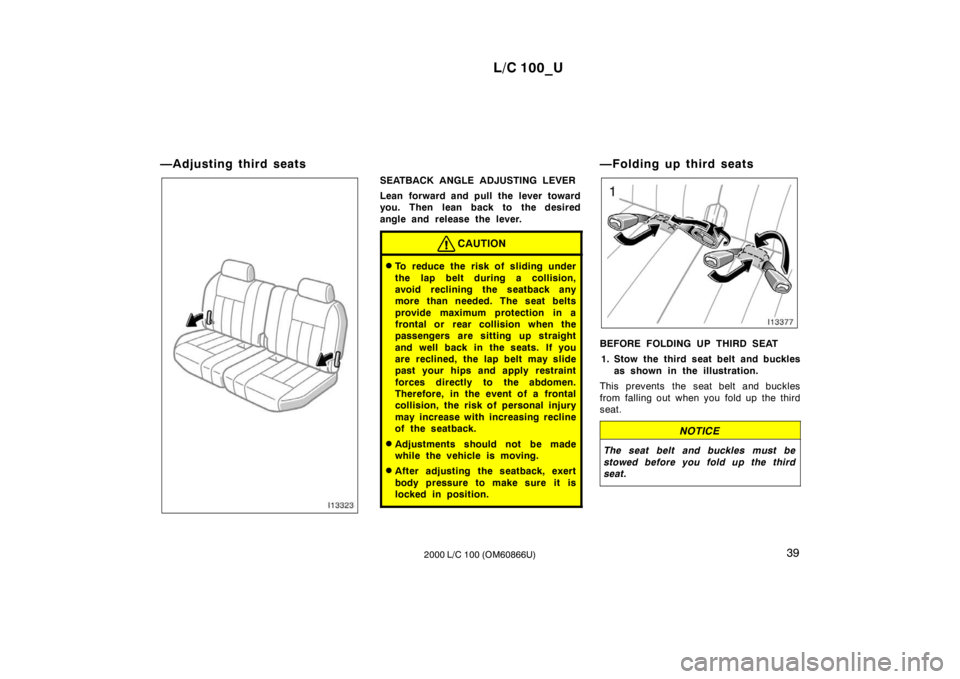
SEATBACK ANGLE ADJUSTING LEVER
Lean forward and pull the lever toward
you. Then lean back to the desired
angle and release the lever.
CAUTION
�
To reduce the risk of sliding under
the lap belt during a collision,
avoid reclining the seatback any
more than needed. The seat belts
provide maximum protection in a
frontal or rear collision when the
passengers are sitting up straight
and well back in the seats. If you
are reclined, the lap belt may slide
past your hips and apply restraint
forces directly to the abdomen.
Therefore, in the event of a frontal
collision, the risk of personal injury
may increase with increasing recline
of the seatback.
� Adjustments should not be made
while the vehicle is moving.
� After adjusting the seatback, exert
body pressure to make sure it is
locked in position.
—Folding up third seats
BEFORE FOLDING UP THIRD SEAT
1. Stow the third seat belt and buckles as shown in the illustration.
This prevents the seat belt and buckles
from falling out when you fold up the third
seat.
NOTICE
The seat belt and buckles must be
stowed before you fold up the third
seat.
Page 18 of 235
L/C 100_U
40 2000 L/C 100 (OM60866U)
2. Make sure the shoulder belt passes
through the hanger when folding the
third seat.
This prevents the shoulder belt from being
damaged.
CAUTION
The seat belt must be removed from
the hanger when the seat belt is in use.
FOLDING UP THIRD SEAT 1. Lower the head restraint to the low- est position. Unlock the seatback
and fold it down.
Folding up the third seats will enlarge the
luggage compartment. See ”Luggage stow-
age precautions” in Section 2 for precau-
tions in loading luggage.2. Unlock the seat cushion and slide the whole seat to the rear −most
position while pulling up the handle.
Page 20 of 235
L/C 100_U
42 2000 L/C 100 (OM60866U)
CAUTION
When returning seats to their original
position: �Make sure the seat belts are not
twisted or caught under the seat
and are arranged in their proper
position and are ready to use.
� Make sure the seat is securely
locked by pushing forward and rear-
ward on the top of the seatback or
by trying to pull up the edge of the
bottom cushion. Be certain to re-
place head restraint. Failure to do
so will prevent seat belt from oper-
ating properly.
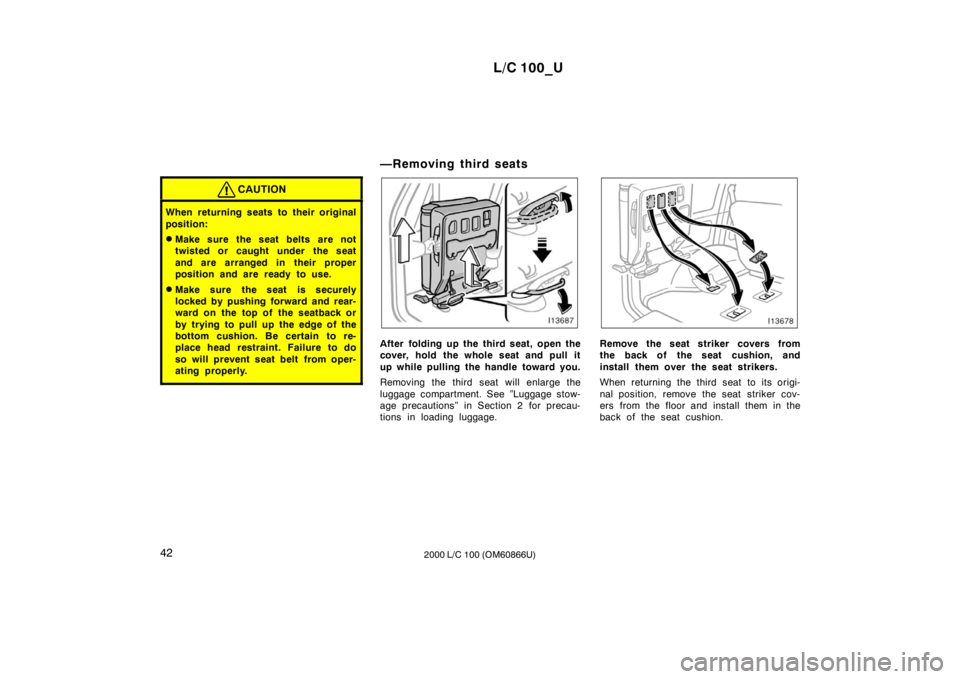
—Removing third seats
After folding up the third seat, open the
cover, hold the whole seat and pull it
up while pulling the handle toward you.
Removing the third seat will enlarge the
luggage compartment. See ”Luggage stow-
age precautions” in Section 2 for precau-
tions in loading luggage.Remove the seat striker covers from
the back of the seat cushion, and
install them over the seat strikers.
When returning the third seat to its origi-
nal position, remove the seat striker cov-
ers from the floor and install them in the
back of the seat cushion.
Page 68 of 235
L/C 100_U
90 2000 L/C 100 (OM60866U)
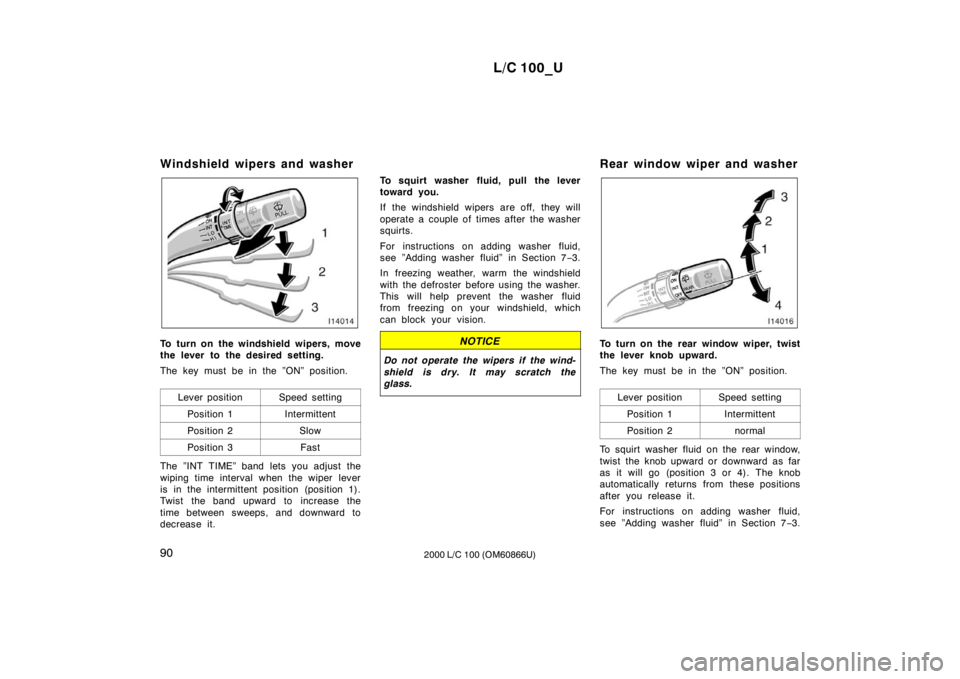
Windshield wipers and washer
To turn on the windshield wipers, move
the lever to the desired setting.
The key must be in the ”ON” position.
Lever position
Speed setting
Position 1Intermittent
Position 2Slow
Position 3Fast
The ”INT TIME” band lets you adjust the
wiping time interval when the wiper lever
is in the intermittent position (position 1).
Twist the band upward to increase the
time between sweeps, and downward to
decrease it. To squirt washer fluid, pull the lever
toward you.
If the windshield wipers are off, they will
operate a couple of times after the washer
squirts.
For instructions on adding washer fluid,
see ”Adding washer fluid” in Section 7
−3.
In freezing weather, warm the windshield
with the defroster before using the washer.
This will help prevent the washer fluid
from freezing on your windshield, which
can block your vision.
NOTICE
Do not operate the wipers if the wind-
shield is dry. It may scratch the
glass.
Rear window wiper and washer
To turn on the rear window wiper, twist
the lever knob upward.
The key must be in the ”ON” position.
Lever position
Speed setting
Position 1Intermittent
Position 2normal
To squirt washer fluid on the rear window,
twist the knob upward or downward as far
as it will go (position 3 or 4). The knob
automatically returns from these positions
after you release it.
For instructions on adding washer fluid,
see ”Adding washer fluid” in Section 7 −3.