Page 29 of 235

L/C 100_U51
2000 L/C 100 (OM60866U)
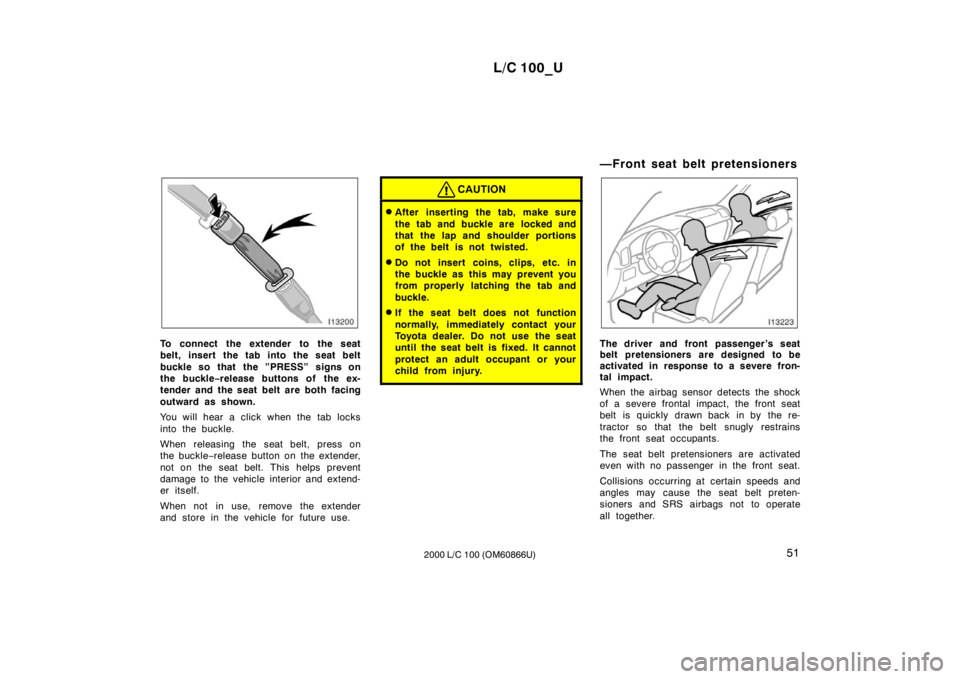
To connect the extender to the seat
belt, insert the tab into the seat belt
buckle so that the ”PRESS” signs on
the buckle −release buttons of the ex-
tender and the seat belt are both facing
outward as shown.
You will hear a click when the tab locks
into the buckle.
When releasing the seat belt, press on
the buckle −release button on the extender,
not on the seat belt. This helps prevent
damage to the vehicle interior and extend-
er itself.
When not in use, remove the extender
and store in the vehicle for future use.
CAUTION
� After inserting the tab, make sure
the tab and buckle are locked and
that the lap and shoulder portions
of the belt is not twisted.
� Do not insert coins, clips, etc. in
the buckle as this may prevent you
from properly latching the tab and
buckle.
� If the seat belt does not function
normally, immediately contact your
Toyota dealer. Do not use the seat
until the seat belt is fixed. It cannot
protect an adult occupant or your
child from injury.
—Front seat belt pretensioners
The driver and front passenger ’s seat
belt pretensioners are designed to be
activated in response to a severe fron-
tal impact.
When the airbag sensor detects the shock
of a severe frontal impact, the front seat
belt is quickly drawn back in by the re-
tractor so that the belt snugly restrains
the front seat occupants.
The seat belt pretensioners are activated
even with no passenger in the front seat.
Collisions occurring at certain speeds and
angles may cause the seat belt preten-
sioners and SRS airbags not to operate
all together.
Page 101 of 235
L/C 100_U123
2000 L/C 100 (OM60866U)
—Controls and features
Details of specific buttons, controls, and
features are described in the alphabetical
listing that follows.
Page 102 of 235

L/C 100_U
124 2000 L/C 100 (OM60866U)
1 2 3 4 5 6 (Preset buttons)
These buttons are used to preset and
tune in radio stations.
To preset a station to a button: Tune in
the desired station (see “TUNE” knob or
“SEEK” button). Push and hold down the
button until you hear a beep—this will set
the station to the button. The button num-
ber will appear on the display.
To tune in to a preset station: Push the
button for the station you want. The but-
ton number and station frequency will ap-
pear on the display.
These systems can store one AM and two
FM stations for each button (The display
will show “AM”, “FM1” or “FM2” when you
push “AM” “FM1·2”).
(Eject button)
Cassette tape
Push the cassette tape eject button to
eject a cassette.
After you turn the ignition to “LOCK”, you
will be able to eject a cassette, but you
will not be able to reinsert it. Compact disc
To eject one compact disc only: Push and
release the compact disc eject button. If
you hold the button too long (if the audio
system is on at this time, you hear a
beep.), the mechanism will change to the
mode for ejecting all the discs loaded in
the changer. You can also eject any spe-
cific one of the discs loaded in the player
as follows:
1. Push either side of the “DISC” button until the number of the disc you want
to eject is displayed.
2. Push and release the compact disc eject button.
To eject all the discs loaded in the player:
Push and hold the compact disc eject but-
ton (until you hear a beep when the audio
system is on). The last compact disc
played before pushing the button will be
ejected first. If a disc is left in the slot
for a long time, the function to eject all
the discs will be automatically cancelled.
After you turn the ignition to “LOCK”, you
will be able to eject one compact disc
only or all the discs loaded in the player,
but you will not be able to reinsert it or
them.
(Program)
Push “
” to select the other side of a
cassette tape. The display indicates which
side is currently selected (“
” indicates
top side, “
” indicates bottom side).
Auto −reverse feature: After the cassette
player reaches the end of a tape side, it
automatically reverses and begins to play
the other side. This is true whether the
cassette was playing or fast forwarding.
(Reverse/Fast forward buttons)
Cassette Player
Push the fast forward button to fast for-
ward a cassette tape. “FF” will appear on
the display. Push the reverse button to
rewind a tape. “REW” will appear on the
display.
To stop the tape while it is fast forward-
ing, push the fast forward button or
“TAPE”; to stop the tape while it is re-
winding, push the reverse button or
“TAPE”.
Page 121 of 235

L/C 100_U143
2000 L/C 100 (OM60866U)
Rear air conditioning on
−off button
To turn the rear air conditioning on, press
the ”REAR” button. To turn the rear air
conditioning off, press the button again.
”AUTO” Button
For automatic operation of the rear air
conditioning, press the ”AUTO” button. An
indicator light will illuminate to show that
the automatic operation mode has been
selected.
In the automatic operation mode, the rear
air conditioning selects the most suitable
fan speed and air flow according to the
temperature.
You may use manual controls if you want
to select your own settings.
To turn off the automatic operation, press
the ”OFF” button.
Fan speed selector
Press the buttons to adjust the fan speed.
In automatic operation, you do not have
to adjust the fan speed unless you desire
another fan speed mode. Temperature selector
Move the lever to adjust the tempera-
ture—to the right to warm, to the left to
cool.
”OFF” button
Push the button to turn off the rear air
conditioning system.
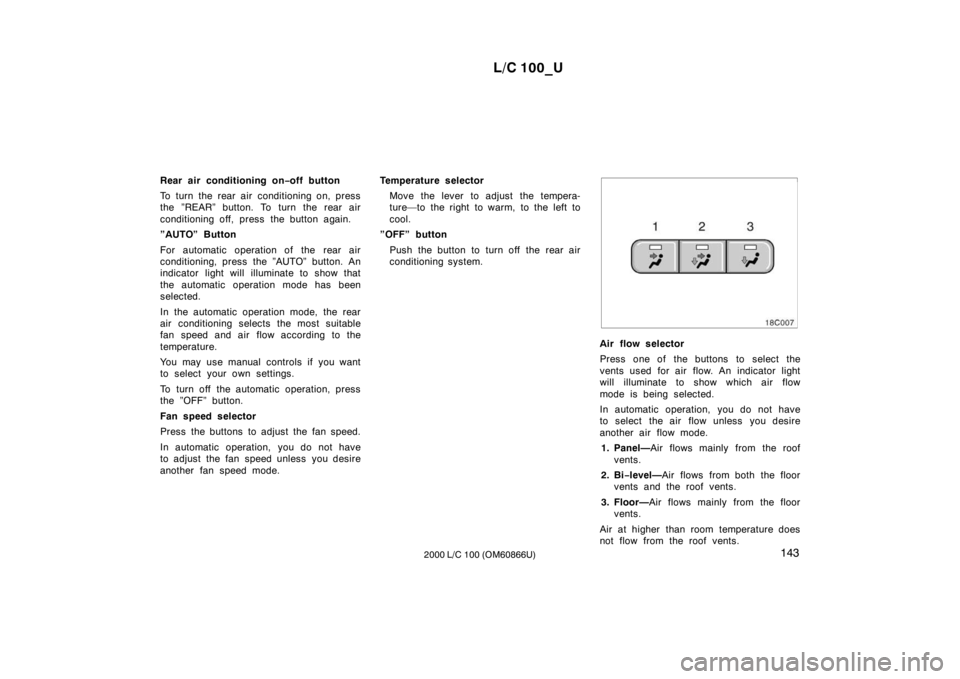
Air flow selector
Press one of the buttons to select the
vents used for air flow. An indicator light
will illuminate to show which air flow
mode is being selected.
In automatic operation, you do not have
to select the air flow unless you desire
another air flow mode.1. Panel— Air flows mainly from the roof
vents.
2. Bi −level— Air flows from both the floor
vents and the roof vents.
3. Floor— Air flows mainly from the floor
vents.
Air at higher than room temperature does
not flow from the roof vents.