Page 186 of 327

4-28
�Tie a red cloth to your vehicle to alert police that
you've been stopped by the snow.
�Put on extra clothing or wrap a blanket around you.
If you have no blankets or extra clothing, make body
insulators from newspapers, burlap bags, rags, floor
mats
-- anything you can wrap around yourself or
tuck under your clothing to keep warm.
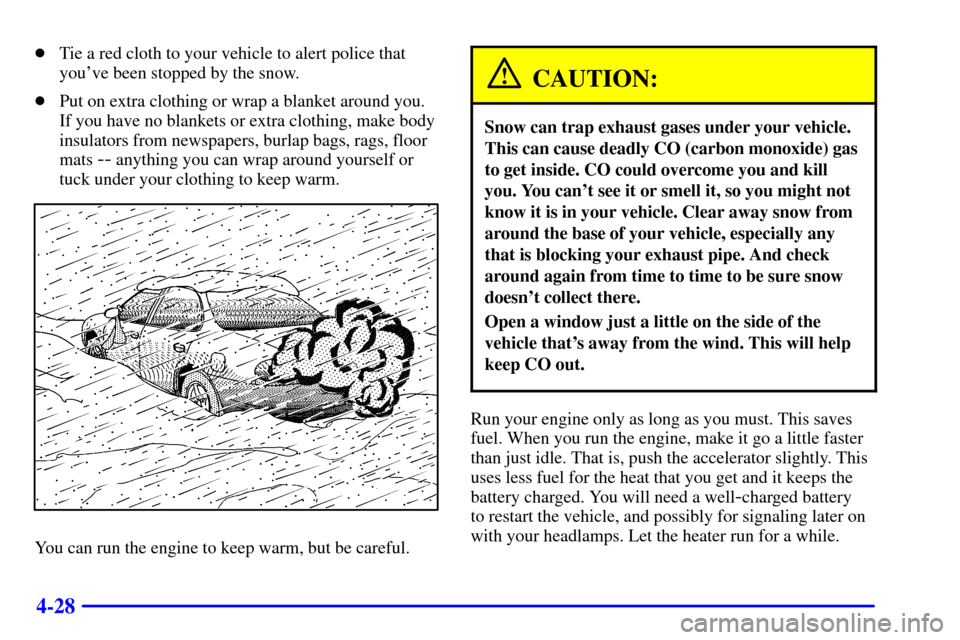
You can run the engine to keep warm, but be careful.
CAUTION:
Snow can trap exhaust gases under your vehicle.
This can cause deadly CO (carbon monoxide) gas
to get inside. CO could overcome you and kill
you. You can't see it or smell it, so you might not
know it is in your vehicle. Clear away snow from
around the base of your vehicle, especially any
that is blocking your exhaust pipe. And check
around again from time to time to be sure snow
doesn't collect there.
Open a window just a little on the side of the
vehicle that's away from the wind. This will help
keep CO out.
Run your engine only as long as you must. This saves
fuel. When you run the engine, make it go a little faster
than just idle. That is, push the accelerator slightly. This
uses less fuel for the heat that you get and it keeps the
battery charged. You will need a well
-charged battery
to restart the vehicle, and possibly for signaling later on
with your headlamps. Let the heater run for a while.
Page 258 of 327
6-30
Bulb Replacement
The following procedures tell you how to replace your
bulbs. For the type of bulb to use, see ªReplacement
Bulbsº in the Index. For any bulbs not listed in this
section, contact your service department.
Halogen Bulbs
CAUTION:
Halogen bulbs have pressurized gas inside and
can burst if you drop or scratch the bulb. You or
others could be injured. Be sure to read and
follow the instructions on the bulb package.
Headlamps
For the type of bulb, see ªReplacement Bulbsº in
the Index.
Page 259 of 327

6-31
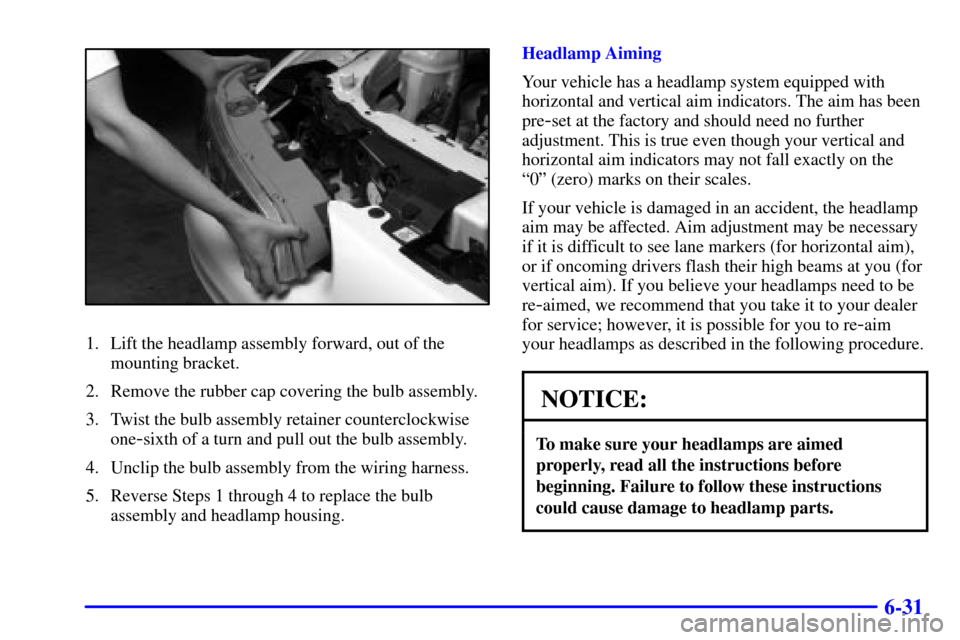
1. Lift the headlamp assembly forward, out of the
mounting bracket.
2. Remove the rubber cap covering the bulb assembly.
3. Twist the bulb assembly retainer counterclockwise
one
-sixth of a turn and pull out the bulb assembly.
4. Unclip the bulb assembly from the wiring harness.
5. Reverse Steps 1 through 4 to replace the bulb
assembly and headlamp housing.Headlamp Aiming
Your vehicle has a headlamp system equipped with
horizontal and vertical aim indicators. The aim has been
pre
-set at the factory and should need no further
adjustment. This is true even though your vertical and
horizontal aim indicators may not fall exactly on the
ª0º (zero) marks on their scales.
If your vehicle is damaged in an accident, the headlamp
aim may be affected. Aim adjustment may be necessary
if it is difficult to see lane markers (for horizontal aim),
or if oncoming drivers flash their high beams at you (for
vertical aim). If you believe your headlamps need to be
re
-aimed, we recommend that you take it to your dealer
for service; however, it is possible for you to re
-aim
your headlamps as described in the following procedure.
NOTICE:
To make sure your headlamps are aimed
properly, read all the instructions before
beginning. Failure to follow these instructions
could cause damage to headlamp parts.
Page 260 of 327
6-32
To check the aim, the vehicle should be properly
prepared as follows:
�The vehicle must have all four tires on a perfectly
level surface.
�If necessary, pads may be used on an uneven surface.
�The vehicle should not have any snow, ice or mud
attached to it.
�The vehicle should be fully assembled and all other
work stopped while headlamp aiming is being done.
�There should not be any cargo or loading of the
vehicle, except it should have a full tank of fuel and
one person or 160 lbs. (75 kg) on the driver's seat.
�Close all doors.
�Tires should be properly inflated.
�Rock the vehicle to stabilize the suspension.
Start with the horizontal aim. The adjustment screws can be
turned with E8 Torx�socket or a T15 Torx� screwdriver.
Once the horizontal aim is adjusted, then adjust the
vertical aim.
Page 261 of 327
6-33
Horizontal Aiming Vertical Aiming
1. Turn the horizontal aiming screw until the indicator
is lined up with zero.
2. Turn the vertical aiming screw until the level bubble
is lined up with zero.
Front Turn Signal and Parking Lamp
Bulb Replacement
1. Remove the headlamp assembly. Refer to the
removal procedure earlier in this section.
2. Twist the bulb assembly retainer and pull out
the bulb.
3. Unclip the bulb assembly from the wiring harness.
4. Reverse Steps 1 through 2 to replace the bulb
assembly. Be sure to properly align the bulb with the
locating feature in the assembly.
Center High-Mounted Stop Lamp
1. Open the trunk lid and locate the center
high
-mounted stop lamp on the inside of the lid.
2. Use a Phillips screwdriver to remove the
three screws.
3. Gently remove and replace the bulbs.
4. Reverse this procedure to reassemble the lamp.
For the type of bulb, seeªReplacement Bulbsºin
the Index.
Page 272 of 327

6-44
Each new wheel should have the same load-carrying
capacity, diameter, width, offset and be mounted the
same way as the one it replaces.
If you need to replace any of your wheels, wheel bolts
or wheel nuts, replace them only with new GM original
equipment parts. This way, you will be sure to have the
right wheel, wheel bolts and wheel nuts for your vehicle.
CAUTION:
Using the wrong replacement wheels, wheel bolts
or wheel nuts on your vehicle can be dangerous.
It could affect the braking and handling of your
vehicle, make your tires lose air and make you
lose control. You could have a collision in which
you or others could be injured. Always use
the correct wheel, wheel bolts and wheel nuts
for replacement.
NOTICE:
The wrong wheel can also cause problems with
bearing life, brake cooling, speedometer or
odometer calibration, headlamp aim, bumper
height, vehicle ground clearance and tire or tire
chain clearance to the body and chassis.
See ªChanging a Flat Tireº in the Index for
more information.
Used Replacement Wheels
CAUTION:
Putting a used wheel on your vehicle is
dangerous. You can't know how it's been used or
how far it's been driven. It could fail suddenly
and cause an accident. If you have to replace a
wheel, use a new GM original equipment wheel.
Page 288 of 327
6-60
Fuse Usage
Mini
-Fuses
23
- 32 Spare Fuse Holder
33 Rear Defog
34 Accessory Power Outlets,
Cigarette Lighter
35 Anti
-Lock Brakes
36 Anti
-Lock Brakes, Variable
Effort Steering
37 Air Conditioning Compressor,
Body Function Control Module
38 Automatic Transaxle
39 Powertrain Control Module
40 Anti
-Lock Brakes
41 Ignition System
42 Back
-Up Lamps, Brake Transaxle
Shift Interlock
43 Horn Fuse Usage
44 Powertrain Control Module
45 Parking Lamps
46 Climate Control System,
Air Conditioning
47 Canister Vent Valve, Exhaust
Oxygen Sensors
48 Fuel Pump, Injectors
49 Generator
50 Right Headlamp
51 Left Headlamp
52 Cooling Fan #2
53 HVAC Blower (Climate Control )
54 Not Used
55 Cooling Fan #2 Ground
56 Fuse Puller for Mini Fuses
57 Not Used
Page 289 of 327

6-61
Replacement Bulbs
Outside Lamps (Rear) Bulb
Back
-Up Lamps 921. . . . . . . . . . . . . . . . . . . . . . . . . .
Center High
-Mounted Stop Lamp 912. . . . . . . . . . . .
Turn Signal Lamps 3157. . . . . . . . . . . . . . . . . . . . . . .
Stop/Taillamps 3157. . . . . . . . . . . . . . . . . . . . . . . . . .
Outside Lamps (Front) Bulb
Halogen Headlamps
-Low Beam 9006. . . . . . . . . . . .
Halogen Headlamps
-High Beam 9005. . . . . . . . . . . .
Parking/Turn Signal Lamps 3157NA. . . . . . . . . . . . . .
Side Marker Lamps 194. . . . . . . . . . . . . . . . . . . . . . .
Fog Lamps 894X *. . . . . . . . . . . . . . . . . . . . . . . . . . .
Inside Lamps Bulb
Dome (Base) 561 *. . . . . . . . . . . . . . . . . . . . . . . . . . .
Dome (Uplevel) 212
-2 * . . . . . . . . . . . . . . . . . . . . . . .
Glovebox 194 *. . . . . . . . . . . . . . . . . . . . . . . . . . . . . .
Console Storage 73 *. . . . . . . . . . . . . . . . . . . . . . . . . .
* For service information on these bulbs, contact your
Oldsmobile dealer service department.
Capacities and Specifications
Engine Crankcase
2.4L L4 Engine 4.0 quarts (3.8 L). . . . . . . . . . . . . . .
3400 V6 Engine 4.5 quarts (4.3 L). . . . . . . . . . . . . . .
Cooling System
2.4L L4 Engine 10.0 quarts (9.5 L). . . . . . . . . . . . . .
3400 V6 Engine 12.5 quarts (11.8 L). . . . . . . . . . . . . .
Refrigerant, Air ConditioningSee refrigerant . . . . .
charge label under the hood.
Fuel Tank14.3 gallons (54.1 L) . . . . . . . . . . . . . . . . .
Tire Pressures, SizesSee Tire
-Loading . . . . . . . . . . .
Information label on the rear driver's
side passenger door.
Wheel Nut Torque100 lb
-ft (140 N´m) . . . . . . . . . .
All capacities are approximate. When adding, be sure to
fill to the appropriate level or as recommended in
this manual.
See ªRecommended Fluids and Lubricantsº in
the Index.