Page 6 of 240
Table of
ContentsSeats, restraints and supplemental air bag systems
Instruments and controls
Pre-driving checks and adjustments
Heater, air conditioner and audio systems
Starting and driving
In case of emergency
Appearance and care
Do-it-yourself
Maintenance
Technical and consumer information
Index
1
2
3
4
5
6
7
8
9
10
11
Page 8 of 240

1 Seats, restraints and supplemental air
bag systems
Seats ......................................................................1-2
Front seat adjustment ............................................1-2
Rear seat adjustment .............................................1-4
Head restraint adjustment ......................................1-5
Supplemental restraint system ...............................1-6
Precautions on supplemental restraint system ......1-6
Supplemental air bag warning labels ...................1-16
Supplemental air bag warning light......................1-16
Seat belts .............................................................1-18
Precautions on seat belt usage ...........................1-18
Child safety...........................................................1-20Pregnant women ..................................................1-20
Injured persons ....................................................1-21
Three-point type seat belt with retractor ..............1-21
Seat belt extenders ..............................................1-24
Seat belt maintenance .........................................1-24
Child restraints .....................................................1-25
Precautions on child restraints .............................1-25
Installation on rear seat center or outboard
positions ...............................................................1-26
Top tether strap child restraint .............................1-32
Installation on front passenger seat .....................1-33
ZX
Page 9 of 240
WARNING
cDo not ride in a moving vehicle when
the seatback is reclined. This can be
dangerous. The shoulder belt will
not be against your body. In an acci-
dent, you could be thrown into it and
receive neck or other serious inju-
ries. You could also slide under the
lap belt and receive serious internal
injuries.cFor most effective protection when
the vehicle is in motion, the seat
should be upright. Always sit well
back in the seat and adjust the seat
properly. See ``Precautions on seat
belt usage'' later in this section.
FRONT SEAT ADJUSTMENT
WARNING
cDo not adjust the driver's seat while
driving so full attention may be given
to vehicle operation. The seat may
move suddenly and could cause
loss of control of the vehicle.
cAfter adjustment, gently rock in the
seat to make sure it is securely
locked.
ARS1131
SEATS
1-2Seats, restraints and supplemental air bag systems
ZX
Page 11 of 240

REAR SEAT ADJUSTMENT
Interior trunk access
(if so equipped)
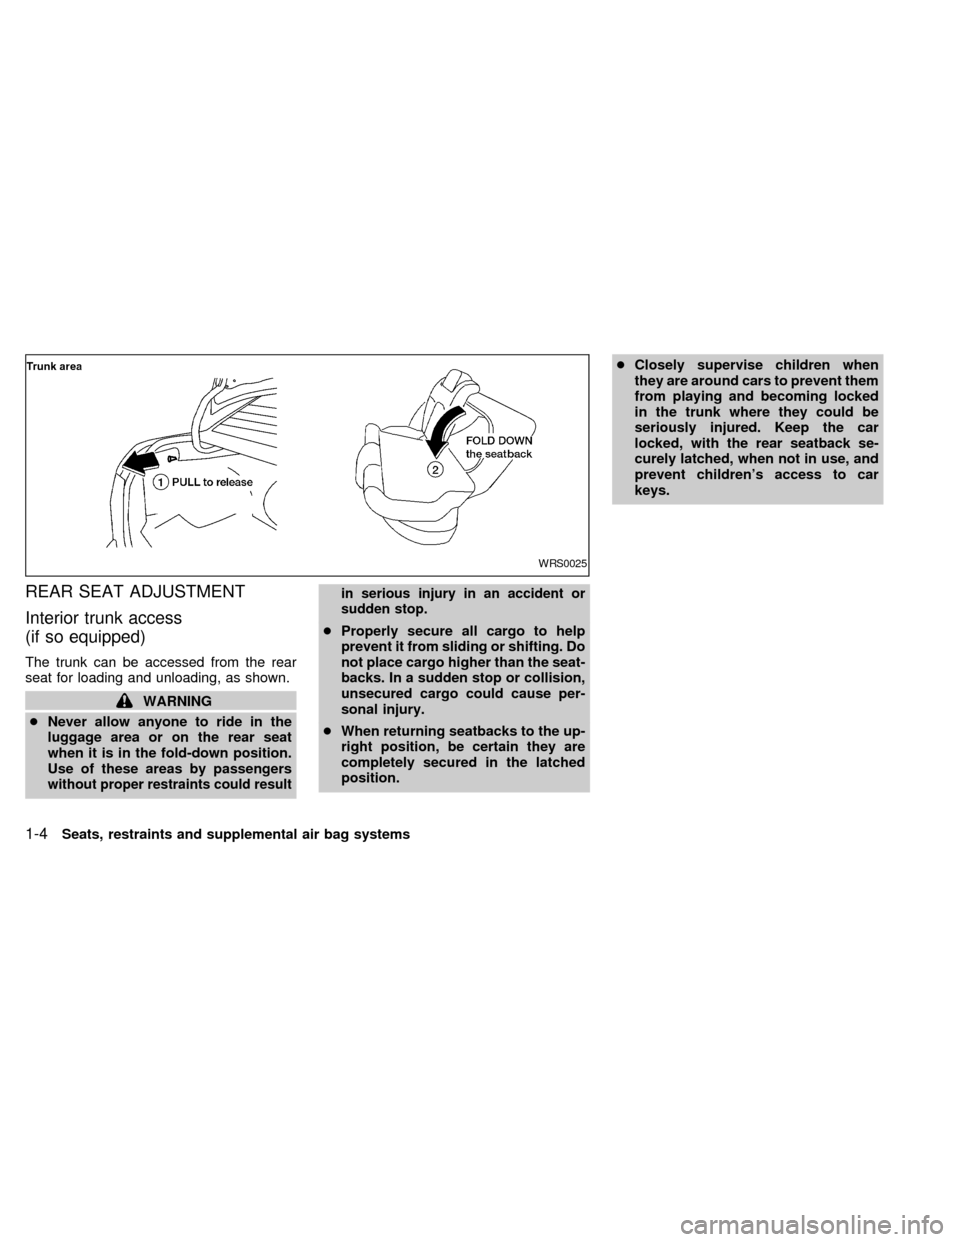
The trunk can be accessed from the rear
seat for loading and unloading, as shown.
WARNING
cNever allow anyone to ride in the
luggage area or on the rear seat
when it is in the fold-down position.
Use of these areas by passengers
without proper restraints could resultin serious injury in an accident or
sudden stop.
cProperly secure all cargo to help
prevent it from sliding or shifting. Do
not place cargo higher than the seat-
backs. In a sudden stop or collision,
unsecured cargo could cause per-
sonal injury.
cWhen returning seatbacks to the up-
right position, be certain they are
completely secured in the latched
position.cClosely supervise children when
they are around cars to prevent them
from playing and becoming locked
in the trunk where they could be
seriously injured. Keep the car
locked, with the rear seatback se-
curely latched, when not in use, and
prevent children's access to car
keys.
WRS0025
1-4Seats, restraints and supplemental air bag systems
ZX
Page 31 of 240

Shoulder belt height adjustment
(For front seats)
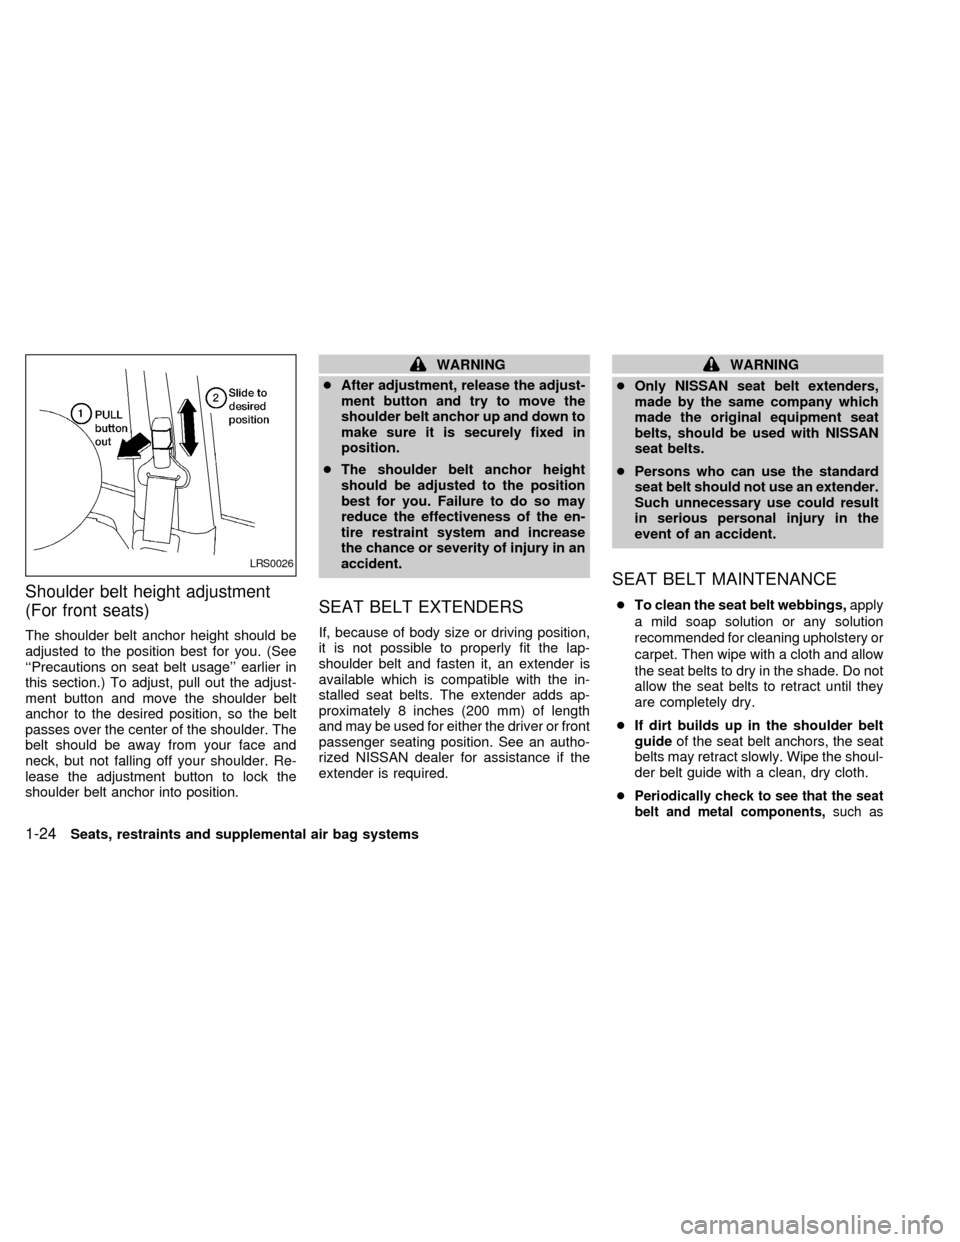
The shoulder belt anchor height should be
adjusted to the position best for you. (See
``Precautions on seat belt usage'' earlier in
this section.) To adjust, pull out the adjust-
ment button and move the shoulder belt
anchor to the desired position, so the belt
passes over the center of the shoulder. The
belt should be away from your face and
neck, but not falling off your shoulder. Re-
lease the adjustment button to lock the
shoulder belt anchor into position.
WARNING
cAfter adjustment, release the adjust-
ment button and try to move the
shoulder belt anchor up and down to
make sure it is securely fixed in
position.
cThe shoulder belt anchor height
should be adjusted to the position
best for you. Failure to do so may
reduce the effectiveness of the en-
tire restraint system and increase
the chance or severity of injury in an
accident.
SEAT BELT EXTENDERS
If, because of body size or driving position,
it is not possible to properly fit the lap-
shoulder belt and fasten it, an extender is
available which is compatible with the in-
stalled seat belts. The extender adds ap-
proximately 8 inches (200 mm) of length
and may be used for either the driver or front
passenger seating position. See an autho-
rized NISSAN dealer for assistance if the
extender is required.
WARNING
cOnly NISSAN seat belt extenders,
made by the same company which
made the original equipment seat
belts, should be used with NISSAN
seat belts.
cPersons who can use the standard
seat belt should not use an extender.
Such unnecessary use could result
in serious personal injury in the
event of an accident.
SEAT BELT MAINTENANCE
cTo clean the seat belt webbings,apply
a mild soap solution or any solution
recommended for cleaning upholstery or
carpet. Then wipe with a cloth and allow
the seat belts to dry in the shade. Do not
allow the seat belts to retract until they
are completely dry.
cIf dirt builds up in the shoulder belt
guideof the seat belt anchors, the seat
belts may retract slowly. Wipe the shoul-
der belt guide with a clean, dry cloth.
c
Periodically check to see that the seat
belt and metal components,such as
LRS0026
1-24Seats, restraints and supplemental air bag systems
ZX
Page 76 of 240

WARNING
cAlways have the doors locked while
driving. Along with the use of seat
belts, this provides greater safety in
the event of an accident by helping
to prevent persons from being
thrown from the vehicle. This also
helps keep children and others from
unintentionally opening the doors,
and will help keep out intruders.
cBefore opening any door, always
look for and avoid oncoming traffic.
c
Do not leave children unattended in-
side the vehicle. They could unknow-
ingly activate switches and controls.
Unattended children could become
involved in serious accidents.
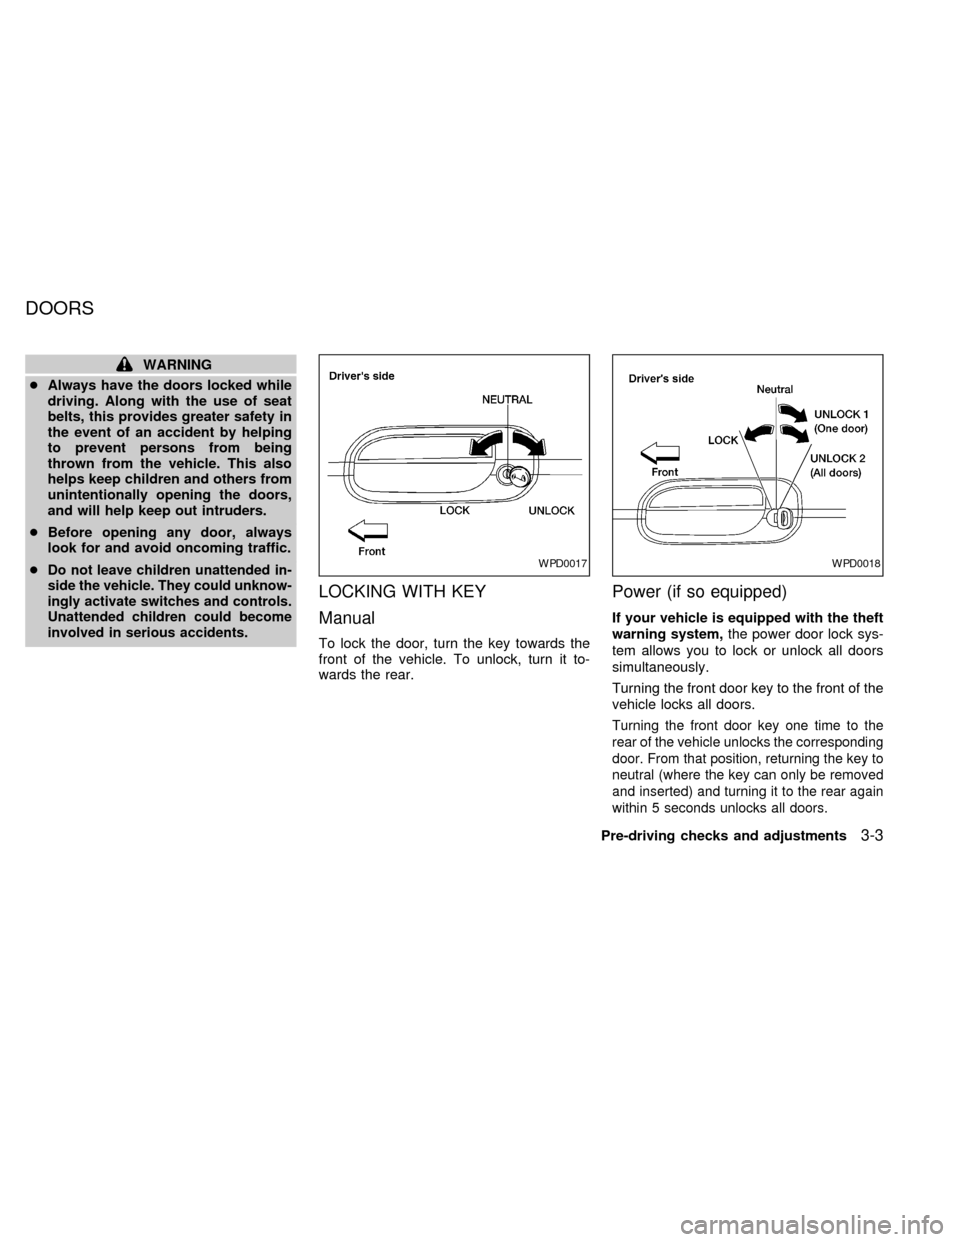
LOCKING WITH KEY
Manual
To lock the door, turn the key towards the
front of the vehicle. To unlock, turn it to-
wards the rear.
Power (if so equipped)
If your vehicle is equipped with the theft
warning system,the power door lock sys-
tem allows you to lock or unlock all doors
simultaneously.
Turning the front door key to the front of the
vehicle locks all doors.
Turning the front door key one time to the
rear of the vehicle unlocks the corresponding
door. From that position, returning the key to
neutral (where the key can only be removed
and inserted) and turning it to the rear again
within 5 seconds unlocks all doors.
WPD0017WPD0018
DOORS
Pre-driving checks and adjustments3-3
ZX
Page 83 of 240
OPENER OPERATION
WARNING
cDo not drive with the trunk lid open.
This could allow dangerous exhaust
gases to be drawn into the vehicle.
See ``Exhaust gas'' in the ``Starting
and driving'' section of this manual.
cClosely supervise children when
they are around cars to prevent them
from playing and becoming locked
in the trunk where they could be
seriously injured. Keep the carlocked, with the trunk closed, when
not in use, and prevent children's
access to car keys.
Type A
The trunk lid opener lever is located on the
outside of the driver's seat. To open the
trunk lid, pull up the opener lever. To close,
push the trunk lid down securely.Type B
The trunk lid release is located on the
instrument panel. To open the trunk, push
the release in the direction indicated in the
illustration. To close the trunk lid, push it
down securely.
WPD0026
TRUNK LID
3-10Pre-driving checks and adjustments
ZX
Page 187 of 240
Adjusting the headlight aim
Before performing aiming adjustment, make
sure of the following:
a. Use an aiming wall screen.
b. Keep all of the tires inflated to the correct
pressure.
c. Place the vehicle and screen on level
ground.
d. See that the vehicle is unloaded (except
for full levels of coolant, engine oil and
fuel, and that the spare tire, jack, and
tools are stored). Have the driver or anequivalent weight placed in the driver's
seat.
1. Open the hood. Turn headlamp low
beam on.
2. Adjust the vertical aim by turning the
adjustment screw.
cCover the opposite lamp and ensure the
fog lamps (if so equipped) are turned off.
cAdjust beam pattern until cutoff line is
positioned at the same height off ground
as bulb center (on H-line).
LDI0027
8-30Do-it-yourself
ZX