Page 67 of 292
2. Route the seat belt tongue through the
child restraint and insert it into the buckle
until you hear and feel the latch engage.
Be sure to follow the child restraint manu-
facturer's instructions for belt routing.3. Pull on the shoulder belt until all of the
belt is fully extended. At this time, the
seat belt retractor is in the automatic
locking mode (child restraint mode). It
reverts back to emergency locking mode
when the seat belt is fully retracted.4. Allow the seat belt to retract. Pull up on
the shoulder belt to remove any slack in
the belt.
ARS1177ARS1178ARS1179
1-60Seats, restraints and supplemental air bag systems
ZX
Page 68 of 292

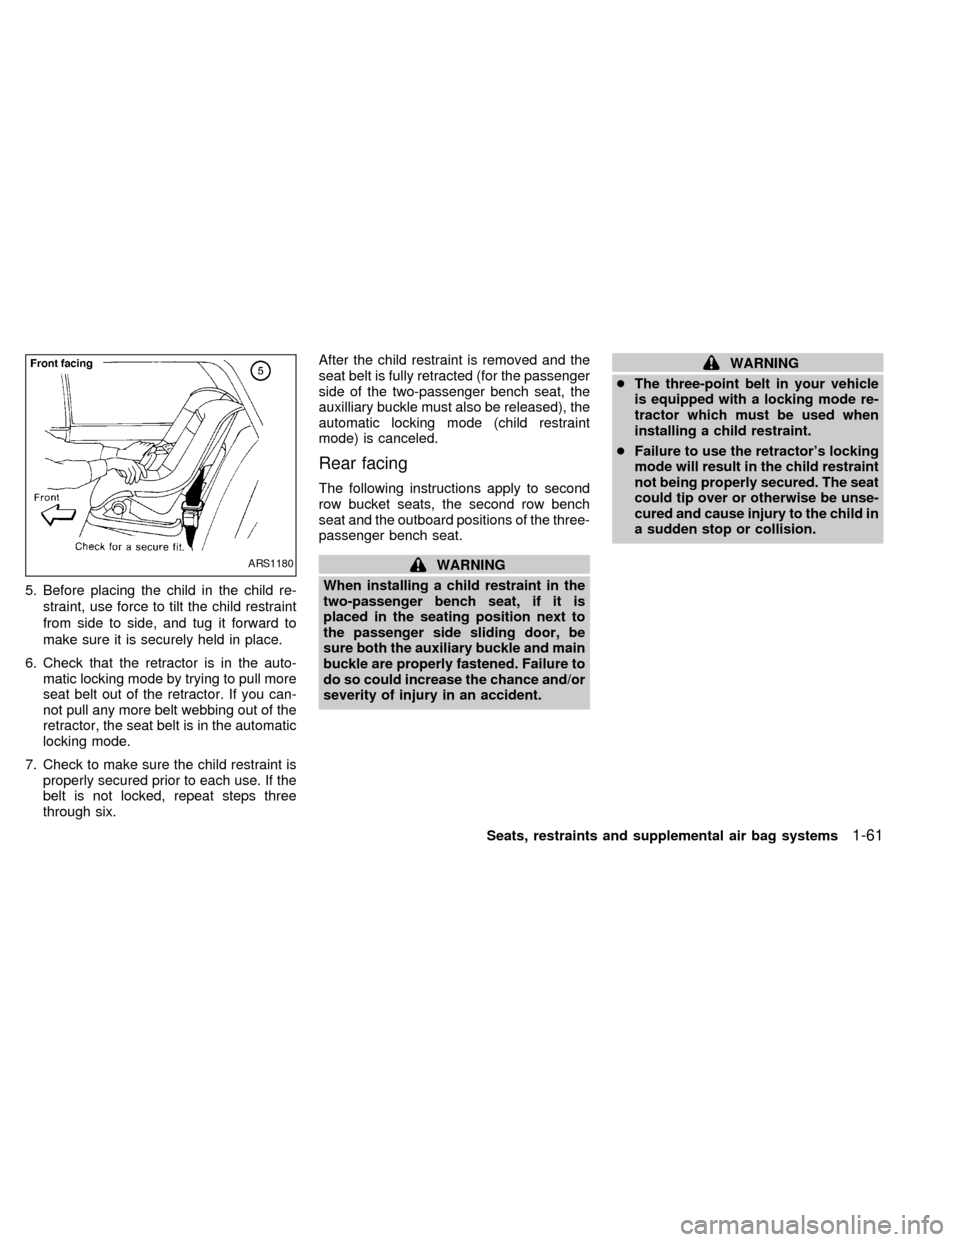
5. Before placing the child in the child re-
straint, use force to tilt the child restraint
from side to side, and tug it forward to
make sure it is securely held in place.
6. Check that the retractor is in the auto-
matic locking mode by trying to pull more
seat belt out of the retractor. If you can-
not pull any more belt webbing out of the
retractor, the seat belt is in the automatic
locking mode.
7. Check to make sure the child restraint is
properly secured prior to each use. If the
belt is not locked, repeat steps three
through six.After the child restraint is removed and the
seat belt is fully retracted (for the passenger
side of the two-passenger bench seat, the
auxilliary buckle must also be released), the
automatic locking mode (child restraint
mode) is canceled.
Rear facing
The following instructions apply to second
row bucket seats, the second row bench
seat and the outboard positions of the three-
passenger bench seat.
WARNING
When installing a child restraint in the
two-passenger bench seat, if it is
placed in the seating position next to
the passenger side sliding door, be
sure both the auxiliary buckle and main
buckle are properly fastened. Failure to
do so could increase the chance and/or
severity of injury in an accident.
WARNING
cThe three-point belt in your vehicle
is equipped with a locking mode re-
tractor which must be used when
installing a child restraint.
cFailure to use the retractor's locking
mode will result in the child restraint
not being properly secured. The seat
could tip over or otherwise be unse-
cured and cause injury to the child in
a sudden stop or collision.
ARS1180
Seats, restraints and supplemental air bag systems1-61
ZX
Page 69 of 292
When you install a child restraint in a rear
outboard seat, follow these steps:
1. Position the child restraint on the seat.
Always follow the restraint manufactur-
er's instructions.2. Route the seat belt tongue through the
child restraint and insert it into the buckle
until you hear and feel the latch engage.
Be sure to follow the child restraint manu-
facturer's instructions for belt routing.3. Pull on the shoulder belt until all of the
belt is fully extended. At this time, the
seat belt retractor is in the automatic
locking mode (child restraint mode). It
reverts back to emergency locking mode
when the seat belt is fully retracted.
ARS1181ARS1182ARS1183
1-62Seats, restraints and supplemental air bag systems
ZX
Page 70 of 292
4. Allow the seat belt to retract. Pull up on
the shoulder belt to remove any slack in
the belt.5. Before placing the child in the child re-
straint, use force to tilt the child restraint
from side to side, and tug it forward to
make sure it is securely held in place.
6. Check that the retractor is in the auto-
matic locking mode by trying to pull more
seat belt out of the retractor. If you can-
not pull any more belt webbing out of the
retractor, the seat belt is in the automatic
locking mode.
7. Check to make sure the child restraint is
properly secured prior to each use. If the
belt is not locked, repeat steps three
through six.After the child restraint is removed and the
seat belt is fully retracted (for the passenger
side of the two-passenger bench seat, the
auxilliary buckle must also be released), the
automatic locking mode (child restraint
mode) is canceled.
ARS1184ARS1185
Seats, restraints and supplemental air bag systems1-63
ZX
Page 71 of 292

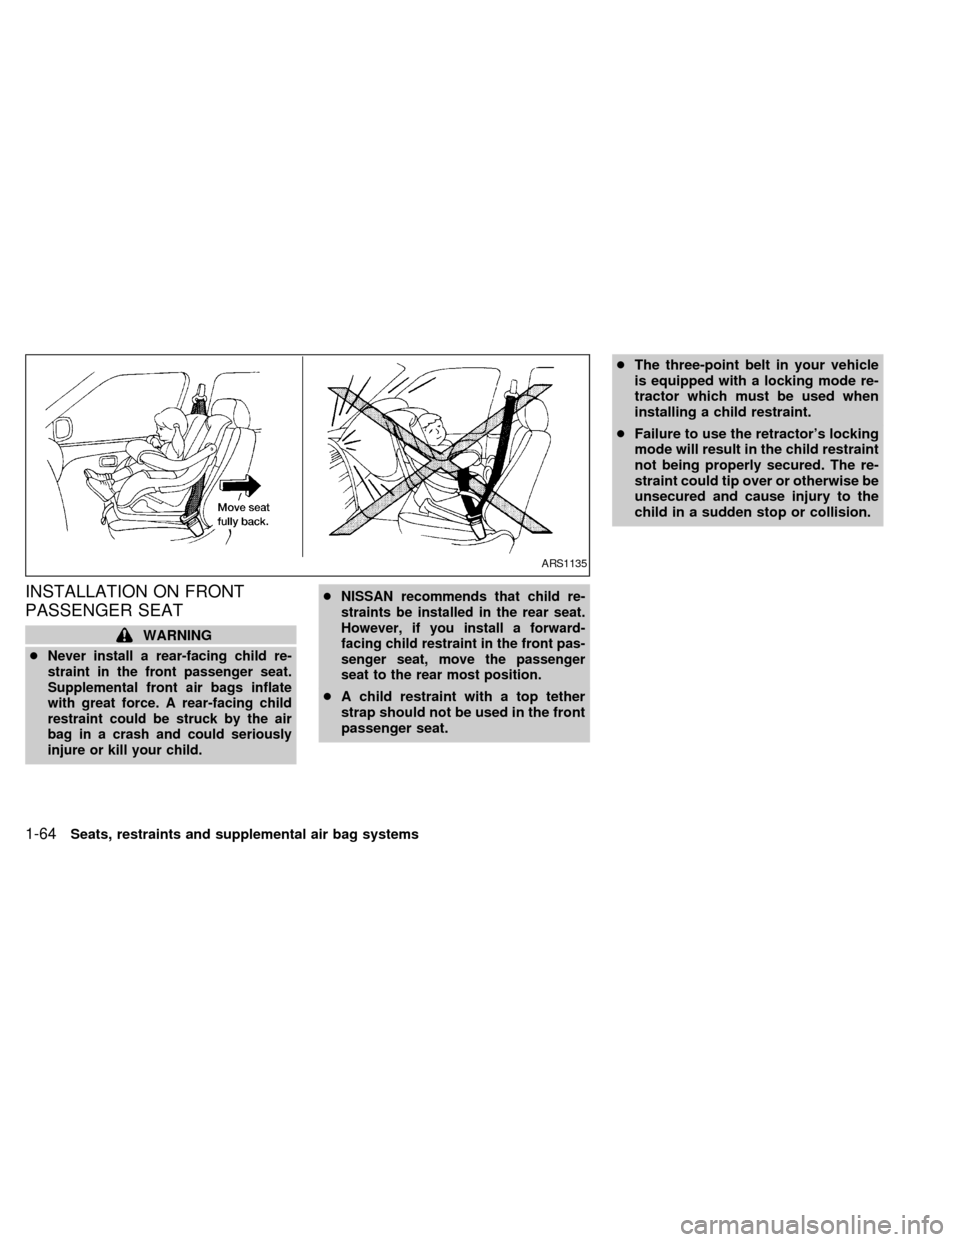
INSTALLATION ON FRONT
PASSENGER SEAT
WARNING
c
Never install a rear-facing child re-
straint in the front passenger seat.
Supplemental front air bags inflate
with great force. A rear-facing child
restraint could be struck by the air
bag in a crash and could seriously
injure or kill your child.cNISSAN recommends that child re-
straints be installed in the rear seat.
However, if you install a forward-
facing child restraint in the front pas-
senger seat, move the passenger
seat to the rear most position.
cA child restraint with a top tether
strap should not be used in the front
passenger seat.cThe three-point belt in your vehicle
is equipped with a locking mode re-
tractor which must be used when
installing a child restraint.
cFailure to use the retractor's locking
mode will result in the child restraint
not being properly secured. The re-
straint could tip over or otherwise be
unsecured and cause injury to the
child in a sudden stop or collision.
ARS1135
1-64Seats, restraints and supplemental air bag systems
ZX
Page 72 of 292
If you must install a child restraint in the front
seat, follow these steps:
1. Position the child restraint on the front
passenger seat.It should be placed in
a forward-facing direction only.Move
the seat to the rearmost position. Always
follow the child restraint manufacturer's
instructions.Child restraints for infants
must be used in the rear-facing direc-
tion and therefore must not be used in
the front seat.2. Route the seat belt tongue through the
child restraint and insert it into the buckle
until you hear and feel the latch engage.
Be sure to follow the child restraint manu-
facturer's instructions for belt routing.3. Pull on the shoulder belt until all of the
belt is fully extended. At this time, the
seat belt retractor is in the automatic
locking mode (child restraint mode). It
reverts back to emergency locking mode
when the seat belt is fully retracted.
ARS1163ARS1164ARS1165
Seats, restraints and supplemental air bag systems1-65
ZX
Page 73 of 292
4.Allow the seat belt to retract. Pull up on
the belt to remove any slack in the belt.5. Before placing the child in the child re-
straint, use force to tilt the child restraint
from side to side, and tug it forward to
make sure it is securely held in place.
6.
Check that the retractor is in the automatic
locking mode by trying to pull more seat
belt out of the retractor. If you cannot pull
any more belt webbing out of the retractor,
the seat belt is in the automatic locking
mode.
7. Check to make sure the child restraint is
properly secured prior to each use. If the
lap belt is not locked, repeat steps three
through six.
After the child restraint is removed and the
seat belt is fully retracted, the automatic
locking mode (child restraint mode) is can-
celed.
ARS1166ARS1167
1-66Seats, restraints and supplemental air bag systems
ZX
Page 74 of 292

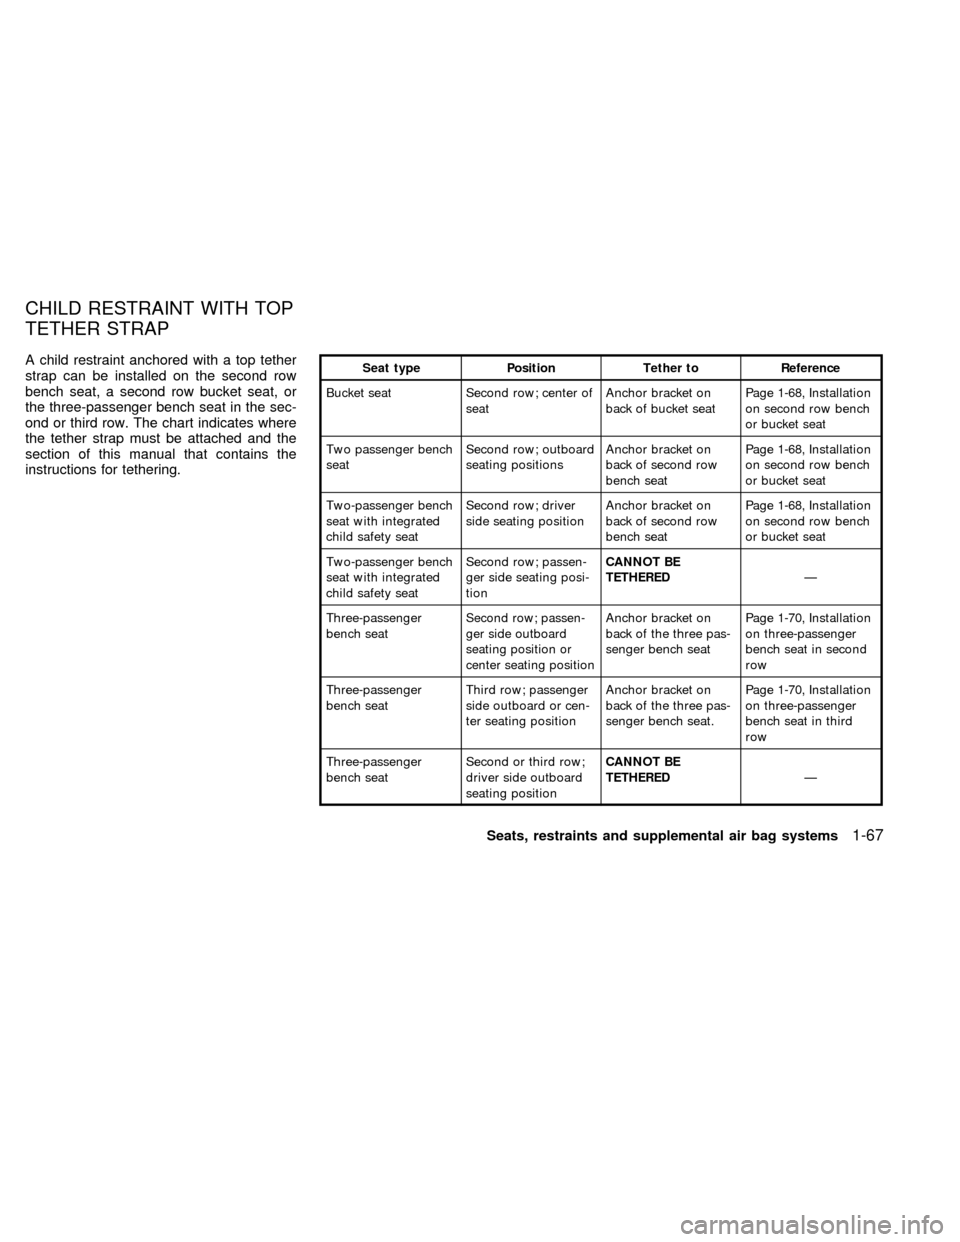
A child restraint anchored with a top tether
strap can be installed on the second row
bench seat, a second row bucket seat, or
the three-passenger bench seat in the sec-
ond or third row. The chart indicates where
the tether strap must be attached and the
section of this manual that contains the
instructions for tethering.Seat type Position Tether to Reference
Bucket seat Second row; center of
seatAnchor bracket on
back of bucket seatPage 1-68, Installation
on second row bench
or bucket seat
Two passenger bench
seatSecond row; outboard
seating positionsAnchor bracket on
back of second row
bench seatPage 1-68, Installation
on second row bench
or bucket seat
Two-passenger bench
seat with integrated
child safety seatSecond row; driver
side seating positionAnchor bracket on
back of second row
bench seatPage 1-68, Installation
on second row bench
or bucket seat
Two-passenger bench
seat with integrated
child safety seatSecond row; passen-
ger side seating posi-
tionCANNOT BE
TETHEREDÐ
Three-passenger
bench seat
Second row; passen-
ger side outboard
seating position or
center seating positionAnchor bracket on
back of the three pas-
senger bench seatPage 1-70, Installation
on three-passenger
bench seat in second
row
Three-passenger
bench seatThird row; passenger
side outboard or cen-
ter seating positionAnchor bracket on
back of the three pas-
senger bench seat.Page 1-70, Installation
on three-passenger
bench seat in third
row
Three-passenger
bench seatSecond or third row;
driver side outboard
seating positionCANNOT BE
TETHEREDÐ
CHILD RESTRAINT WITH TOP
TETHER STRAP
Seats, restraints and supplemental air bag systems1-67
ZX