2000 NISSAN QUEST reset
[x] Cancel search: resetPage 175 of 292

CD, or the CD changer. The radio will go
into DUAL PLAY mode and the rear pas-
sengers can use the rear controls to change
media.
VOLUME button
The VOLUME button allows the rear pas-
sengers to adjust the headphone volume
level.
MEDIA button
The MEDIA button allows the rear passen-
ger to change between AM, FM1, FM2,
TAPE, CD, & CD DJ.
MEM button
In AM, FM1, or FM2 mode the MEM button
allows the rear passenger to successively
access memory preset station 1 through 6.
In CD DJ mode the MEM button allows the
rear passengers to select other compact
discs in the CD changer.
SEEK button
In AM, FM1, or FM2 mode the SEEKandbutton allows the rear pas-
sengers to find the next radio station up or
down the station band frequency.In TAPE mode the SEEK
and
button allows the rear passengers use Au-
tomatic Music Search (AMS) to find the next
or previous song on the cassette.
In CD mode the SEEK
andbutton
allows the rear passengers to find the next
or previous selection on the CD.
In CD DJ mode the SEEK
andbutton allows the rear passengers to find
the next or previous selection on the CD.
For vehicles equipped with the FM-AM radio
with cassette player, when the rear seat
controls are on, push the SPKRS ON-OFF
button to turn all speakers off. Push again to
turn all speakers on.
For vehicles equipped with the premium
FM-AM radio with cassette player, compact
disc player and 6 disc CD player, when the
rear seat controls are on, push the SPKRS
ON-OFF button to turn the rear speakers
off. Push again to turn the rear speakers on.
If the rear audio system was on when the
ignition was turned OFF, the audio system
``remembers'' and the rear system is still on
when the engine is started again. The sys-
tem also ``remembers'' if the speakers were
ON or OFF. Therefore, the speakers mayhave to be turned on again by pressing the
SPKRS ON-OFF button or turning the rear
audio controls off.
4-34Heater, air conditioner and audio systems
ZX
Page 185 of 292

Accelerator downshift--
In D position--
For rapid passing or hill climbing, fully depress
the accelerator pedal to the floor. This shifts the
transmission down into third gear, second gear
or first gear, depending on the vehicle speed.
Fail-safe
When the Fail-safe operation occurs, the
next time the key is turned to the ON
position, the O/D OFF light blinks for ap-
proximately 8 seconds after coming on for 2
seconds. While the vehicle can be driven
under these circumstances, please note
that the transmission will remain in 3rd gear.
NOTE: If the vehicle is driven under extreme
conditions, such as excessive wheel spinning
and subsequent hard braking, the Fail-safe
system may be activated. This will occur even
if all electrical circuits are functioning properly.
In this case, turn the ignition key OFF and wait
for 3 seconds. Then turn the key back to the
ON position. The vehicle should return to its
normal operating condition. If it does not re-
turn to its normal operating condition, have an
authorized NISSAN dealer check the trans-
mission and repair, if necessary.
Overdrive switch
Each time your vehicle is started, the trans-
mission is automatically ``reset'' to overdrive
ON.
ON: For normal driving the overdrive
switch is engaged. The transmission
is upshifted into overdrive as the
vehicle speed increases.
The overdrive does not engage until the
engine has reached operating tempera-
ture.
OFF: For driving up and down long slopes
where engine braking is necessary,push the overdrive switch once. The
O/D OFF indicator light illuminates at
this time.
When cruising at a low speed or climbing a
gentle slope, you may feel uncomfortable
shift shocks as the transmission shifts be-
tween 3rd gear and overdrive repeatedly. In
this case, press the overdrive switch.
When driving conditions change, press the
overdrive switch to turn the overdrive on.
The O/D OFF indicator light goes out.
Remember not to drive at high speeds for
extended periods of time with the O/D OFF
light illuminated. This reduces the fuel
economy.
ASD0561
5-8Starting and driving
ZX
Page 187 of 292

The cruise control allows driving at speeds
between 30 and 90 MPH (48 and 144 km/h)
without keeping your foot on the accelerator
pedal.
To turn the cruise control on,push the
CRUISE main switch. The indicator light on
the switch comes on.
To set at cruising speed,accelerate your
vehicle to the desired speed, push the
COAST/SET switch and release it. The
CRUISE light in the instrument cluster
comes on. Take your foot off the accelerator
pedal. Your vehicle maintains the set
speed.cTo pass another vehicle,depress the
accelerator pedal. When you release the
pedal, the vehicle returns to the previ-
ously set speed.
cThe vehicle may not maintain the set
speed when going up or down steep hills.
If this happens, drive without the cruise
control.
To cancel the preset speed,follow any of
these three methods.
a) Push the CANCEL button; the CRUISE
light in the instrument panel goes out.b) Tap the brake pedal; the CRUISE light
goes out.
c)
Push the cruise control OFF switch. Both
the main switch indicator and CRUISE
lights go out.
cIf you depress the brake pedal while
pushing the RES/ACCEL switch, the
RES/ ACCEL function is cancelled.
In order for the RES/ACCEL switch to
operate, the COAST/SET must be used
to re-engage the system.
cThe cruise control automatically cancels
if the vehicle slows down more than 5
MPH (8 km/h) below the set speed.
WSD0003
5-10Starting and driving
ZX
Page 188 of 292

cMove the selector lever to N (Neutral).
The CRUISE light goes out.
To reset at a faster cruising speed,use
one of the following three methods:
a) Depress the accelerator pedal. When the
vehicle attains the desired speed, push
and release the COAST/SET switch.
b) Push and hold the RES/ACCEL switch.
When the vehicle attains the speed you
desire, release the switch.
c) Push and release the RES/ACCEL
switch. Each time you do this, the set
speed increases by about 1 MPH (1.6
km/h).
To reset at a slower cruising speed,use
one of the following three methods.
a) Tap the brake pedal. When the vehicle
attains the desired speed, push the
COAST/SET switch and release it.
b) Push and hold the COAST/SET switch.
Release the switch when the vehicle
slows down to the desired speed.
c) Push and release the COAST/SET
switch. Each time you do this, the setspeed decreases by about 1 MPH (1.6
km/h).
To resume the preset speed,push and
release the RES/ACCEL switch. The ve-
hicle resumes the last set cruising speed
when the vehicle speed is over 30 MPH (48
km/h).
Precautions
cIf the cruise control system malfunctions,
it cancels automatically. The CRUISE
light in the instrument panel then blinks to
warn the driver.
cWhen the CRUISE light blinks, turn the
CRUISE main switch OFF and have the
system checked by an authorized NIS-
SAN dealer.
cThe CRUISE light in the instrument panel
may blink when the CRUISE main switch
is turned ON while pushing either the
RES/ACCEL, COAST/SET, or the CAN-
CEL switch (located on the steering
wheel). To properly set the cruise control
system, perform the steps in the order
indicated.During the first 1,000 miles (1,600 km),
follow these recommendations for the future
reliability and fuel economy of your new
vehicle. Failure to follow these recommen-
dations may result in vehicle damage or
shortened engine life.
cDo not drive over the legal speed limit
and do not run the engine over 4,000
RPM. Avoid driving for long periods at
constant speed, either fast or slow.
cDo not accelerate at full throttle in any
gear.
cAvoid quick starts.
cAvoid hard braking as much as possible.
cDo not tow a trailer for the first 500 miles
(800 km).
BREAK-IN SCHEDULE
Starting and driving5-11
ZX
Page 206 of 292

3. If engine overheating is caused by climb-
ing a long hill on a hot day, run the engine
at a fast idle (approximately 1,500 RPM)
until the temperature gauge indication
returns to normal.
4. Get out of the vehicle. Look and listen for
steam or coolant escaping from the ra-
diator before opening the hood. Wait until
no steam or coolant can be seen before
proceeding.
5. Open the hood.
WARNING
If steam or water is coming from the
engine, stand clear to prevent getting
burned.
6. Visually check if the cooling fan is run-
ning. The radiator hoses and radiator
should not leak water. If coolant is leak-
ing or the cooling fan does not run, stop
the engine.
WARNING
Be careful not to allow your hands, hair
or clothing to come into contact with,
or get caught in, engine belts or the
engine cooling fan. The engine cooling
fan can start at any time when the
coolant temperature is high.
7. After the engine cools down completely,
check the coolant level in the reservoir
tank with the engine running. Add coolant
to the reservoir tank, if necessary. Have
your vehicle repaired at an authorized
NISSAN dealer.
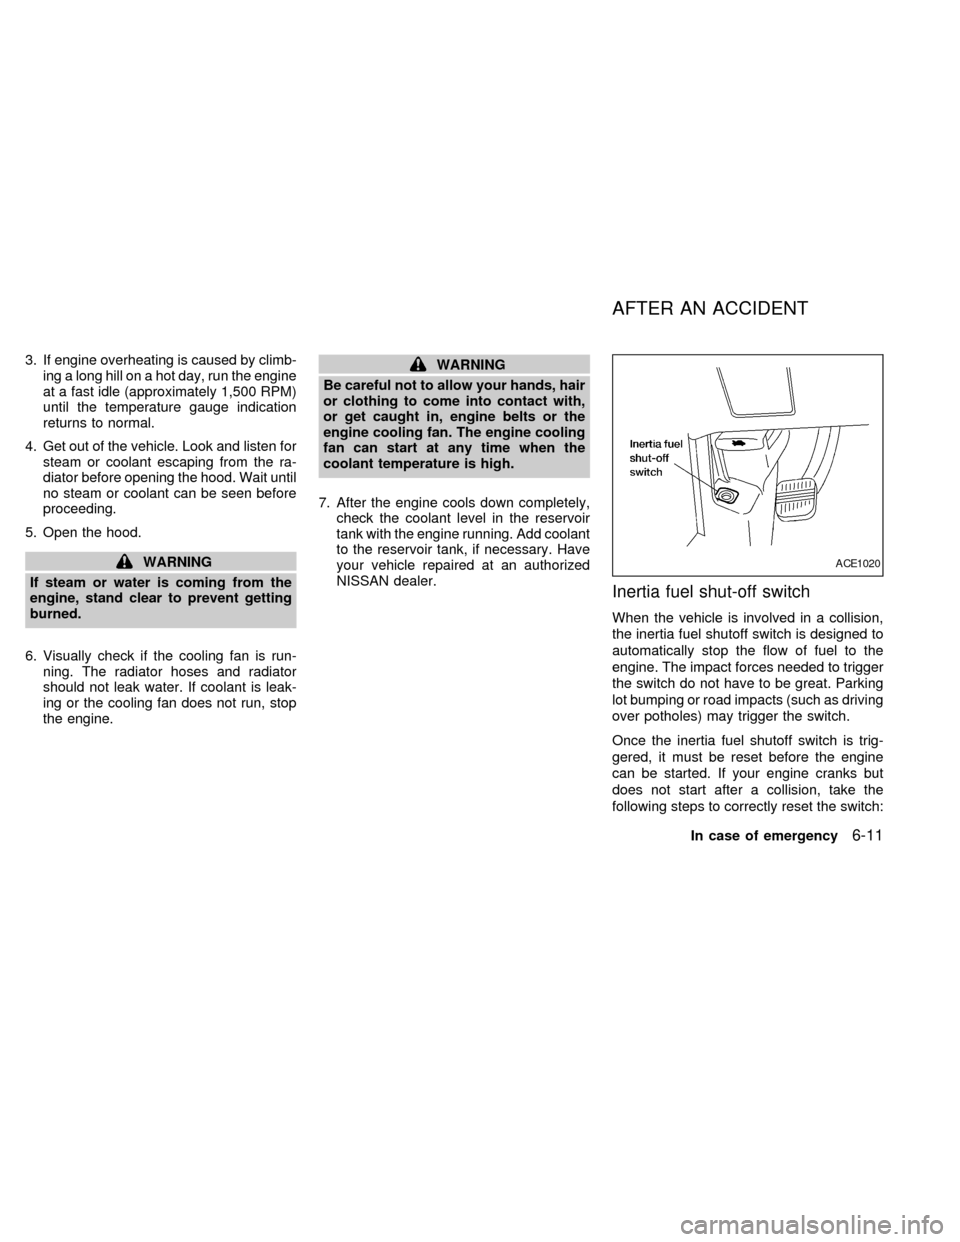
Inertia fuel shut-off switch
When the vehicle is involved in a collision,
the inertia fuel shutoff switch is designed to
automatically stop the flow of fuel to the
engine. The impact forces needed to trigger
the switch do not have to be great. Parking
lot bumping or road impacts (such as driving
over potholes) may trigger the switch.
Once the inertia fuel shutoff switch is trig-
gered, it must be reset before the engine
can be started. If your engine cranks but
does not start after a collision, take the
following steps to correctly reset the switch:
ACE1020
AFTER AN ACCIDENT
In case of emergency6-11
ZX
Page 207 of 292

1. Turn the key in the ignition to OFF.
2. Check under the vehicle for leaking fuel.
3. If you do not see or smell fuel, push down
the red reset button on the inertia fuel
shut-off switch.
4. Turn the ignition key ON for a few sec-
onds, then turn it OFF.
5. Check under the vehicle again for leaking
fuel. If you see or smell fuel, do not start
your vehicle again. If no fuel is detected,
try to start your vehicle again.
WARNING
If you see or smell fuel, do not reset the
switch or try to start your vehicle. You
could injure yourself or others. Have all
the passengers get out of the vehicle
and call the local fire department or a
towing service.When towing your vehicle, U.S. States, Ca-
nadian Provinces and local regulations for
towing must be followed. Incorrect towing
equipment could damage your vehicle.
Towing instructions are available from an
authorized NISSAN dealer. Local service
operators are generally familiar with the
applicable laws and procedures for towing.
To assure proper towing and to prevent
accidental damage to your vehicle, NISSAN
recommends that you have a service opera-
tor tow your vehicle. It is advisable to have
the service operator carefully read the fol-
lowing precautions.
WARNING
cNever ride in a vehicle that is being
towed.
cNever get under your vehicle after it
has been lifted by a tow truck.
CAUTION
cWhen towing, make sure that the
transmission, axles, steering system
and powertrain are in working con-
dition. If any unit is damaged, dollies
must be used.
cNever use a tow bar that attaches to
the bumper when you tow your ve-
hicle. It may damage the bumper and
cause damage to the transmission.
cWhen towing with the front wheels
on dollies:
Turn the ignition key to the OFF
position and secure the steering
wheel in a straight-ahead position
with a rope or similar device. Never
place the ignition key in the LOCK
position. This will result in damage
to the steering lock mechanism.
Move the gearshift lever to the N
(Neutral) position.
cWhen towing front wheel drive, auto-
matic transmission models with the
rear wheels on the ground (if you do
not use towing dollies), release the
parking brake.
cAlways attach safety chains before
towing.
TOWING YOUR VEHICLE
6-12In case of emergency
ZX
Page 282 of 292

Due to legal requirements in some states
and Canadian Provinces, your vehicle may
be required to be in the ready condition for
an Inspection/Maintenance (I/M) test of the
emission control system.
The vehicle is set to the ready condition
when it is driven through certain driving pat-
terns. Usually, the ready condition can be
obtained by ordinary usage of the vehicle.
If a powertrain system component is repaired
or the battery is disconnected, the vehicle
may be reset to a not ready condition. Before
taking the I/M test, drive the vehicle through
the following pattern to set the vehicle to the
ready condition. If you cannot or do not want
to perform the driving pattern, an authorized
NISSAN dealer can conduct it for you.
WARNING
Always drive the vehicle in a safe and
prudent manner according to traffic
conditions and obey all traffic laws.
1. Start the engine when the engine coolant
temperature gauge needle points to C.
Allow the engine to idle until the gauge
needle points between the C and H (nor-
mal operating temperature).2. Accelerate the vehicle to 55 MPH (88
km/h), then quickly release the accelera-
tor pedal completely and keep it released
for at least 6 seconds.
3. Quickly depress the accelerator pedal for
a moment, then drive the vehicle at a
speed of 53 to 60 MPH (86 to 96 km/h)
for at least 5 minutes.
4. Stop the vehicle.
5. Accelerate the vehicle to 35 mph (55
km/h) and maintain the speed for 20
seconds.
6. Repeat steps four through five at least
three times.
7. Accelerate the vehicle to 55 mph (88
km/h) and maintain the speed for at least
3 minutes.
8. Stop the vehicle (shift lever in the ``P'' or
``N'' position).
9. Rev the engine up between 2,500 and
3,500 rpm and hold it for 3 consecutive
minutes, then release the accelerator
pedal completely.
10. Wait 5 seconds at idle.
11. Rev the engine up between 2,000 and3,000 rpm and maintain it for 5 consecu-
tive minutes.
12. Stop the vehicle and turn the engine off.
13. Repeat steps one through twelve at
least one more time.
If step one through seven are interrupted,
repeat the preceding step. Any safe driving
mode is acceptable between steps. Do not
stop the engine until step seven is com-
pleted.
READINESS FOR
INSPECTION/MAINTENANCE
(I/M) TEST (US only)
Technical and consumer information10-21
ZX