2000 NISSAN FRONTIER turn signal
[x] Cancel search: turn signalPage 55 of 269

2 Instruments and controls
Meters and gauges ................................................2-2
Speedometer and odometer ..................................2-3
Tachometer ............................................................2-5
Engine coolant temperature gauge ........................2-5
Fuel gauge .............................................................2-6
Warning/indicator lights and chimes ......................2-8
Theft warning (if so equipped) .............................2-14
Headlight and turn signal switch ..........................2-16
Daytime running light system (Canada only) .......2-16
Front fog light switch (if so equipped)..................2-17
Windshield wiper and washer switch ...................2-17
Instrument brightness control ...............................2-18
Hazard warning flasher switch .............................2-19Cigarette lighter (accessory) and ash tray ...........2-19
Power point (if so equipped) ................................2-20
Storage compartment (Crew Cab models
only) ......................................................................2-21
Cup holder (if so equipped) .................................2-21
Dome light and cargo light ...................................2-22
Map lights (if so equipped)...................................2-23
Manual windows ...................................................2-23
Power windows (if so equipped) ..........................2-24
Automatic power window switch ..........................2-25
Rear sliding window (if so equipped) ...................2-25
Sunroof (if so equipped).......................................2-25
ZX
Page 62 of 269
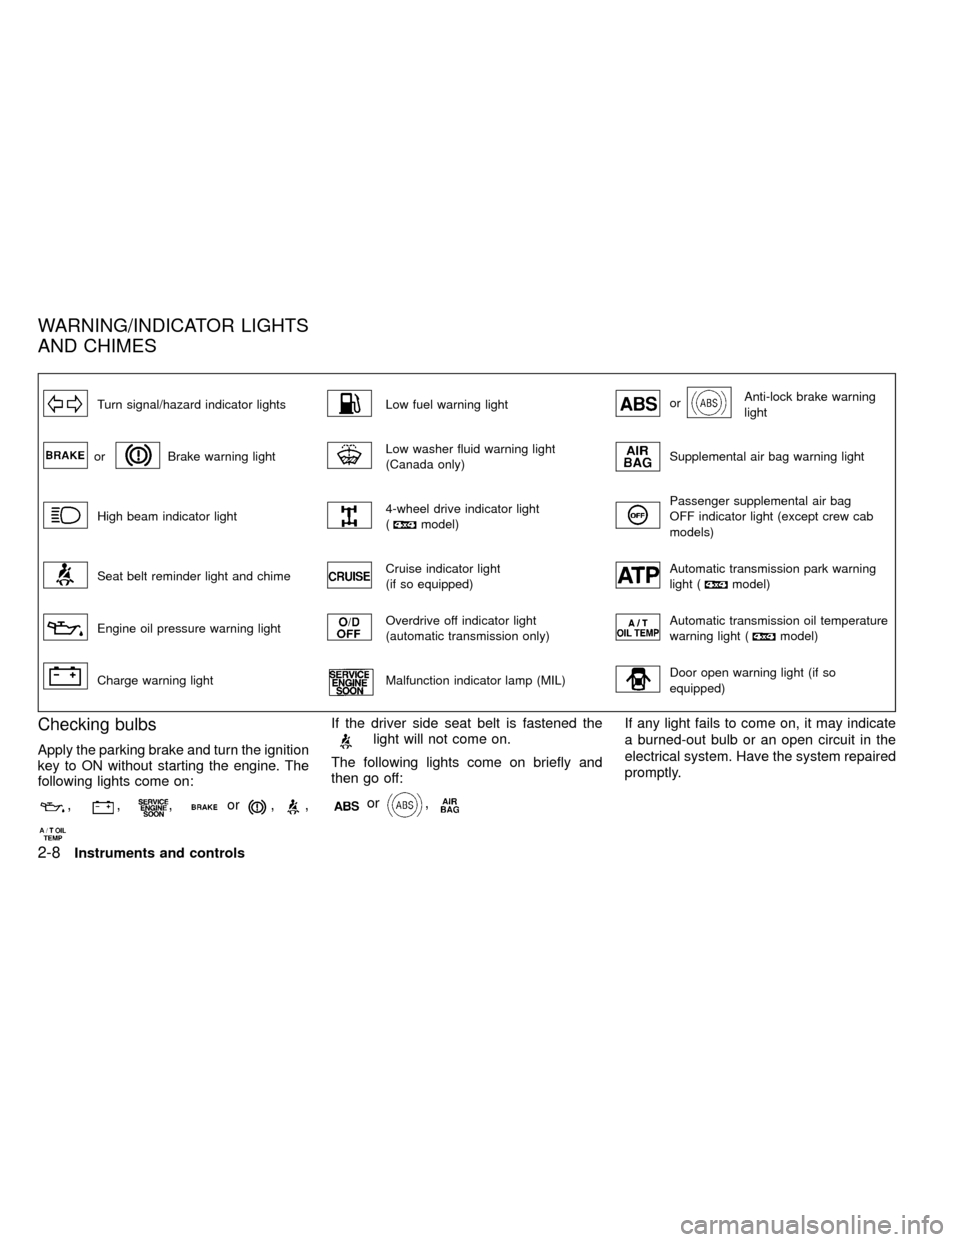
Turn signal/hazard indicator lightsLow fuel warning lightorAnti-lock brake warning
light
orBrake warning lightLow washer fluid warning light
(Canada only)Supplemental air bag warning light
High beam indicator light4-wheel drive indicator light
(model)
Passenger supplemental air bag
OFF indicator light (except crew cab
models)
Seat belt reminder light and chimeCruise indicator light
(if so equipped)Automatic transmission park warning
light (model)
Engine oil pressure warning lightOverdrive off indicator light
(automatic transmission only)Automatic transmission oil temperature
warning light (model)
Charge warning lightMalfunction indicator lamp (MIL)Door open warning light (if so
equipped)
Checking bulbs
Apply the parking brake and turn the ignition
key to ON without starting the engine. The
following lights come on:
,,,or,,
If the driver side seat belt is fastened thelight will not come on.
The following lights come on briefly and
then go off:
or,
If any light fails to come on, it may indicate
a burned-out bulb or an open circuit in the
electrical system. Have the system repaired
promptly.
WARNING/INDICATOR LIGHTS
AND CHIMES
2-8Instruments and controls
ZX
Page 63 of 269
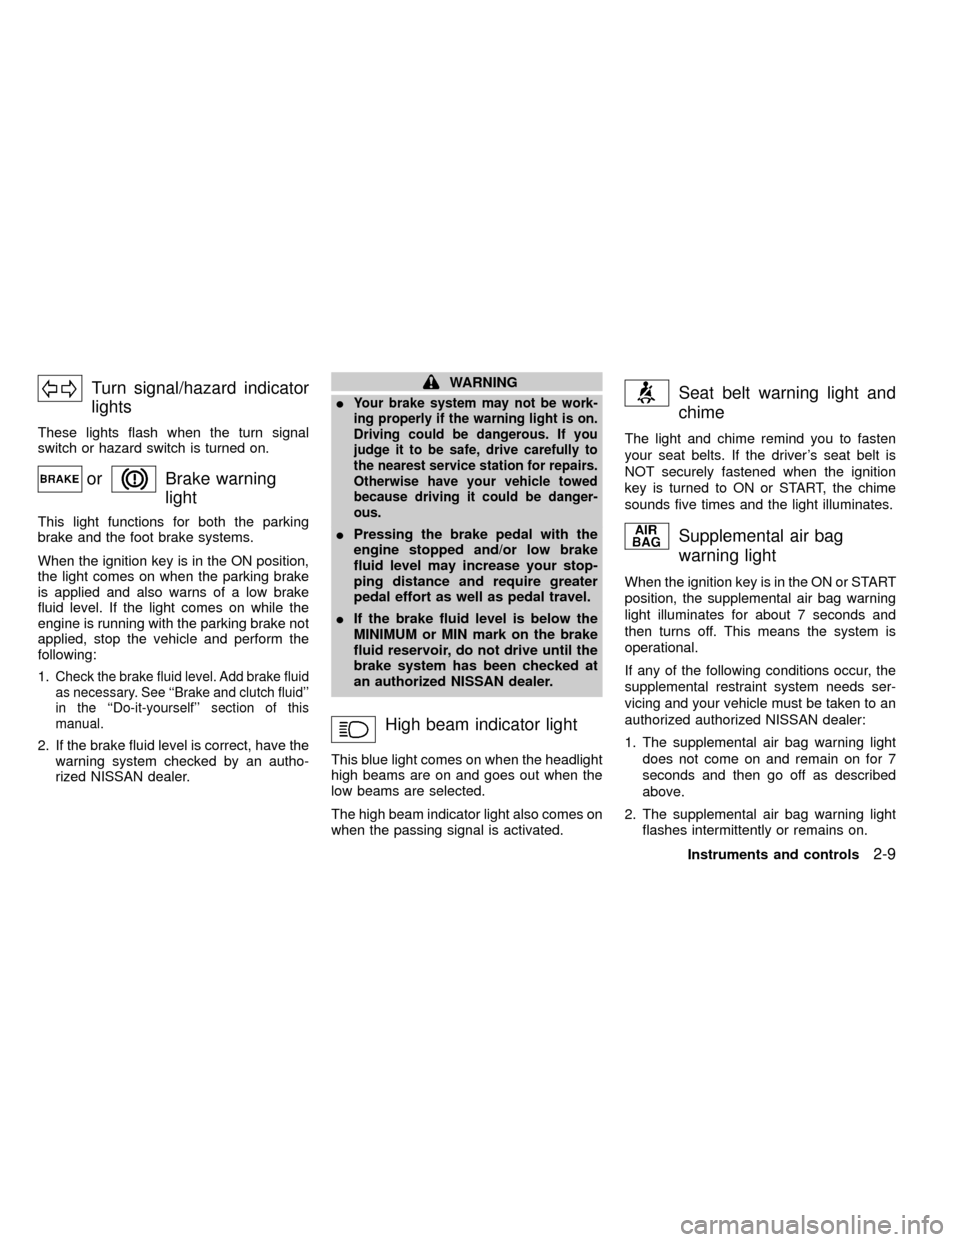
Turn signal/hazard indicator
lights
These lights flash when the turn signal
switch or hazard switch is turned on.
orBrake warning
light
This light functions for both the parking
brake and the foot brake systems.
When the ignition key is in the ON position,
the light comes on when the parking brake
is applied and also warns of a low brake
fluid level. If the light comes on while the
engine is running with the parking brake not
applied, stop the vehicle and perform the
following:
1.
Check the brake fluid level. Add brake fluid
as necessary. See ``Brake and clutch fluid''
in the ``Do-it-yourself'' section of this
manual.
2. If the brake fluid level is correct, have the
warning system checked by an autho-
rized NISSAN dealer.
WARNING
I
Your brake system may not be work-
ing properly if the warning light is on.
Driving could be dangerous. If you
judge it to be safe, drive carefully to
the nearest service station for repairs.
Otherwise have your vehicle towed
because driving it could be danger-
ous.
IPressing the brake pedal with the
engine stopped and/or low brake
fluid level may increase your stop-
ping distance and require greater
pedal effort as well as pedal travel.
IIf the brake fluid level is below the
MINIMUM or MIN mark on the brake
fluid reservoir, do not drive until the
brake system has been checked at
an authorized NISSAN dealer.
High beam indicator light
This blue light comes on when the headlight
high beams are on and goes out when the
low beams are selected.
The high beam indicator light also comes on
when the passing signal is activated.
Seat belt warning light and
chime
The light and chime remind you to fasten
your seat belts. If the driver's seat belt is
NOT securely fastened when the ignition
key is turned to ON or START, the chime
sounds five times and the light illuminates.
Supplemental air bag
warning light
When the ignition key is in the ON or START
position, the supplemental air bag warning
light illuminates for about 7 seconds and
then turns off. This means the system is
operational.
If any of the following conditions occur, the
supplemental restraint system needs ser-
vicing and your vehicle must be taken to an
authorized authorized NISSAN dealer:
1. The supplemental air bag warning light
does not come on and remain on for 7
seconds and then go off as described
above.
2. The supplemental air bag warning light
flashes intermittently or remains on.
Instruments and controls
2-9
ZX
Page 68 of 269

The theft warning system provides visual
and audio alarm signals if parts of the
vehicle are disturbed.
How to activate the theft warning
system
1. Close all windows.
2. Remove the key from the ignition switch.
3. Close the hood and all doors.
4. Push the
button on the multi-
remote controller. All doors lock. The
hazard lights flash twice and the hornbeeps once to indicate all doors are
locked.
I
When thebutton is pushed with all
doors locked, the hazard lights flash twice
and the horn beeps once as a reminder that
the doors are already locked. The horn may
or may not beep once. Refer to ``silencing
the horn beep feature'' later in this section.
The system can be activated even if the
windows are open.
5.
Confirm that the SECURITY indicator
light comes on. The SECURITY light
glows for about 30 seconds and then
begins to flash once every three seconds.
The system is now activated. If, during
this 30 second time period, a door is
unlocked by the key or the multi-remote
controller, or the ignition key is turned to
ACC or ON, the system will not activate.
IIf the key is turned slowly when lock-
ing the door, the system may not acti-
vate. Furthermore, if the key is turned
excessively to the unlock position, the
system may be deactivated when the
key is removed. If the indicator light
fails to glow for 30 seconds, unlock
the door once and lock it again.
IEven when the driver and/or passen-
gers are in the vehicle, the system will
activate with doors, and hood locked
and with the ignition key in the OFF
position. Turn the ignition key to ACC
or ON to turn the system off.
The theft warning system is NOT activated if
one of the following occurs:
IA door is unlocked or the ignition key is
turned to the ACC or ON position during
the 30 seconds in which the SECURITY
light stays on.
IThe SECURITY light blinks at a steady
1/2 second on - 1/2 second off rate (a
door, or the hood is open and the key is
not in the ACC or ON position). When the
ignition key is turned to the ACC or ON
position, the SECURITY light turns off.
Theft warning system operation
The theft warning system emits the follow-
ing alarm:
IThe headlights blink and the horn sounds
intermittently. In addition, the starter mo-
tor does not operate.
I
The alarm automatically turns off after 2 to
3 minutes. However, the alarm reactivates
IC0005
THEFT WARNING
(if so equipped)
2-14Instruments and controls
ZX
Page 70 of 269
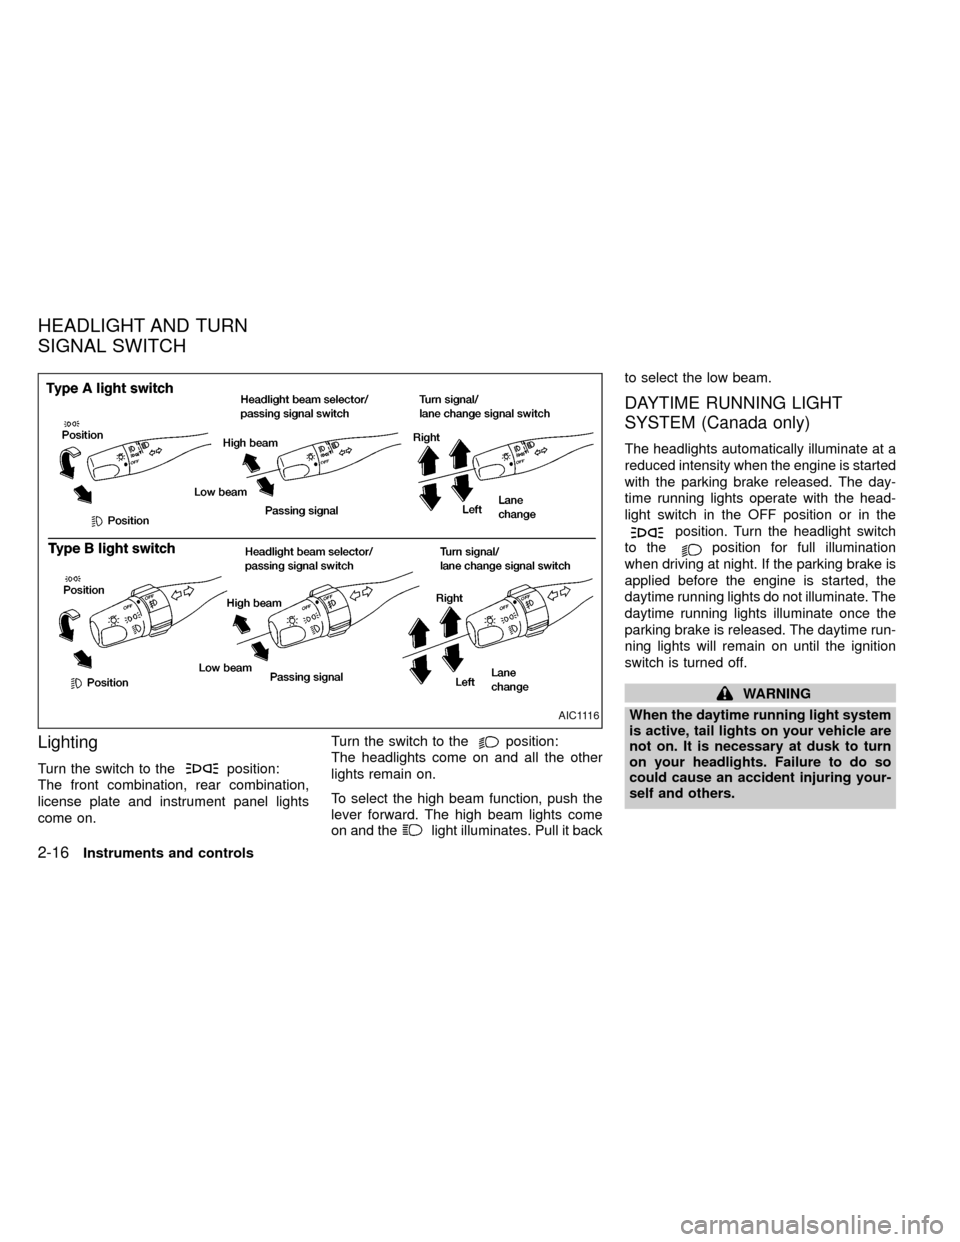
Lighting
Turn the switch to theposition:
The front combination, rear combination,
license plate and instrument panel lights
come on.Turn the switch to the
position:
The headlights come on and all the other
lights remain on.
To select the high beam function, push the
lever forward. The high beam lights come
on and the
light illuminates. Pull it backto select the low beam.
DAYTIME RUNNING LIGHT
SYSTEM (Canada only)
The headlights automatically illuminate at a
reduced intensity when the engine is started
with the parking brake released. The day-
time running lights operate with the head-
light switch in the OFF position or in the
position. Turn the headlight switch
to the
position for full illumination
when driving at night. If the parking brake is
applied before the engine is started, the
daytime running lights do not illuminate. The
daytime running lights illuminate once the
parking brake is released. The daytime run-
ning lights will remain on until the ignition
switch is turned off.
WARNING
When the daytime running light system
is active, tail lights on your vehicle are
not on. It is necessary at dusk to turn
on your headlights. Failure to do so
could cause an accident injuring your-
self and others.
AIC1116
HEADLIGHT AND TURN
SIGNAL SWITCH
2-16Instruments and controls
ZX
Page 71 of 269

Passing signal
Pulling the lever toward you turns on the
headlight high beam.
Turn signal
Move the lever up or down to signal the
turning direction. When the turn is com-
pleted, the turn signal cancels automatically.
Lane change signal
To indicate a lane change, move the lever
up or down to the point where the indicator
light begins to flash, but the lever does not
latch.
To turn the front fog lights on, rotate the
switch to the
position.
To turn them off, rotate the switch to the
OFF position.
The headlight switch must be in the
position (low beam headlights on) for
the fog lights to operate. The fog lights
automatically turn off whenever the high
beam headlight function is selected
AIC1084
AIC0618
FRONT FOG LIGHT SWITCH
(if so equipped)WINDSHIELD WIPER AND
WASHER SWITCH
Instruments and controls2-17
ZX
Page 73 of 269
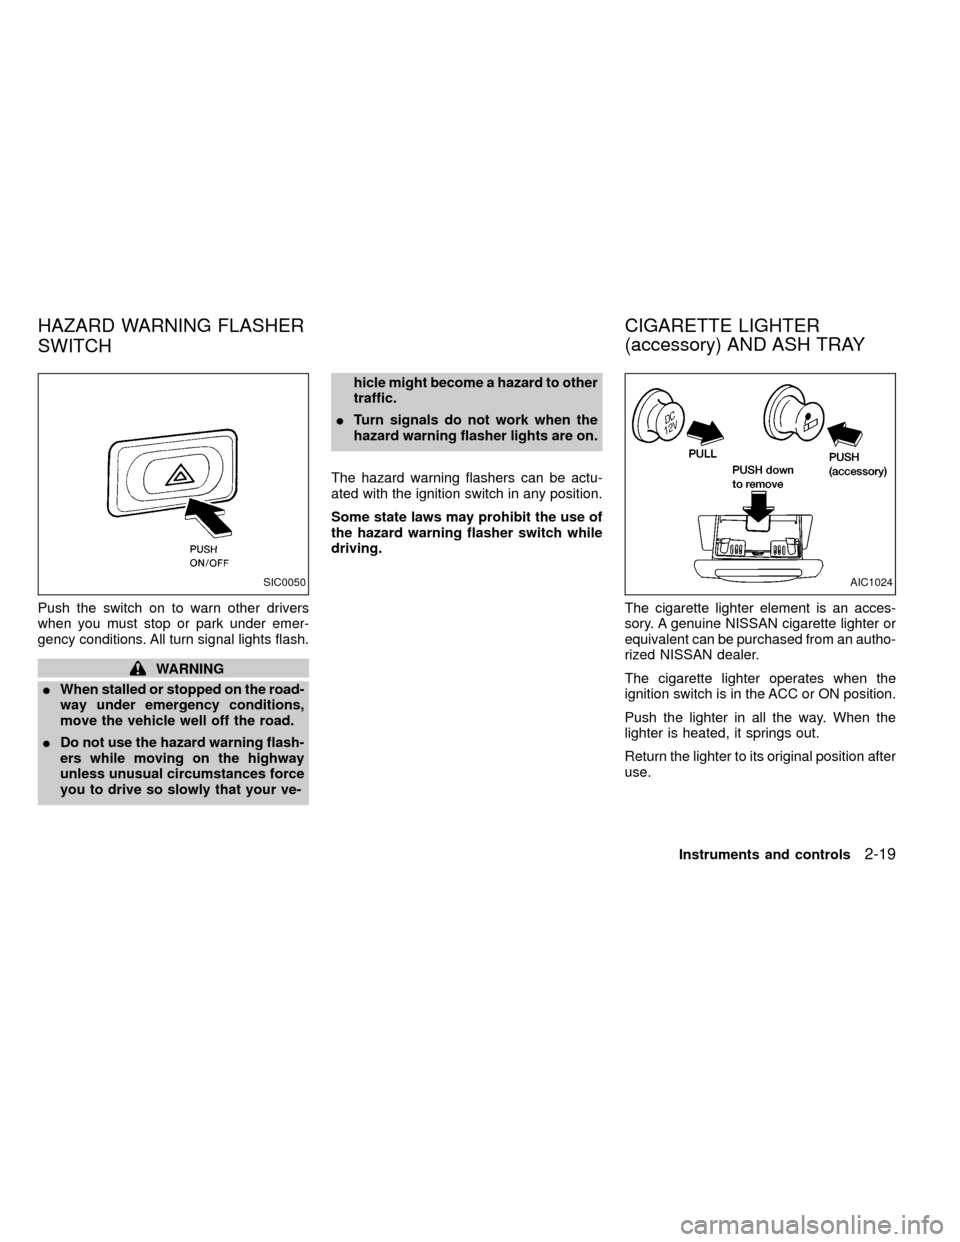
Push the switch on to warn other drivers
when you must stop or park under emer-
gency conditions. All turn signal lights flash.
WARNING
IWhen stalled or stopped on the road-
way under emergency conditions,
move the vehicle well off the road.
IDo not use the hazard warning flash-
ers while moving on the highway
unless unusual circumstances force
you to drive so slowly that your ve-hicle might become a hazard to other
traffic.
ITurn signals do not work when the
hazard warning flasher lights are on.
The hazard warning flashers can be actu-
ated with the ignition switch in any position.
Some state laws may prohibit the use of
the hazard warning flasher switch while
driving.
The cigarette lighter element is an acces-
sory. A genuine NISSAN cigarette lighter or
equivalent can be purchased from an autho-
rized NISSAN dealer.
The cigarette lighter operates when the
ignition switch is in the ACC or ON position.
Push the lighter in all the way. When the
lighter is heated, it springs out.
Return the lighter to its original position after
use.
SIC0050AIC1024
HAZARD WARNING FLASHER
SWITCHCIGARETTE LIGHTER
(accessory) AND ASH TRAY
Instruments and controls2-19
ZX
Page 111 of 269
Clock set
Depressing the CLOCK and thebuttons
together sets hours. Depressing the CLOCK
and
buttons together sets minutes.
Clock priority mode
In this mode the clock is shown in the
display. If any radio or cassette tape func-
tions are activated, the radio (or cassette
tape) display illuminates for 10 seconds
then returns to the clock mode.
NOTE:
After clock adjustment, the radio is in the
clock priority mode.
Radio/Cassette tape priority mode
In this mode, the radio station illuminates in
the display during radio operation. During
cassette tape operation, TAPE illuminates in
the display.
Selecting the desired band
Push thebutton to change from AM
to FM1 or FM2 reception.
The FM stereo indicator, ST, illuminates dur-
ing FM stereo reception. When the stereo
broadcast signal is weak, the radio automati-cally changes from stereo to monaural re-
ception.
Radio reception is affected by station signal
strength, distance from radio transmitter,
buildings, bridges, mountains and other ex-
ternal influences. Intermittent changes in
reception quality normally are caused by
these external influences.
Using a cellular phone in or near the
vehicle may influence radio reception
quality.
TUNE buttons
WARNING
The radio should not be tuned while
driving in order that full attention may
be given to the driving operation.
Use the
andbuttons for
manual tuning. To move quickly through the
channels, hold either of the tune buttons
down for more than 1.5 seconds.
SEEK tuning
Push thetuning buttonfor less
than 1.5 seconds. SEEK tuning begins from
low to high frequencies and stops at the next
broadcasting station. Pushing the buttonagain continues the SEEK function. Once the
highest broadcasting station is reached, the
radio continues in the SEEK mode at the
lowest broadcast station.
SCAN tuning
Push and hold thetuning buttonfor more than 1.5 seconds. SCAN illu-
minates in the display window. SCAN tuning
begins from low to high frequencies and
stops at each broadcasting station for five
seconds. Pushing the button again during this
five second period stops SCAN tuning and
the radio remains tuned to that station.
Heater, air conditioner and audio systems4-11
ZX