2000 NISSAN ALTIMA high beam
[x] Cancel search: high beamPage 53 of 242
CHECKING BULBS
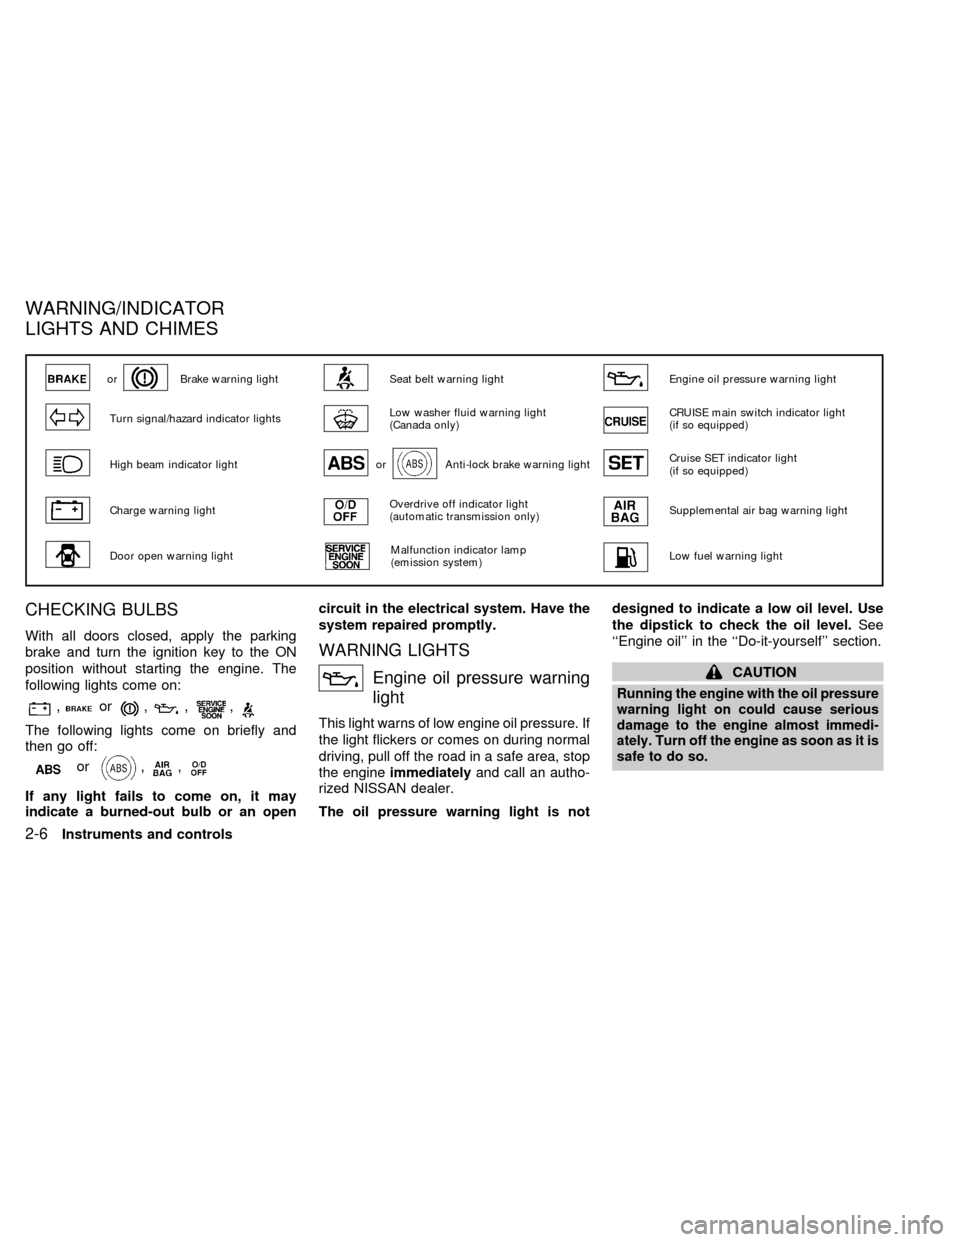
With all doors closed, apply the parking
brake and turn the ignition key to the ON
position without starting the engine. The
following lights come on:
,or,,,
The following lights come on briefly and
then go off:
or,,
If any light fails to come on, it may
indicate a burned-out bulb or an opencircuit in the electrical system. Have the
system repaired promptly.
WARNING LIGHTS
Engine oil pressure warning
light
This light warns of low engine oil pressure. If
the light flickers or comes on during normal
driving, pull off the road in a safe area, stop
the engineimmediatelyand call an autho-
rized NISSAN dealer.
The oil pressure warning light is notdesigned to indicate a low oil level. Use
the dipstick to check the oil level.See
``Engine oil'' in the ``Do-it-yourself'' section.
CAUTION
Running the engine with the oil pressure
warning light on could cause serious
damage to the engine almost immedi-
ately. Turn off the engine as soon as it is
safe to do so.
orBrake warning lightSeat belt warning lightEngine oil pressure warning light
Turn signal/hazard indicator lightsLow washer fluid warning light
(Canada only)CRUISE main switch indicator light
(if so equipped)
High beam indicator lightorAnti-lock brake warning lightCruise SET indicator light
(if so equipped)
Charge warning lightOverdrive off indicator light
(automatic transmission only)Supplemental air bag warning light
Door open warning lightMalfunction indicator lamp
(emission system)Low fuel warning light
WARNING/INDICATOR
LIGHTS AND CHIMES
2-6Instruments and controls
ZX
Page 55 of 242
2. If the brake fluid level is correct, have the
brake system checked by an authorized
NISSAN dealer.
WARNING
c
Your brake system may not be work-
ing properly if the warning light is on.
Driving could be dangerous. If you
judge it to be safe, drive carefully to
the nearest service station for repairs.
Otherwise, have your vehicle towed
because driving it could be danger-
ous.
cPressing the brake pedal with the
engine stopped and/or a low brake
fluid level may increase your stop-
ping distance and braking will re-
quire greater pedal effort as well as
pedal travel.
cIf the brake fluid level is below the
MINIMUM or MIN mark on the brake
fluid reservoir, do not drive until the
brake system has been checked at a
NISSAN dealer.
Brake pad wear warning
The disc brake pads have audible wear
warnings. When a brake pad requires re-
placement, it makes a high pitched scrapingsound when the vehicle is in motion,
whether or not the brake pedal is depressed.
Have the brakes checked as soon as pos-
sible if the warning sound is heard.
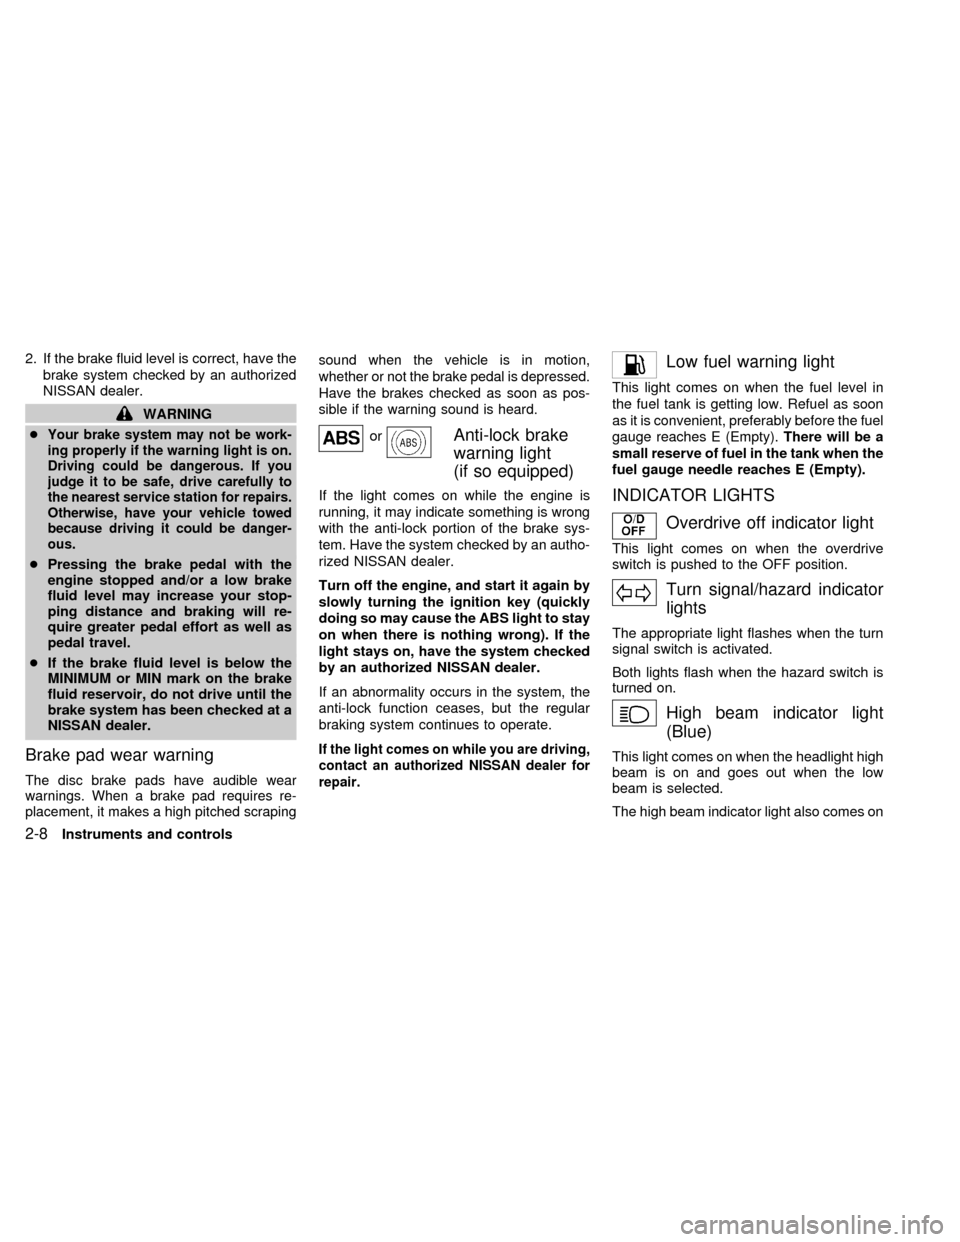
orAnti-lock brake
warning light
(if so equipped)
If the light comes on while the engine is
running, it may indicate something is wrong
with the anti-lock portion of the brake sys-
tem. Have the system checked by an autho-
rized NISSAN dealer.
Turn off the engine, and start it again by
slowly turning the ignition key (quickly
doing so may cause the ABS light to stay
on when there is nothing wrong). If the
light stays on, have the system checked
by an authorized NISSAN dealer.
If an abnormality occurs in the system, the
anti-lock function ceases, but the regular
braking system continues to operate.
If the light comes on while you are driving,
contact an authorized NISSAN dealer for
repair.
Low fuel warning light
This light comes on when the fuel level in
the fuel tank is getting low. Refuel as soon
as it is convenient, preferably before the fuel
gauge reaches E (Empty).There will be a
small reserve of fuel in the tank when the
fuel gauge needle reaches E (Empty).
INDICATOR LIGHTS
Overdrive off indicator light
This light comes on when the overdrive
switch is pushed to the OFF position.
Turn signal/hazard indicator
lights
The appropriate light flashes when the turn
signal switch is activated.
Both lights flash when the hazard switch is
turned on.
High beam indicator light
(Blue)
This light comes on when the headlight high
beam is on and goes out when the low
beam is selected.
The high beam indicator light also comes on
2-8Instruments and controls
ZX
Page 63 of 242

HEADLIGHT SWITCH
Lighting
Turn the switch to theposition: The
parking, rear combination, side marker, li-cense plate and instrument panel lights
come on.
Turn the switch to the
position:
The headlights come on and all the other
lights remain on.To select the high beam function, push the
lever forward. The high beam lights come
on and the indicator light illuminates. Pull it
back to select the low beam.
AIC0505
HEADLIGHT AND TURN
SIGNAL SWITCH
2-16Instruments and controls
ZX
Page 64 of 242
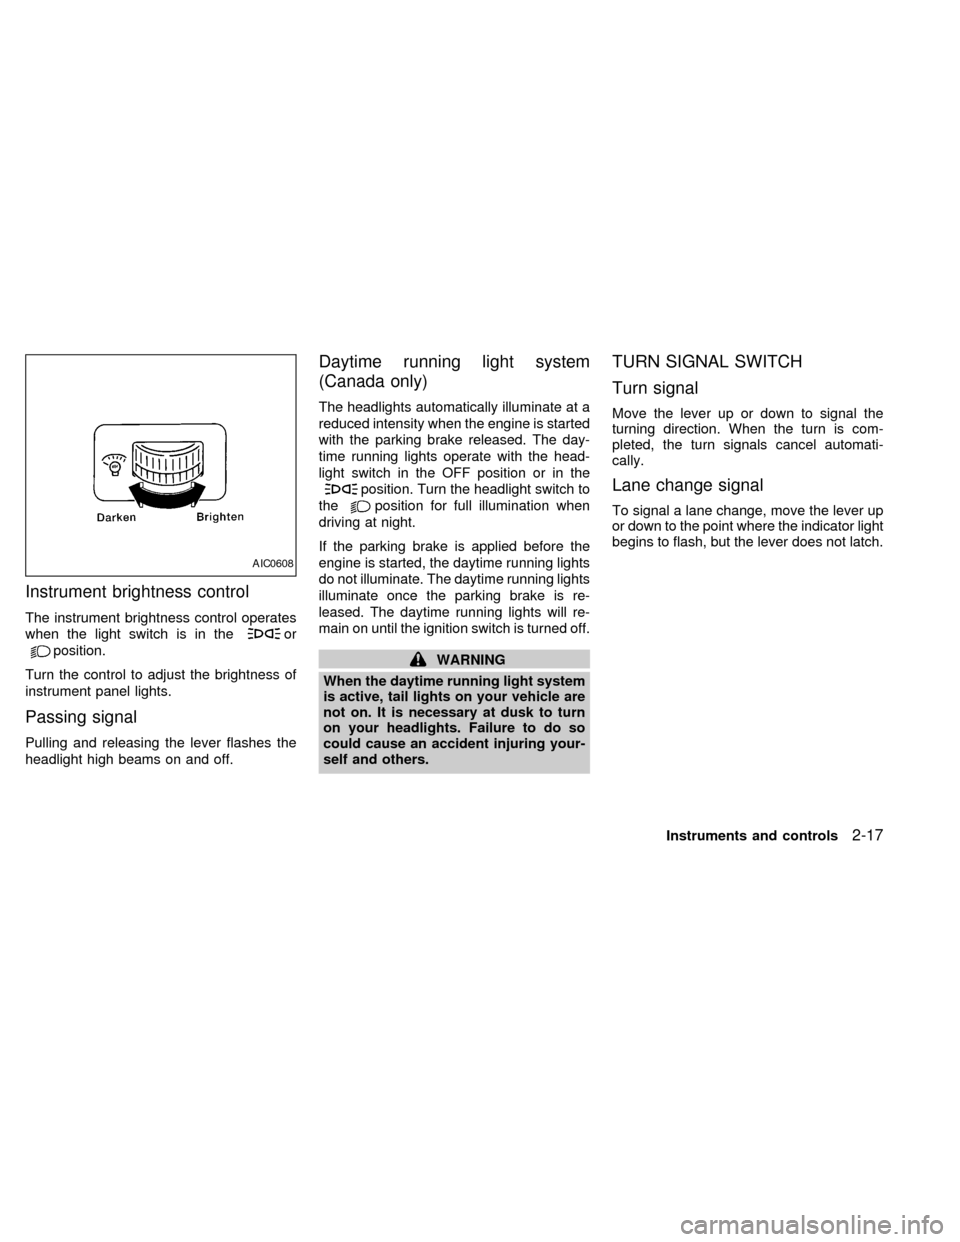
Instrument brightness control
The instrument brightness control operates
when the light switch is in the
or
position.
Turn the control to adjust the brightness of
instrument panel lights.
Passing signal
Pulling and releasing the lever flashes the
headlight high beams on and off.
Daytime running light system
(Canada only)
The headlights automatically illuminate at a
reduced intensity when the engine is started
with the parking brake released. The day-
time running lights operate with the head-
light switch in the OFF position or in the
position. Turn the headlight switch to
the
position for full illumination when
driving at night.
If the parking brake is applied before the
engine is started, the daytime running lights
do not illuminate. The daytime running lights
illuminate once the parking brake is re-
leased. The daytime running lights will re-
main on until the ignition switch is turned off.
WARNING
When the daytime running light system
is active, tail lights on your vehicle are
not on. It is necessary at dusk to turn
on your headlights. Failure to do so
could cause an accident injuring your-
self and others.
TURN SIGNAL SWITCH
Turn signal
Move the lever up or down to signal the
turning direction. When the turn is com-
pleted, the turn signals cancel automati-
cally.
Lane change signal
To signal a lane change, move the lever up
or down to the point where the indicator light
begins to flash, but the lever does not latch.
AIC0608
Instruments and controls2-17
ZX
Page 65 of 242
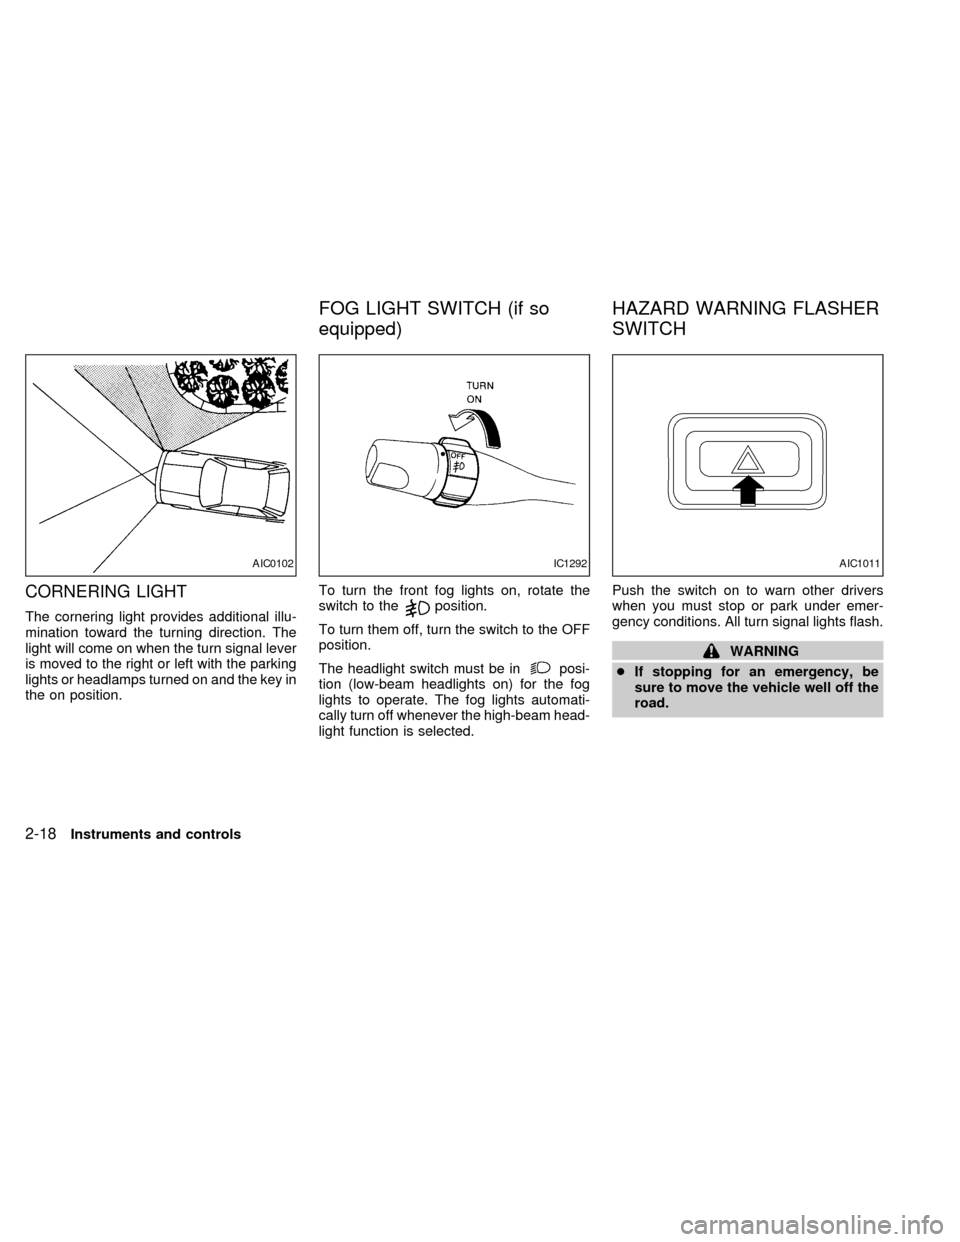
CORNERING LIGHT
The cornering light provides additional illu-
mination toward the turning direction. The
light will come on when the turn signal lever
is moved to the right or left with the parking
lights or headlamps turned on and the key in
the on position.To turn the front fog lights on, rotate the
switch to theposition.
To turn them off, turn the switch to the OFF
position.
The headlight switch must be in
posi-
tion (low-beam headlights on) for the fog
lights to operate. The fog lights automati-
cally turn off whenever the high-beam head-
light function is selected.Push the switch on to warn other drivers
when you must stop or park under emer-
gency conditions. All turn signal lights flash.
WARNING
cIf stopping for an emergency, be
sure to move the vehicle well off the
road.
AIC0102IC1292AIC1011
FOG LIGHT SWITCH (if so
equipped)HAZARD WARNING FLASHER
SWITCH
2-18Instruments and controls
ZX
Page 187 of 242
HEADLIGHTS
The headlamp is a semi-sealed beam type
which uses a replaceable halogen bulb.
Because the headlamp assembly must be
removed from the vehicle for bulb replace-
ment, it is recommended that your vehicle
be taken to an authorized NISSAN Dealer.
Replacing the headlight bulb
CAUTION
cDo not leave the headlamp assembly
open without a bulb installed for a
long period of time. Dust, moisture,
smoke, etc. entering the headlamp
body may affect bulb performance.
Remove the bulb from the headlamp
assembly just before a replacement
bulb is installed.
cOnly touch the plastic base when
handling the bulb. Never touch the
glass envelope. Touching the glass
could significantly affect bulb life
and/or headlamp performance.cHigh pressure halogen gas is sealed
inside the halogen bulb. The bulb
may break if the glass envelope is
scratched or the bulb is dropped.
cUse the same number and wattage
as originally installed:
Wattage 65/55
Bulb no. 9007(HB5)
cAiming is not necessary after replac-
ing the bulb. When aiming adjust-
ment is necessary, contact an autho-
rized NISSAN dealer.
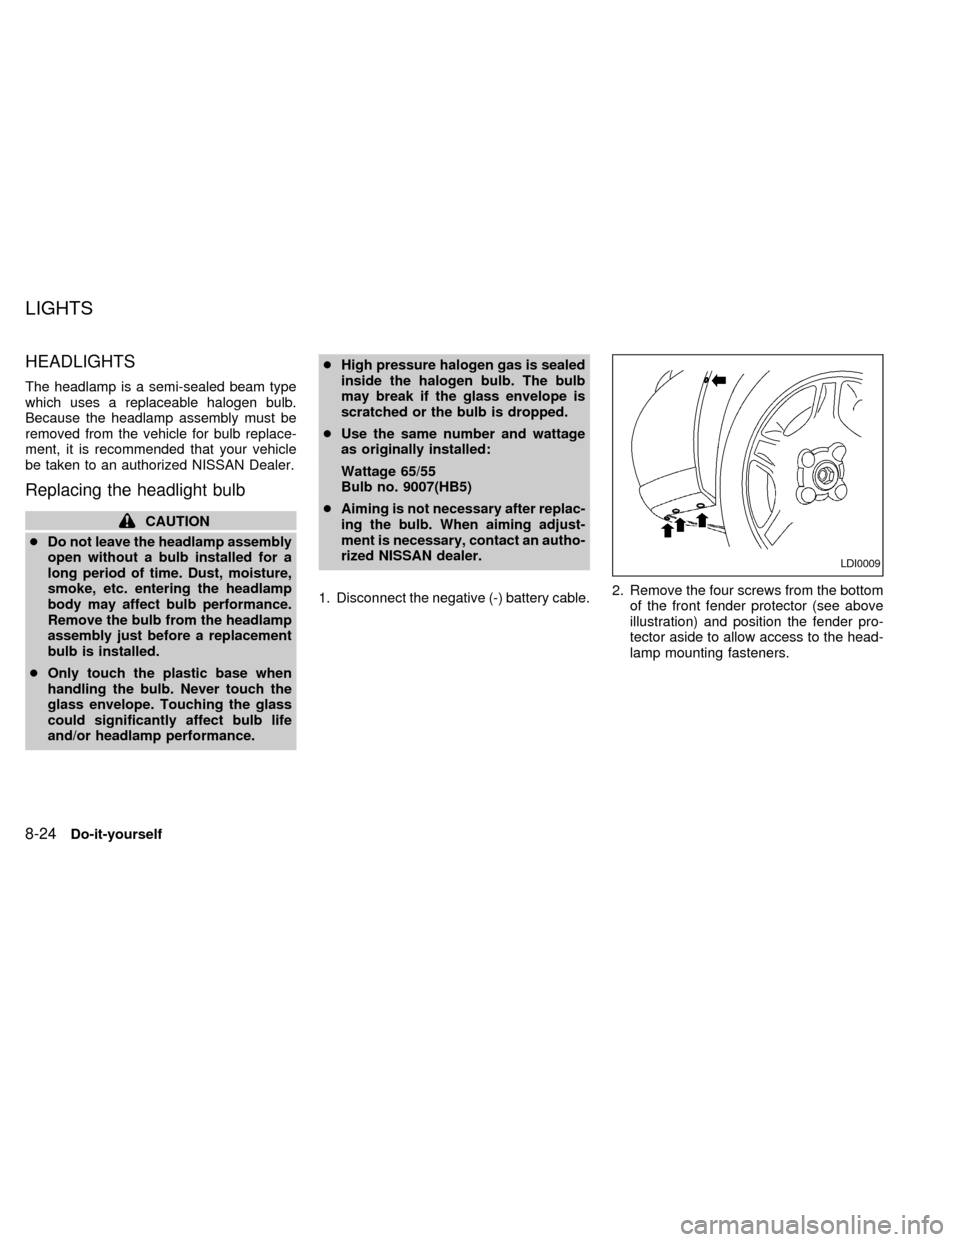
1. Disconnect the negative (-) battery cable.2. Remove the four screws from the bottom
of the front fender protector (see above
illustration) and position the fender pro-
tector aside to allow access to the head-
lamp mounting fasteners.
LDI0009
LIGHTS
8-24Do-it-yourself
ZX