2000 MERCEDES-BENZ CLK-CLASS garage door opener
[x] Cancel search: garage door openerPage 4 of 299

Operation Audio and telephone 123
DrivingBrakes 185
Power windows 141 Driving off 186
Sliding/pop-up roof 143 Control and operation of radio Parking 187
Interior lighting 145 transmitters 162 Tires 187
Rear window sunshade 146 COMAND, radio, telephone and Snow chains 190
Sun visors 146 two-way radio 162 Winter driving instructions 190
Illuminated vanity mirrors 147 Maintenance 163 Deep water 191
Interior 147 Catalytic converter 164 Passenger compartment 192
Storage compartments, armrest and
cup holder 147Emission control 165 Travelling abroad 192
Glove box 148 Tele Aid 166 Cruise control 193
Ashtrays 150 Steering lock 172 Brake assist system (BAS) 196
Lighter 151 Starting and turning off the engine 174 Antilock brake system (ABS) 198
Enlarged cargo area – split folding rear
seat backrest 152Automatic transmission 175
Electronic stability program (ESP)
200
Loading instructions 153 Parking brake 184 What you should know at the
Cargo tie down rings 155 Driving instructions 184 gas station 203
Parcel net in front passenger footwell 155 Drive sensibly – save fuel 184 Check regularly and before a
long trip 205
Telephone, general 156 Drinking and driving 185
Cellular telephone 156 Pedals 185
Garage door opener 157 Power assistance 185
4
ProCarManuals.com
Page 21 of 299

Instruments and controls
Te ch n ica l
data Instruments
and controlsOperation DrivingInstrument
cluster displayPractical hints Car care Index Overhead control panel1Interior lighting, see page 145
2Sliding / pop-up roof, see page 143
3Tele Aid (emergency call system), see page 166
4Hands-free microphone for Tele Aid, telephone and
voice recognition system.
5Rear view mirror, see page 74
6Garage door opener, see page 157
1
1
6
P82.00-2049-27
5
2
3
4
21
ProCarManuals.com
Page 23 of 299

Engine oil consumption 109 Glove box 148
Exterior lamp switch 110 Ashtrays 150
Night security illumination 111 Lighter 151
Headlamp cleaning system 112 Enlarged cargo area – split folding rear
seat backrest 152
Combination switch 113 Loading instructions 153
Hazard warning flasher switch 115 Cargo tie down rings 155
Automatic climate control 116 Parcel net in front passenger footwell 155
Operation Audio and telephone 123 Telephone, general 156
Power windows 141 Cellular telephone 156
Sliding/pop-up roof 143 Garage door opener 157
Interior lighting 145
Rear window sunshade 146
Sun visors 146
Illuminated vanity mirrors 147
Interior 147
Storage compartments, armrest and
cup holder 147
23
ProCarManuals.com
Page 157 of 299
Garage door opener
Te ch n ica l
data Instruments
and controlsOperationDrivingInstrument
cluster displayPractical hints Car care Index
Garage door opener
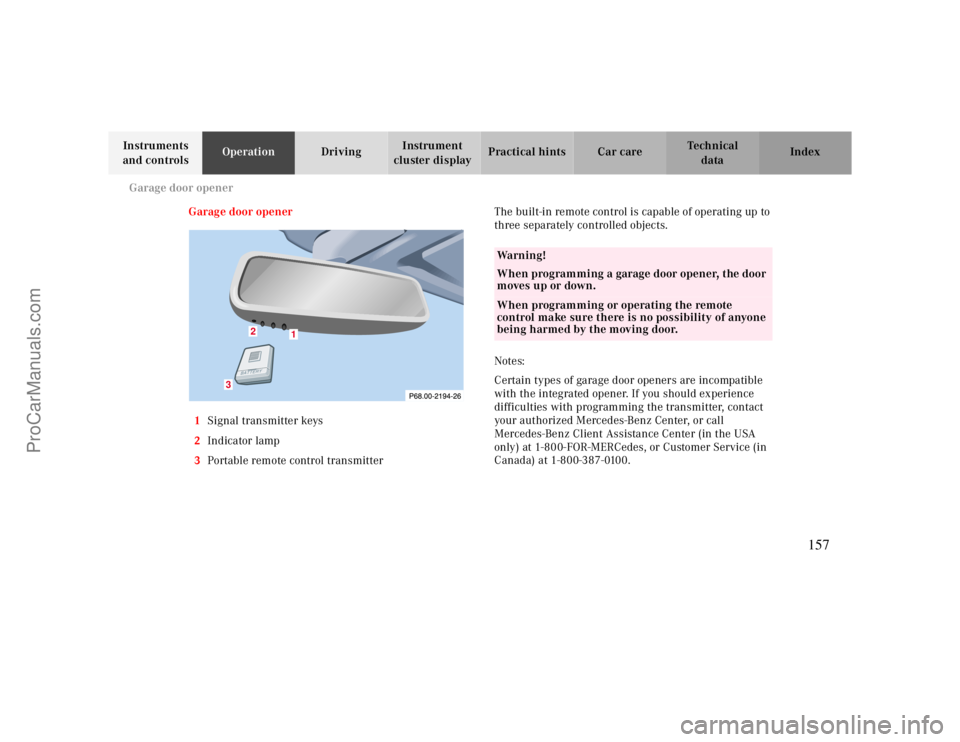
1Signal transmitter keys
2Indicator lamp
3Portable remote control transmitterThe built-in remote control is capable of operating up to
three separately controlled objects.
Notes:
Certain types of garage door openers are incompatible
with the integrated opener. If you should experience
difficulties with programming the transmitter, contact
your authorized Mercedes-Benz Center, or call
Mercedes-Benz Client Assistance Center (in the USA
only) at 1-800-FOR-MERCedes, or Customer Service (in
Canada) at 1-800-387-0100.
1
2
3
Wa r n i n g !
When programming a garage door opener, the door
moves up or down.When programming or operating the remote
control make sure there is no possibility of anyone
being harmed by the moving door.
157
ProCarManuals.com
Page 158 of 299
Garage door opener
Te ch n ica l
data Instruments
and controlsOperationDrivingInstrument
cluster displayPractical hints Car care Index For operation in the USA only: This device complies
with Part
15 of the FCC Rules.
Operation is subject to the following two conditions:
(1) This device may not cause harmful interference, and
(2) this device must accept any interference received,
including interference that may cause undesired
operation.
WARNING: Changes or modification not expressly
approved by party responsible for compliance could void
the user’s authority to operate the equipment.
Programming or reprogramming the integrated
remote control:
1. Turn electronic key in steering lock to position 1
or 2.
2. Hold the end of the hand-held transmitter of the
device you wish to train approximately 2 to 5 inches
(5 cm to 12 cm) away from the surface of the
integrated remote control located on the inside rear
view mirror, keeping the indicator lamp in view.3. Using both hands, simultaneously push the hand-
held transmitter button and the desired integrated
remote control button. Do not release the buttons
until completing step 4.
4. The indicator lamp on the integrated remote control
will flash, first slowly and then rapidly. When the
indicator lamp flashes rapidly, both buttons may be
released (the rapid flashing lamp indicates
successful programming of the new frequency
signal). To program the remaining two buttons,
follow steps 1 though 4.
Note:
If after repeated attempts, you do not successfully
program the integrated remote control device to learn
the signal of the hand-held transmitter, the garage door
opener could be equipped with the “rolling code
feature”.
158
ProCarManuals.com
Page 159 of 299
Garage door opener
Te ch n ica l
data Instruments
and controlsOperationDrivingInstrument
cluster displayPractical hints Car care Index
Rolling code programming:
To train a garage door opener (or other rolling code
devices) with the rolling code feature, follow these
instructions after completing the “Programming”
portion of this text. (A second person may make the
following training procedures quicker and easier.)
1. Locate training button on the garage door opener
motor head unit. Exact location and color of the
button may vary by garage door opener brand. If
there is difficulty locating the transmitting button,
reference to garage door opener operator’s manual.
2. Press “training” button on the garage door opener
motor head unit (which activated the “training
light”).
Note:
Following step 2, there are 30 seconds to initiate
step 3.3. Firmly press and release the programmed
integrated remote control transmit button. Press
and release same button a second time to complete
the training process. (Some garage door openers
may requires you to do this procedure a third time
to complete the training.)
4. Confirm the garage door operation by pressing the
programmed button on the integrated remote
control transmitter.
Canadian programming:
During programming, your hand-held transmitter may
automatically stop transmitting. Continue to press and
hold the integrated remote control transmitter button
(note steps 2 through 4 in the “Programming” portion)
while you press and re-press (“cycle”) your hand-held
transmitter every two seconds until the frequency
signal has been learned. The indicator lamp will flash
slowly and then rapidly after several seconds upon
successful training.
159
ProCarManuals.com
Page 160 of 299
Garage door opener
Te ch n ica l
data Instruments
and controlsOperationDrivingInstrument
cluster displayPractical hints Car care Index Operation of remote control:
1. Turn electronic key in steering lock to position 1
or 2.
2. Select and press the appropriate button to activate
the remote controlled device. The integrated remote
control transmitter continues to send the signal as
long as the button is pressed – up to 20 seconds.Erasing the remote control memory:
1. Turn electronic key in steering lock to position 1
or 2.
2. Simultaneously holding down the left and right side
buttons for approximately 20 seconds, or until the
control lamp blinks rapidly, will erase the codes of
all three channels.
160
ProCarManuals.com
Page 295 of 299
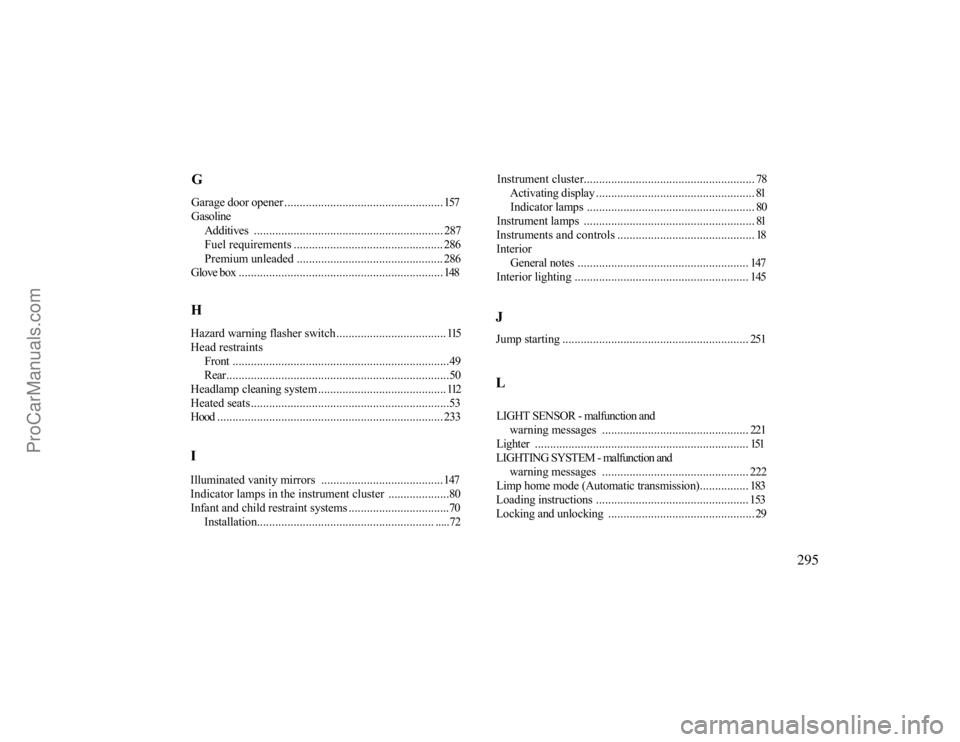
GGarage door opener.................................................... 157Gasoline
Additives .............................................................. 287Fuel requirements ................................................. 286Premium unleaded ................................................ 286
Glove box ................................................................... 148
Instrument cluster........................................................ 78
Activating display .................................................... 81Indicator lamps ....................................................... 80
Instrument lamps ........................................................ 81Instruments and controls ............................................. 18Interior
General notes ........................................................ 147
Interior lighting ......................................................... 145
HHazard warning flasher switch ....................................115Head restraints
Front .......................................................................49Rear.........................................................................50
Headlamp cleaning system ..........................................112Heated seats.................................................................53Hood .......................................................................... 233IIlluminated vanity mirrors ........................................147Indicator lamps in the instrument cluster ....................80Infant and child restraint systems .................................70
Installation...............................................................72
JJump starting ............................................................. 251LLIGHT SENSOR - malfunction and
warning messages ................................................ 221
Lighter ...................................................................... 151LIGHTING SYSTEM - malfunction and
warning messages ................................................ 222
Limp home mode (Automatic transmission)................ 183Loading instructions .................................................. 153Locking and unlocking ................................................ 29
295
ProCarManuals.com