2000 MERCEDES-BENZ CLK-CLASS hood release
[x] Cancel search: hood releasePage 5 of 299

Instrument cluster displayBRAKE FLUID 217 Coolant level 236
PARKING BRAKE 218 Adding coolant 237
Malfunction and indicator lamps in the
instrument cluster 208ENGINE FAN 218 Windshield washer / headlamp
clean.system 238
On-board diagnostic systemCheck engine malfunction indicator lamp
208COOLANT (coolant level) 219 Windshield and headlamp
washer fluid mixing ratio 238
Brake warning lamp 209 COOLANT (coolant temp.) 220 Wheels 239
Supplemental restraint system STEER. WHEEL ADJUST. 221 Tire replacement 239
(SRS) indicator lamp 210 LIGHT SENSOR 221 Rotating wheels 240
Fuel reserve and fuel cap LIGHTING SYSTEM 222 Spare wheel 241
placement warning 210 WASHER FLUID 223 Changing wheels 242
Electronic stability program(ESP) OIL TEMP. (engine oil temperature) 224 Tire inflation pressure 247
warning lamp 211 ENGINE OIL LEVEL 224 Battery 249
BAS/ESP malfunction indicator lamp 211 ELEC. STABIL. PROG. (Electronic Jump starting 251
ABS malfunction indicator lamp 211 stability program) 226 Towing the vehicle 253
Telescoping steering column – Transmission selector lever,
indicator lamp 212
Practical hintsmanually unlocking 255
Seat belt warning lamp 212 Bulbs 256
Malfunction and indicator lamps in the First aid kit 228 Adjusting headlamp aim 261
center console 212 Shelf below rear window 228 Changing batteries in the
AIRBAG OFF indicator lamp 212 Stowing things in the vehicle 228 electronic main key 264
Roll bar warning lamp 221 Spare wheel, vehicle tools, storage Synchronizing remote control 266
Malfunction and warning messages in compartment 229 Emergency operation of
the multifunction display 213 Vehicle jack 230 sliding/pop-up roof 267
DISPLAY DEFECTIVE 214 Fuses 231
Manual release for fuel filler flap
268
BATTERY/ALTERNATOR 215 Hood 233 Replacing wiper blade insert 268
ABS-SYSTEM 216 Checking engine oil level 234 Trunk lamp 270
BRAKE ASSIST 216 Automatic transmission fluid level 236 Roof rack 270
BRAKE LINING WEAR 217
5
ProCarManuals.com
Page 19 of 299

Instruments and controls
Te ch n ica l
data Instruments
and controlsOperation DrivingInstrument
cluster displayPractical hints Car care Index For more detailed descriptions see Index on page
For adjustment of air outlets, refer to automatic climate
control, see page 1
2
116
.
1Side air outlet, adjustable
2Air volume control for side air outlet
3Exterior lamp switch, see page 11
0
4Parking brake release, see page 184
5Parking brake pedal, see page 184
6Hood lock release, see page 2339
7Combination switch, see page 113
8Cruise control switch, see page 193
9Multifunction steering wheel, see page 84
Horn (with electronic key in steering lock
position 1 or 2)
10Instrument cluster, see page 78
11Voice recognition system switch, see separate
operating instructions
12Steering lock with ignition/starter switch,
see page17213Center air outlets, adjustable
14Air volume control for center air outlets
15Left front seat heater switch, see page 53
16Headlamp washer switch, see page 112
17Switch for rear seat head restraints, see page 50
18Hazard warning flasher switch
19Central locking switch, see page 35
20Switch for tow-away alarm, see page43
Indicator lamp for antitheft alarm system,
see page41
21Right front seat heater switch, see page 53
22Automatic climate control, see page 116
Rear window defroster switch
23Glove box (illuminated with electronic key in
steering lock position 1 or 2), see page 148
24Audio system,
25Storage compartment
26Ashtray with lighter, see page 150
19
ProCarManuals.com
Page 59 of 299

Restraint systems
Te ch n ica l
data Instruments
and controlsOperationDrivingInstrument
cluster displayPractical hints Car care Index Unfastening of seat belts
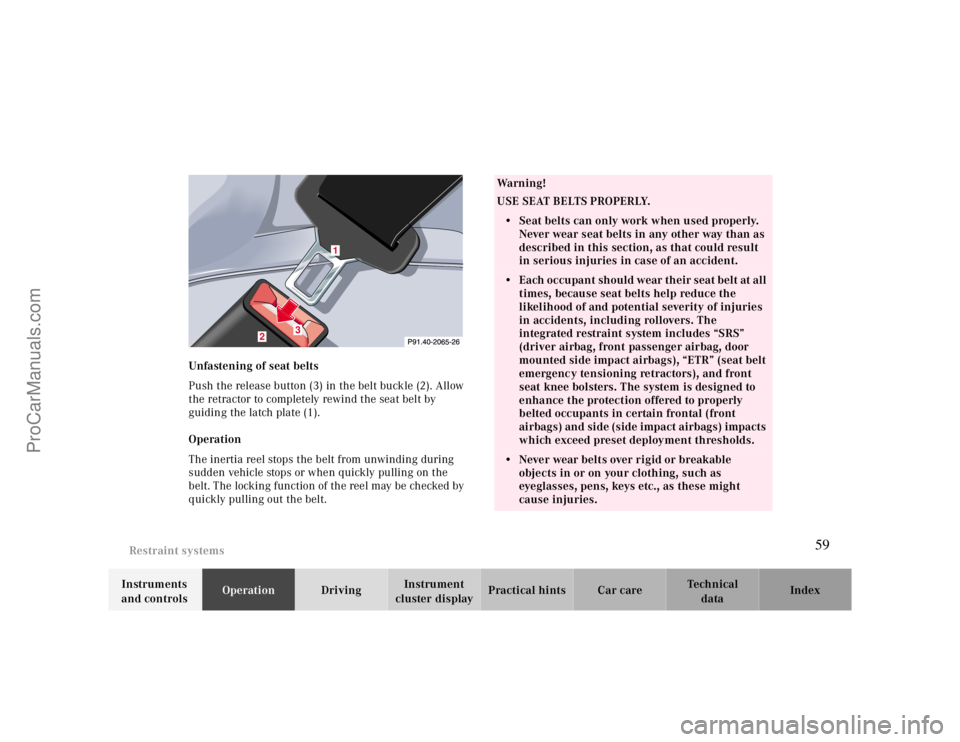
Push the release button (3) in the belt buckle (2). Allow
the retractor to completely rewind the seat belt by
guiding the latch plate (1).
Operation
The inertia reel stops the belt from unwinding during
sudden vehicle stops or when quickly pulling on the
belt. The locking function of the reel may be checked by
quickly pulling out the belt.
1
2
3
Wa r n i n g !
USE SEAT BELTS PROPERLY.• Seat belts can only work when used properly.
Never wear seat belts in any other way than as
described in this section, as that could result
in serious injuries in case of an accident.• Each occupant should wear their seat belt at all
times, because seat belts help reduce the
likelihood of and potential severity of injuries
in accidents, including rollovers. The
integrated restraint system includes “SRS”
(driver airbag, front passenger airbag, door
mounted side impact airbags), “ETR” (seat belt
emergency tensioning retractors), and front
seat knee bolsters. The system is designed to
enhance the protection offered to properly
belted occupants in certain frontal (front
airbags) and side (side impact airbags) impacts
which exceed preset deployment thresholds. • Never wear belts over rigid or breakable
objects in or on your clothing, such as
eyeglasses, pens, keys etc., as these might
cause injuries.
59
ProCarManuals.com
Page 227 of 299

Practical hints
Spare wheel 241
Changing wheels 242
First aid kit 228 Tire inflation pressure 247
Shelf below rear window 228 Battery 249
Stowing things in the vehicle 228 Jump starting 251
Spare wheel, vehicle tools, storage Towing the vehicle 253
compartment 229 Transmission selector lever,
Vehicle jack 230 manually unlocking 255
Fuses 231 Bulbs 256
Hood 233 Adjusting headlamp aim 261
Checking engine oil level 234 Changing batteries in the
Automatic transmission fluid level 236 electronic main key 264
Coolant level 236 Synchronizing remote control 266
Adding coolant 237 Emergency operation of
Windshield washer / headlamp
clean.system 238sliding/pop-up roof 267
Windshield and headlamp washer fluid
mixing ratio 238Manual release for fuel filler flap
268
Wheels 239 Replacing wiper blade insert 268
Tire replacement 239 Trunk lamp 270
Rotating wheels 240 Roof rack 270
227
ProCarManuals.com
Page 233 of 299

Engine compartment
Te ch n ica l
data Instruments
and controlsOperation DrivingInstrument
cluster displayPractical hintsCar care Index
Hood
Warning!
To help prevent personal injury, stay clear of
moving parts when the hood is open and the engine
is running. Be sure the hood is properly closed
before driving. When closing hood, use extreme
caution not to catch hands or fingers.The engine is equipped with a transistorized
ignition system. Because of the high voltage it is
dangerous to touch any components (ignition coils,
spark plug sockets, diagnostic socket) of the
ignition system
• with the engine running,
• while starting the engine,
• if ignition is “on” and the engine is turned
manually.If you see flames, steam or smoke coming from the
engine compartment, or if the coolant temperature
gauge indicates that the engine is overheated, do
not open the hood. Move away from vehicle and do
not open the hood until the engine has cooled. If
necessary, call a fire department.To o pen :
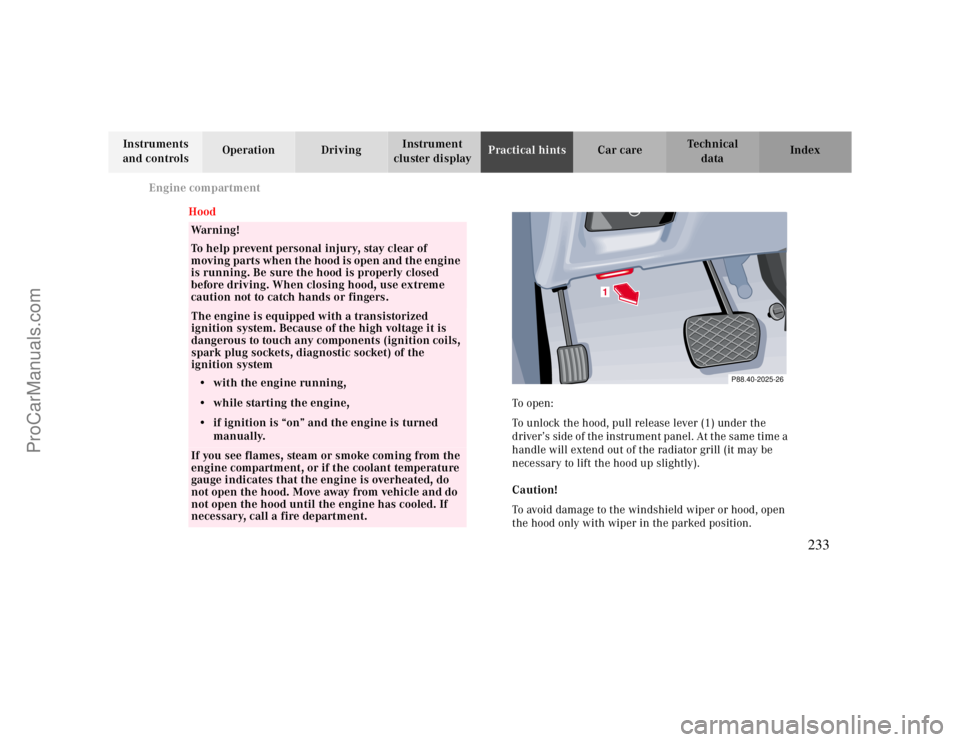
To unlock the hood, pull release lever (1) under the
driver’s side of the instrument panel. At the same time a
handle will extend out of the radiator grill (it may be
necessary to lift the hood up slightly).
Caution!
To avoid damage to the windshield wiper or hood, open
the hood only with wiper in the parked position.
P88.40-2025-26
1
233
ProCarManuals.com
Page 268 of 299

Manual release for fuel filler flap
Te ch n ica l
data Instruments
and controlsOperation DrivingInstrument
cluster displayPractical hintsCar care Index Manual release for fuel filler flap
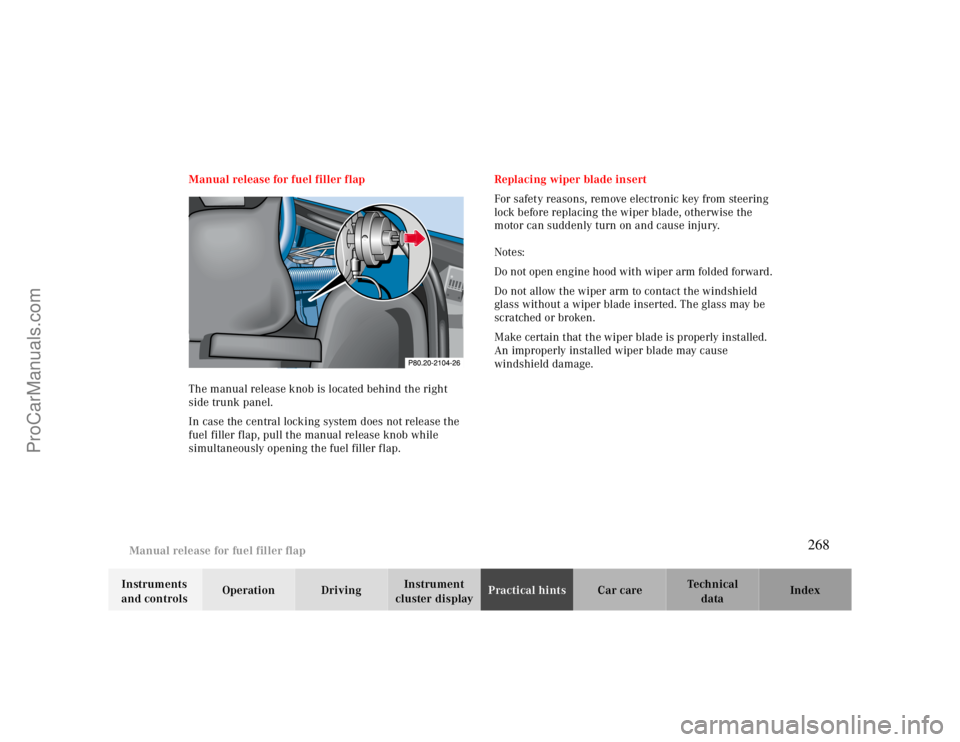
The manual release knob is located behind the right
side trunk panel.
In case the central locking system does not release the
fuel filler flap, pull the manual release knob while
simultaneously opening the fuel filler flap.Replacing wiper blade insert
For safety reasons, remove electronic key from steering
lock before replacing the wiper blade, otherwise the
motor can suddenly turn on and cause injury.
Notes:
Do not open engine hood with wiper arm folded forward.
Do not allow the wiper arm to contact the windshield
glass without a wiper blade inserted. The glass may be
scratched or broken.
Make certain that the wiper blade is properly installed.
An improperly installed wiper blade may cause
windshield damage.
268
ProCarManuals.com