2000 MERCEDES-BENZ CLK-CLASS tow
[x] Cancel search: towPage 154 of 299
Interior equipment
Te ch n ica l
data Instruments
and controlsOperationDrivingInstrument
cluster displayPractical hints Car care Index Always place items being carried against front or rear
seat backrests, and fasten them as securely as possible.
The heaviest portion of the cargo should always be kept
as low as possible since it influences the handling
characteristics of the vehicle.
Notes:
The trunk is the preferred place to carry objects.
The enlarged cargo area should only be used for items
which do not fit in the trunk alone.
Wa r n i n g !
In an accident, during hard braking or sudden
maneuvers, loose items will be thrown around
inside the vehicle, and can cause injury to vehicle
occupants unless the items are securely fastened in
the vehicle.To help avoid personal injury during a collision or
sudden maneuver, exercise care when stowing
things. Put luggage or cargo in the trunk if
possible. Do not pile luggage or cargo higher than
the seat backs. Do not place anything on the shelf
below the rear window.Never drive vehicle with trunk lid open while pass-
through is not closed and seat backrest sections not
locked in their upright positions. Deadly carbon
monoxide (CO) gases may enter vehicle interior
resulting in unconsciousness and death. The handling characteristics of a fully loaded vehicle
depend greatly on the load distribution. It is therefore
recommended to load the vehicle according to the
illustrations shown, with the heaviest items being
placed towards the front of the vehicle.
154
ProCarManuals.com
Page 168 of 299
Tele Aid
Te ch n ica l
data Instruments
and controlsOperationDrivingInstrument
cluster displayPractical hints Car care Index In the event of an ETR or airbag deployment, if the
system cannot connect to the Emergency Response
Center, it will attempt to contact 9-1-1. Close the
cover (1) after the emergency call is concluded.
Wa r n i n g !
If you feel at any way in jeopardy when in the
vehicle (e.g. smoke or fire in the vehicle, vehicle in
a dangerous road location), please do not wait for
voice contact after you have pressed the emergency
button. Carefully leave the vehicle and move to a
safe location. The Response Center will
automatically contact local emergency officials
with the vehicle’s approximate location
Roadside Assistance button •
Located below the center armrest cover is the Roadside
Assistance button•. Pressing and holding the
button (for longer than 2 seconds) will initiate a call to a
Mercedes-Benz Roadside Assistance dispatcher. The
button will flash while the call is in progress. The
message “ROADSIDE ASSISTANCE – CONNECTING
CALL” will appear in the multifunction display. When the connection is established, the message “ROADSIDE
ASSISTANCE – CALL CONNECTED” appears in the
multifunction display. The Tele Aid system will transmit
data generating the vehicle identification number,
model, color and location (subject to availability of
cellular and GPS signals).
A voice connection between the Roadside Assistance
dispatcher and the occupants of the vehicle will be
established. The nature of the need for assistance
can then be described.
.
For services such as labor and/or towing charges
may apply.Refer to the Roadside Assistance manual
for moreinformation. Sign and Drive services: Services such as jump start,
a few gallons of fuel or the replacement of a f lat tire
with the vehicle spare tire are obtainable
168
ProCarManuals.com
Page 179 of 299
Automatic transmission
Te ch n ica l
data Instruments
and controlsOperationDrivingInstrument
cluster displayPractical hints Car care Index Dependent on the program mode selector switch
position “S” or “W” the maximum speed in the
reverse gear is different. However, it is not
possible to change the program mode while in
reverse.
Neutral
No power is transmitted from the engine to the
drive axle. When the brakes are released, the
vehicle can be moved freely (pushed or towed). Do
not engage “N” while driving except to coast
when the vehicle is in danger of skidding (e.g. on
icy roads, see winter driving instructions on
page190).
Important!
Coasting the vehicle, or driving for any other
reason with selector lever in “N” can result in
transmission damage that is not covered by the
Mercedes-Benz Limited Warranty.
The transmission automatically upshifts through
5th gear. Position “D” provides optimum driving
characteristics under all normal operating
conditions.Gear selection for special circumstances
The transmission gear ranges for special circumstances
can be selected by pressing the selector lever to the
right or the left with the selector lever in position “D”.
The gear range currently selected is indicated in the
instrument cluster display.
Briefly press selector lever in the çdirection:
The transmission downshifts, one gear at a time, in the
orderD, 4, 3, 2, 1.
Press and hold selector lever in the çdirection:
The selector lever position display will switch to the
gear range currently selected by the automatic
transmission.
The transmission will only shift down one gear if the
gear range currently selected has already shifted to its
highest possible gear.
Briefly press selector lever in the ædirection:
The transmission will shift from the current gear range
to the next higher gear range. If the transmission is
already in gear range “D”, an additional upshift of one
gear is possible.
179
ProCarManuals.com
Page 187 of 299
Driving instructions
Te ch n ica l
data Instruments
and controlsOperationDrivingInstrument
cluster displayPractical hints Car care Index Parking
Important!
It is advisable to set the parking brake whenever
parking or leaving the vehicle. In addition, move
selector lever to position “P”.
When parking on hills, always set the parking brake.
Wa r n i n g !
To reduce the risk of personal injury as a result of
vehicle movement, before
turning off the engine
and leaving the vehicle, always:
1. Keep right foot on the service brake pedal.
2. Firmly depress parking brake pedal.
3. Move the selector lever to position “P”.
4. Slowly release the service brake pedal.
5. Turn front wheels towards the road curb.
6. Turn the electronic key to steering lock
position 0 and remove.
7. Take the electronic key and lock vehicle when
leaving.Tires
Tread wear indicators (TWI) are required by law. These
indicators are located in six places on the tread
circumference and become visible at a tread depth of
approximately
1/16in (1.5 mm), at which point the tire is
considered worn and should be replaced.
The tread wear indicator appears as a solid band across
the tread.
Warning!
If you feel a sudden significant vibration or ride
disturbance, or you suspect that possible damage to
your vehicle has occurred, you should turn on the
hazard warning f lashers, carefully slow down, and
drive with caution to an area which is a safe
distance from the roadway.Inspect the tires and under the vehicle for possible
damage. If the vehicle or tires appear unsafe, have
it towed to the nearest Mercedes-Benz Center or
tire dealer for repairs.
187
ProCarManuals.com
Page 200 of 299
Driving systems
Te ch n ica l
data Instruments
and controlsOperationDrivingInstrument
cluster displayPractical hints Car care Index
Electronic stability program (ESP)
The ESP enhances directional control and reduces
driving wheel spin of the vehicle under various driving
conditions.
Over/understeering of the vehicle is counteracted by
applying brakes to the appropriate wheel to create a
countervailing vehicle movement. Engine torque is also
limited. The ESP warning lamp, located in the
speedometer dial, starts to flash when ESP is in
operation.
Important!
If the ESP warning lamp flashes
adapt your speed
and driving to the prevailing road conditions.
Caution!
If the vehicle is towed with the front axle raised (see
towing the vehicle on page253), the engine must be
shut off (electronic key in steering lock position 0 or 1).
Otherwise, the ESP will immediately be engaged and
will apply the rear wheel brakes.Notes:
The malfunction indicator lamp for the ESP is
combined with that of the BAS.
The yellow BAS/ESP malfunction indicator lamp in the
instrument cluster and the yellow ESP warning
lamp in the speedometer dial come on with the
electronic key in steering lock position 2. They should
go out with the engine running.
If the BAS/ESP malfunction indicator lamp comes on
continuously with the engine running, a malfunction
has been detected in either system. Only partial engine
output will be available.
If the BAS malfunctions, the brake system functions in
the usual manner, but without BAS.
If the ESP warning message is displayed, have the BAS
or ESP checked at your authorized Mercedes-Benz
Center as soon as possible.
With the ABS malfunctioning, the ESP is also switched
off.
200
ProCarManuals.com
Page 227 of 299

Practical hints
Spare wheel 241
Changing wheels 242
First aid kit 228 Tire inflation pressure 247
Shelf below rear window 228 Battery 249
Stowing things in the vehicle 228 Jump starting 251
Spare wheel, vehicle tools, storage Towing the vehicle 253
compartment 229 Transmission selector lever,
Vehicle jack 230 manually unlocking 255
Fuses 231 Bulbs 256
Hood 233 Adjusting headlamp aim 261
Checking engine oil level 234 Changing batteries in the
Automatic transmission fluid level 236 electronic main key 264
Coolant level 236 Synchronizing remote control 266
Adding coolant 237 Emergency operation of
Windshield washer / headlamp
clean.system 238sliding/pop-up roof 267
Windshield and headlamp washer fluid
mixing ratio 238Manual release for fuel filler flap
268
Wheels 239 Replacing wiper blade insert 268
Tire replacement 239 Trunk lamp 270
Rotating wheels 240 Roof rack 270
227
ProCarManuals.com
Page 228 of 299
First aid kit
Te ch n ica l
data Instruments
and controlsOperation DrivingInstrument
cluster displayPractical hintsCar care Index
First aid kit
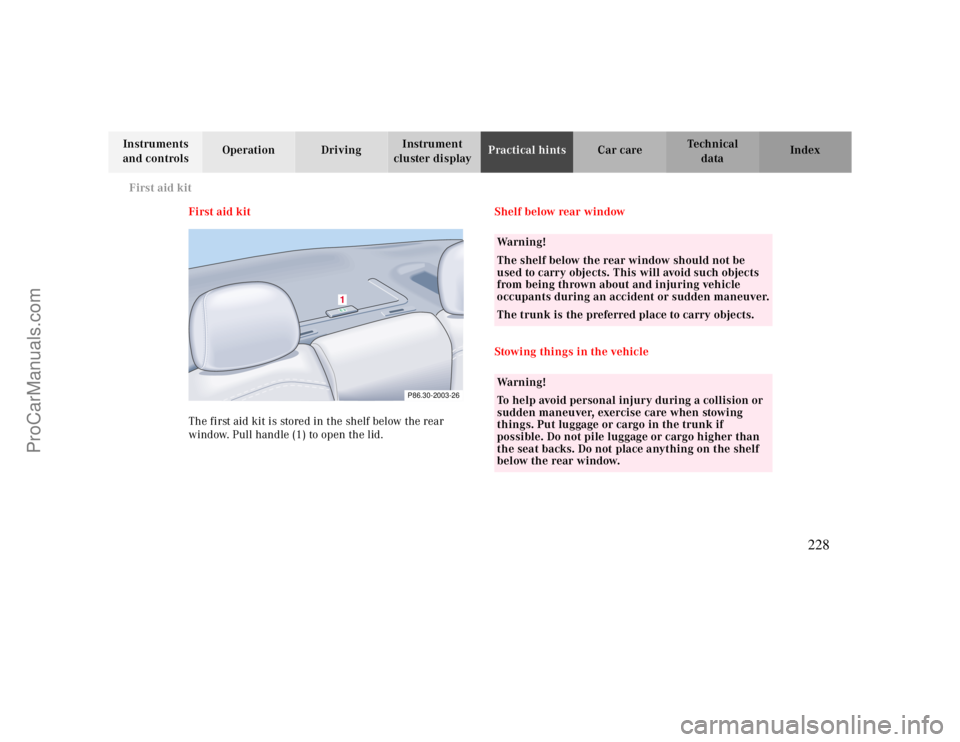
The first aid kit is stored in the shelf below the rear
window. Pull handle (1) to open the lid.Shelf below rear window
Stowing things in the vehicle
P86.30-2003-26
1
Wa r n i n g !
The shelf below the rear window should not be
used to carry objects. This will avoid such objects
from being thrown about and injuring vehicle
occupants during an accident or sudden maneuver.
The trunk is the preferred place to carry objects.Wa r n i n g !
To help avoid personal injury during a collision or
sudden maneuver, exercise care when stowing
things. Put luggage or cargo in the trunk if
possible. Do not pile luggage or cargo higher than
the seat backs. Do not place anything on the shelf
below the rear window.
228
ProCarManuals.com
Page 253 of 299
Towing
Te ch n ica l
data Instruments
and controlsOperation DrivingInstrument
cluster displayPractical hintsCar care Index
Towing the vehicle
Important!
When towing the vehicle, please, note the following:
With the automatic central locking activated and the
electronic key in steering lock position 2, the vehicle
doors lock if the left front wheel as well as the right rear
wheel are turning at vehicle speeds of approx. 9 mph
(15 km/h) or more.
To prevent the vehicle door locks from locking,
deactivate the automatic central locking, see page36.
Prior to towing the vehicle with all wheels on the
ground, make certain that the electronic key is in
steering lock position 2.If the electronic key is left in the steering lock
position 0 for an extended period of time, it can no
longer be turned in the lock. In this case, the
steering is locked. To unlock, remove electronic key
from steering lock and reinsert.
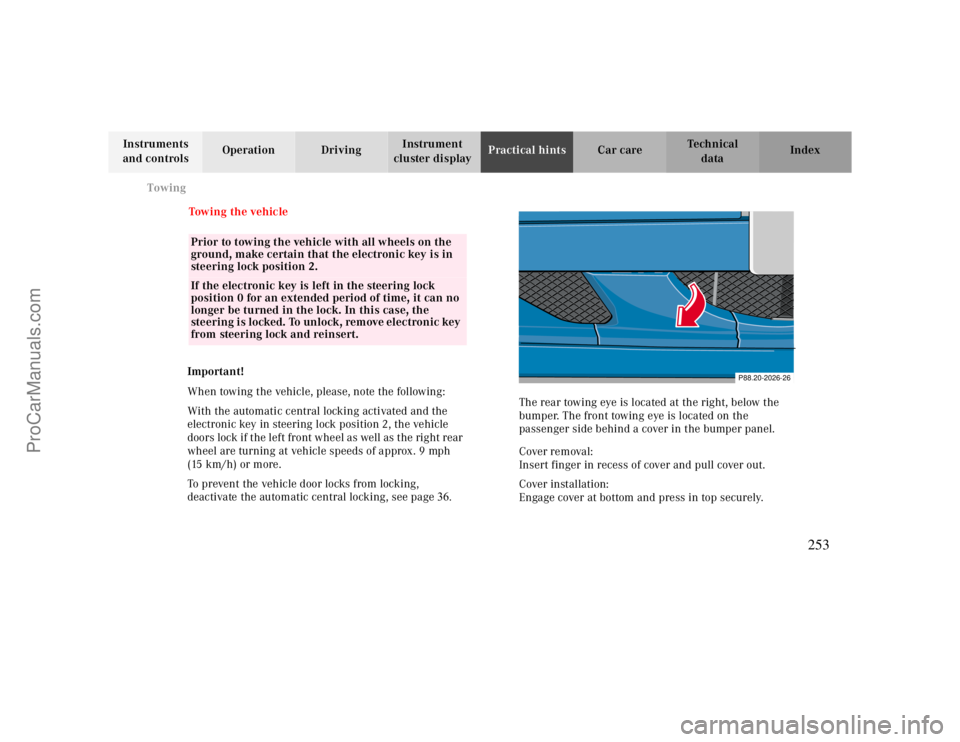
The rear towing eye is located at the right, below the
bumper. The front towing eye is located on the
passenger side behind a cover in the bumper panel.
Cover removal:
Insert finger in recess of cover and pull cover out.
Cover installation:
Engage cover at bottom and press in top securely.
P88.20-2026-26
253
ProCarManuals.com