2000 MERCEDES-BENZ CLK CABRIOLET CD player
[x] Cancel search: CD playerPage 87 of 323

Multifunction steering wheel, multifunction display
Te ch n ica l
data Instruments
and controlsOperationDrivingInstrument
cluster displayPractical hints Car care Index Depending on your vehicle’s equipment, you may use
the buttons on the multifunction steering wheel to call
up, control and set the following systems in the
multifunction display:
1Trip odometer and main odometer, see page90
Flexible service system (FSS), see page107
Engine oil level indicator, see page110
2Audio systems, see page91
Radio, see page 91
CD player (optional), see page 92
Cassette player, see page 93
3Navigation system (optional), see page 99
4Malfunction message memory, see page 102
5Individual settings, see page 104
6Trip computer, see page 100
After start
After reset
Fuel tank content
7Telephone (if so equipped), see page 94Press the è or ÿ button repeatedly until the
required system is displayed.
Pressing the è button advances the display to the
ne xt system.
Pressing the ÿ button returns the display to the
previous system.
You may call up additional displays within some of these
categories by pressing the j or k button.
Wa r n i n g !
A driver’s attention to the road must always be his /
her primary focus when driving. For your safety and the safety of others,
programming and selecting
features through the
multifunction steering wheel should only be done
by the driver when traffic and road conditions
permit it to be done safely, including pulling over to a
safe location where that is required for safe operation.
87
Page 89 of 323

Multifunction steering wheel, multifunction display
Te ch n ica l
data Instruments
and controlsOperationDrivingInstrument
cluster displayPractical hints Car care Index Press the è or ÿ button repeatedly until the
required system is displayed.
Pressing the è button advances the display to the
next system.
Pressing the ÿ button returns the display to the
previous system.
You may call up additional displays in some systems by
pressing the j or k button.Note:
The displays in the multifunction display can be set to
German, English, French, Italian or Spanish language.
See the “TEXT” individual setting on page 104 for
instructions on changing the language setting.
The displays for the audio systems (radio, CD player,
cassette player) will appear in English, regardless of the
language selected.
89
Page 92 of 323

Multifunction steering wheel, multifunction display
Te ch n ica l
data Instruments
and controlsOperationDrivingInstrument
cluster displayPractical hints Car care Index
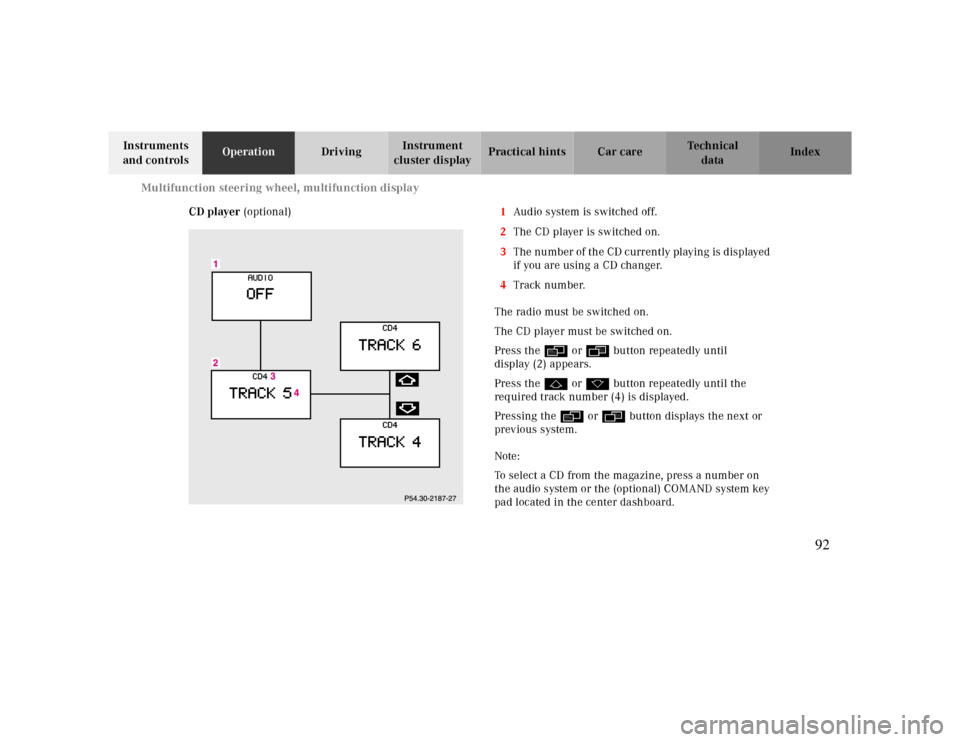
CD player (optional)1Audio system is switched off.
2The CD player is switched on.
3The number of the CD currently playing is displayed
if you are using a CD changer.
4Track number.
The radio must be switched on.
The CD player must be switched on.
Press the è or ÿ button repeatedly until
display (2) appears.
Press the j or k button repeatedly until the
required track number (4) is displayed.
Pressing the è or ÿ button displays the next or
previous system.
Note:
To select a CD from the magazine, press a number on
the audio system or the (optional) COMAND system key
pad located in the center dashboard.
92
Page 93 of 323

Multifunction steering wheel, multifunction display
Te ch n ica l
data Instruments
and controlsOperationDrivingInstrument
cluster displayPractical hints Car care Index Cassette player1Audio system is switched off.
2The cassette player is switched on.
3Side being played.
The radio must be switched on.
The cassette player must be switched on.
Press the è or ÿ button repeatedly until
display (2) appears.
Pressing the j button fast forwards on to the next
track.
Pressing the k button rewinds the cassette to the
beginning of the current track.
Pressing the è or ÿ button displays the next or
previous system.
Note:
To select the reverse side of the tape, press button below
track number on the audio system display, or enter
request on the (optional) COMAND system located in
the center dashboard.
93
Page 133 of 323

Audio system
Te ch n ica l
data Instruments
and controlsOperationDrivingInstrument
cluster displayPractical hints Car care Index Cassette mode
Note:
Vehicles equipped with the COMAND system do not
come with a factory installed cassette mechanism.
A standard 1/8” stereo phono plug for auxiliary audio
input (located in glove box) is provided for connection of
a portable battery operated cassette player or any other
portable device which uses a headphone output. Please
refer to the COMAND operating manual for information
concerning the activation of the audio input.
Playing cassettes
Press the “TAPE” button. When the eject (EJ) key is
pressed, the display folds down and the cassette slot
becomes visible. Push the cassette into the slot until it
engages. The cassette will be pulled in automatically.
Note:
Do not press directly on the radio display face.
Return the display panel to its normal position by
folding it back up and pressing gently on the display
frame to lock in place. Important!
If the display is in the down position for more than
20 seconds, 2 successive beeps will be heard. This will
continue at 5 second intervals until the display is
returned to its normal position.
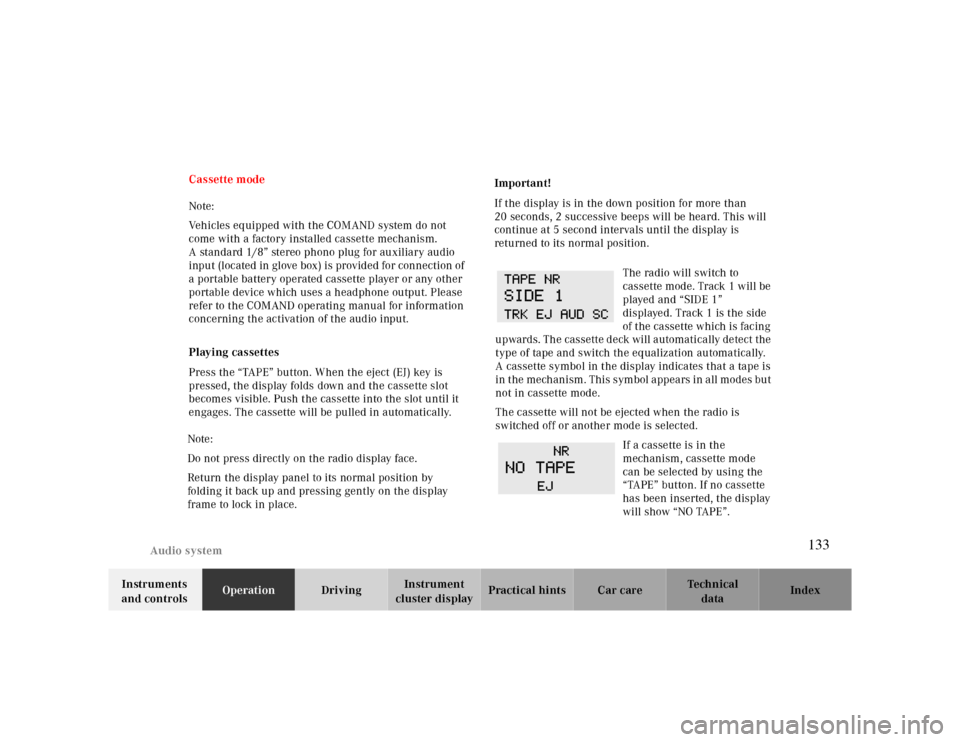
The radio will switch to
cassette mode. Track 1 will be
played and “SIDE 1”
displayed. Track 1 is the side
of the cassette which is facing
upwards. The cassette deck will automatically detect the
type of tape and switch the equalization automatically.
A cassette symbol in the display indicates that a tape is
in the mechanism. This symbol appears in all modes but
not in cassette mode.
The cassette will not be ejected when the radio is
switched off or another mode is selected.
If a cassette is in the
mechanism, cassette mode
can be selected by using the
“TAPE” button. If no cassette
has been inserted, the display
will show “NO TAPE”.
133
Page 315 of 323

IndexABS (Antilock brake system). . .. . .. . .. . .. . .. . .. . .. . .. . .. . .. . .. . .. 206 ABS-SYSTEM - malfunction and
warning m essa ges . . .. . .. . .. . .. . .. . .. . .. . .. . .. . .. . .. . .. . .. . .. . .. . 225
Adjusting headlamp aim ..........................................274 Adjusting telescoping steering column ....................... 74 Air conditioner refrigerant ......................................309 Airbag OFF indicator lamp .......................................221 Airbags .................................................................... 65 Antenna
Removal..............................................................287
Antilock brake system (ABS). . .. . .. . .. . .. . .. . .. . .. . .. . .. . .. . .. . .. 206
Malfunction indicator lamp ...................................219
Antitheft alarm system.............................................. 42 Aquaplaning............................................................196 Ashtray
Center console, front............................................150
Audio system
Anti-theft system ................................................127 Button and soft key operation ..............................128
C a s s e t t e m od e . . . . . . . . . . . . . . . . . . . . . . . . . . . . . . . . . . . . . . . . . . . . . . . . . . . . 133 C D ch a n ger . . . . . . . . . . . . . . . . . . . . . . . . . . . . . . . . . . . . . . . . . . . . . . . . . . . . . . . . 137 CD mode .............................................................136 Operating and display elements ........................... 126 Operating safety ................................................. 125 Oper at i on . . . . . . . . . . . . . . . . . . . . . . . . . . . . . . . . . . . . . . . . . . . . . . . . . . . . . . . . . . 129 Oper a t i on Audi o an d t el eph on e . . . . . . . . . . . . . . . . . . . . . . . . . . . . 125 R a d i o m o d e . . . . . . . . . . . . . . . . . . . . . . . . . . . . . . . . . . . . . . . . . . . . . . . . . . . . . . . . 131 T e l e p h on e op e r a t i on . . . . . . . . . . . . . . . . . . . . . . . . . . . . . . . . . . . . . . . . . . . . 140
Audio systems .......................................................... 91
Cassette player ..................................................... 93 CD player ............................................................. 92 Radio.................................................................... 91
A u t o m a t i c c l i m a t e c o n t r o l . . . . . . . . . . . . . . . . . . . . . . . . . . . . . . . . . . . . . . . . . 118
Air distribution .................................................. 122 A i r r e c i r c u l a t i on . . . . . . . . . . . . . . . . . . . . . . . . . . . . . . . . . . . . . . . . . . . . . . . . . . 123 A i r vol um e . . . . . . . . . . . . . . . . . . . . . . . . . . . . . . . . . . . . . . . . . . . . . . . . . . . . . . . . . 122 Basic setting ...................................................... 120 Defogging windows .............................................121 D e f r o s t i n g . . . . . . . . . . . . . . . . . . . . . . . . . . . . . . . . . . . . . . . . . . . . . . . . . . . . . . . . . . . 121 Display and controls ............................................ 120 Dust filter ........................................................... 124 E c on om y . . . . . . . . . . . . . . . . . . . . . . . . . . . . . . . . . . . . . . . . . . . . . . . . . . . . . . . . . . . . . 121
315