2000 MERCEDES-BENZ CLK CABRIOLET ECO mode
[x] Cancel search: ECO modePage 133 of 323

Audio system
Te ch n ica l
data Instruments
and controlsOperationDrivingInstrument
cluster displayPractical hints Car care Index Cassette mode
Note:
Vehicles equipped with the COMAND system do not
come with a factory installed cassette mechanism.
A standard 1/8” stereo phono plug for auxiliary audio
input (located in glove box) is provided for connection of
a portable battery operated cassette player or any other
portable device which uses a headphone output. Please
refer to the COMAND operating manual for information
concerning the activation of the audio input.
Playing cassettes
Press the “TAPE” button. When the eject (EJ) key is
pressed, the display folds down and the cassette slot
becomes visible. Push the cassette into the slot until it
engages. The cassette will be pulled in automatically.
Note:
Do not press directly on the radio display face.
Return the display panel to its normal position by
folding it back up and pressing gently on the display
frame to lock in place. Important!
If the display is in the down position for more than
20 seconds, 2 successive beeps will be heard. This will
continue at 5 second intervals until the display is
returned to its normal position.
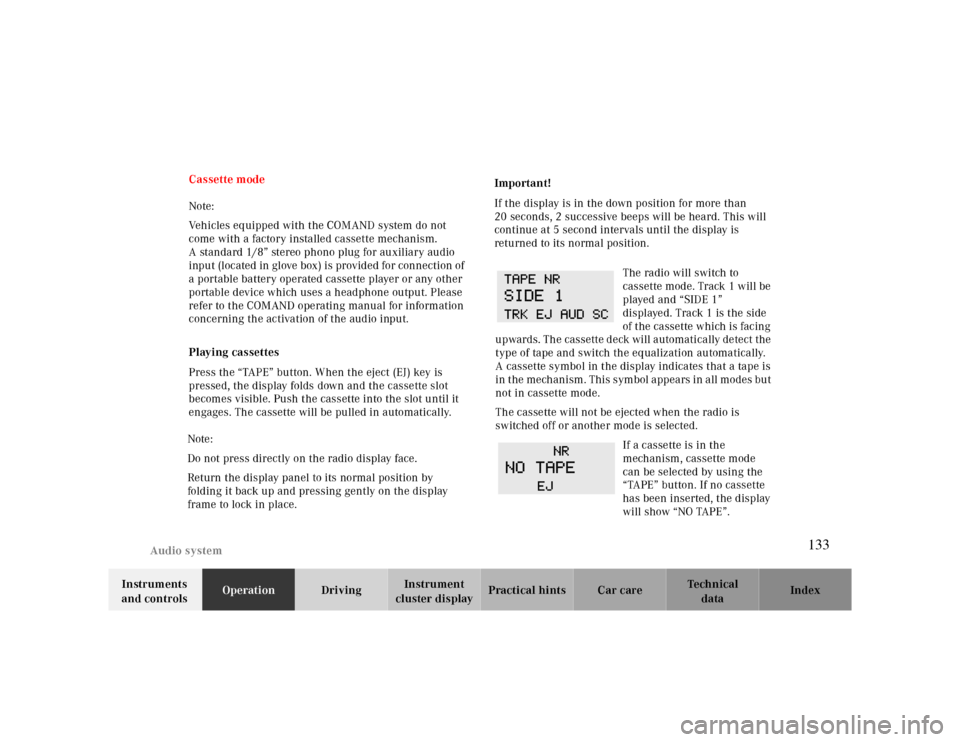
The radio will switch to
cassette mode. Track 1 will be
played and “SIDE 1”
displayed. Track 1 is the side
of the cassette which is facing
upwards. The cassette deck will automatically detect the
type of tape and switch the equalization automatically.
A cassette symbol in the display indicates that a tape is
in the mechanism. This symbol appears in all modes but
not in cassette mode.
The cassette will not be ejected when the radio is
switched off or another mode is selected.
If a cassette is in the
mechanism, cassette mode
can be selected by using the
“TAPE” button. If no cassette
has been inserted, the display
will show “NO TAPE”.
133
Page 134 of 323

Audio system
Te ch n ica l
data Instruments
and controlsOperationDrivingInstrument
cluster displayPractical hints Car care Index
Cassette eject
Press the eject (EJ) key. The display will fold down and
the cassette will be ejected. Remove the cassette, then
fold the display back up manually. The radio will switch
back to radio mode automatically.
Note:
The cassette will not be ejected when the radio is
switched off.
Important!
If the display is in the down position for more than
20 seconds, 2 successive beeps will be heard. This will
continue at 5 second intervals until the display is
returned to its normal position.
Track selection
Press the track selection
(TRK) key. The current track
will be displayed as “SIDE 1”
or “SIDE 2”. The track will be
changed automatically at the
end of the tape.
Track search forwards/backwards
Press the button.
“SEEK FWD” will be shown on
the display and the track
search will run the tape
forwards to the start of the
next track.
Press the button.
“SEEK RWD” will be shown
on the display and the track
search will run the tape
backwards to the start of the
track currently playing. Track search can be interrupted
by pressing the same button again.
Note:
The beginning of a track can only be located if there is a
break of at least 4 seconds between tracks.
134
Page 138 of 323

Audio system
Te ch n ica l
data Instruments
and controlsOperationDrivingInstrument
cluster displayPractical hints Car care Index If there is no CD in the
selected magazine slot,
“NO CD” and the
corresponding slot number
will be displayed
(e.g.“NO CD3”). After the last track on a CD has been
played, the next CD will automatically be selected and
played.
Skipping tracks forwards/backwards
Press the button. The next track on the CD will be
played.
Press the button. If the track has been playing for
more than 10 seconds, it will revert to the start of that
track. If it has been playing for less than ten seconds it
will revert to the preceding track. To skip several tracks,
the respective button must be pressed until the desired
track is reached. If the beginning or end of the CD is
reached during the search, the first or last track will be
played.Fast forward/reverse
Press the button and hold it down for audible fast
forward.
Press the button and hold it down for audible
reverse.
The search will stop when the
button is released. The
relative time of the track will
be displayed during the
search. The search mode will
cancel if the beginning or end of the CD is reached.
Scanning
Press the SC key. Each tra ck w ill be played for 8 second s
in ascending order. The search will stop at the track in
question if the , , , buttons or the
“SC” key is pressed.
138
Page 171 of 323

The first 1 000 miles
Te ch n ica l
data Instruments
and controlsOperationDrivingInstrument
cluster displayPractical hints Car care Index The first 1 000 miles (1 500 km)
The more cautiously you treat your vehicle during the
break-in period, the more satisfied you will be with its
performance later on. Therefore, drive your vehicle
during the first 1 000 miles (1 500 km) at moderate
vehicle and engine speeds.
During this period, avoid heavy loads (full throttle
driving) and excessive engine speeds.
Avoid accelerating by kickdown. It is not recommended
to brake the vehicle by manually shifting to a lower gear.
We recommend that you select positions “3”, “2” or “1”
only at moderate speeds (for hill driving).
After 1 000 miles (1 500 km) speeds may be gradually
increased to the permissible maximum.Maintenance
Approximately 30 days or 2 000 miles ( 2000 km) prior
to the next recommended service, the remaining
distance or days are displayed in the multifunction
indicator. See Flexible service system (FSS) on
page107.
We strongly recommend that you have your vehicle
serviced by your authorized Mercedes-Benz Center, in
accordance with the Service Booklet at the times called
for by the FSS.
Failure to have the vehicle maintained in accordance
with the Service Booklet at the designated times /
mileage may result in vehicle damage not covered by
the Mercedes-Benz Limited Warranty.
Check regularly and before a long trip, see page213.
171
Page 174 of 323

Tele Aid
Te ch n ica l
data Instruments
and controlsOperationDrivingInstrument
cluster displayPractical hints Car care Index
Te l e A i d
The electronic key in the steering lock must be in position
1 or 2 for the Tele Aid to be operational.Important!
The initial activation of the Tele Aid system may only be
performed by completing the subscriber agreement and
placing an acquaintance call using the “SOS” button.
Failure to complete either of these steps will result in a
system that is not activated.
If you have any questions regarding activation, please
call the Response Center at 1-800-756-9018 (in the USA)
or 1-888-923-8367 (in Canada).
(Te l ematic Alarm Identification on Demand)
The Tele Aid system consists of three types of response;
automatic and manual emergency, roadside assistance
and information.Emergency calls
An emergency call is initiated automatically
following an accident in which the Emergency
Tensioning Retractors (ETR’s) or airbags deploy,
An emergency call can also be initiated manually by
opening the cover next to the inside rear view mirror
labeled “SOS”, then pressing the button (for longer than
2 seconds) located under the cover. Once the emergency
call is in progress, the indicator
lamp in the “SOS”
button will begin to f lash. All information relevant to the
emergency, such as the location of the vehicle
(determined by the GPS satellite location system),
vehicle model, identification number and color are
generated.
A voice connection between the Response Center and
the occupants of the vehicle will be established
automatically soon after the emergency call has been
initiated. The Response Center will attempt
to determine more precisely the nature of the accident
provided they can speak to an occupant of the vehicle.
174
Page 176 of 323

Tele Aid
Te ch n ica l
data Instruments
and controlsOperationDrivingInstrument
cluster displayPractical hints Car care Index In the event of an ETR or airbag deployment, if the
system cannot connect to the Emergency Response
Center, it will attempt to contact 9-1-1. Close the
cover (1) after the emergency call is concluded.
Wa r n i n g !
If you feel at any way in jeopardy when in the
vehicle (e.g. smoke or fire in the vehicle, vehicle in
a dangerous road location), please do not wait for
voice contact after you have pressed the emergency
button. Carefully leave the vehicle and move to a
safe location. The Response Center will
automatically contact local emergency officials
with the vehicle’s approximate location
Roadside Assistance button •
Located below the center armrest cover is the Roadside
Assistance button•. Pressing and holding the
button (for longer than 2 seconds) will initiate a call to a
Mercedes-Benz Roadside Assistance dispatcher. The
button will flash while the call is in progress. The
message “ROADSIDE ASSISTANCE – CONNECTING
CALL” will appear in the multifunction display. When the connection is established, the message “ROADSIDE
ASSISTANCE – CALL CONNECTED” appears in the
multifunction display. The Tele Aid system will transmit
data generating the vehicle identification number,
model, color and location (subject to availability of
cellular and GPS signals).
A voice connection between the Roadside Assistance
dispatcher and the occupants of the vehicle will be
established. The nature of the need for assistance
can then be described.
.
For services such as labor and/or towing charges
may apply.Refer to the Roadside Assistance manual
for moreinformation. Sign and Drive services: Services such as jump start,
a few gallons of fuel or the replacement of a f lat tire
with the vehicle spare tire are obtainable
176
Page 177 of 323

Tele Aid
Te ch n ica l
data Instruments
and controlsOperationDrivingInstrument
cluster displayPractical hints Car care Index Information button ¡
Located below the center armrest cover is the
Information button¡. Pressing and holding the
button (for longer than 2 seconds) will initiate a call to
the Client Assistance Center. The button will flash while
the call is in progress.
The Tele Aid system will transmit
data generating the vehicle identification number,
model, color and location (subject to availability of
cellular and GPS signals).
A voice connection between the Client Assistance
Center representative and the occupants of the vehicle
will be established. Information regarding the
operation of your vehicle, the nearest Mercedes-Benz
Center or Mercedes-Benz USA products and services is
ava il ab l e to you .
For more details concerning this optional service, please
TheTele A id system is operational one the electronic If you have chosen the Route Guidance Service (only USA)
your communication will be transferred to our Emergency
Response Center, who will provide the appririate information. The indicator lamp in the
Information buttons
for approx. 5
seconds s
after switching on the ignition.“SOS”
Roadside Assistance
light up
and
key in steering lock is turned to position 1 or 2.contact the Emergency Response Center at 1-800-756-9018.Important!
If the indicator lamps do not start f lashing after
pressing one of the buttons or remain illuminated (in
red) at any time, the Tele Aid system has detected a fault
or the service is not currently active, and may not
initiate a call. Visit your Mercedes-Benz Center and
have the system checked or contact the Response Center
at 1-800-756-9018 (in the USA) or 1-888-923-8367 (in
Canada) as soon as possible.
Upgrade Signals
Tele Aid system processes calls using the following
priority.
•Automatic emergency
•Manual emergency
•Roadside assistance
•Information
177
Page 191 of 323

Automatic transmission
Te ch n ica l
data Instruments
and controlsOperationDrivingInstrument
cluster displayPractical hints Car care Index Caution!
Never change the program mode when the selector lever
is out of position “P”. It could result in a change of
driving characteristics for which you may not be
prepared.
Important!
Always be certain of the program mode selected since
the vehicle driving characteristics change with the
selection of the program mode.
Dependent on the program mode selector switch
position “S” or “W” and the gear selector lever in
position “R”, the ratio of power transmission changes.
Emergency operation (Limp home mode)
If vehicle acceleration worsens or the transmission no
longer shifts, the transmission is most likely operating
in Limp home mode which engages when there is a
malfunction of the transmission. This condition may be
accompanied by the “CHECK ENGINE” malfunction
indicator lamp in the instrument cluster coming on.In this mode only the 2nd gear or reverse gear can be
activated.
To engage 2nd gear or reverse:
1. Stop the vehicle.
2. Move selector lever to position “P”.
3. Turn off the engine.
4. Wait approx. 10 seconds.
5. Restart the engine.
6. Move selector lever to position “D” (for 2nd gear), or
move selector lever to position “R” (for reverse gear).
Have the transmission checked at your authorized
Mercedes-Benz Center as soon as possible.
191