2000 LINCOLN TOWN CAR brake fluid
[x] Cancel search: brake fluidPage 4 of 224
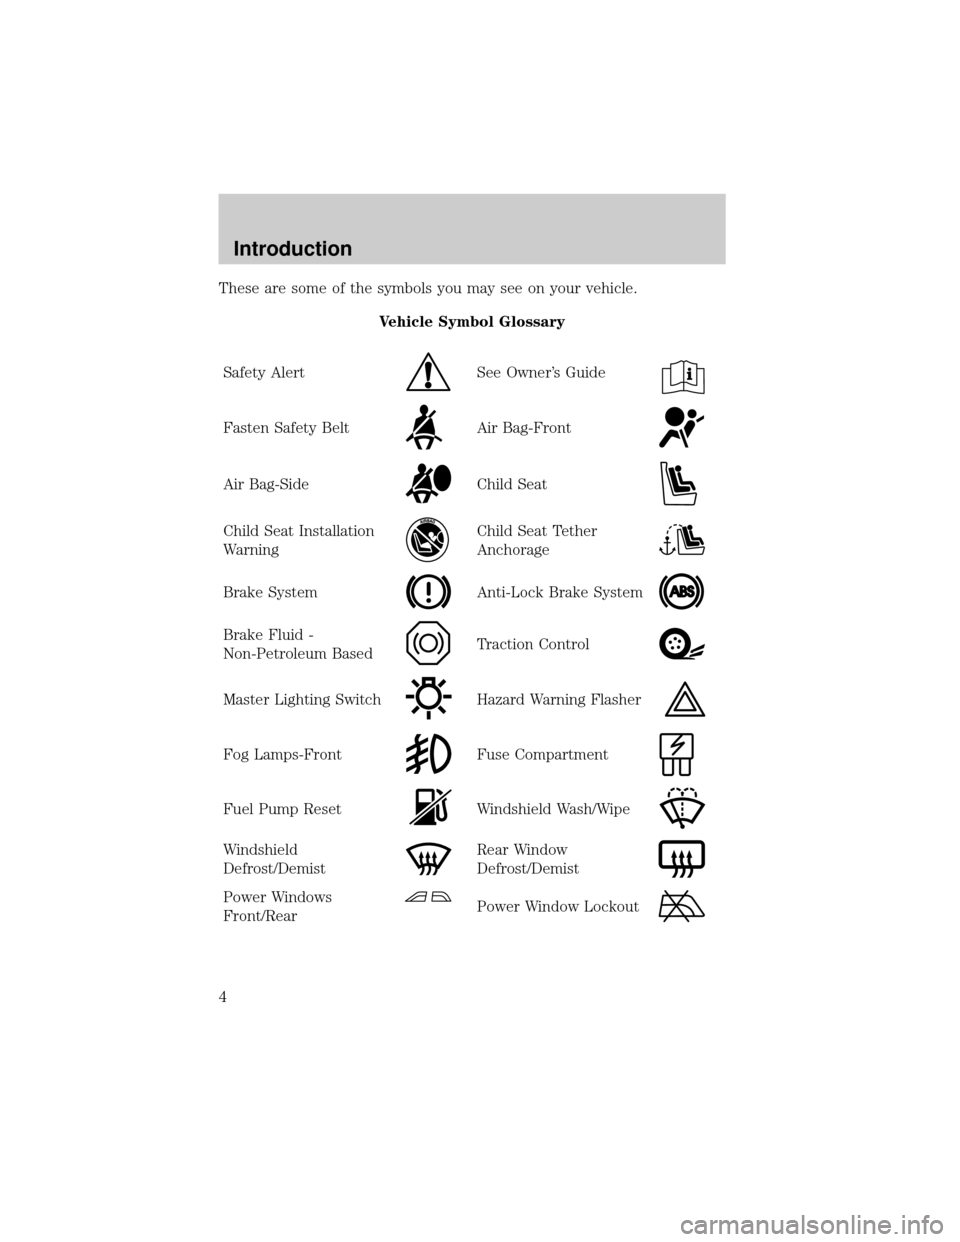
These are some of the symbols you may see on your vehicle.
Vehicle Symbol Glossary
Safety Alert
See Owner's Guide
Fasten Safety BeltAir Bag-Front
Air Bag-SideChild Seat
Child Seat Installation
WarningChild Seat Tether
Anchorage
Brake SystemAnti-Lock Brake System
Brake Fluid -
Non-Petroleum BasedTraction Control
Master Lighting SwitchHazard Warning Flasher
Fog Lamps-FrontFuse Compartment
Fuel Pump ResetWindshield Wash/Wipe
Windshield
Defrost/DemistRear Window
Defrost/Demist
Power Windows
Front/RearPower Window Lockout
Introduction
4
Page 10 of 224
Brake system warning
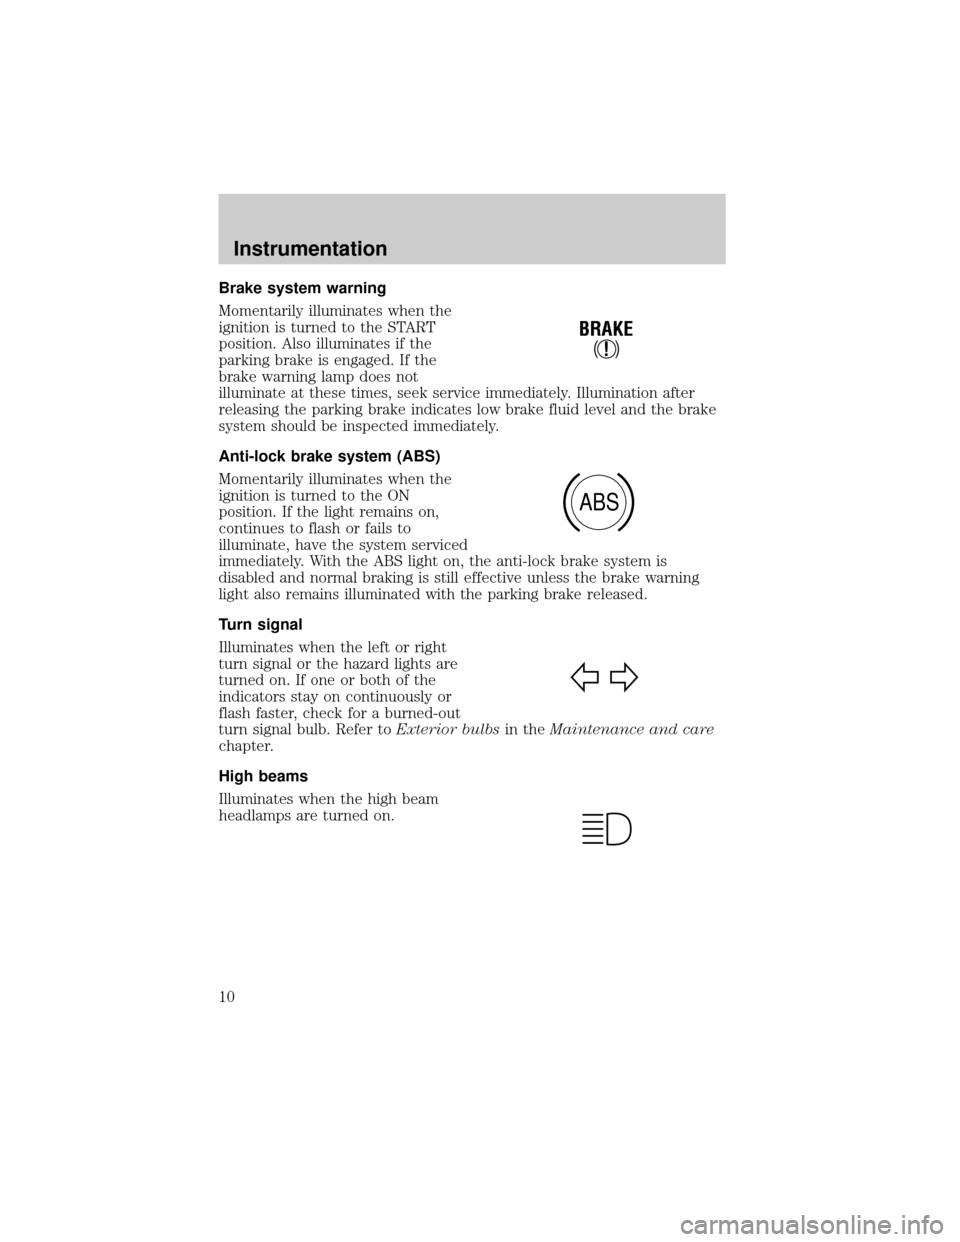
Momentarily illuminates when the
ignition is turned to the START
position. Also illuminates if the
parking brake is engaged. If the
brake warning lamp does not
illuminate at these times, seek service immediately. Illumination after
releasing the parking brake indicates low brake fluid level and the brake
system should be inspected immediately.
Anti-lock brake system (ABS)
Momentarily illuminates when the
ignition is turned to the ON
position. If the light remains on,
continues to flash or fails to
illuminate, have the system serviced
immediately. With the ABS light on, the anti-lock brake system is
disabled and normal braking is still effective unless the brake warning
light also remains illuminated with the parking brake released.
Turn signal
Illuminates when the left or right
turn signal or the hazard lights are
turned on. If one or both of the
indicators stay on continuously or
flash faster, check for a burned-out
turn signal bulb. Refer toExterior bulbsin theMaintenance and care
chapter.
High beams
Illuminates when the high beam
headlamps are turned on.
!
BRAKE
ABS
Instrumentation
10
Page 152 of 224
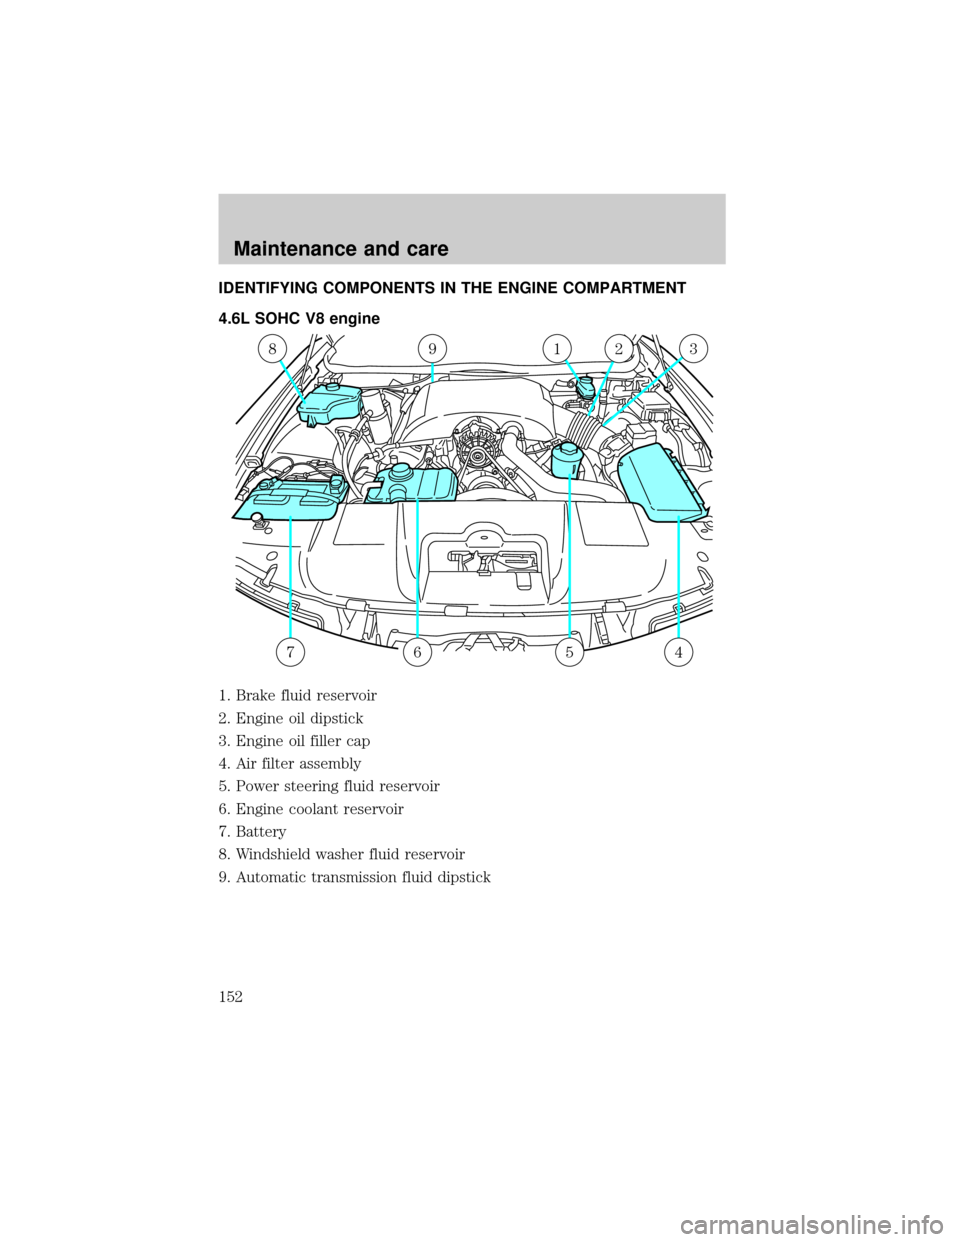
IDENTIFYING COMPONENTS IN THE ENGINE COMPARTMENT
4.6L SOHC V8 engine
1. Brake fluid reservoir
2. Engine oil dipstick
3. Engine oil filler cap
4. Air filter assembly
5. Power steering fluid reservoir
6. Engine coolant reservoir
7. Battery
8. Windshield washer fluid reservoir
9. Automatic transmission fluid dipstick
89123
6547
Maintenance and care
152
Page 156 of 224
BRAKE FLUID
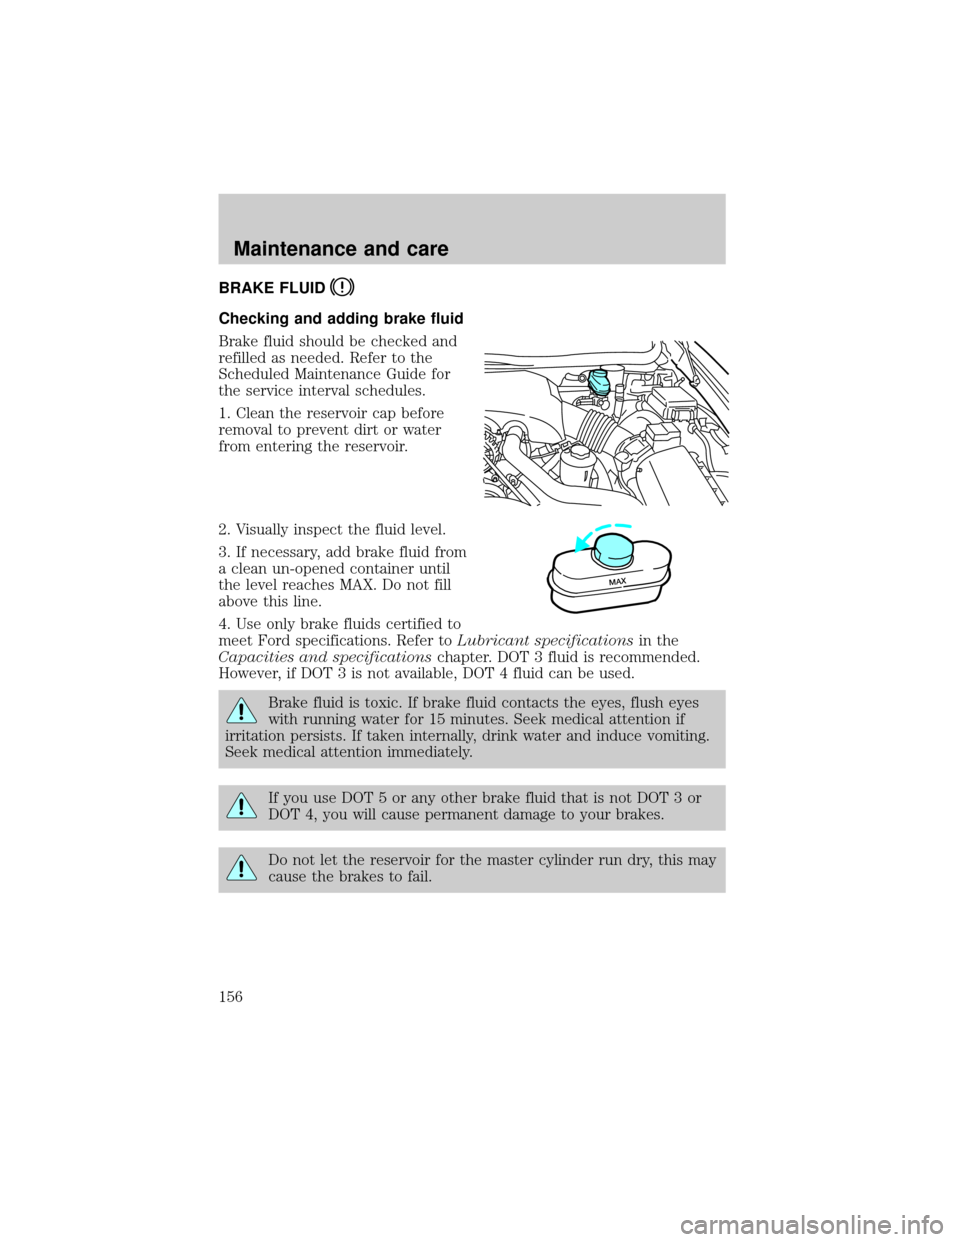
Checking and adding brake fluid
Brake fluid should be checked and
refilled as needed. Refer to the
Scheduled Maintenance Guide for
the service interval schedules.
1. Clean the reservoir cap before
removal to prevent dirt or water
from entering the reservoir.
2. Visually inspect the fluid level.
3. If necessary, add brake fluid from
a clean un-opened container until
the level reaches MAX. Do not fill
above this line.
4. Use only brake fluids certified to
meet Ford specifications. Refer toLubricant specificationsin the
Capacities and specificationschapter. DOT 3 fluid is recommended.
However, if DOT 3 is not available, DOT 4 fluid can be used.
Brake fluid is toxic. If brake fluid contacts the eyes, flush eyes
with running water for 15 minutes. Seek medical attention if
irritation persists. If taken internally, drink water and induce vomiting.
Seek medical attention immediately.
If you use DOT 5 or any other brake fluid that is not DOT 3 or
DOT 4, you will cause permanent damage to your brakes.
Do not let the reservoir for the master cylinder run dry, this may
cause the brakes to fail.
MAX
Maintenance and care
156
Page 164 of 224
5. If the fluid is low, add fluid in small amounts, continuously checking
the level until it reaches the range between the MIN and MAX lines. Be
sure to put the cap back on the reservoir.
TRANSMISSION FLUID
Checking automatic transmission fluid
Refer to your Scheduled Maintenance Guide for scheduled intervals for
fluid checks and changes. Your transmission does not consume fluid.
However, the fluid level should be checked if the transmission is not
working properly, i.e., if the transmission slips or shifts slowly or if you
notice some sign of fluid leakage.
Automatic transmission fluid expands when warmed. To obtain an
accurate fluid check, drive the vehicle until it is at normal operating
temperature (approximately 30 km [20 miles]). If your vehicle has been
operated for an extended period at high speeds, in city traffic during hot
weather or pulling a trailer, the vehicle should be turned off for about 30
minutes to allow fluid to cool before checking.
1. Drive the vehicle 30 km (20 miles) or until it reaches normal operating
temperature.
2. Park the vehicle on a level surface and engage the parking brake.
3. With the parking brake engaged and your foot on the brake pedal,
start the engine and move the gearshift lever through all of the gear
ranges. Allow sufficient time for each gear to engage.
4. Latch the gearshift lever in P (Park) and leave the engine running.
5. Remove the dipstick, wiping it clean with a clean, dry lint free rag. If
necessary, refer toIdentifying components in the engine compartment
in this chapter for the location of the dipstick.
6. Install the dipstick making sure it is fully seated in the filler tube.
7. Remove the dipstick and inspect the fluid level. The fluid should be in
the designated area for normal operating temperature or ambient
temperature.
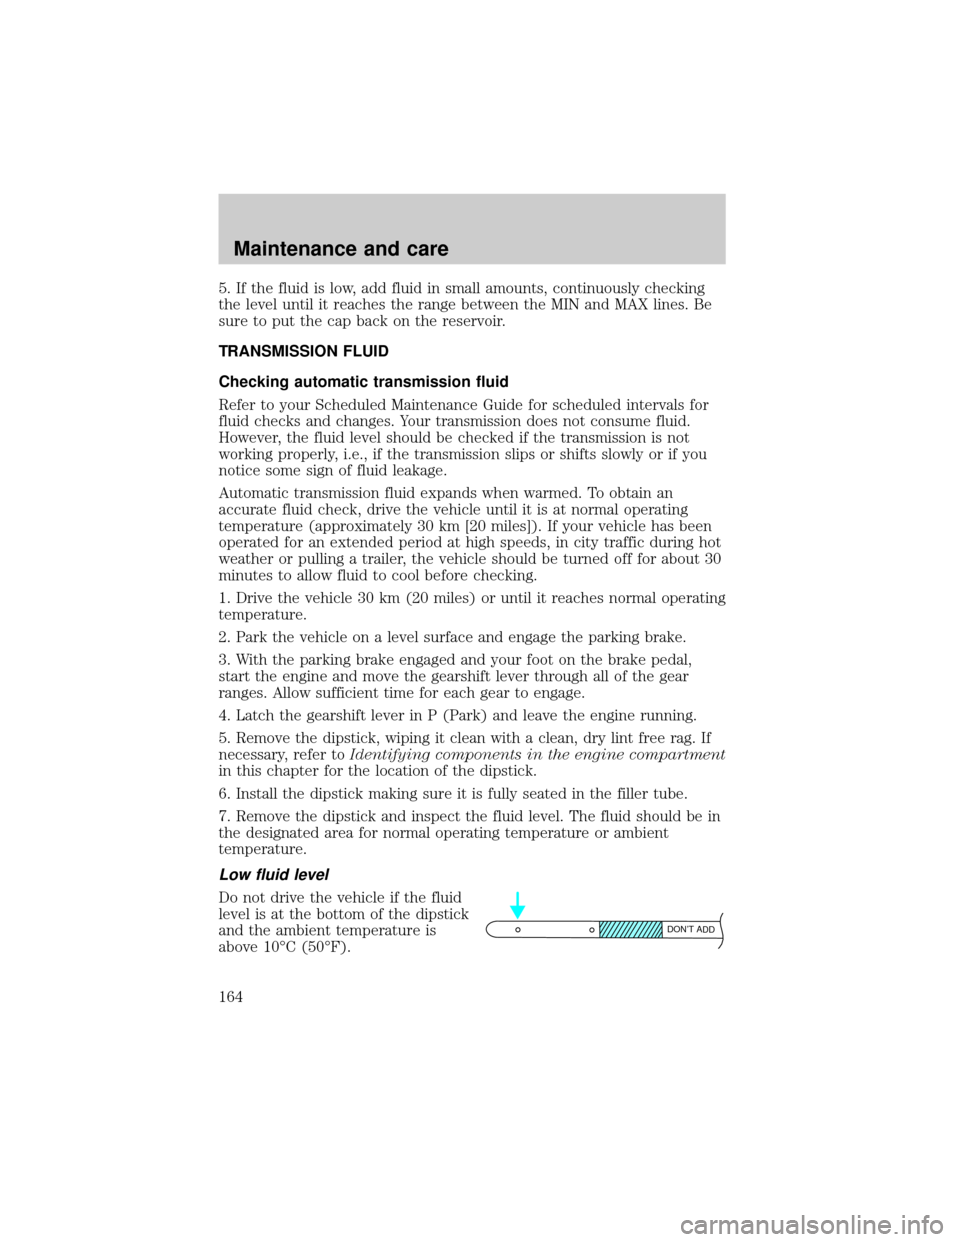
Low fluid level
Do not drive the vehicle if the fluid
level is at the bottom of the dipstick
and the ambient temperature is
above 10ÉC (50ÉF).
DON’T ADD
Maintenance and care
164
Page 191 of 224
During winter months, it is especially important to wash the vehicle on a
regular basis. Large quantities of dirt and road salt are difficult to
remove and also cause damage to the vehicle.
Remove any exterior accessories, such as antennas, before entering a car
wash. If you have wax applied to the vehicle at a commercial car wash, it
is recommended that you clean the wiper blades and windshield as
described inCleaning the wiper blades and windshield.
After washing, apply the brakes several times to dry them.
Waxing your vehicle
Waxing your vehicle on a regular basis will reduce minor scratches and
paint damage.
Wax when water stops beading on the surface. This could be every three
or four months, depending on operating conditions.
Use only carnauba or synthetic-based waxes. Use a cleaning fluid with a
clean cloth to remove any bugs before waxing your vehicle. Use tar
remover to remove any tar spots.
Avoid getting wax on the windshield, or on any surfaces which appear
coarse or bumpy. If you have wax applied at a commercial car wash, it is
recommended that you clean the wiper blades and windshield as
described inCleaning the wiper blades and windshield.
Repairing paint chips
Minor scratches or paint damage from road debris may be repaired with
the Ultra Touch Prep and Finishing Kit (#F7AZ-19K507±BA), Lacquer
Touch-up Paint (#ALBZ-19500±XXXXA), or Exterior Acrylic Spray
Lacquer (#ALAZ-19500±XXXXA) from the Ford Car Care Chemicals line.
Please note that the part numbers (shown as XXXX above) will vary with
your vehicle's specific coloring. Observe the application instructions on
the products.
Remove particles such as bird droppings, tree sap, insect remains, tar
spots, road salt and industrial fallout immediately.
Cleaning the wheels
Wash with the same detergent as the body of your vehicle. Do not use
acid-based or alcohol-based wheel cleaners, steel wool, fuel or strong
detergents. Never use abrasives that will damage the finish of special
wheel surfaces. Use a tar remover to remove grease and tar.
Maintenance and care
191
Page 195 of 224
Do not use household cleaning products, alcohol solutions,
solvents or cleaners intended for rubber, vinyl or plastics.
Cleaning the interior fabric
Remove dust and loose dirt with a whisk broom or a vacuum cleaner.
Remove fresh spots immediately. Do not use household or glass cleaners.
These agents can stain and discolor the fabric. Use a mild soap and
water solution if necessary.
MOTORCRAFT PART NUMBERS
Component 4.6L SOHC V8 engine
Air filter element FA-1668
Fuel filter FG-986B
Battery-standard BXT-65-650
Battery-heavy duty
1BXT-65-750
Oil filter FL-820-S
PCV valve EV-98
Spark plugs
2AWSF-32P
1Included in long wheelbase package.
2Refer to Vehicle Emissions Control Information (VECI) decal for spark
plug gap information.
REFILL CAPACITIES
Fluid Ford Part Name Capacity
Engine oil (includes
filter change)Motorcraft SAE 5W-30
Super Premium Motor
Oil4.7L (5.0 quarts)
Brake fluid
1Fill to line on reservoir
Power steering fluid Motorcraft MERCONt
AT FFill to line on reservoir
Transmission fluid
2Motorcraft
MERCONtVATF12.1L (12.8 quarts)3
Engine coolant4Premium Engine
Coolant15.0L (15.8 quarts)
Fuel tank N/A 71.9L (19.0 gallons)
Capacities and specifications
195
Page 196 of 224
Fluid Ford Part Name Capacity
Rear axle lubricant5Motorcraft SAE
80W-90 Premium Rear
Axle Lubricant1.8L (3.75 pints)6
Windshield washer
fluidUltra-Clear Windshield
Washer ConcentrateFill to line on reservoir
1Use only brake fluids certified to meet Ford specifications. Refer to
Lubricant Specificationsin this chapter. DOT 3 fluid is recommended.
However, if DOT 3 is not available, DOT 4 fluid can be used.
2Ensure the correct automatic transmission fluid is used. MERCONtand
MERCONtV are not interchangeable. DO NOT MIX MERCONtand
MERCONtV. Refer to the Scheduled Maintenance Guide to determine
the correct service interval.
3Indicates only approximate dry-fill capacity. Some applications may
vary based on cooler size and if equipped with an in-tank cooler. The
amount of transmission fluid and fluid level should be set by the
indication on the dipstick's normal operating range.
4Use Ford Premium Engine Coolant (green in color). DO NOT USE Ford
Extended Life Engine Coolant (orange in color). Refer toAdding engine
coolant, in the Maintenance and Care chapter.
5Rear axles are considered lubricated for life when the vehicle is used
for normal service. See your Scheduled Maintenance Guide for Severe
Duty requirements.
6Add 118 ml (4 oz.) of Additive Friction Modifier C8AZ-19B546-A or
equivalent meeting Ford specification EST-M2C118±A for complete refill
of Traction-Lok rear axle.
For limousine, use 2.4L (5.0 pints) of Motorcraft Synthetic Rear Axle
Lubricant F1TZ-19780-B or equivalent meeting Ford specification
WSL-M2C192-A for complete refill of rear axle.
Service refill capacities are determined by filling the rear axle 6 mm to
14 mm (1/4 inch to 9/16 inch) below the bottom of the filler hole.
Capacities and specifications
196