2000 HONDA S2000 lock
[x] Cancel search: lockPage 37 of 273

Additional Information About Your Seat Belts
To deactivate the locking
mechanism, unlatch
the buckle and
let the seat belt fully retract.
To
refasten the belt, pull it out only as
far as needed.
See page
15 for instructions on how
to wear the lap/shoulder belt
properly.
34 Driver and Passenger Safety
Seat Belt Maintenance
For safety, you should check the
condition of your seat belts regularly.
Pull each belt out fully and look for
frays, cuts, burns, and wear. Check
that the latches work smoothly and
that the lap/shoulder belts retract
easily. Any belt not
in good condition
or not working properly will not
provide good protection and should
be replaced as soon as possible.
U.S. Models
Honda provides a lifetime warranty
on seat belts. Honda
will repair or
replace any seat belt component
that
fails to function properly during
normal use.
Please see your Honda
WmTanty Information
booklet for
details.
·.
Not checking or maintaining
seat
belts can result in serious
injury or death if the seat
belts
do not work properly when
needed.
Check your seat
belts regularly
and have any problem
corrected as soon as possible.
If a seat belt is worn during a crash,
you should have your dealer inspect
the belt, and replace it
if necessary.
A belt that
has been worn during a
crash may not provide
the same level
of protection in a subsequent crash.
The dealer should also inspect the
anchors for damage and replace
them if needed.
For information on how to clean your
seat belts, see page
207 .
Page 39 of 273

Additional Information About Your SRS
During a crash, your seat belt helps
restrain your lower body and torso,
while the tensioner tightens and
locks
the seat belt to help keep you
in place.
Your air bag provides a
cushion to help restrain and protect
your head and chest.
Since both airbags use the same
sensors, both airbags normally
inflate at the same time. However, it
is possible for only one air bag to
inflate.
This can occur when the severity of
a collision is at the margin, or
threshold, that determines whether
or not the airbags will deploy. In
such cases, the seat belt will provide
sufficient protection, and the
supplemental protection offered by
the air bag would be minimal.
36 Driver and Passenger Safety
Mter inflating, the airbags
immediately deflate, so they won't
interfere with the driver's visibility,
or the ability to
steer or operate
other controls.
The total time for inflation and
deflation is approximately one-tenth
of a second, so fast
that most
occupants are not aware that the
airbags deployed until they see
them
lying in their laps.
Mter a crash, you may see what
looks like smoke. This is actually
powder from the airbag's surface.
Although the powder is not harmful,
people with respiratory problems
may experience some temporary
discomfort.
If this occurs, get out of
the car as soon as it is safe to
do so.
U.S. Owners
For additional information on how
your airbags work, see the booklet
titled
SRS· What You Need to Know
About Airbags that came with your
owner's manual.
Canadian Owners
For additional information on how
your airbags work, ask your dealer
for a copy of the booklet titled
SRS:
What
You Need to Know About Airbags.
Page 44 of 273

This section gives information about
the controls and displays
that
contribute to the daily operation of
your Honda.
All the essential
controls are within easy reach.
Control Locations ............................ 42
Indicator Lights ................................ 43
Gauges .............................................. 47
Speedometer ................................ 4 7
Select Button ................................ 4 7
Tachometer .................................. 4 7
Temperature Gauge ....................
47
Fuel Gauge ................................... 48
Odometer ...................................... 48
Trip Meter .................................... 48
Maintenance Required
Indicator ....................................
49
Controls Near the Steering
Wheel ........................................
50
Headlights .................................... 51
Daytime Running Lights ............. 52
Instrument Panel Brightness ..... 52
Turn Signals ................................. 53
Windshield Wipers ...................... 53
Windshield Washers ................... 54
Steering Wheel Controls ................ 55
Cruise Control .............................. 55
Keys and Locks ................................ 58
Keys ............................................... 58
Immobilizer System ..................... 59
Ignition Switch ............................. 60
Instruments and Controls
Power Door Locks ....................... 62
Remote Transmitter .................... 63
Trunk ............................................ 66
Console Compartments .............. 67
Seat Adjustments ............................. 68
Power Windows ............................... 69
Convertible Top ............................... 71
Opening the Convertible Top ..... 71
Closing the Convertible Top ...... 7 4
Convertible Top
Cover.. .............. 76
Maintenance ................................. 77
Hazard Warning ............................... 79
Mirrors .............................................. 79
Adjusting the Power Mirrors ..... 79
Parking Brake .................................. 80
Beverage Holder .............................. 81
Accessory Power Socket ................ 81
Audio Panel. ...................................... 82
Interior Lights .................................. 83
Instruments and Controls 41
Page 48 of 273

~ Supplemen~al Restraint
~ System Indicator
This indicator lights when you turn
the ignition switch
0 N (II). If it
comes on at any other time, it
indicates a problem in
the
supplemental restraint system. For
complete information, see page 37.
U.S. Canada
I ABS II@) I
Anti-lock Brake System (ABS)
Indicator
This light normally comes on for a
few seconds when you turn the
ignition switch
ON (II), and when
you push the START button.
If this
light comes on at any other time,
there
is a problem in the ABS. If this
happens, take the car to your dealer
to have it checked. With
the light on,
your car still
has normal braking
ability but no anti-lock.
~ Malfunction Indicator
~Lamp
See page 228 .
I F¥ I Trunk-open Indicator
This light comes on if the trunk lid is
not closed tightly.
[I] Door-open Indicator
This light comes on if either door is
not closed tightly.
Indicator Lights
~ Electric Power Steering
~ (EPS) Indicator
This light normally comes on when
you turn the ignition
ON (II) and
goes off after the engine starts.
If it
comes on at any other time, there is
a problem
in the Electric Power
Steering system. If this happens,
stop the car
in a safe place and turn
off the engine. Reset the system by
restarting the engine, and watch the
EPS light. If it does not go off, or
comes back on again while driving,
take the car to your dealer to have it
checked. With the light
on, the EPS
is turned off, making the car harder
to steer.
Instruments and Controls 45
Page 49 of 273

Indicator Lights
lA! I Q I Tum Signal a!ld ~ Hazard Wammg
Indicators
The left or right turn signal light
blinks when you signal a lane change
or turn. If the light does not blink or
blinks rapidly, it usually means one
of the turn signal bulbs is burned out
(see page
192 ) . Replace the bulb as
soon as possible, since other drivers
cannot see that you are signalling.
When you turn on the Hazard
Warning switch, both turn signal
lights blink.
All turn signals on the
outside of the car should flash.
I § D I High Beam Indicator
This light comes on with the high
beam headlights.
See page 51 for
information on the headlight
controls.
46 Instruments and Controls
~ "Daytime Running
~ Lights" Indicator
Canadian models only
This indicator lights when you turn
the ignition switch to
ON (ID with
the headlight switch off and the
parking brake set.
It should go off if
you turn on the headlights or release
the parking brake.
If it comes on at
any other time, it means there is a
problem with the DRL.
There may
also be a problem with the high
beam headlights.
~ Immobilizer System
~ Indicator
This indicator comes on for a few
seconds when you turn the ignition
switch
0 N (ID. It will then go off if
you have inserted a properly-coded
ignition key.
If it is not a properly
coded key, the indicator will blink
and
the engine will not start (see
page
59 ). This
indicator also blinks several
times when you turn the ignition
switch from
ON (II) to ACCESSORY
(I) or LOCK (0).
Cruise Control Indicator
This lights when you set the cruise
control.
See page 55 for information
on operating the cruise control.
[ji] Low Fuel Indicator
This light comes on as a reminder
that you must refuel soon.
Page 52 of 273

Maintenance Required Indicator
This indicator reminds you that it is
time to take your car in for
scheduled maintenance.
Refer to the Maintenance Schedules
for Normal and
Severe Driving
Conditions on pages
148-152 . When
the distance driven since
the
last scheduled maintenance reaches
6,000 miles (9,600 km), the indicator
starts blinking.
If you exceed 7,500
miles (12,000 km), the indicator stay
on.
Your dealer will reset the indicator
when they perform the scheduled
maintenance.
If someone else
performs the maintenance, reset the
indicator yourself.
To reset the maintenance required
indicator, turn the ignition switch to
the
LOCK position, then press and
hold the trip meter reset button until
the indicator resets.
Gauges
Instruments and Controls 49
Page 54 of 273

Headlights
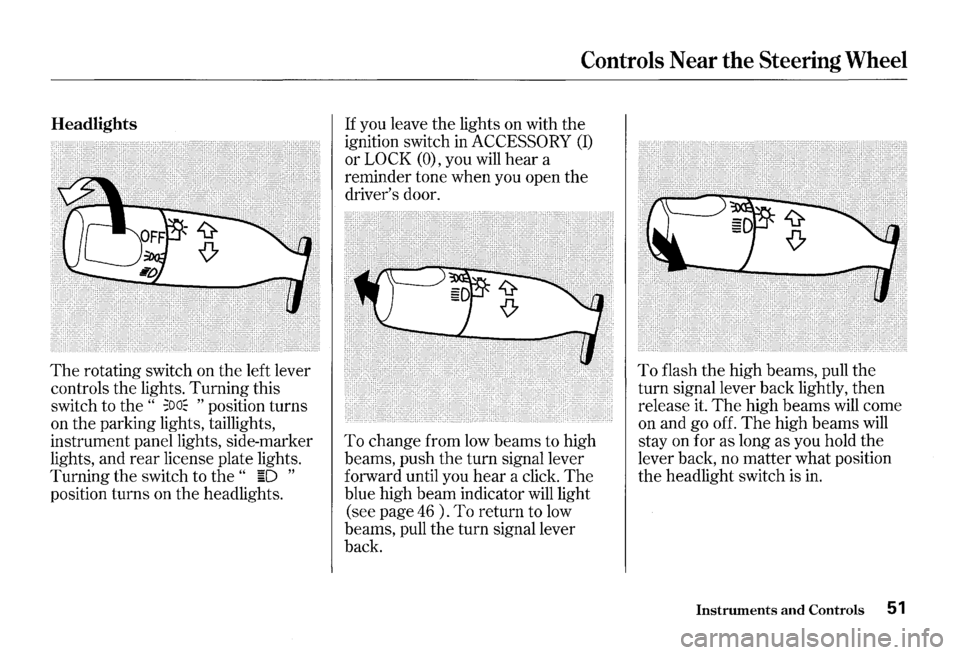
The rotating switch on the left lever
controls the lights. Turning this
switch to the
" ;oa~ " position turns
on the parking lights, taillights,
instrument panel lights, side-marker
lights, and
rear license plate lights.
Turning the switch to
the " ~D "
position turns on the headlights.
Controls Near the Steering Wheel
If you leave the lights on with the
ignition switch in
ACCESSORY (I)
or LOCK (O), you will hear a
reminder tone when you open the
driver's door.
To change from low beams to high
beams, push
the turn signal lever
forward until you
hear a click. The
blue high beam indicator will light
(see page
46 ) . To return to low
beams, pull the turn signal lever
back.
To flash the high beams, pull the
turn signal lever back lightly, then
release it.
The high beams will come
on and go off.
The high beams will
stay on for as long as you hold the
lever back, no matter what position
the headlight switch is in.
Instruments and Controls 51
Page 58 of 273

Cruise Control
Cruise control allows you to maintain
a
set speed above 25 mph ( 40 km/h)
without keeping your foot on the
accelerator pedal. It should be used
for cruising on straight, open
highways.
It is not recommended for
conditions such as city driving,
winding roads, slippery roads, heavy
rain, or bad weather. You should
have full control of
the car under
those conditions.
Improper use of the cruise
control can lead to a crash.
Use the cruise
control only
when traveling on open
highways
in good weather.
NOTICE
The cruise control, as it operates,
moves the accelerator pedal. You can
damage your vehicle's accelerator
mechanism by resting your
foot under
the pedal and blocking the movement.
Steering Wheel Controls
Using the Cruise Control
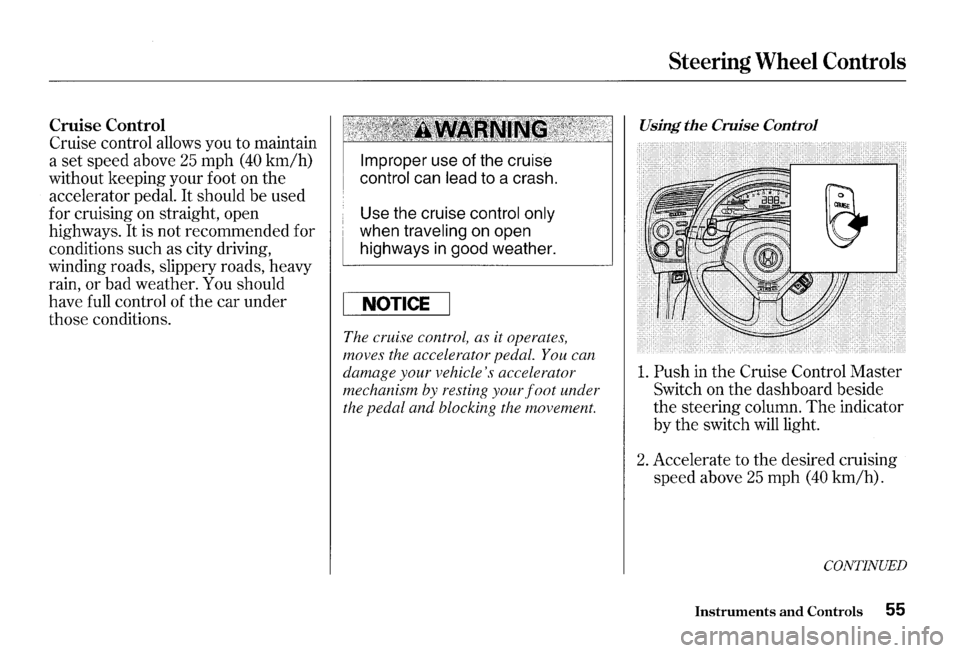
1. Push in the Cruise Control Master
Switch on the dashboard beside
the steering column. The indicator
by
the switch will light.
2. Accelerate to the desired cruising
speed above
25 mph (40 km/h).
CONTINUED
Instruments and Controls 55