Page 191 of 267

Use only towing equipment
specifically designed for this
purpose, following the instructions of the equipment
manufacturer. A separate safety
chain system must be used.
For such towing, the parking
brake must be released, thetransmission must be in neutraland the key switch turned to
the "OFF" position (not
"LOCK").
Towing attachments must be made to main structural
members of the vehicle. Do not attach to bumpers or associated
brackets.
Remember that the power brake assist will not beavailable when the engine is
inoperative.
Towin
g Tip s
All Four Wheels on the Ground
1. Transfer case in 2H (4WD model only).
2. Transmission in Neutral
position.
3. Maximum speed 30 mph (50 km/h).
4. Maximum distance 50 miles (80 kilometers).
If you are towing the vehicle at distances and speeds greater thanshown, disconnect the propeller
shaft from the rear axle carrier.
On 4WD models, also disconnect
the front propeller shaft. Safely
secure the propeller shafts so they
will not fall and scrape the
ground.
Front Wheels off the Ground
1. Transfer case in 2H (4WD model only).
2. Transmission in Neutral position.
3. Maximum speed 30 mph (50 km/h).
4. Maximum distance 50 miles (80 kilometers).
If you are towing the vehicle at
distances and speeds greater than shown, disconnect the propeller
shaft from the rear axle carrier.
Safely secure the propeller shaft so it will not fall and scrape the
ground.
I n Cas e o f Emergenc y
Page 192 of 267

Rear Wheels off the Ground
1. Transfer case in 2H (4WD model only).
2. Transmission in Neutral position.
3. Maximum speed 30 mph (50 km/h).
4. Maximum distance 50 miles (80 kilometers).
If you need to tow your vehicle by
this method, secure the steering
wheel to keep the front wheels
pointed straight ahead. Do not
rely on the steering column lock; it is not strong enough to hold the
front wheels straight while
towing. The ignition switch must
be in the OFF position.
Inoperativ
e Electrica l Device s
If you have electrical problems without extreme damage to any
electrical parts, check for burned out fuses, broken wires, poor
connections or poor grounding. Correct as necessary.
The fuse boxes are located under
the left hand side of theinstrument panel and in the right
hand side of the engine compartment. (See "Fuses" on
page 236.)
Replacing a fuse with one that has
a higher rating greatly increases
the chances of damaging the
electrical system. If you do not
have a replacement fuse with the
proper rating for the circuit,
install one with a lower rating.
In Cas e o f Emergenc y
NOTIC
E
Page 195 of 267

Front (4WD Only) and
Rear Propeller Shaft ... 218
Exhaust System ....... 218 Fuel Line and Fuel Tank/Cap ............ 218
Drive Belt ............ 218
Timing Belt ........... 218 Valve Clearance ........ 218SparkPlugs ........... 219
Clutch ............... 219
Fluid or Lubricant Levels 219
Power Steering ........ 219 Accelerator Pedal Linkage 220
Wheel Alignment ...... 220
Exterior ................ 220 Washing Your Vehicle . . 220
Polishing and Waxing Your Vehicle ......... 220
Protection of Exterior Bright Metal Parts ..... 220
Care of Aluminum Wheels 220 Foreign Material Deposits 220
Finish Damage ........ 221
Corrosion Protection .... 221
Sheet Metal Damage .... 221
Underbody Maintenance 221
Interior ................ 222 Basic StepsBefore Cleaning ...... 222
Cleaning Fabric ........ 223 Cleaning General Soilageor Water Spots From
Fabric Trim ........ 223
Spot Cleaning Fabric With Solvent Cleaner 223
Removal of Specific Stains ...... 224
Cleaning Vinyl or Leather Trim ....... 225
Seat Belt Care ......... 225
Cleaning Glass Surfaces . 226
Car e an d Maintenanc e
Page 207 of 267

Owne
r Safet y Check s
Promptly take any safety
problems to your Honda dealer for service advice.
Parkin g brak e — Park on a fairly
steep hill and hold the vehicle
with the parking brake only. This
checks its holding ability.
Starte r safet y switc h (automati c
transmission ) — Check the safety
switch by trying to start the
engine in each gear. The starter should work only with the shift
lever in the "P" (Park) or "N" (Neutral) position.
Starte r safet y switc h (manua l
transmission ) — To check the
safety switch, place the shift lever
in "Neutral," push the clutch
pedal halfway and try to start the engine. The starter should not
work. The starter should work only when the clutch pedal is fully
depressed.
Transmissio n shif t indicato r
(automati c transmission ) —
Check that the indicator points to
the gear chosen.
Steerin g — Be alert for any
changes in steering action. An inspection or service is needed
when the steering wheel is harder
to turn or has too much free play,
or if there are unusual sounds when turning or parking.
Whee l alignment , balanc e an d
tire s — Uneven or abnormal tire
wear, or pulling to the right or left
on a straight and level road may show the need for a wheel
alignment. A vibration of the
steering wheel or seat at normal
highway speeds means wheel balancing is needed. Check tire
pressures (including the spare) at
least monthly and whenever the
vehicle is serviced (see page 159).
Brake s — Watch for the
"BRAKE" light coming on. Other signs of possible brake trouble are
such things as repeated pulling to
one side when braking, unusual sounds when braking or between
brake applications, or increased
brake pedal travel. If you note one
of these conditions, have the system checked at once and
repaired if needed.
Car e an d Maintenanc e
Page 219 of 267

If the diaphragm inside the
reservoir cap is deformed, return
it to the original (collapsed)
condition, then tighten the cap.
It is normal for the brake fluid
level to go down slightly as the
front brake pads wear. So be sure
to keep the reservoir fluid at the
proper level.
If the reservoir needs frequent
refilling, it may indicate a serious mechanical problem.
Brake fluid absorbs water from
the air. Never use brake fluid that
has been open to the air for an
extended period. Throw it away and use new brake fluid from a
sealed container.
Brake fluid can damage your vehicle's paint. Thoroughly clean
up any brake fluid spills.
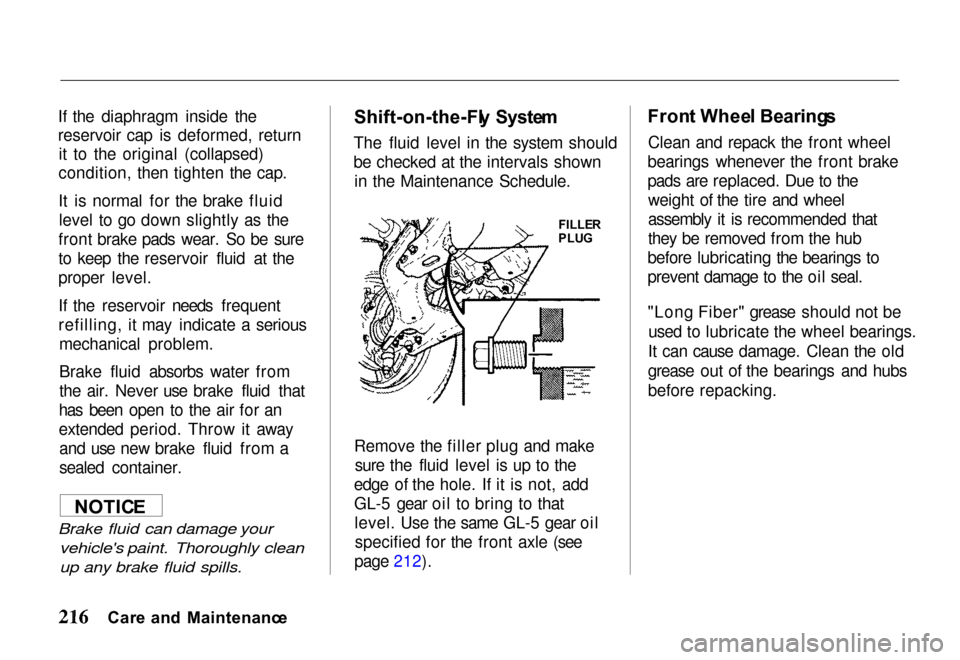
Shift-on-the-Fl
y Syste m
The fluid level in the system should
be checked at the intervals shown in the Maintenance Schedule.
Remove the filler plug and make sure the fluid level is up to the
edge of the hole. If it is not, add
GL-5 gear oil to bring to that level. Use the same GL-5 gear oilspecified for the front axle (see
page 212). Fron
t Whee l Bearing s
Clean and repack the front wheel
bearings whenever the front brake
pads are replaced. Due to the weight of the tire and wheel
assembly it is recommended that
they be removed from the hub
before lubricating the bearings to
prevent damage to the oil seal.
"Long Fiber" grease should not be
used to lubricate the wheel bearings.
It can cause damage. Clean the old
grease out of the bearings and hubs
before repacking.
Car e an d Maintenanc e
NOTIC
E
FILLE
R
PLU G
Page 221 of 267

Fron
t (4W D Only ) an d Rea r
Propelle r Shaf t
Lubricate the sliding yoke with
EP chassis grease. Lubricate
universal joints with grease
containing MoS 2 (molybdenum
disulfide-type grease) at the intervals shown in the
Maintenance Schedule. Also
check the propeller shaft
flange-to-pinion bolts for proper
torque of 64 N.m (46.3 Ib-ft).
Most lubrication recommendations
and procedures for four-wheel drive-
equipped vehicles are the same
for the corresponding components in conventional drive vehicles.
Exhaus t Syste m
Check the complete exhaust
system and nearby body areas for
damaged, missing, or
mispositioned parts, open seams, holes, loose connections, or other
deterioration that could allow
exhaust fumes to seep into the
passenger compartment or cause
heat build-up in the floor pan. Any
necessary corrections should be made immediately. For continuedsafety, exhaust system pipes and
resonators rearward of the muffler must be replaced whenever a new
muffler is installed.
Fue l Lin e an d Fue l Tank/Ca p
Inspect the fuel tank, cap and lines
for damage that could cause
leakage. Inspect the fuel cap and
gasket for correct sealing ability
and indications of physical
damage. Replace any damaged or
malfunctioning parts.
Driv
e Bel t
Check the belt driving the
alternator, power steering pump,
and air conditioning compressor.
Look for cracks, fraying, and wear. Replace as necessary.
Timin g Bel t
The timing belt should normally
be replaced at the intervals shown
in the Maintenance Schedule.
Valv e Clearanc e
Incorrect valve clearance will
result in increased engine noise and lower engine output, thereby
adversely affecting engine
performance.
Car e an d Maintenanc e
Page 223 of 267

Accelerato
r Peda l Linkag e
Lubricate the accelerator pedal
fulcrum pin with multipurpose
Whee l Alignmen t
Proper wheel alignment improves tire mileage. Your vehicle's
suspension parts should be
inspected often and aligned when
needed (see the "Technical Data" section). Improper alignment will
cause the front tires to roll at an angle that will result in faster tire
wear.
Proper tire balancing provides the
best riding comfort and helps
reduce tire tread wear. Out-of-balance tires can cause
annoying vibration and uneven
tire wear such as cupping and flat
spots.
Exterio
r
Washin g You r Vehicl e
The best way to preserve your vehicle's finish is to keep it clean by
frequent washings. Wash the vehicle
with lukewarm or cold water.
Do not use hot water or wash in direct sunlight. Do not use strong
soap or chemical detergents. All
cleaning agents should be promptly
flushed from the surface and not
allowed to dry on the finish.
Polishin g an d Waxin g
You r Vehicl e
Polishing is recommended to
remove accumulated residue and eliminate any "weathered"
appearance.
Your Honda dealer offers several
polishes and cleaners that have
proven to maintain the original finish appearance and durability. Protectio
n o f Exterio r
Brigh t Meta l Part s
Bright metal parts should be cleaned
regularly to keep their luster.
Washing with water is all that is
usually needed. However, chrome
polish may be used on chrome or stainless steel trim, if necessary. A
coating of wax, rubbed to a high
polish, is recommended for all bright metal parts.
Car e o f Aluminu m Wheel s
Aluminum wheels have a clear-coat finish similar to paint.
Use a chamois skin, sponge or
other soft material when washing
the wheels.
Foreig n Materia l Deposit s
Calcium chloride and other salts, ice melting agents, road oil and
tar, tree sap, bird droppings,
Car e an d Maintenanc e
Page 237 of 267
Fron
t Suspensio n
Independent wishbone arms, torsion bar springs with stabilizer bar.
Fron t Whee l Alignmen t
Rea r Suspensio n
5-link, coil spring type with stabilizer bar and direct
double-acting shock absorbers.
Rea r Whee l Alignmen t
Steerin
g
Rack and pinion.
Servic e Brak e
Hydraulic Front: Disc brake.
Rear: Self-adjusting drum brake,leading-trailing (2WD model).
Disc brake (4WD model).
Parkin g Brak e
Mechanical, operating on rear wheels (2WD model).
Mechanical, drum in disc, duo-servo, manual-adjusting,
operating on rear wheels (4WD model).
Batter y
Technical Dat a