2000 HONDA ODYSSEY Fuel tank
[x] Cancel search: Fuel tankPage 190 of 352

Befor
e Drivin g
Before you begin driving your Honda,
you should know what gasoline to use, and how to check the levels of
important fluids. You also need to
know how to properly store luggage or packages. The information in this
section will help you. If you plan to
add any accessories to your vehicle,
please read the information in this section first. Break-in Period.............................. 188
Gasoline.......................................... 188
Service Station Procedures .......... 189 Filling the Fuel Tank................. 189Opening the Hood..................... 190 Oil Check................................ 192
Engine Coolant Check.......... 193
Fuel Economy................................ 194 Vehicle Condition...................... 194
Driving Habits............................ 194
Accessories and Modifications.... 195 Carrying Cargo.............................. 197
Before Drivin g
Page 193 of 352
Service Statio n Procedure s
3. Remove the fuel fill cap slowly.
You may hear a hissing sound aspressure inside the tank escapes.
Place the cap in the holder on the
fuel fill door.
4. Stop filling the tank after the fuel nozzle automatically clicks off. Do
not try to "top off" the tank, leavesome room for the fuel to expand
with temperature changes.
5. Screw the fuel fill cap back on, tighten it until it clicks several
times. If you do not properly
tighten the cap, the Malfunction
Indicator Lamp may come on (seepage 309 ).
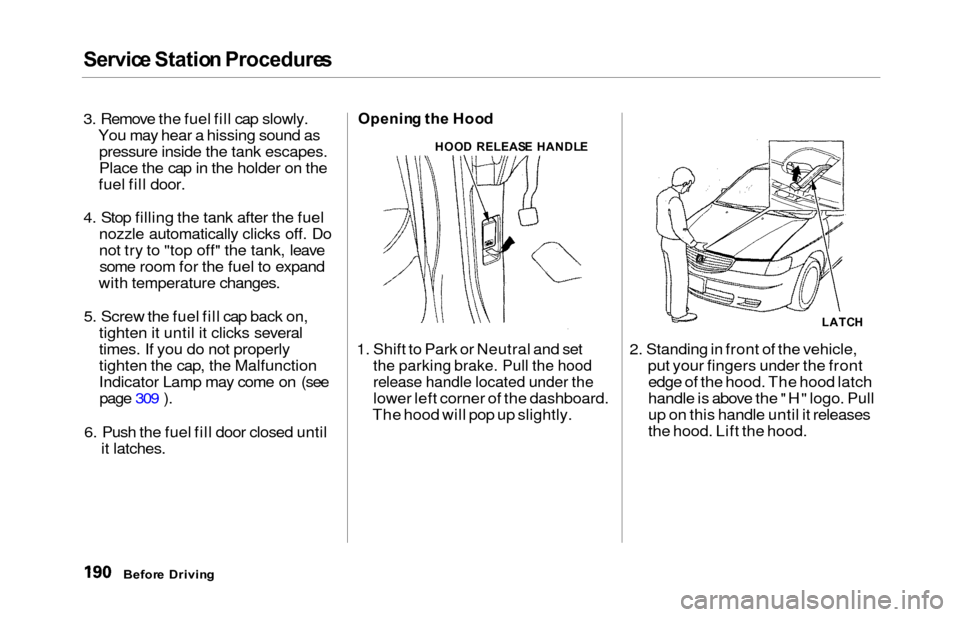
6. Push the fuel fill door closed until it latches.Openin g th e Hoo d
1. Shift to Park or Neutral and set
the parking brake. Pull the hood
release handle located under the
lower left corner of the dashboard.
The hood will pop up slightly. 2. Standing in front of the vehicle,
put your fingers under the frontedge of the hood. The hood latch
handle is above the "H" logo. Pull
up on this handle until it releases
the hood. Lift the hood.
Befor e Drivin g
HOOD RELEAS E HANDL E
LATCH
Page 225 of 352
Towing a Traile r
Spare Vehicle Tire
When towing a trailer, you should
carry a full-size wheel and tire as a
spare in case you have a flat. If you
use the compact spare tire that came
with the vehicle, it may adversely affect vehicle handling. See page 317 for information on proper tire
size, and page 299 for information on
how to store a full-size tire. When storing a full-size spare tire in the
trailer, follow the trailer maker's
instructions.
Additional Trailer Equipment
Many states and Canadian provinces
require special outside mirrors when
towing a trailer. Even if they don't,
you should install special mirrors if
you cannot clearly see behind you, or if the trailer creates a blind spot.
Ask your trailer sales or rental agency if any other items are
recommended or required for your
towing situation. Pre-To
w Checklis t
When preparing to tow, and before driving away, be sure to check the
following:
The vehicle has been properlyserviced, and the tires, brakes,
suspension, and cooling system
are in good operating condition.
All weights and loads are within limits (see pages 218 and 219).
The hitch, safety chain, and any other attachments are secure.
All items on and in the trailer are properly secured and cannot shift
while you drive.
The lights and brakes on your vehicle and the trailer are workingproperly. Your vehicle tires and spare are
properly inflated (see page 323),and the trailer tires and spare are
inflated as recommended by the
trailer maker.
You may want to fill the fuel tank with premium fuel. Premium fuel
provides improved performance.
Drivin g
Page 240 of 352
Owner Maintenanc e Check s
You should check the following
items at the specified intervals. If
you are unsure of how to perform
any check, turn to the page given.
Engine oil level — Check every
time you fill the fuel tank. See
page 192.
Engine coolant level — Check the
radiator reserve tank every time
you fill the fuel tank. See page 193.
Windshield washer fluid — Check the level in the reservoir monthly.If weather conditions cause you to
use the washers frequently, check
the reservoir each time you stop
for fuel. See page 248.
Automatic transmission — Check the fluid level monthly. See page
249.
Brakes — Check the fluid level
monthly. See page 250. Tires — Check the tire pressure
monthly. Examine the tread for
wear and foreign objects. See page
263.
Lights — Check the operation of
the headlights, parking lights,
taillights, high-mount brake light,
turn signals, brake lights, and
license plate light monthly. See
page 270.
Maintenanc e
Page 284 of 352
Storing You r Vehicl e
If you need to park your vehicle for
an extended period (more than one
month), there are several things you
should do to prepare it for storage.
Proper preparation helps prevent
deterioration and makes it easier to
get your vehicle back on the road. If
possible, store your vehicle indoors.
Fill the fuel tank.Change the engine oil and filter
(see page 241).
Wash and dry the exterior
completely.
Clean the interior. Make sure the
carpeting, floor mats, etc. are
completely dry.
Leave the parking brake off. Put
the transmission in Park.
Block the rear wheels.
If the vehicle is to be stored for a
longer period, it should be
supported on jackstands so the
tires are off the ground. Leave one window open slightly (if
the vehicle is being stored
indoors).
Disconnect the battery.
Support the front and rear wiper
blade arms with a folded towel or rag so they do not touch the
windshield.
To minimize sticking, apply a silicone spray lubricant to all door
and tailgate seals. Also, apply a
vehicle body wax to the painted surfaces that mate with the door
and tailgate seals.
Cover the vehicle with a
"breathable" cover, one made
from a porous material such as cotton. Nonporous materials, such
as plastic sheeting, trap moisture,
which can damage the paint.
If possible, run the engine for a
while periodically (preferably once a month).
If you store your vehicle for 12
months or longer, have your Honda
dealer perform the inspections called
for in the 24 months/30,000 miles (48,000 km) maintenance schedule
(Normal Conditions) as soon as you
take it out of storage (see page 230).
The replacements called for in the maintenance schedule are not
needed unless the vehicle hasactually reached that time or mileage.
Maintenanc e
Page 306 of 352
If You r Engin e Won' t Start , Jum p Startin g
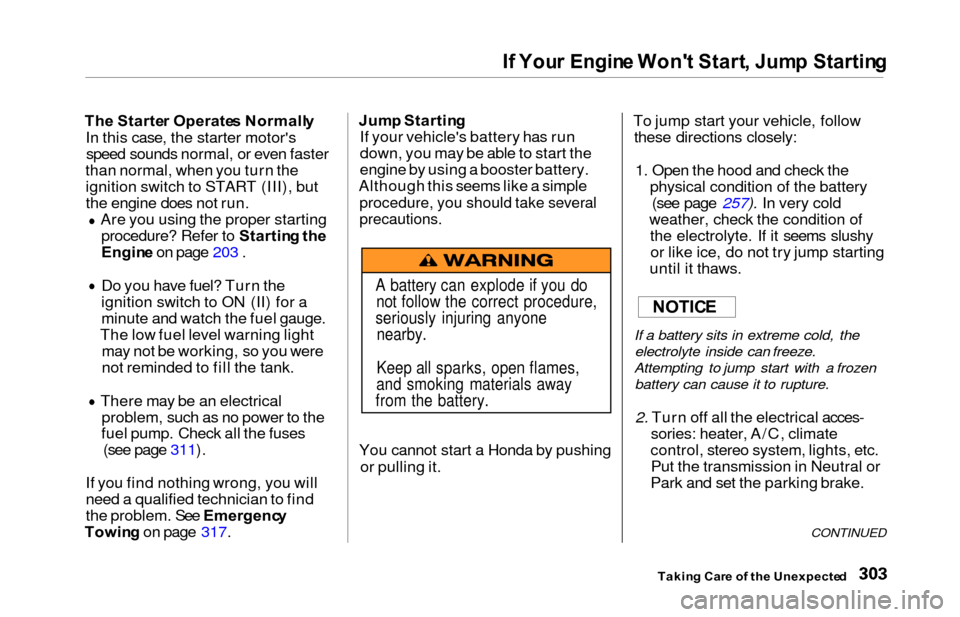
The Starte r Operate s Normall y
In this case, the starter motor's speed sounds normal, or even faster
than normal, when you turn the ignition switch to START (III), but
the engine does not run. Are you using the proper startingprocedure? Refer to Startin g th e
Engin e on page 203 .
Do you have fuel? Turn the
ignition switch to ON (II) for a
minute and watch the fuel gauge.
The low fuel level warning light may not be working, so you were
not reminded to fill the tank.
There may be an electrical problem, such as no power to the
fuel pump. Check all the fuses (see page 311).
If you find nothing wrong, you will
need a qualified technician to find
the problem. See Emergenc y
Towin g on page 317. Jum
p Startin g
If your vehicle's battery has run
down, you may be able to start the
engine by using a booster battery.
Although this seems like a simple
procedure, you should take several
precautions.
You cannot start a Honda by pushing
or pulling it. To jump start your vehicle, follow
these directions closely:
1. Open the hood and check the physical condition of the battery(see page 257). In very cold
weather, check the condition of the electrolyte. If it seems slushyor like ice, do not try jump starting
until it thaws.
If a battery sits in extreme cold, the
electrolyte inside can freeze.
Attempting to jump start with a frozen
battery can cause it to rupture.
2. Turn off all the electrical acces- sories: heater, A/C, climate
control, stereo system, lights, etc. Put the transmission in Neutral or
Park and set the parking brake.
CONTINUED
Takin g Car e o f th e Unexpecte d
A battery can explode if you do
not follow the correct procedure,
seriously injuring anyone nearby.
Keep all sparks, open flames,
and smoking materials away
from the battery.
NOTIC E
Page 331 of 352
Emissions Control s
The burning of gasoline in your
vehicle's engine produces several by-products. Some of these are carbon
monoxide (CO), oxides of nitrogen (NO
x) and hydrocarbons (HC).
Gasoline evaporating from the tank
also produces hydrocarbons. Con-
trolling the production of NOx, CO, and HC is important to the environ-
ment. Under certain conditions ofsunlight and climate, NOx and HC
react to form photochemical "smog." Carbon monoxide does not contri-
bute to smog creation, but it is a
poisonous gas.
Th e Clea n Ai r Ac t
The United States Clean Air Act*
sets standards for automobile
emissions. It also requires that
automobile manufacturers explain to
owners how their emissions controls
work and what to do to maintain
them. This section summarizes how
the emissions controls work.
Scheduled maintenance is on page
230.
* In Canada, Honda vehicles comply
with the Canadian Motor Vehicle
Safety Standards (CMVSS) for
Emissions valid at the time they are
manufactured.
Crankcas e Emission s Contro l
System
Your vehicle has a Positive
Crankcase Ventilation System. This
keeps gasses that build up in the engine's crankcase from going into
the atmosphere. The Positive Crank- case Ventilation valve routes them
from the crankcase back to the
intake manifold. They are then drawn into the engine and burned.
Evaporativ e Emission s Contro l
Syste m
As gasoline evaporates in the fuel tank, an evaporative emissions
control canister filled with charcoaladsorbs the vapor. It is stored in this
canister while the engine is off. After
the engine is started and warmed up,
the vapor is drawn into the engine and burned during driving.
Technica l Informatio n
Page 345 of 352
Index
Emergencies on the Road
Brake System Indicator............ 310Changing a Flat Tire................. 293
Charging System Indicator...... 308
Checking the Fuses................... 311
Low Oil Pressure Indicator...... 307
Malfunction Indicator Lamp.... 309Overheated Engine................... 305
Emergency Brake.......................... 116
Emergency Flashers....................... 70
Emergency Towing....................... 317
Emissions Controls........................ 328
Engine Coolant Temperature Gauge ..... 63
Drive Belts.................................. 262
Malfunction Indicator Lamp................................. 58, 309
Oil Pressure Indicator......... 58, 307
Oil, What Kind to Use............... 239
Overheating................................ 305
Specifications............................. 323
Ethanol in Gasoline....................... 326
Evaporative Emissions Controls.. 328
Exhaust Fumes............................... . 53
Exhaust Gas Recirculation
System......................................... 329
Expectant Mothers, Use of Seat
Belts by......................................... 20
Exterior, Cleaning the .................. 284
Fabric, Cleaning............................. 286
Fan, Interior.......................... 130, 142
Features, Comfort and Convenience............................... 129
Filling the Fuel Tank..................... 189
Filters Air............................................... . 252
Air Conditioning........................ 262
Oil................................................ 241
First Gear Position......................... 207
Flashers, Hazard Warning.............. 70
Flat Tire, Changing a.................... 293
Fluids Automatic Transmission.......... 249Brake........................................... 250
Power Steering.......................... . 251
Windshield Washer................... 248
FM Stereo Radio Reception........................... 156, 168
Folding the Third Seat ................. 109 Foreign Countries, Driving in......
327
Four-way Flashers........................... 70
Front End, Towing by Emergency Wrecker...................................... 316
Fuel.................................................. 188
Fill Door and Cap....................... 189
Gauge............................................ 63
Octane Requirement................. 188
Oxygenated................................ 326
Reserve Indicator........................ . 61
Tank, Filling the......................... 189
Fuses, Checking the...................... 312
Gas Mileage, Improving................ 194
Gasohol .......................................... 324
Gasoline ......................................... 186 Fuel Reserve Indicator................ 61
Gauge............................................ 63
Octane Requirement................. 186
Tank, Filling the......................... 189
Gas Station Procedures................. 189
Gauges
Engine Coolant Temperature .... 63
Fuel
.............................................. . 63