Page 195 of 352
Service Statio n Procedure s
Oil Check
Check the engine oil level every time
you fill the vehicle with fuel. Wait a few minutes after turning the engine off before you check the oil.
1. Remove the dipstick (orange
handle).
2. Wipe the dipstick with a clean cloth or paper towel. 3. Insert it all the way back in its tube.
Befor
e Drivin g
DIPSTIC K
Page 200 of 352
Carryin
g Carg o
Your vehicle has several convenient storage areas so you can stow cargo
safely.
The glove box, and the pockets in the front doors and seat-backs, aredesigned for small, lightweight items.
The cargo area is intended for larger, heavier items. In addition, the seats
in the second row can be removed
and the bench seat in the third row
can be folded into the floor to allow
you to carry more cargo or longer items.
However, carrying too much cargo,or improperly storing it, can affect
your vehicle's handling, stability and operation and make it unsafe. Before
carrying any type of cargo, be sure to
read the following pages.
Before Drivin g
REA
R COMPARTMEN T
FRONT DOO R POCKE T
CENTE R POCKE T
SEAT-BAC K POCKE T
STORAG E BOX *
GLOV E BO X
*E X mode l onl y
CARG
O ARE A
Page 201 of 352

Carrying Carg o
Load Limi t
The maximum load for your vehicle
is 1,277 Ibs (580 kg).
This figure includes the total weight
of all occupants, cargo, accessories,
and the tongue weight if you are
towing a trailer.
To figure out how much cargo you
can carry:
Add up the weight of all occupants.
If you are towing a trailer, add the
tongue weight to the number
above.
Subtract the total from 1,277 Ibs
(580 kg).
The final number is the total weight
of cargo you can carry.
When you load luggage, the total
weight of the vehicle, all passengers, cargo, and trailer tongue load must
not exceed the Gross Vehicle
Weight Rating (GVWR). The load for the front and rear axles also must not exceed the Gross Axle Weight
Rating (GAWR). The GVWR andGAWR are printed on the tire
information label attached to the
driver's doorjamb (see page 322). Carryin
g Item s i n th e Passenge r
Compartmen t
Store or secure all items that could
be thrown around and hurt someone during a crash.
Be sure items placed on the floor
behind the front seats cannot roll
under the seats and interfere with the driver's ability to operate the
pedals, or with the properoperation of the seats.
Keep the glove box closed while
driving. If the lid is open, a
passenger could injure their knees during a crash or sudden stop.
Befor e Drivin g
Overloading or improper
loading can affect handling and
stability and cause a crash in
which you can be hurt or killed.
Follow all load limits and other
loading guidelines in this
manual.
Page 204 of 352

Drivin
g
This section gives you tips on starting the engine under various
conditions, and how to operate the
automatic transmission. It also
includes important information on
parking your vehicle, the braking system, the Traction Control System,
and facts you need if you are
planning to tow a trailer. Preparing to Drive......................... 202
Starting the Engine........................ 203
Starting in Cold Weatherat High Altitude..................... 203
Automatic Transmission............... 204 Shift Lever Position Indicator.. 204
Shift Lever Positions................. 205
Engine Speed Limiter............... 207
Shift Lock Release..................... 207
Parking............................................ 209
The Braking System...................... 210 Brake Wear Indicators.............. 210
Brake System Design................ 211
Anti-lock Brakes........................ 211
Important SafetyReminders.......................... 212
ABS Indicator......................... 212
Traction Control System............... 213 TCS ON/OFF Switch................ 214TCS Indicator............................. 215
Driving in Bad Weather................ 216
Towing a Trailer............................ 218
Driving
Page 208 of 352
Automatic Transmissio n
Shift Leve r Position s
The shift lever has seven positions.
It must be in Park or Neutral to start
the engine. When you are stopped in
D4, D3, 2,1, N or R, press firmly on
the brake pedal, and keep your foot
off the accelerator pedal.
Park (P ) — This position mechani-
cally locks the transmission. Use
Park whenever you are turning off or starting the engine. To shift out of
Park, you must press on the brake
pedal and have your foot off the
accelerator pedal. Pull the shift lever
towards you, then move it out of
Park.
If you have done all of the above and still cannot move the lever out of
Park, see Shift Lock Release on page
208.
You must also pull the shift lever towards you to shift into Park. Toavoid transmission damage, come to
a complete stop before shifting into
Park. The shift lever must be in Park
before you can remove the key from the ignition switch.
CONTINUED
Drivin g
SHIFT LEVE R
Page 209 of 352

Automatic Transmissio n
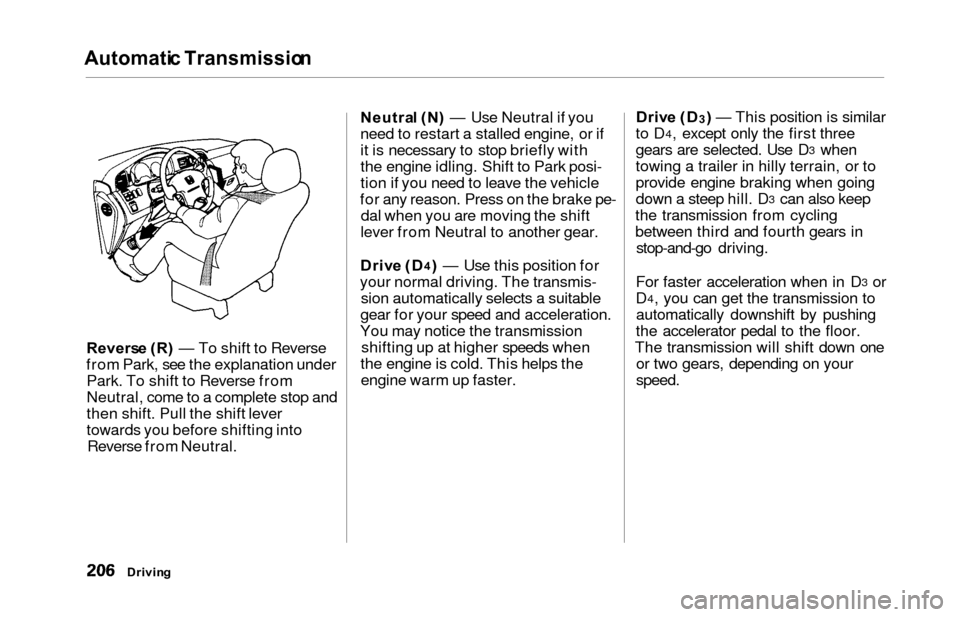
Reverse (R ) — To shift to Reverse
from Park, see the explanation under Park. To shift to Reverse from
Neutral, come to a complete stop and
then shift. Pull the shift lever
towards you before shifting into Reverse from Neutral. Neutra
l (N ) — Use Neutral if you
need to restart a stalled engine, or if
it is necessary to stop briefly with
the engine idling. Shift to Park posi-
tion if you need to leave the vehicle
for any reason. Press on the brake pe- dal when you are moving the shift
lever from Neutral to another gear.
Driv e (D
4) — Use this position for
your normal driving. The transmis- sion automatically selects a suitable
gear for your speed and acceleration.
You may notice the transmission shifting up at higher speeds when
the engine is cold. This helps the engine warm up faster. Driv
e (D
3) — This position is similar
to D4, except only the first three
gears are selected. Use D3 when
towing a trailer in hilly terrain, or to
provide engine braking when going
down a steep hill. D
3 can also keep
the transmission from cycling
between third and fourth gears in stop-and-go driving.
For faster acceleration when in D
3 or
D4, you can get the transmission to
automatically downshift by pushing
the accelerator pedal to the floor.
The transmission will shift down one or two gears, depending on your
speed.
Drivin g
Page 210 of 352

Automatic Transmissio n
Second (2 ) — To shift to Second,
pull the shift lever towards you, then shift to the lower gear. This position
locks the transmission in second
gear. It does not downshift to first
gear when you come to a stop. Second gives you more power when
climbing, and increased engine
braking when going down steep hills. Use second gear when starting outon a slippery surface or in deep snow.
It will help reduce wheelspin.
When driving down hill with a trailer, use the Second position.
Firs t (1 ) — To shift from Second to
First, pull the shift lever towards you,
then shift to the lower gear. With the
lever in this position, the transmis- sion locks in First gear. By upshift-
ing and downshifting through 1, 2,
D
3 and D4, you can operate this
transmission much like a manual
transmission without a clutch pedal. Engin
e Spee d Limite r
If you exceed the maximum speed
for the gear you are in, the engine speed will enter into the tachometer's
red zone. If this occurs, you may feel the engine cut in and out. This is
caused by a limiter in the engine's
computer controls. The engine will
run normally when you reduce the
RPM below the red zone. Shif
t Loc k Releas e
This allows you to move the shift lever out of Park if the normalmethod of pushing on the brake
pedal and pulling the shift lever does not work.
1. Set the Parking brake.
2. Remove the key from the ignition switch.
3. Place a cloth on the edge of the shift lock release slot cover on the
steering column. Remove the
cover by carefully prying on the
edge with a small flat-tipped screwdriver (not included in the
toolkit).
Drivin g
CONTINUED
Page 211 of 352
Automatic Transmissio n
4. Insert the key in the Shift Lock
Release slot.
5. Push down on the key while you pull the shift lever towards youand move it out of Park to Neutral. 6. Remove the key from the Shift
Lock Release slot, then install a
new cover. Depress the brake
pedal and restart the engine.
If you need to use the Shift Lock
Release, it means your vehicle is
developing a problem. Have the
vehicle checked by your Honda dealer.
Drivin g
SHIFT LOC K RELEAS E SLO T COVE R