2000 HONDA ODYSSEY check engine light
[x] Cancel search: check engine lightPage 53 of 352

Additional Informatio n Abou t You r SR S
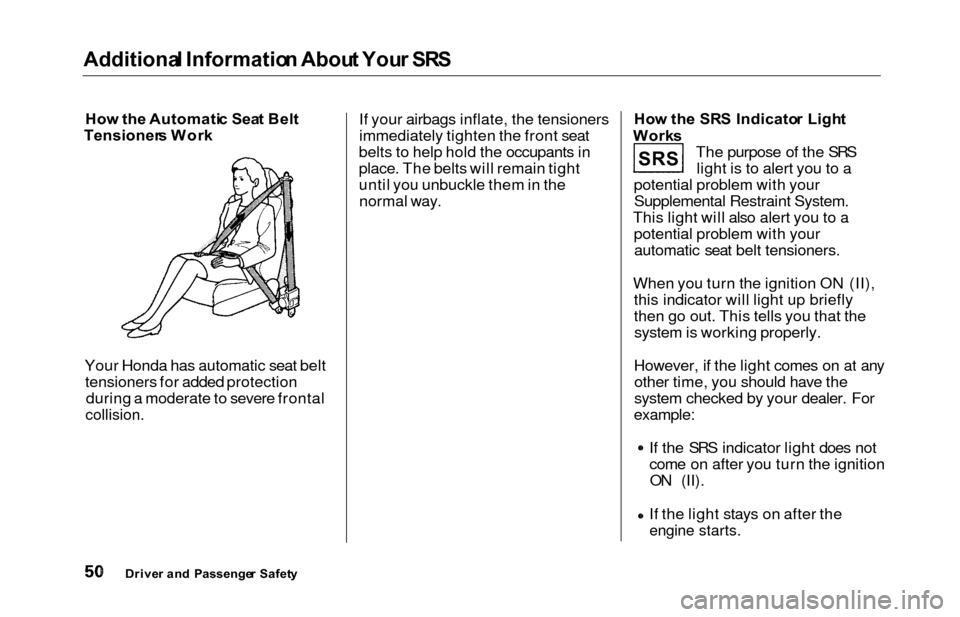
How th e Automati c Sea t Bel t
Tensioner s Wor k
Your Honda has automatic seat belt tensioners for added protection during a moderate to severe frontal
collision.
If your airbags inflate, the tensioners
immediately tighten the front seat
belts to help hold the occupants in
place. The belts will remain tight
until you unbuckle them in the
normal way.
Ho w th e SR S Indicato r Ligh t
Work s
The purpose of the SRSlight is to alert you to a
potential problem with your Supplemental Restraint System.
This light will also alert you to a potential problem with yourautomatic seat belt tensioners.
When you turn the ignition ON (II), this indicator will light up briefly
then go out. This tells you that thesystem is working properly.
However, if the light comes on at any other time, you should have the
system checked by your dealer. For
example:
If the SRS indicator light does not
come on after you turn the ignitionON (II).
If the light stays on after the
engine starts.
Drive r an d Passenge r Safet y
S R S
Page 61 of 352

Indicator Light s
Malfunctio n Indicato r
Lam p
See page 309.
Low Oi l Pressur e
Indicato r
The engine can be severely damaged
if this light flashes or stays on when
the engine is running. For complete
information, see page 307.
Charging Syste m
Indicato r
If this light comes on when the
engine is running, the battery is not
being charged. For complete
information, see page 308.
Supplementa l Restrain t
System Indicato r
This indicator lights when you turn the ignition switch ON (II). If itcomes on at any other time, it
indicates a problem in the
supplemental restraint system. For
complete information, see page 50. Parkin
g Brak e
an d Brak e
System
Indicato r
This light has two functions:
1. It comes on when you turn the ignition switch ON (II) as a
reminder to check the parking
brake. If the parking brake is notset, it goes off after the engine
starts. If the parking brake is set,
it goes off when you release the
parking brake with the engine
running. Driving with the parking
brake applied can damage the
brakes and tires.
2. If it remains lit after you release the parking brake while the engine
is running, or comes on whiledriving, it can indicate a problem
in the brake system. For complete
information, see page 310 .
Instrument s an d Control s
S R SBRAKE
U.S.Canad a
Page 62 of 352

Indicator Light s
U.S.
Anti-loc k Brak e Syste m
(ABS ) Indicato r
This light normally comes on for a few seconds when you turn theignition switch ON (II), and when
the ignition switch is turned toSTART (III). If this light comes on at
any other time, there is a problem in
the ABS. If this happens, take the
vehicle to your dealer to have it checked. With the light on, your
vehicle still has normal braking ability but no anti-lock. For complete
information, see page 211. Tractio
n Contro l Syste m
(TCS ) Indicato r
On EX model
This indicator has three functions:
1. It comes on as a reminder that you have turned off the Traction
Control System.
2. It flashes when the TCS is
regulating wheelspin.
3. If it comes on and stays on whenthe Traction Control System is on,it indicates that there is a problem
in the TCS.
This light also comes on when youturn the ignition ON (II) and goes offafter the engine starts. See page 213 for more information on the
TCS.
Immobilize r Syste m
Indicato r
This indicator comes on for a few seconds when you turn the ignition
switch ON (II). It will then go off if
you have inserted a properly-coded ignition key. If it is not a properly-
coded key, the indicator will blinkand the engine will not start (see
page 77 ).
This indicator also blinks several times when you turn the ignition switch from ON (II) to ACCESSORY (I) or LOCK (0).
Instrument s an d Control s
Canad
a
T C SA B S
Page 63 of 352

Indicator Light s
Power Slidin g Doo r
Indicato r
EX model only
This indicator comes on for a few
seconds when you turn the ignition
switch ON (II). If it comes on at anyother time, there is a problem in the
power sliding door system. With this
light on, move the main switch on
the dashboard to the OFF position, and have the system checked by
your Honda dealer as soon as possible. You can still open or closeeach sliding door manually. For
more information on the power
sliding doors, see page 90.
Tur n Signa l an d
Hazar d Warnin g
Indicator s
The left or right turn signal light blinks when you signal a lane change or turn. If the light does not blink or
blinks rapidly, it usually means one of the turn signal bulbs is burned out (see page 273). Replace the bulb as
soon as possible, since other drivers
cannot see that you are signalling.
When you turn on the Hazard
Warning switch, both turn signal lights blink. All turn signals on theoutside of the vehicle should flash. Doo
r an d Brak e Lam p Monito r
The appropriate light comes on in this display if the tailgate or any dooris not closed tightly. If a brake light
does not work, the BRAK E LAM P
indicator comes on when you push
the brake pedal with the ignition switch ON (II).
A burned out brake light is a hazard
when drivers behind you cannot tell
you are braking. Have your brake lights repaired right away.
All the lights in the monitor display come on when you turn the ignitionswitch ON (II). The lights go off
after the engine starts and the
tailgate and all doors are closed
tightly.
Instrument s an d Control s
SLIDINGDOOR
BRAKE LAMP
Page 66 of 352

Gauges
Trip Mete r
This meter shows the number of
miles (U.S.) or kilometers (Canada)driven since you last reset it.
There are two trip meters: Trip A and Trip B. Switch between these
displays by pressing the Select/
Reset button repeatedly. Each trip
meter works independently, so you can keep track of two different
distances.
To reset a trip meter, display it and then press and hold the Select/Reset
button until the number resets to
"0.0".
Temperatur e Gaug e
This shows the temperature of the engine's coolant. During normal
operation, the pointer should rise
from the bottom white mark to about the middle of the gauge. In severedriving conditions, such as very hot
weather or a long period of uphill driving, the pointer may rise to near
the upper white mark. If it reaches
the red (Hot) mark, pull safely to the side of the road. Turn to page 305 for
instructions and precautions on checking the engine's cooling
system.
Fue l Gaug e
This shows how much fuel you have. It is most accurate when the vehicle
is on level ground. It may showslightly more or less than the actual
amount when you are driving on
curvy or hilly roads.
The needle returns to the bottom after you turn off the ignition. The
gauge shows the fuel level reading
immediately after you turn the
ignition switch back ON (II).
Instrument s an d Control s
Page 205 of 352

Preparing to Driv e
You should do the following checks
and adjustments every day before
you drive your vehicle.
1. Make sure all windows, mirrors, and outside lights are clean and
unobstructed. Remove frost, snow,or ice.
2. Check that the hood and tailgate are fully closed.
3. Visually check the tires. If a tire looks low, use a gauge to check its
pressure.
4. Check that any items you may be carrying with you inside are stored
properly or fastened down
securely.
5. Check the adjustment of the seat
(see page 100).
6. Check the adjustment of the inside and outside mirrors (see
page 115).
7. Check the adjustment of the steering wheel (see page 72).
8. Make sure the doors and tailgate are securely closed and locked.
9. Fasten your seat belt. Check that your passengers have fastenedtheir seat belts (see page 15). 10. Turn the ignition switch ON (II).
Check the indicator lights in the
instrument panel.
11. Start the engine (see page 203).
12. Check the gauges and indicator lights in the instrument panel (see
page 57).
Drivin g
Page 213 of 352

The Brakin g Syste m
Your Honda is equipped with front
disc brakes. The brakes on the rear
wheels are drum. A power assist helps reduce the effort needed on
the brake pedal. The ABS helps you
retain steering control when braking
very hard.
Put your foot on the brake pedal only
when you intend to brake. Resting
your foot on the pedal keeps the brakes applied lightly, causing them
to build up heat. Heat build-up canreduce how well your brakes work. It
also keeps your brake lights on all
the time, confusing drivers behind
you.
Constant application of the brakes
when going down a long hill builds up heat and reduces their effective-
ness. Use the engine to assist the
brakes by downshifting to a lower
gear and taking your foot off the accelerator pedal.
Check your brakes after driving
through deep water. Apply the
brakes moderately to see if they feel normal. If not, apply them gently and
frequently until they do. Since a
longer distance is needed to stop
with wet brakes, be extra cautious and alert in your driving. Brak
e Wea r Indicator s
The front disc brakes on all vehicles have audible brake wear indicators.
When the brake pads need replacing,
you will hear a distinctive metallic "screeching" sound when you apply
the brakes. If you do not have the
brake pads replaced, they will begin screeching all the time.
Your brakes may sometimes squeal or squeak when you apply them
lightly. Do not confuse this with the
brake wear indicators. They make a
very audible "screeching."
Drivin g
Page 228 of 352

Maintenance
This section explains why it is
important to keep your vehicle well
maintained and to follow basic
maintenance safety precautions.
This section also includes Maintenance Schedules for normal
driving and severe driving conditions,
a Maintenance Record, and instruc-
tions for simple maintenance tasks
you may want to take care of
yourself.
If you have the skills and tools to per-
form more complex maintenance tasks on your Honda, you may want
to purchase the Service Manual. See page 337 for information on how to
obtain a copy, or see your Honda
dealer.
Maintenance Safety....................... 226
Important Safety Precautions.. 227
Maintenance Schedule.................. 228
Required Maintenance Record.... 235
Owner Maintenance Checks........ 237
Fluid Locations............................... 238
Engine Oil....................................... 239 Adding Oil................................... 239Recommended Oil..................... 239
Synthetic Oil............................... 240
Additives..................................... 241
Changing the Oil and Filter...... 241
Cooling System.............................. 243
Adding Engine Coolant............. 243
Replacing Engine Coolant........ 245
Windshield Washers..................... 248
Automatic Transmission Fluid..... 249
Brake Fluid..................................... 250
Brake System............................ . 250
Power Steering............................... 251
Air Cleaner Element...................... 252
Hood Latch.................................... . 254
Spark Plugs..................................... 254
Replacement............................... 254
Specifications............................. 256
Battery............................................ 257
Wiper Blades.................................. 259
Air Conditioning System............... 261 Air Conditioning Filter.................. 262Drive Belts...................................... 262
Timing Belt.................................... . 263
Tires................................................ 263 Inflation....................................... 263
Inspection.................................. . 265
Maintenance............................... 266
Tire Rotation.............................. 266 Replacing Tires and Wheels.... 267
Wheels and Tires....................... 268
Winter Driving........................... 268
Snow Tires.............................. 269
Tire Chains............................. 269
Lights............................................. . 270
Headlight Aiming...................... 272
Replacing Bulbs......................... 272
Storing Your Vehicle..................... 281
Maintenanc e