Page 85 of 262

Heating
Proper us e o f th e Heatin g syste m
can mak e th e interio r comfortable ,
and kee p th e window s clea r fo r bes t
visibility .
What Eac h Contro l Doe s
Fa n Contro l Button s
Pressing th e t o increas e th e
fan' s speed , whic h increas e ai r flow .
Pressin g th e t o decreas e th e
fan' s speed .
Temperatur e Contro l Dia l
Turnin g thi s dia l clockwis e increase s
th e temperatur e o f th e ai r flow .
ECO N Butto n
Whe n th e ECO N is turne d o n wit h
thi s button , th e aut o sto p functio n
wil l activat e a t a temperatur e
approximatel y ove r 4 1 ° F (5°C) . Recirculatio
n Butto n
Thi s butto n control s th e sourc e o f
th e ai r goin g int o th e system . Whe n
th e indicato r i n thi s butto n is lit , ai r
fro m th e car' s interio r i s sen t
throug h th e syste m agai n (Recircula -
tio n mode) . Whe n th e indicato r i s off ,
ai r i s brough t i n fro m outsid e th e ca r
(Fres h Ai r mode) . Rea
r Windo w Defogge r Butto n
Thi s butto n turn s th e rea r windo w
defogge r o n an d of f (se e pag e
63 , 6 4 ) .
Comfor t an d Convenienc e Feature sREA
R WINDO W
DEFOGGE R BUTTO NRECIRCULATIO
N
BUTTO N
FAN CONTRO L BUTTON S
TEMPERATUR
E
CONTRO L DIA L
ECO
N BUTTO N
MODE BUTTO N
Page 135 of 262

Preparin
g to Driv e
Yo u shoul d d o th e followin g check s
an d adjustment s ever y da y befor e
yo u driv e you r car .
1 . Mak e sur e al l windows , mirrors ,
an d outsid e light s ar e clea n an d
unobstructed . Remov e frost , snow ,
o r ice .
2 . Chec k tha t th e hoo d an d hatc h ar e
full y closed .
3 . Visuall y chec k th e tires . I f a tir e
look s low , us e a gaug e to chec k it s
pressure .
4 . Chec k tha t an y item s yo u ma y b e
carryin g wit h yo u insid e ar e store d
properl y o r fastene d dow n
securely . 5
. Chec k th e adjustmen t o f th e sea t
(se e pag e 7 4 ) .
6 . Chec k th e adjustmen t o f th e
insid e an d outsid e mirror s (se e
pag e 7 6 ) .
7 . Mak e sur e th e door s ar e securel y
close d an d locked .
8 . Faste n you r sea t belt . Chec k tha t
you r passenge r ha s fastene d hi s
sea t bel t (se e pag e 15 ). 9
. Tur n th e ignitio n switc h O N (II) .
Chec k th e indicato r light s i n th e
instrumen t panel .
10 . Star t th e engin e (se e pag e 13 3 ) .
11 . Chec k th e gauge s an d indicato r
light s i n th e instrumen t pane l (se e
pag e 45 ).
Drivin g
Page 139 of 262

5-spee
d Manua l Transmissio n
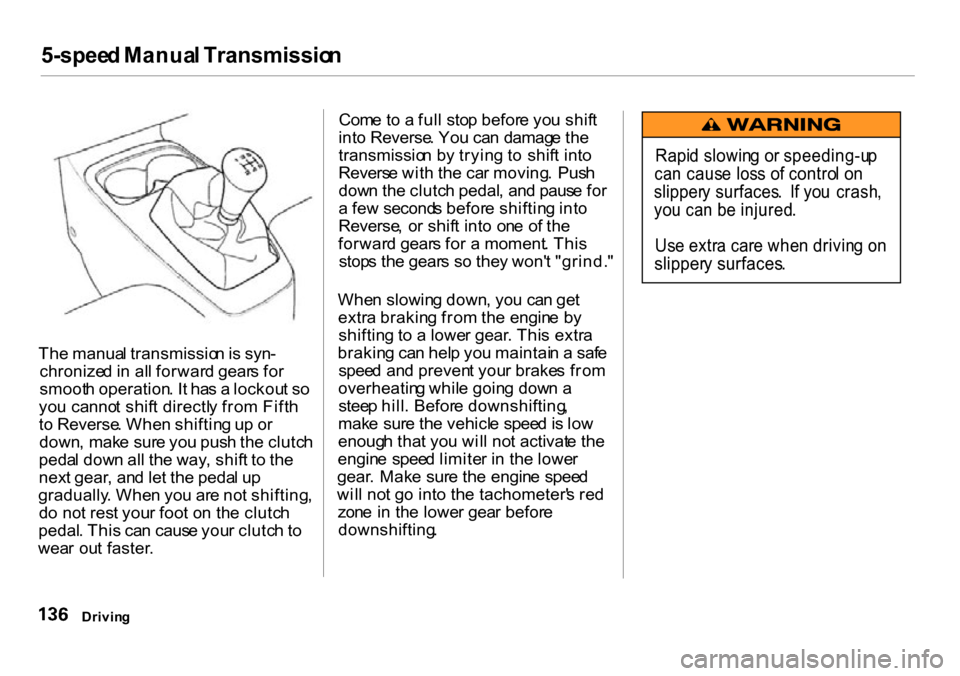
Th e manua l transmissio n is syn -
chronize d in al l forwar d gear s fo r
smoot h operation . I t ha s a lockou t s o
yo u canno t shif t directl y fro m Fift h
t o Reverse . Whe n shiftin g u p o r
down , mak e sur e yo u pus h th e clutc h
peda l dow n al l th e way , shif t t o th e
nex t gear , an d le t th e peda l u p
gradually . Whe n yo u ar e no t shifting ,
d o no t res t you r foo t o n th e clutc h
pedal . Thi s ca n caus e you r clutc h to
wea r ou t faster . Com
e t o a ful l sto p befor e yo u shif t
int o Reverse . Yo u ca n damag e th e
transmissio n b y tryin g t o shif t int o
Revers e wit h th e ca r moving . Pus h
dow n th e clutc h pedal , an d paus e fo r
a fe w second s befor e shiftin g int o
Reverse , o r shif t int o on e o f th e
forwar d gear s fo r a moment . Thi s
stop s th e gear s s o the y won' t "grind. "
Whe n slowin g down , yo u ca n ge t
extr a brakin g fro m th e engin e b y
shiftin g to a lowe r gear . Thi s extr a
brakin g ca n hel p yo u maintai n a saf e
spee d an d preven t you r brake s fro m
overheatin g whil e goin g dow n a
stee p hill . Befor e downshifting ,
mak e sur e th e vehicl e spee d is lo w
enoug h tha t yo u wil l no t activat e th e
engin e spee d limite r i n th e lowe r
gear . Mak e sur e th e engin e spee d
wil l no t g o int o th e tachometer' s re d
zon e i n th e lowe r gea r befor e
downshifting .
Drivin g
Rapi
d slowin g o r speeding-u p
ca n caus e los s o f contro l o n
slipper y surfaces . I f yo u crash ,
yo u ca n b e injured .
Us e extr a car e whe n drivin g o n
slipper y surfaces .
Page 143 of 262

Th
e Brakin g Syste m
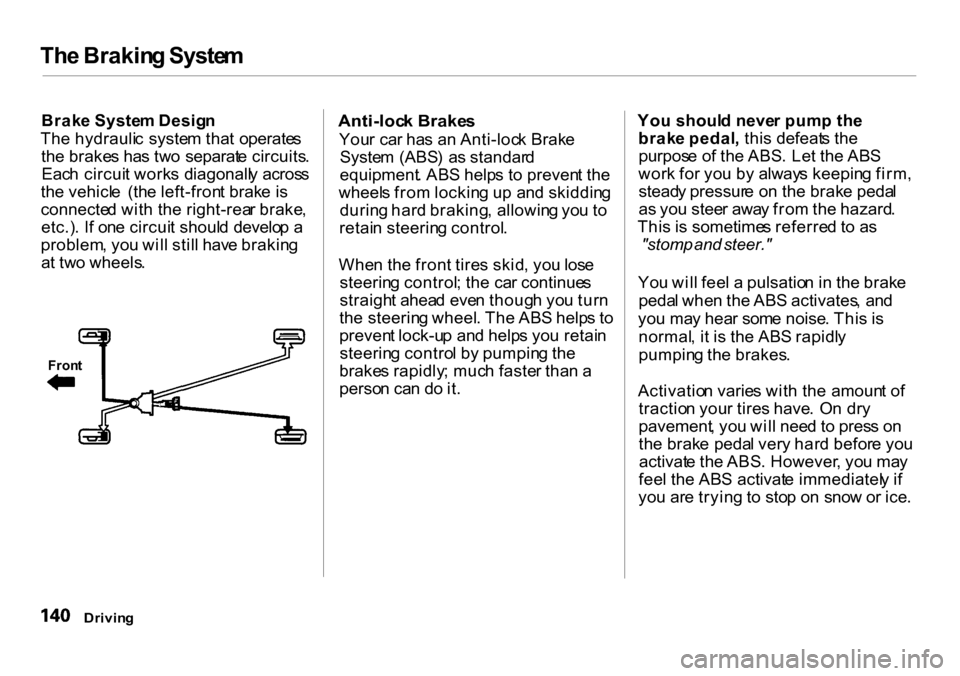
Brak e Syste m Desig n
Th e hydrauli c syste m tha t operate s
th e brake s ha s tw o separat e circuits .
Eac h circui t work s diagonall y acros s
th e vehicl e (th e left-fron t brak e i s
connecte d wit h th e right-rea r brake ,
etc.) . I f on e circui t shoul d develo p a
problem , yo u wil l stil l hav e brakin g
a t tw o wheels .
Anti-loc
k Brake s
You r ca r ha s a n Anti-loc k Brak e
Syste m (ABS ) a s standar d
equipment . AB S help s t o preven t th e
wheel s fro m lockin g u p an d skiddin g
durin g har d braking , allowin g yo u t o
retai n steerin g control .
Whe n th e fron t tire s skid , yo u los e
steerin g control ; th e ca r continue s
straigh t ahea d eve n thoug h yo u tur n
th e steerin g wheel . Th e AB S help s t o
preven t lock-u p an d help s yo u retai n
steerin g contro l b y pumpin g th e
brake s rapidly ; muc h faste r tha n a
perso n ca n d o it . Yo
u shoul d neve r pum p th e
brak e pedal , thi s defeat s th e
purpos e o f th e ABS . Le t th e AB S
wor k fo r yo u b y alway s keepin g firm ,
stead y pressur e o n th e brak e peda l
a s yo u stee r awa y fro m th e hazard .
Thi s i s sometime s referre d t o a s
"stomp and steer."
Yo u wil l fee l a pulsatio n i n th e brak e
peda l whe n th e AB S activates , an d
yo u ma y hea r som e noise . Thi s i s
normal , i t i s th e AB S rapidl y
pumpin g th e brakes .
Activatio n varie s wit h th e amoun t o f
tractio n you r tire s have . O n dr y
pavement , yo u wil l nee d t o pres s o n
th e brak e peda l ver y har d befor e yo u
activat e th e ABS . However , yo u ma y
fee l th e AB S activat e immediatel y i f
yo u ar e tryin g t o sto p o n sno w o r ice .
Drivin g
Fron
t
Page 144 of 262

Th
e Brakin g Syste m
Important Safety Reminders
AB S doe s no t reduc e th e tim e o r
distanc e i t take s t o sto p th e car , i t
onl y help s wit h steerin g contro l
durin g braking . Yo u shoul d alway s
maintai n a saf e followin g distanc e
fro m othe r vehicles .
AB S wil l no t preven t a ski d tha t
result s fro m changin g directio n
abruptly , suc h a s tryin g to tak e a
corne r to o fas t o r makin g a sudde n
lan e change . Alway s driv e a t a safe ,
pruden t spee d fo r th e roa d an d
weathe r conditions .
AB S canno t preven t a los s o f
stability . Alway s stee r moderatel y
whe n yo u ar e brakin g hard . Sever e
o r shar p steerin g whee l movemen t
ca n stil l caus e you r ca r t o vee r int o
oncomin g traffi c o r of f th e road . A
ca r wit h AB S ma y requir e a
longe r distanc e t o sto p o n loos e o r
uneve n surfaces , suc h a s grave l o r
snow , tha n a ca r withou t anti-lock .
Slo w dow n an d allo w a greate r
distanc e betwee n car s unde r thos e
conditions .
ABS
Indicator
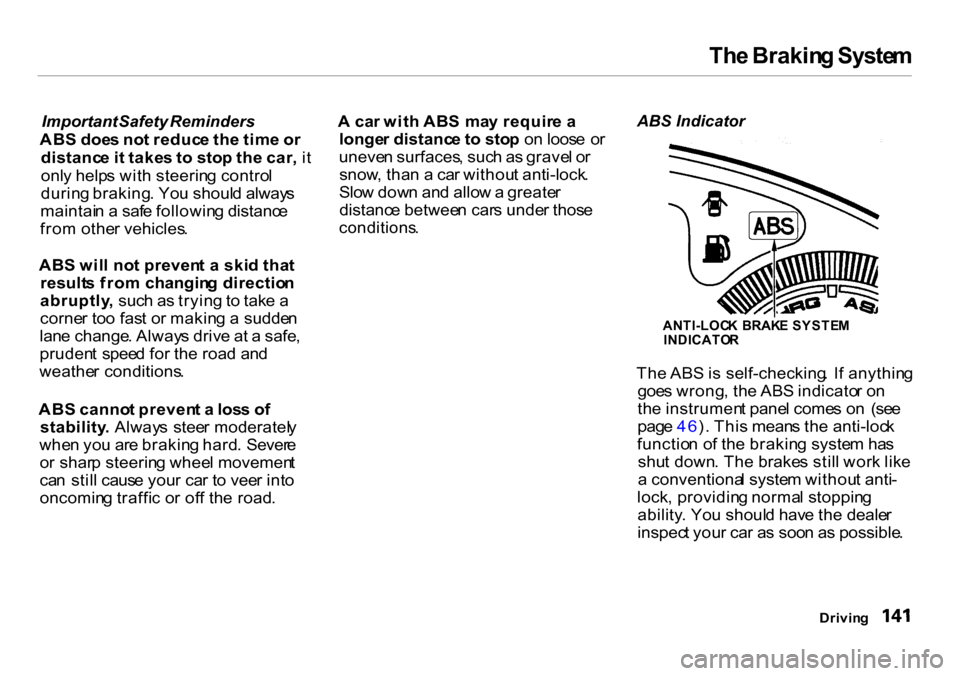
Th e AB S is self-checking . I f anythin g
goe s wrong , th e AB S indicato r o n
th e instrumen t pane l come s o n (se e
pag e 46 ). Thi s mean s th e anti-loc k
functio n o f th e brakin g syste m ha s
shu t down . Th e brake s stil l wor k lik e
a conventiona l syste m withou t anti -
lock , providin g norma l stoppin g
ability . Yo u shoul d hav e th e deale r
inspec t you r ca r a s soo n a s possible .
Drivin g
ANTI-LOC
K BRAK E SYSTE M
INDICATO R
Page 167 of 262
Coolin
g Syste m
1 . Mak e sur e th e engin e an d radiato r
ar e cool .
2 . Tur n th e radiato r ca p counter -
clockwise , withou t pressin g dow n
o n it , unti l i t stops . Thi s relieve s
an y pressur e remainin g in th e
coolin g system .
3 . Remov e th e radiato r ca p b y
pushin g dow n an d turnin g
counterclockwise .
4.
The coolant level should be up to
the base of the filler neck. Add
coolant if it is low.
5 . Pu t th e radiato r ca p bac k on .
Tighte n it fully .
6. Pour coolant into the reserve tank.
Fil l i t t o halfwa y betwee n th e MA X
an d MI N marks . Pu t th e ca p bac k
o n th e reserv e tank .
D
o no t ad d an y rus t inhibitor s o r
othe r additive s t o you r car' s coolin g
system . The y ma y no t b e compatibl e
wit h th e coolan t o r engin e compo -
nents .
Maintenanc e
RADIATO
R CA P
RESERVE TAN K
Page 169 of 262
Coolin
g Syste m
4 . Loose n th e drai n plu g o n th e
botto m o f th e radiator . Th e
coolan t wil l drai n throug h th e
splas h guard . Remov e th e drai n
bol t an d washe r fro m th e engin e
block . 5
. Remov e th e reserv e tan k fro m its
holde r b y pullin g it straigh t up .
Drai n th e coolant , the n pu t th e
tan k bac k i n it s holder .
Maintenanc e
DRAI
N BOL T RESERV
E TAN K CA P
RESERV E TAN K HOLDE
R
Page 170 of 262

Coolin
g Syste m
6 . Whe n th e coolan t stop s draining ,
tighte n th e drai n plu g a t th e
botto m o f th e radiator .
Appl y non-hardenin g sealan t t o th e
drai n bol t threads , pu t a ne w
washe r o n th e drai n bolt , an d
reinstal l th e bol t i n th e engin e
block . Tighte n it securely .
Tightenin g torque :
6 1 Ibf .
f t (8 3 N .
m , 8. 5 kgf .
m )
7 . Mi x th e recommende d antifreez e
wit h a n equa l amoun t o f purifie d
o r distille d wate r i n a clea n
container . Th e coolin g syste m
capacit y is :
0.61 US gal (2.3 , 0.51 Imp gal)
8. Remov e th e engin e cover .
9. Loose n th e bleede r bol t on top of
th e engine . Pou r coolan t int o th e
radiato r u p t o th e bas e o f th e fille r
neck . Tighte n th e bleede r bol t
whe n coolan t come s ou t i n a
stead y strea m wit h n o bubbles .
Instal l th e radiato r cap .
10.Remov e th e ca p fro m th e wate r
outlet , an d instal l a pip e an d funnel .11.Pou
r coolan t int o th e funne l unti l
th e coolan t stop s flowin g int o th e
engine .
12.Star t th e engin e an d le t i t ru n fo r
abou t 3 0 seconds . The n tur n of f
th e engine .
13.Pou r coolan t int o th e wate r outle t
u p t o it s edge . Instal l th e cap .
14.Instal l th e engin e cover .
CONTINUED
Maintenanc e
CA
P
BLEEDE R BOL T