2000 HONDA ACCORD COUPE belt
[x] Cancel search: beltPage 51 of 338
Additiona
l Informatio n Abou t You r Airbag s
Airba g Servic e
You r fron t an d sid e airba g system s
(i f equipped ) ar e virtuall y
maintenance-free , an d ther e ar e n o
part s yo u ca n safel y service .
However , yo u mus t have your ca r
service d if :
Your airbags ever inflate. An
y
airba g tha t ha s deploye d mus t b e
replace d alon g wit h th e contro l
uni t an d othe r relate d parts . D o
no t tr y t o remov e o r replac e an y
airba g b y yourself .
Thi s mus t b e don e b y a Hond a
deale r o r a knowledgeabl e bod y
shop .
The SRS indicator light alerts you
to a problem. Tak
e you r ca r t o a n
authorize d Hond a deale r a s soo n
a s possible . I f yo u ignor e thi s
indication , th e airbag s migh t no t
inflat e whe n yo u nee d them . Additiona
l Safet y Precaution s
• Do not attempt to deactivate your
airbags. Together , airbag s an d
sea t belt s provid e th e bes t
protection .
Do not tamper with airbag
components or wiring for any
reason. Tamperin g coul d caus e
th e airbag s t o deploy , possibl y
causin g ver y seriou s injury .
Do not expose the front seat-backs
to water. I f rai n o r spille d wate r
soak s int o a seat-back , i t ca n
preven t th e sid e airba g syste m
fro m workin g properly .
Do not cover or replace front seat-
back covers without consulting a
Honda dealer. Improperl y
replacin g o r coverin g fron t seat -
bac k cover s ca n preven t you r sid e
airbag s fro m inflatin g durin g a
collision .
Se e pag e 16 9 fo r furthe r informatio n
an d precaution s relatin g t o you r
airbags .
Drive r an d Passenge r Safet y
Page 57 of 338
Indicato
r Light s
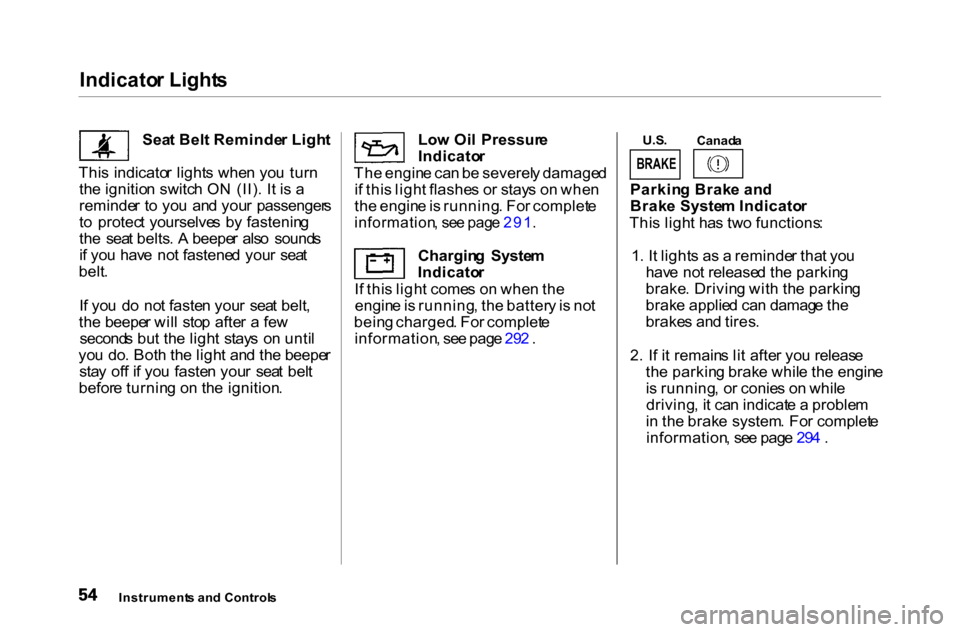
Sea t Bel t Reminde r Ligh t
Thi s indicato r light s whe n yo u tur n
th e ignitio n switc h ON (II) . I t i s a
reminde r t o yo u an d you r passenger s
t o protec t yourselve s b y fastenin g
th e sea t belts . A beepe r als o sound s
i f yo u hav e no t fastene d you r sea t
belt .
I f yo u d o no t faste n you r sea t belt ,
th e beepe r wil l sto p afte r a fe w
second s bu t th e ligh t stay s o n unti l
yo u do . Bot h th e ligh t an d th e beepe r
sta y of f i f yo u faste n you r sea t bel t
befor e turnin g o n th e ignition . Lo
w Oi l Pressur e
Indicato r
Th e engin e ca n b e severel y damage d
i f thi s ligh t flashe s o r stay s o n whe n
th e engin e is running . Fo r complet e
information , se e pag e 291 .
Chargin g Syste m
Indicato r
I f thi s ligh t come s o n whe n th e
engin e is running , th e batter y is no t
bein g charged . Fo r complet e
information , se e pag e 29 2 . U.S
.
Canad a
Parkin g Brak e an d
Brak e Syste m Indicato r
Thi s ligh t ha s tw o functions :
1 . I t light s a s a reminde r tha t yo u
hav e no t release d th e parkin g
brake . Drivin g wit h th e parkin g
brak e applie d ca n damag e th e
brake s an d tires .
2 . I f i t remain s li t afte r yo u releas e
th e parkin g brak e whil e th e engin e
i s running , o r conie s o n whil e
driving , i t ca n indicat e a proble m
i n th e brak e system . Fo r complet e
information , se e pag e 29 4 .
Instrument s an d Control s
BRAKE
Page 85 of 338
Key
s an d Lock s
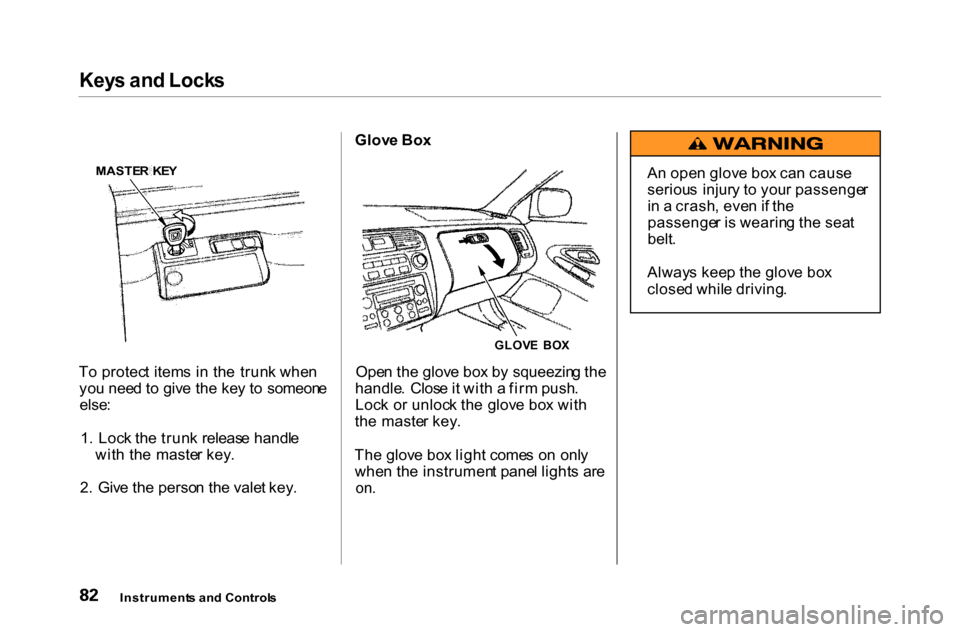
T o protec t item s i n th e trun k whe n
yo u nee d t o giv e th e ke y t o someon e
else :
1 . Loc k th e trun k releas e handl e
wit h th e maste r key .
2 . Giv e th e perso n th e vale t key . Glov
e Bo x
Ope n th e glov e bo x b y squeezin g th e
handle . Clos e it wit h a fir m push .
Loc k o r unloc k th e glov e bo x wit h
th e maste r key .
Th e glov e bo x ligh t come s o n onl y
whe n th e instrumen t pane l light s ar e
on .
Instrument s an d Control s
MASTE
R KE Y
GLOVE BO X A
n ope n glov e bo x ca n caus e
seriou s injur y t o you r passenge r
i n a crash , eve n if th e
passenge r i s wearin g th e sea t
belt .
Alway s kee p th e glov e bo x
close d whil e driving .
Page 97 of 338
Sea
t Adjustment s
RELEAS E
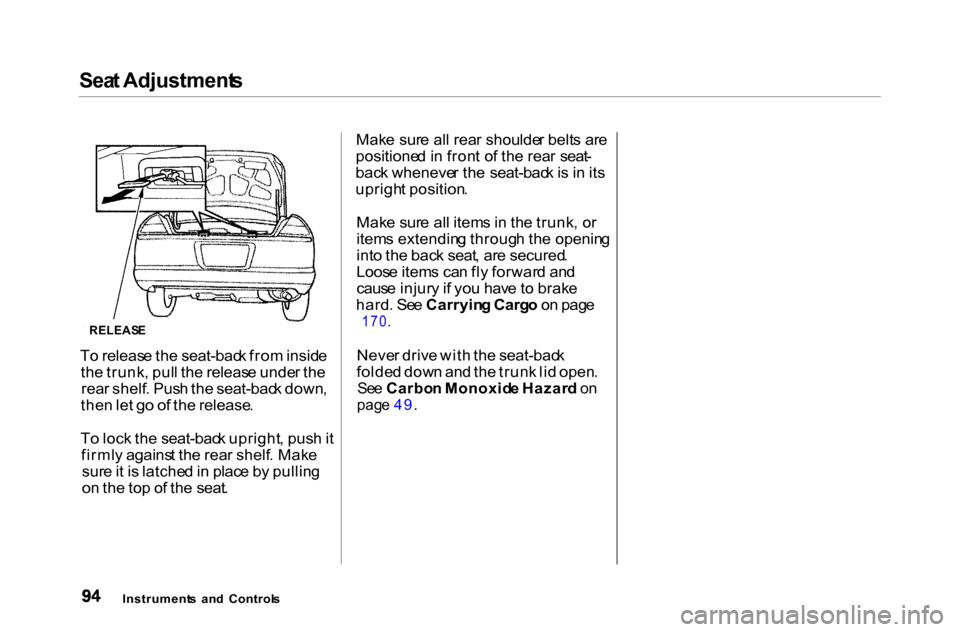
T o releas e th e seat-bac k fro m insid e
th e trunk , pul l th e releas e unde r th e
rea r shelf . Pus h th e seat-bac k down ,
the n le t g o o f th e release .
T o loc k th e seat-bac k upright , pus h it
firml y agains t th e rea r shelf . Mak e
sur e it i s latche d in plac e b y pullin g
o n th e to p o f th e seat . Mak
e sur e al l rea r shoulde r belt s ar e
positione d in fron t o f th e rea r seat -
bac k wheneve r th e seat-bac k is i n it s
uprigh t position .
Mak e sur e al l item s in th e trunk , o r
item s extendin g throug h th e openin g
int o th e bac k seat , ar e secured .
Loos e item s ca n fl y forwar d an d
caus e injur y if yo u hav e t o brak e
hard . Se e Carryin g Carg o o n pag e
170 .
Neve r driv e wit h th e seat-bac k
folde d dow n an d th e trun k li d open .
Se e Carbo n Monoxid e Hazar d o n
pag e 49 .
Instrument s an d Control s
Page 177 of 338
Preparin
g to Driv e
Yo u shoul d d o th e followin g check s
an d adjustment s ever y da y befor e
yo u driv e you r car .
1 . Mak e sur e al l windows , mirrors ,
an d outsid e light s ar e clea n an d
unobstructed . Remov e frost , snow ,
o r ice .
2 . Chec k tha t th e hoo d an d trun k ar e
full y closed .
3 . Visuall y chec k th e tires . I f a tir e
look s low , us e a gaug e to chec k it s
pressure .
4 . Chec k tha t an y item s yo u ma y b e
carryin g wit h yo u insid e ar e store d
properl y o r fastene d dow n
securely .
5
. Chec k th e adjustmen t o f th e sea t
(se e pag e 8 7).
6 . Chec k th e adjustmen t o f th e
insid e an d outsid e mirror s (se e
pag e 9 9).
7 . Chec k th e
adjustmen
t o f th e
steerin g whee l (se e pag e 68 ).
8 . Mak e sur e th e door s ar e securel y
close d an d locked .
9 . Faste n you r sea t belt . Chec k tha t
you r passenger s hav e fastene d
thei r sea t belt s (se e pag e 1 5 ) . 10.
Tur n th e ignitio n switc h O N (II) .
Chec k th e indicato r light s i n th e
instrumen t panel .
11. Star t th e engin e (se e pag e 175 ).
12. Chec k th e gauge s an d indicato r
light s i n th e instrumen t pane l (se e
pag e 53 ).
Drivin g
Page 200 of 338
Maintenanc
e
Thi s sectio n explain s wh y i t i s
importan t t o kee p you r ca r wel l
maintaine d an d to follo w basi c
maintenanc e safet y precautions .
Thi s sectio n als o include s
Maintenanc e Schedule s fo r norma l
drivin g an d sever e drivin g conditions ,
a Maintenanc e Record , an d instruc -
tion s fo r simpl e maintenanc e task s
yo u ma y wan t t o tak e car e o f
yourself .
I f yo u hav e th e skill s an d tool s t o per -
for m mor e comple x maintenanc e
task s o n you r Honda , yo u ma y wan t
t o purchas e th e Servic e Manual . Se e
pag e 32 3 fo r informatio n o n ho w to
obtai n a copy , o r se e you r Hond a
dealer .
Maintenanc e Safety...................... . 19 8
Importan t Safet y Precautions. . 19 9
Maintenanc e Schedule................. . 20 0
Maintenanc e Record.................... . 20 7
Owne
r Maintenanc e Checks....... . 20 9
Flui d Locations.............................. . 21 0
Engin e Oil...................................... . 21 2
Addin g Oil.................................. . 21 2
Recommende d Oil.................... . 21 2
Syntheti c Oil.............................. . 21 4
Additives.................................... . 21 4
Changin g th e Oi l an d Filter..... . 21 4
Coolin g System............................. . 21 7
Addin g Engin e Coolant............ . 21 7
Replacin g Engin e Coolant........ 219
Windshiel d Washers.................... . 22 4
Transmissio n Fluid....................... . 22 5
Automati c
Transmission......................... . 22 5
5-spee d Manua l
Transmission......................... . 22 7
Brak e an d Clutc h Fluid................ . 22 8
Brak e System............................ . 22 8
Clutc h System........................... . 22 9
Powe r Steering.............................. . 23 0
Ai r Cleane r Element..................... . 23 1
Hoo d Latch.................................... . 23 3
Spar k Plug s
(4-cylinde r Models).............. . 23 3
Replacement.............................. . 23 3
Specifications............................
. 23 4
Spar k Plug s
(6-cylinde r Models).............. . 23 5
Replacement.............................. . 23 5
Specifications............................ . 23 7
Battery........................................... . 23 8
Wipe r Blades................................. . 24 1
Ai r Conditionin g System.............. . 24 3
Ai r Conditionin g Filter................. . 24 4
Driv e Belts..................................... . 24 4
Timin g Belt.................................... . 24 5
Tires............................................... . 24 6
Inflation...................................... . 24 6
Inspection.................................. . 24 7
Maintenance.............................. . 24 8
Tir e Rotation............................. . 24 9
Replacin g Tire s an d Wheels... . 24 9
Wheel s an d Tires...................... . 25 0
Winte r Driving.......................... . 25 0
Sno w Tires............................. . 25 1
Tir e Chains............................ . 25 1
Lights............................................. . 25 2
Headligh t Aiming..................... . 25 4
Replacin g Bulbs........................ . 25 5
Storin g You r Car........................... . 26 6
Maintenanc e
Page 209 of 338
NOTE
:
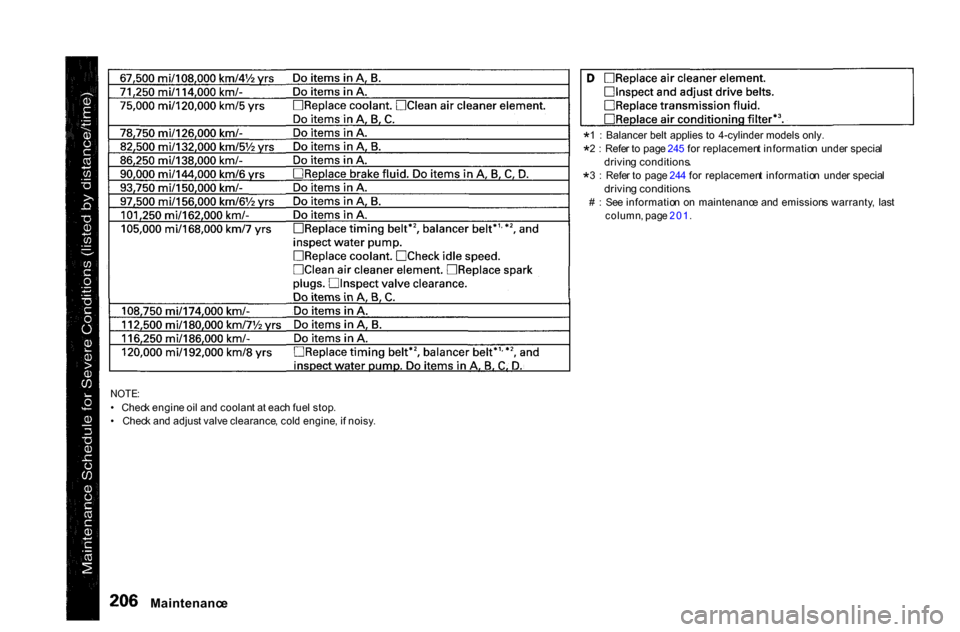
• Chec k engin e oi l an d coolan t a t eac h fue l stop .
• Chec k an d adjus t valv e clearance , col d engine , i f noisy .
Maintenanc e
*1 : Balancer belt applies to 4-cylinder models only.
*2
: Refe r t o pag e 24 5 fo r replacemen t informatio n unde r specia l
drivin g conditions .
* 3
: Refe r t o pag e 24 4 fo r replacemen t informatio n unde r specia l
drivin g conditions .
# : Se e informatio n o n maintenanc e an d emission s warranty , las t
column , pag e 201 .
Page 247 of 338
Ai
r Conditionin g Filter , Driv e Belt s
Ai r Conditionin g Filte r
Th e ai r conditionin g filte r remove s
polle n an d dus t tha t i s brough t i n
fro m th e outsid e throug h th e heatin g
an d coolin g system/climat e contro l
system .
Thi s filte r shoul d b e replace d ever y
30,00 0 mile s (48,00 0 km ) unde r
norma l conditions . I t shoul d b e
replace d ever y 15,00 0 mile s (24,00 0
km ) i f yo u driv e primaril y i n urba n
area s tha t hav e hig h concentration s
o f soo t i n th e ai r fro m industr y an d
diesel-powere d vehicles . Replac e it
mor e ofte n i f ai r flo w fro m th e
heatin g an d coolin g system/climat e
contro l syste m become s les s tha n
usual . Hav e th e ai r conditionin g filte r
replace d b y you r Hond a dealer . Driv
e Belt s
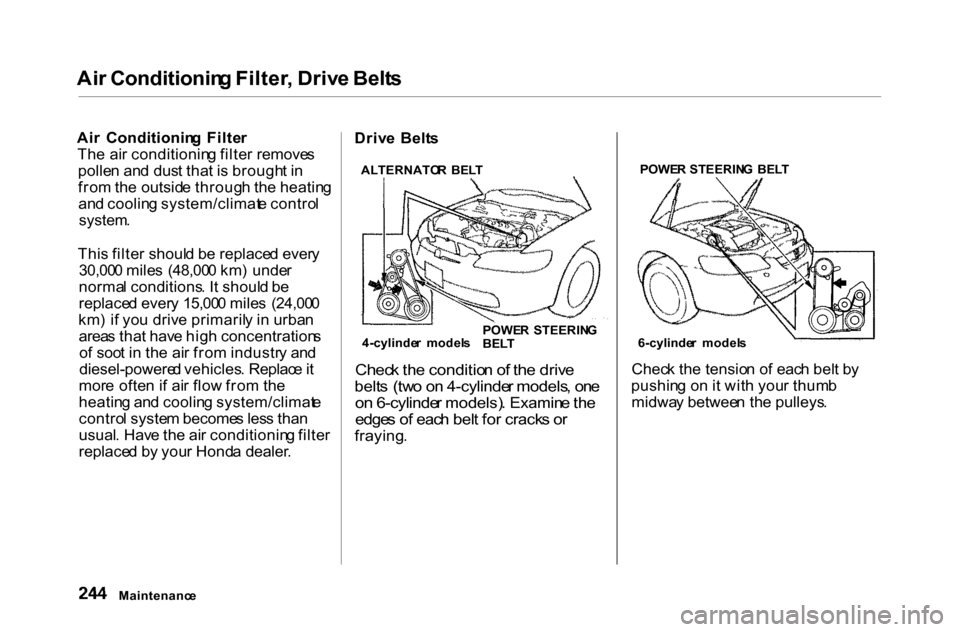
Chec k th e conditio n o f th e driv e
belt s (tw o o n 4-cylinde r models , on e
o n 6-cylinde r models) . Examin e th e
edge s o f eac h bel t fo r crack s o r
fraying .
POWE
R STEERIN G BEL T
6-cylinde r model s
Chec k th e tensio n o f eac h bel t b y
pushin g o n i t wit h you r thum b
midwa y betwee n th e pulleys .
Maintenanc e POWE
R STEERIN G
BEL T
ALTERNATO
R BEL T
4-cylinde r model s