2000 HONDA ACCORD COUPE clock
[x] Cancel search: clockPage 54 of 338

Instrument
s an d Control s
Thi s sectio n give s informatio n abou t
th e control s an d display s tha t
contribut e t o th e dail y operatio n o f
you r Honda . Al l th e essentia l
control s ar e withi n eas y reach .
Contro l Locations........................... . 5 2
Indicato r Lights............................... . 5 3
Gauges............................................. . 5 8
Speedometer............................... . 5 8
Tachometer................................. . 5 8
Odometer..................................... . 5 8
Tri p Meter................................... . 5 9
Temperatur e Gauge................... . 5 9
Fue l Gauge.................................. . 5 9
Maintenanc e Require d
Indicator................................... . 6 0
Control s Nea r th e Steerin g
Wheel....................................... . 6 1
Headlights................................... . 6 2
Automati c Lightin g Of f
Feature..................................... . 6 3
Daytim e Runnin g Lights............ . 6 3
Instrumen t Pane l Brightness.... . 6 4
Tur
n Signals................................ . 6 4
Windshiel d Wipers..................... . 6 5
Windshiel d Washers.................. . 6 6
Hazar d Warning.......................... . 6 6
Rea r Windo w Defogger............. . 6 7
Steerin g Whee l Adjustment...... . 6 8
Steerin g Whee l Control s ............... . 6 9
Cruis e Control............................. . 6 9
Remot e Audi o Control s ............. . 7 2
Key s an d Locks............................... . 7 2
Keys.............................................. . 7 2
Immobilize r System.................... . 7 3
Ignitio n Switch............................ . 7 5
Powe r Doo r Locks...................... . 7 6
Lockou t Prevention................ . 7 7
Remot e Transmitter................... . 7 8
Trunk........................................... . 8 1
Glov e Box.................................... . 82
HomeLin k Universa l
Transmitter................................. . 8 3
Sea t Adjustments............................ . 8 7
Fron t Sea t Adjustments............. . 8 7
Driver' s Sea t Manua l Heigh t
Adjustment.............................. . 8 8
Driver' s Sea t Powe r Heigh t
Adjustment.............................. . 8 8
Driver'
s Sea t Powe r
Adjustments............................ . 8 9
Driver' s Lumba r Support........... . 9 0
Rea r Sea t Access........................ . 9 1
Hea d Restraints.......................... . 9 2
Foldin g Rea r Seat....................... . 9 3
Sea t Heaters.................................... . 9 5
Powe r Windows.............................. . 9 6
Moonroof......................................... . 9 8
Mirrors............................................. . 9 9
Adjustin g th e Powe r Mirrors.... . 9 9
Parkin g Brake............................... . 10 0
Digita l Clock.................................. . 10 1
Sunglasse s Holder........................ . 10 1
Beverag e Holder........................... . 10 2
Consol e Compartment................. . 10 3
Su n Visor........................................ . 10 4
Vanit y Mirror................................ . 10 4
Coi n Box........................................ . 10 5
Cente r Pocket............................... . 10 5
Accessor y Powe r Socket............. . 10 5
Interio r Lights............................... . 10 6
Ceilin g Light.............................. . 10 6
Spotlights................................... . 10 6
Courtes y Lights........................ . 10 7
Instrument s an d Control s
Page 96 of 338
Sea
t Adjustment s
Foldin g Rea r Sea t
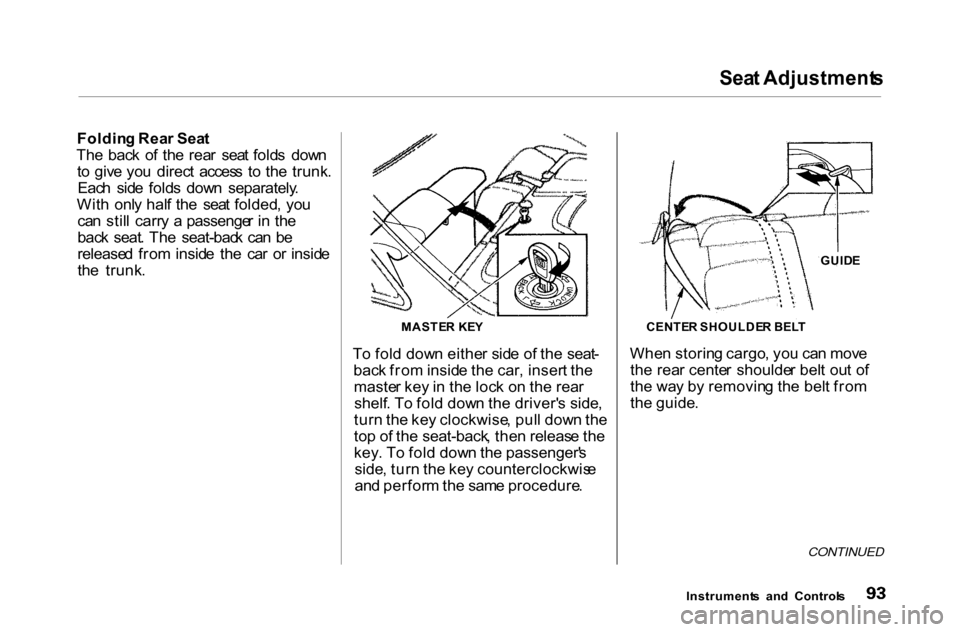
Th e bac k o f th e rea r sea t fold s dow n
t o giv e yo u direc t acces s t o th e trunk .
Eac h sid e fold s dow n separately .
Wit h onl y hal f th e sea t folded , yo u
ca n stil l carr y a passenge r i n th e
bac k seat . Th e seat-bac k ca n b e
release d fro m insid e th e ca r o r insid e
th e trunk .
To fol d dow n eithe r sid e o f th e seat -
bac k fro m insid e th e car , inser t th e
maste r ke y in th e loc k o n th e rea r
shelf . T o fol d dow n th e driver' s side ,
tur n th e ke y clockwise , pul l dow n th e
to p o f th e seat-back , the n releas e th e
key . T o fol d dow n th e passenger' s
side , tur n th e ke y counterclockwis e
an d perfor m th e sam e procedure .Whe
n storin g cargo , yo u ca n mov e
th e rea r cente r shoulde r bel t ou t o f
th e wa y b y removin g th e bel t fro m
th e guide .
CONTINUED
Instrument s an d Control s
MASTE
R KE Y CENTER SHOULDE R BEL TGUID
E
Page 104 of 338
Digita
l Clock , Sunglasse s Holde r
Digita l Cloc k
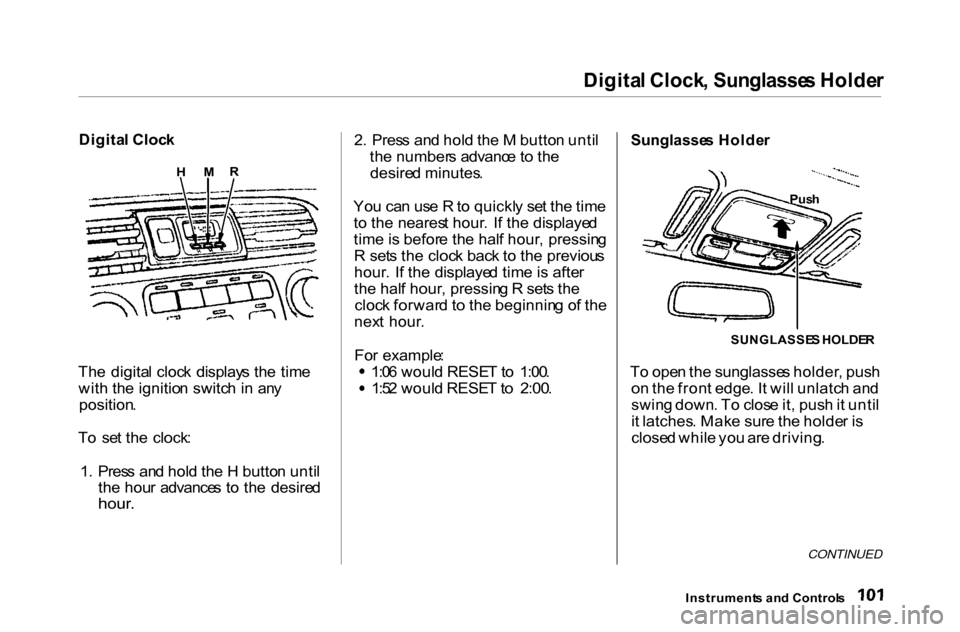
Th e digita l cloc k display s th e tim e
wit h th e ignitio n switc h in an y
position .
T o se t th e clock :
1 . Pres s an d hol d th e H butto n unti l
th e hou r advance s t o th e desire d
hour .
2
. Pres s an d hol d th e M butto n unti l
th e number s advanc e t o th e
desire d minutes .
Yo u ca n us e R to quickl y se t th e tim e
t o th e neares t hour . I f th e displaye d
tim e is befor e th e hal f hour , pressin g
R set s th e cloc k bac k t o th e previou s
hour . I f th e displaye d tim e is afte r
th e hal f hour , pressin g R set s th e
cloc k forwar d t o th e beginnin g o f th e
nex t hour .
Fo r example : 1:0
6 woul d RESE T to 1:00 . 1:5
2 woul d RESE T to 2:00 .
Sunglasse
s Holde r
SUNGLASSE S HOLDE R
T o ope n th e sunglasse s holder , pus h
o n th e fron t edge . I t wil l unlatc h an d
swin g down . T o clos e it , pus h it unti l
i t latches . Mak e sur e th e holde r i s
close d whil e yo u ar e driving .
CONTINUED
Instrument s an d Control s
M
R
H
Push
Page 113 of 338
Heatin
g an d Coolin g
On LX, LX-V6 and EX models
Prope r us e o f the Heatin g an d
Coolin g syste m ca n mak e th e
interio r dr y an d comfortable , an d
kee p th e window s clea r fo r bes t
visibility .
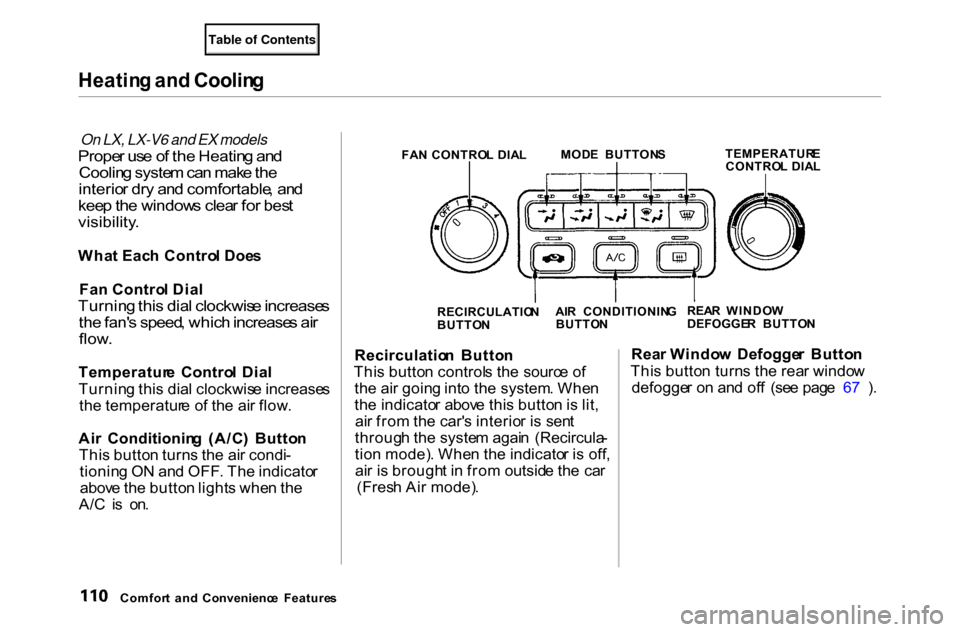
Wha t Eac h Contro l Doe s
Fa n Contro l Dia l
Turnin g thi s dia l clockwis e increase s
th e fan' s speed , whic h increase s ai r
flow .
Temperatur e Contro l Dia l
Turnin g thi s dia l clockwis e increase s
th e temperatur e o f th e ai r flow .
Ai r Conditionin g (A/C ) Butto n
Thi s butto n turn s th e ai r condi -
tionin g O N an d OFF . Th e indicato r
abov e th e butto n light s whe n th e
A/ C is on . Recirculatio
n Butto n
Thi s butto n control s th e sourc e o f
th e ai r goin g int o th e system . Whe n
th e indicato r abov e thi s butto n is lit ,
ai r fro m th e car' s interio r i s sen t
throug h th e syste m agai n (Recircula -
tio n mode) . Whe n th e indicato r i s off ,
ai r i s brough t i n fro m outsid e th e ca r
(Fres h Ai r mode) . Rea
r Windo w Defogge r Butto n
Thi s butto n turn s th e rea r windo w
defogge r o n an d of f (se e pag e 6 7 ) .
Comfor t an d Convenienc e Feature s FA
N CONTRO L DIA L MOD
E BUTTON S TEMPERATUR
E
CONTRO L DIA L
RECIRCULATIO N
BUTTO N AI
R CONDITIONIN G
BUTTO N REA
R WINDO W
DEFOGGE R BUTTO N
Page 124 of 338
Climat
e Contro l Syste m
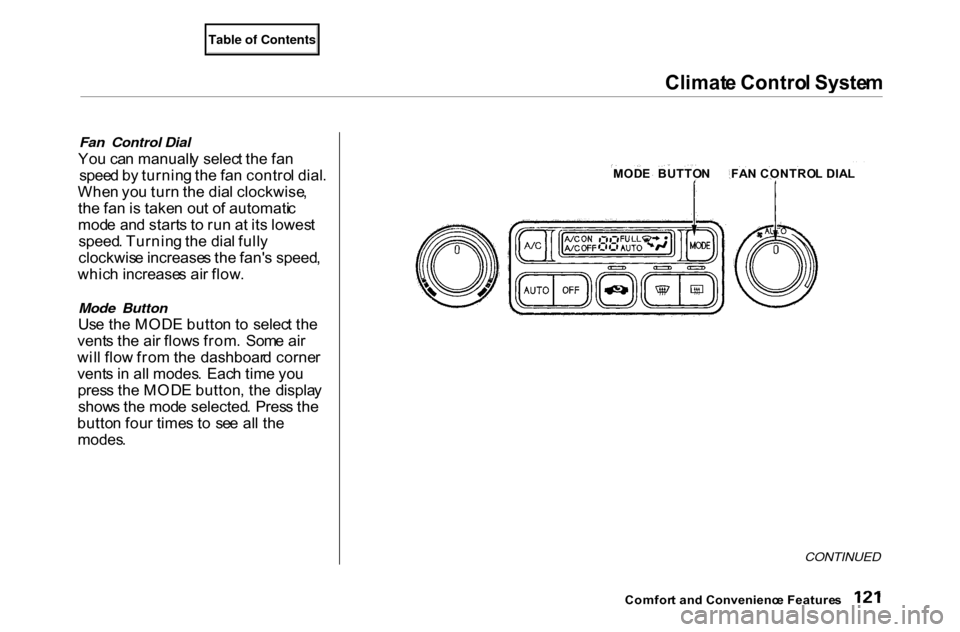
Fan Control Dial
Yo u ca n manuall y selec t th e fa n
spee d b y turnin g th e fa n contro l dial .
Whe n yo u tur n th e dia l clockwise ,
th e fa n is take n ou t o f automati c
mod e an d start s t o ru n a t it s lowes t
speed . Turnin g th e dia l full y
clockwis e increase s th e fan' s speed ,
whic h increase s ai r flow .
Mode Button
Us e th e MOD E butto n t o selec t th e
vent s th e ai r flow s from . Som e ai r
wil l flo w fro m th e dashboar d corne r
vent s i n al l modes . Eac h tim e yo u
pres s th e MOD E button , th e displa y
show s th e mod e selected . Pres s th e
butto n fou r time s t o se e al l th e
modes .
CONTINUED
Comfor t an d Convenienc e Feature s
MOD
E BUTTO NFAN CONTRO L DIA L
Page 221 of 338
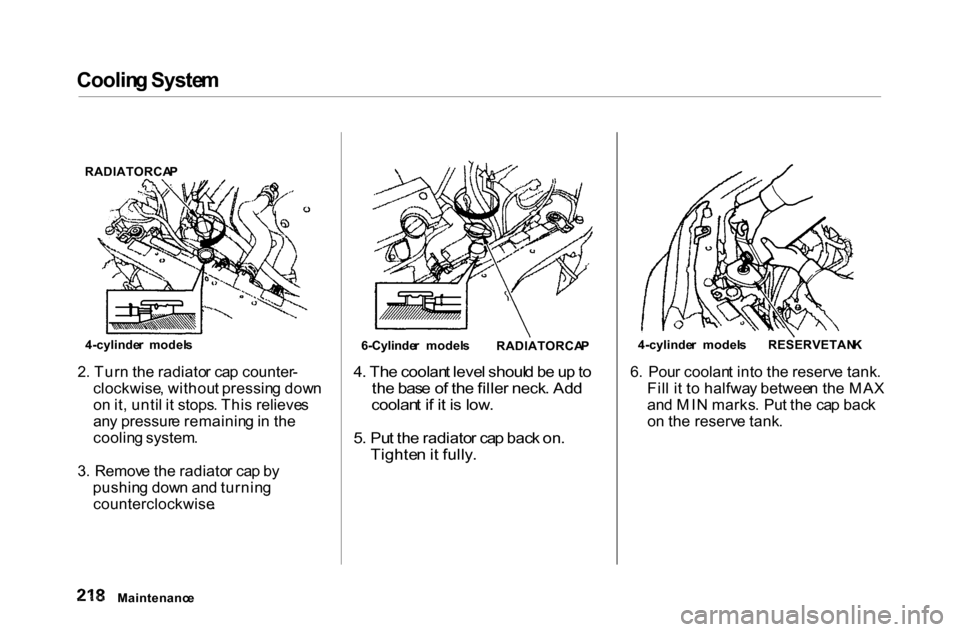
Coolin
g Syste m
2 . Tur n th e radiato r ca p counter -
clockwise , withou t pressin g dow n
o n it , unti l i t stops . Thi s relieve s
an y pressur e remainin g in th e
coolin g system .
3 . Remov e th e radiato r ca p b y
pushin g dow n an d turnin g
counterclockwise .
4
. Th e coolan t leve l shoul d b e u p to
th e bas e o f th e fille r neck . Ad d
coolan t i f i t i s low .
5 . Pu t th e radiato r ca p bac k on .
Tighte n it fully .
6
. Pou r coolan t int o th e reserv e tank .
Fil l i t t o halfwa y betwee n th e MA X
an d MI N marks . Pu t th e ca p bac k
o n th e reserv e tank .
Maintenanc e
RADIATORCA
P
4-cylinde r model s
6-Cylinder model s
RADIATORCA P4-cylinde
r model sRESERVETAN K
Page 238 of 338
Spar
k Plug s (6-cylinde r Models )
Th e spar k plug s in you r ca r shoul d
b e replace d accordin g to th e tim e
an d distanc e recommendation s i n
th e maintenanc e schedule .
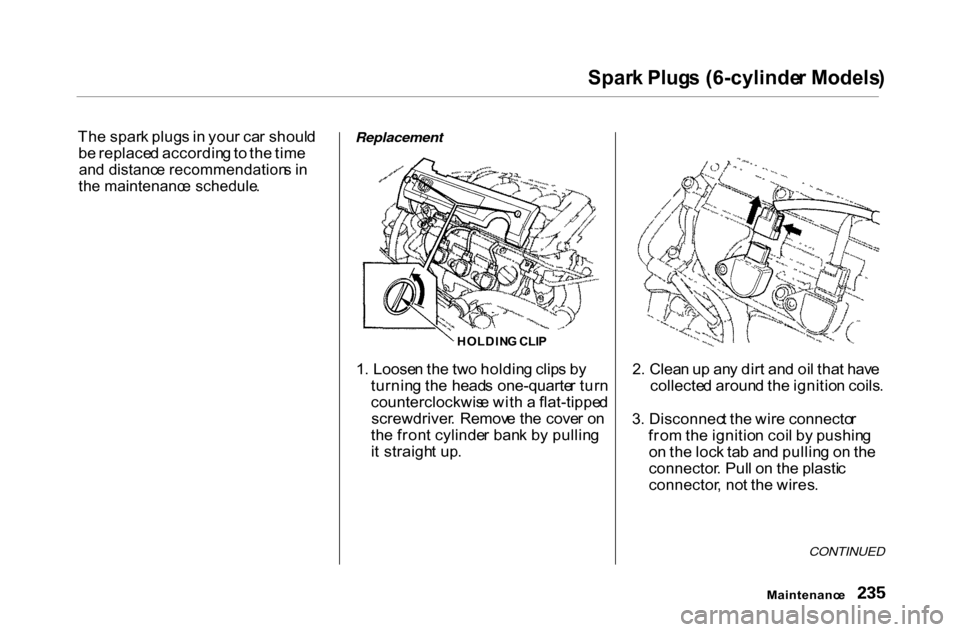
Replacement
HOLDING CLI P
1 . Loose n th e tw o holdin g clip s b y
turnin g th e head s one-quarte r tur n
counterclockwis e wit h a flat-tippe d
screwdriver . Remov e th e cove r o n
th e fron t cylinde r ban k b y pullin g
i t straigh t up . 2
. Clea n u p an y dir t an d oi l tha t hav e
collecte d aroun d th e ignitio n coils .
3 . Disconnec t th e wir e connecto r
fro m th e ignitio n coi l b y pushin g
o n th e loc k ta b an d pullin g o n th e
connector . Pul l o n th e plasti c
connector , no t th e wires .
CONTINUED
Maintenanc e
Page 240 of 338
Spar
k Plug s (6-cylinde r Models )
Tighten the spark plugs carefully. A
spark plug that is too loose can
overheat and damage the engine. Overtightening can cause damage to
the threads in the cylinder head.
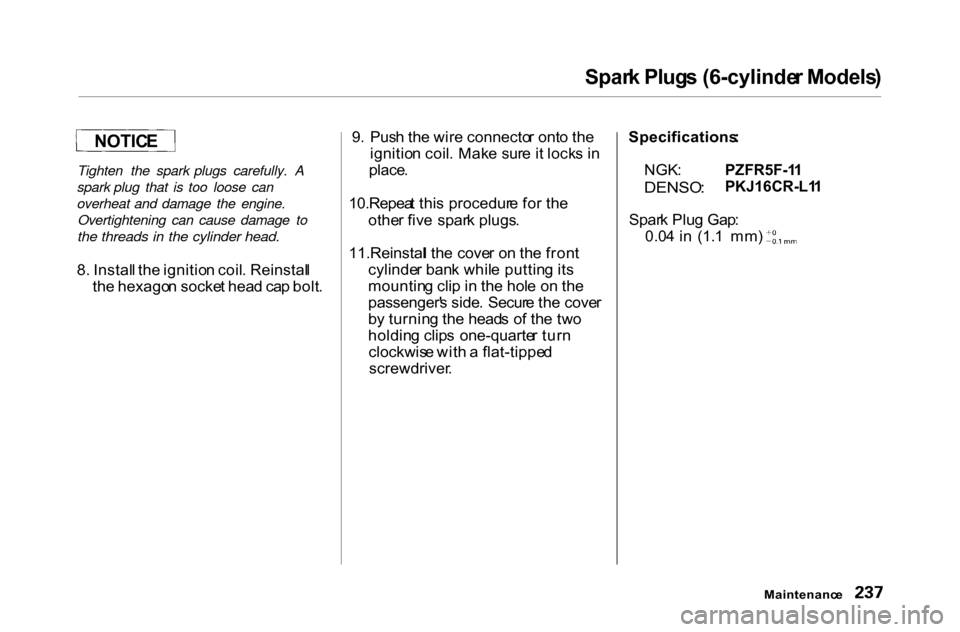
8 . Instal l th e ignitio n coil . Reinstal l
th e hexago n socke t hea d ca p bolt . 9
. Pus h th e wir e connecto r ont o th e
ignitio n coil . Mak e sur e i t lock s i n
place .
10.Repea t thi s procedur e fo r th e
othe r fiv e spar k plugs .
11.Reinstal l th e cove r o n th e fron t
cylinde r ban k whil e puttin g it s
mountin g cli p in th e hol e o n th e
passenger' s side . Secur e th e cove r
b y turnin g th e head s o f th e tw o
holdin g clip s one-quarte r tur n
clockwis e wit h a flat-tippe d
screwdriver . Specifications
:
NGK :
DENSO :
PZFR5F-1
1
PKJ16CR-L1 1
Spar k Plu g Gap :
0.0 4 i n (1. 1 mm )
Maintenanc e
NOTIC
E