Page 77 of 224

²Recline the seat slightly (one or two degrees)
from the upright position.
Do not put anything on or over the air bag
module. Placing objects on or over the air
bag inflation area may cause those objects to be
propelled by the air bag into your face and torso
causing serious injury.
Do not attempt to service, repair, or modify
the Air Bag Supplemental Restraint System
or its fuses. See your Ford or Lincoln-Mercury
dealer.
Modifications to the front end of the vehicle,
including frame, bumper, front end body
structure and tow hooks may effect the
performance of the air bag sensors increasing the
risk of injury. Do not modify the front end of the
vehicle.
Children and air bags
For additional
important safety
information, read all
information on safety
restraints in this guide.
Children must always
be properly restrained.
Accident statistics
suggest that children
are safer when
properly restrained in
the rear seating
positions than in the front seating position. Failure
to follow these instructions may increase the risk of
injury in a collision.
Seating and safety restraints
77
Page 86 of 224
5. To put the retractor
in the automatic
locking mode, grasp
the shoulder portion of
the belt and pull
downward until all of
the belt is extracted
and a click is heard.
6. Allow the belt to retract. The belt will click as it
retracts to indicate it is in the automatic locking
mode.
7. Pull the lap belt
portion across the child
seat toward the buckle
and pull up on the
shoulder belt while
pushing down with
your knee on the child
seat.
8. Allow the safety belt
to retract to remove
any slack in the belt.
9. Before placing the
child in the seat,
forcibly tilt the seat
forward and back to
make sure the seat is
securely held in place.
10. Try to pull the belt out of the retractor to make
sure the retractor is in the automatic locking mode
(you should not be able to pull more belt out). If the
retractor is not locked, unbuckle the belt and repeat
steps two through nine.
Check to make sure the child seat is properly
secured before each use.
Seating and safety restraints
86
Page 104 of 224
(Overdrive)
The normal driving
position for the best
fuel economy.
Transmission operates
in gears one through
four.
(Overdrive) can be
deactivated by pressing
the transmission
control switch on the
gearshift lever.
The transmission
control indicator light
(TCIL) will illuminate
on the instrument
cluster.
Drive± Not shown on the display. Activate by
pressing the transmission control switch on the end
of the gearshift lever with the gearshift in the
position. The O/D OFF indicator will illuminate on
the instrument cluster. Transmission operates in
gears one through three.
(Drive) provides more
engine braking than
(Overdrive) and is useful
when:
²driving with a heavy load.
²towing a trailer up or down steep hills.
²additional engine braking is desired. If towing a
trailer, refer toDriving while you towin the
Trailer Towingchapter.
O/ D
OFF
Driving
104
Page 109 of 224

If R (Reverse) is not engaged, push the clutch
pedal down and put the gearshift back into
Neutral. Then, release the clutch pedal for a
moment and repeat steps 3 through 6.
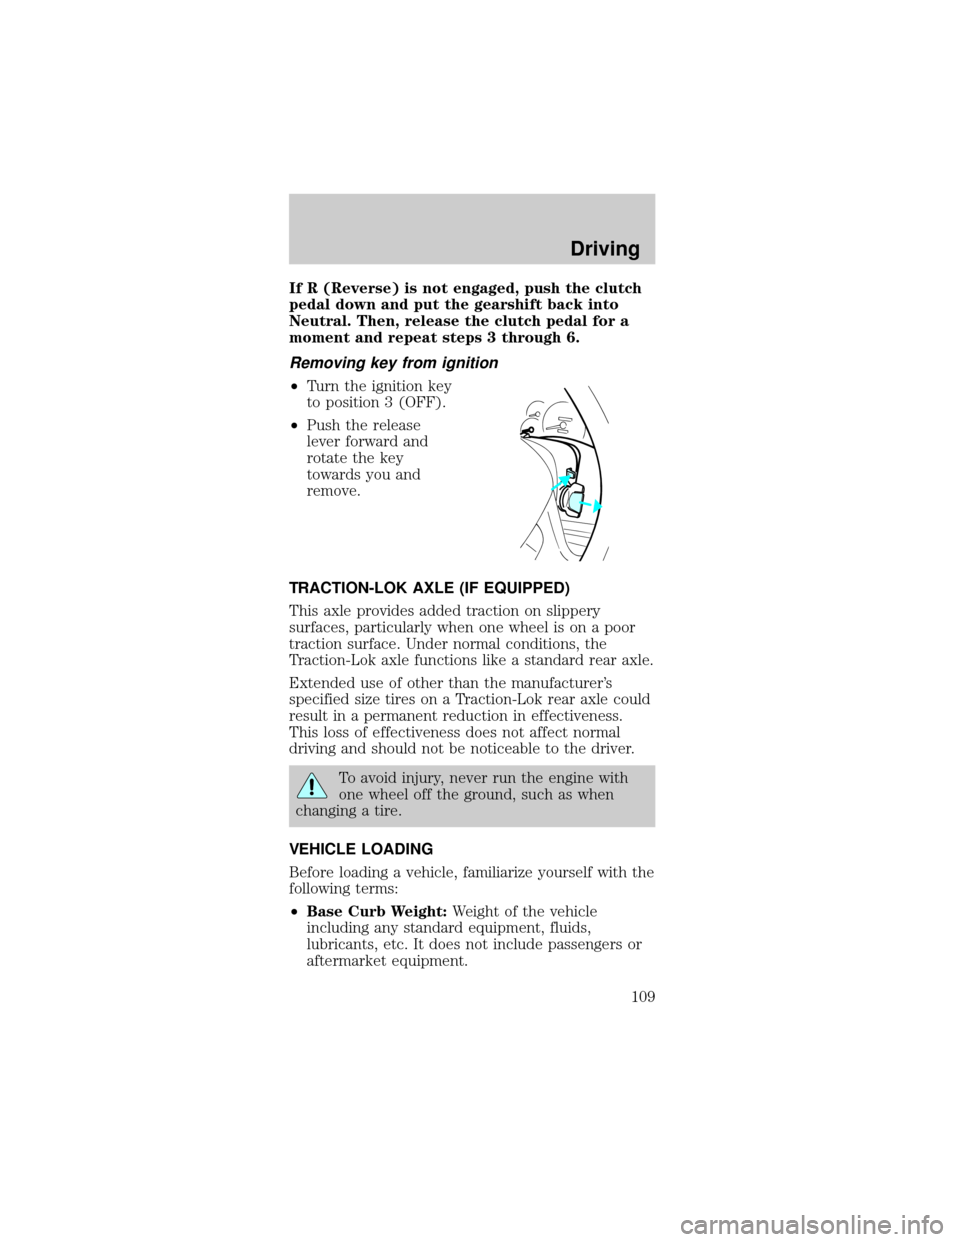
Removing key from ignition
²Turn the ignition key
to position 3 (OFF).
²Push the release
lever forward and
rotate the key
towards you and
remove.
TRACTION-LOK AXLE (IF EQUIPPED)
This axle provides added traction on slippery
surfaces, particularly when one wheel is on a poor
traction surface. Under normal conditions, the
Traction-Lok axle functions like a standard rear axle.
Extended use of other than the manufacturer's
specified size tires on a Traction-Lok rear axle could
result in a permanent reduction in effectiveness.
This loss of effectiveness does not affect normal
driving and should not be noticeable to the driver.
To avoid injury, never run the engine with
one wheel off the ground, such as when
changing a tire.
VEHICLE LOADING
Before loading a vehicle, familiarize yourself with the
following terms:
²Base Curb Weight:Weight of the vehicle
including any standard equipment, fluids,
lubricants, etc. It does not include passengers or
aftermarket equipment.
Driving
109
Page 110 of 224

²Payload:Combined maximum allowable weight of
cargo, passengers and optional equipment. The
payload equals the gross vehicle weight rating
minus base curb weight.
²GVW (Gross Vehicle Weight):Base curb weight
plus payload weight. The GVW is not a limit or a
specification.
²GVWR (Gross Vehicle Weight Rating):
Maximum total weight of the base vehicle,
passengers, optional equipment and cargo. The
GVWR is specific to each vehicle and is listed on
the Safety Compliance Label on the driver's door
pillar.
²GAWR (Gross Axle Weight Rating):Carrying
capacity for each axle system. The GAWR is
specific to each vehicle and is listed on the Safety
Compliance Label on the driver's door pillar.
²GCW (Gross Combined Weight):The
combined weight of the towing vehicle (including
passengers and cargo) and the trailer.
²GCWR (Gross Combined Weight Rating):
Maximum combined weight of towing vehicle
(including passengers and cargo) and the trailer.
The GCWR indicates the maximum loaded weight
that the vehicle is designed to tow.
²Maximum Trailer Weight Rating:Maximum
weight of a trailer the vehicle is permitted to tow.
The maximum trailer weight rating is determined
by subtracting the vehicle curb weight for each
engine/transmission combination, any required
option weight for trailer towing and the weight of
the driver from the GCWR for the towing vehicle.
²Maximum Trailer Weight:Maximum weight of a
trailer the loaded vehicle (including passengers
and cargo) is permitted to tow. It is determined
by subtracting the weight of the loaded trailer
towing vehicle from the GCWR for the towing
vehicle.
Driving
110
Page 112 of 224

TRAILER TOWING
Your vehicle is capable of towing a trailer up to 454
kg (1 000 lbs.) gross trailer weight with a maximum
tongue load of 45 kg (100 lbs.). Do not tow a trailer
until your vehicle has been driven at least 800 km
(500 miles).
Towing a trailer places an additional load on your
vehicle's engine, transmission, axles, brakes, tires
and suspension. Inspect these components carefully
after towing.
Do not exceed the GVWR or the GAWR
specified on the certification label.
Towing trailers beyond the maximum
recommended gross trailer weight could
result in engine damage, transmission/axle damage,
structural damage, loss of control, and personal
injury.
Preparing to tow
Use the proper equipment for towing a trailer, and
make sure it is properly attached to your vehicle.
See your dealer or a reliable trailer dealer if you
require assistance.
Safety chains
Always connect the trailer's safety chains to the
frame or hook retainers of the vehicle. To connect
the trailer's safety chains, cross the chains under the
trailer tongue and allow slack for turning corners.
If you use a rental trailer, follow the instructions that
the rental agency gives to you.
Do not attach safety chains to the bumper.
Trailer brakes
Electric brakes and manual, automatic or surge-type
trailer brakes are safe if installed properly and
Driving
112
Page 113 of 224

adjusted to the manufacturer's specifications. The
trailer brakes must meet local and Federal
regulations.
Do not connect a trailer's hydraulic brake
system directly to your vehicle's brake
system. Your vehicle may not have enough braking
power and your chances of having a collision
greatly increase.
The braking system of the tow vehicle is rated for
operation at the GVWR not GCWR.
Trailer lamps
Trailer lamps are required on most towed vehicles.
Make sure your trailer lamps conform to local and
Federal regulations. See your dealer or trailer rental
agency for proper instructions and equipment for
hooking up trailer lamps.
Driving while you tow
When towing a trailer:
²Ensure that you turn off your speed control. The
speed control may shut off automatically when
you are towing on long, steep grades.
²Consult your local motor vehicle speed regulations
for towing a trailer.
²Use a lower gear when towing up or down steep
hills. This will eliminate excessive downshifting
and upshifting for optimum fuel economy and
transmission cooling.
²Anticipate stops and brake gradually.
Exceeding the GCWR rating may cause internal
transmission damage and void your warranty
coverage.
Servicing after towing
If you tow a trailer for long distances, your vehicle
will require more frequent service intervals. Refer to
Driving
113
Page 114 of 224

your Scheduled Maintenance guide for more
information.
Trailer towing tips
²Practice turning, stopping and backing up in an
area before starting on a trip to get the feel of the
vehicle trailer combination. When turning, make
wider turns so the trailer wheels will clear curbs
and other obstacles.
²Allow more distance for stopping with a trailer
attached.
²The trailer tongue weight should be 10% of the
loaded trailer weight.
²After you have traveled 80 km (50 miles),
thoroughly check your hitch, electrical
connections and trailer wheel lug nuts.
²When stopped in traffic for long periods of time in
hot weather, place the gearshift in P (Park) and
increase idle speed. This aids engine cooling and
air conditioner efficiency.
²Vehicles with trailers should not be parked on a
grade. If you must park on a grade, place wheel
chocks under the trailer's wheels.
Recreational towing (all wheels on the ground)
Follow these guidelines for your specific powertrain
combination to tow your vehicle with all four wheels
on the ground (such as behind a recreational
vehicle).
These guidelines are designed to ensure that your
transmission is not damaged due to insufficient
lubrication.
All Rear Wheel Drive (RWD) vehicles
This applies to all cars and 4x2 trucks/sport utilities
with rear wheel drive capability.
An example of recreational towing is towing your
vehicle behind a Motorhome. The following
recreational towing guidelines are designed to
Driving
114