Page 93 of 256

In order to avoid inadvertent activation of the switch, always
remove the ignition key from the passenger air bag ON/OFF
switch.
Turning the passenger air bag back on
The passenger air bag remains OFF until you turn it back ON.
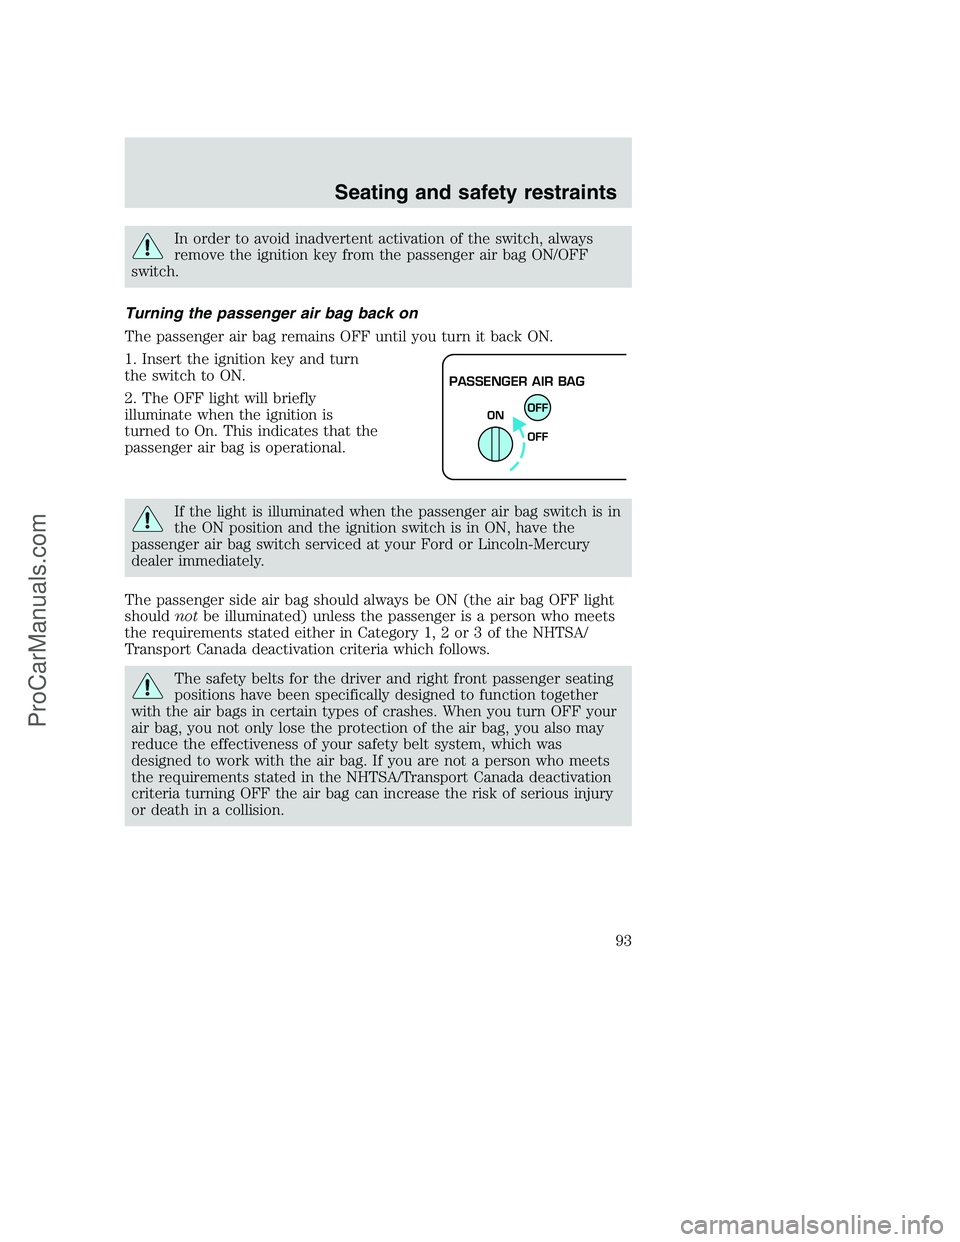
1. Insert the ignition key and turn
the switch to ON.
2. The OFF light will briefly
illuminate when the ignition is
turned to On. This indicates that the
passenger air bag is operational.
If the light is illuminated when the passenger air bag switch is in
the ON position and the ignition switch is in ON, have the
passenger air bag switch serviced at your Ford or Lincoln-Mercury
dealer immediately.
The passenger side air bag should always be ON (the air bag OFF light
shouldnotbe illuminated) unless the passenger is a person who meets
the requirements stated either in Category 1, 2 or 3 of the NHTSA/
Transport Canada deactivation criteria which follows.
The safety belts for the driver and right front passenger seating
positions have been specifically designed to function together
with the air bags in certain types of crashes. When you turn OFF your
air bag, you not only lose the protection of the air bag, you also may
reduce the effectiveness of your safety belt system, which was
designed to work with the air bag. If you are not a person who meets
the requirements stated in the NHTSA/Transport Canada deactivation
criteria turning OFF the air bag can increase the risk of serious injury
or death in a collision.
PASSENGER AIR BAG
OFF
OFF ON
Seating and safety restraints
93
ProCarManuals.com
Page 105 of 256
2. Make sure the headlamps and vehicle accessories are off.
If starting a vehicle with an automatic transmission:
•Make sure the parking brake is
set.
•Make sure the gearshift is in P (Park).
If starting a vehicle with a manual transmission:
•Make sure the parking brake is set.
•Push the clutch pedal to the
floor.
3. Turn the key to 4 (ON) without
turning the key to 5 (START).
If there is difficulty in turning the key,
firmly rotate the steering wheel left
and right until the key turns freely.
This condition may occur when:
•front wheels are turned
•front wheel is against the curb
•steering wheel is turned when
getting in or out of the vehicle
1
2
34
5
Starting
105
ProCarManuals.com
Page 106 of 256

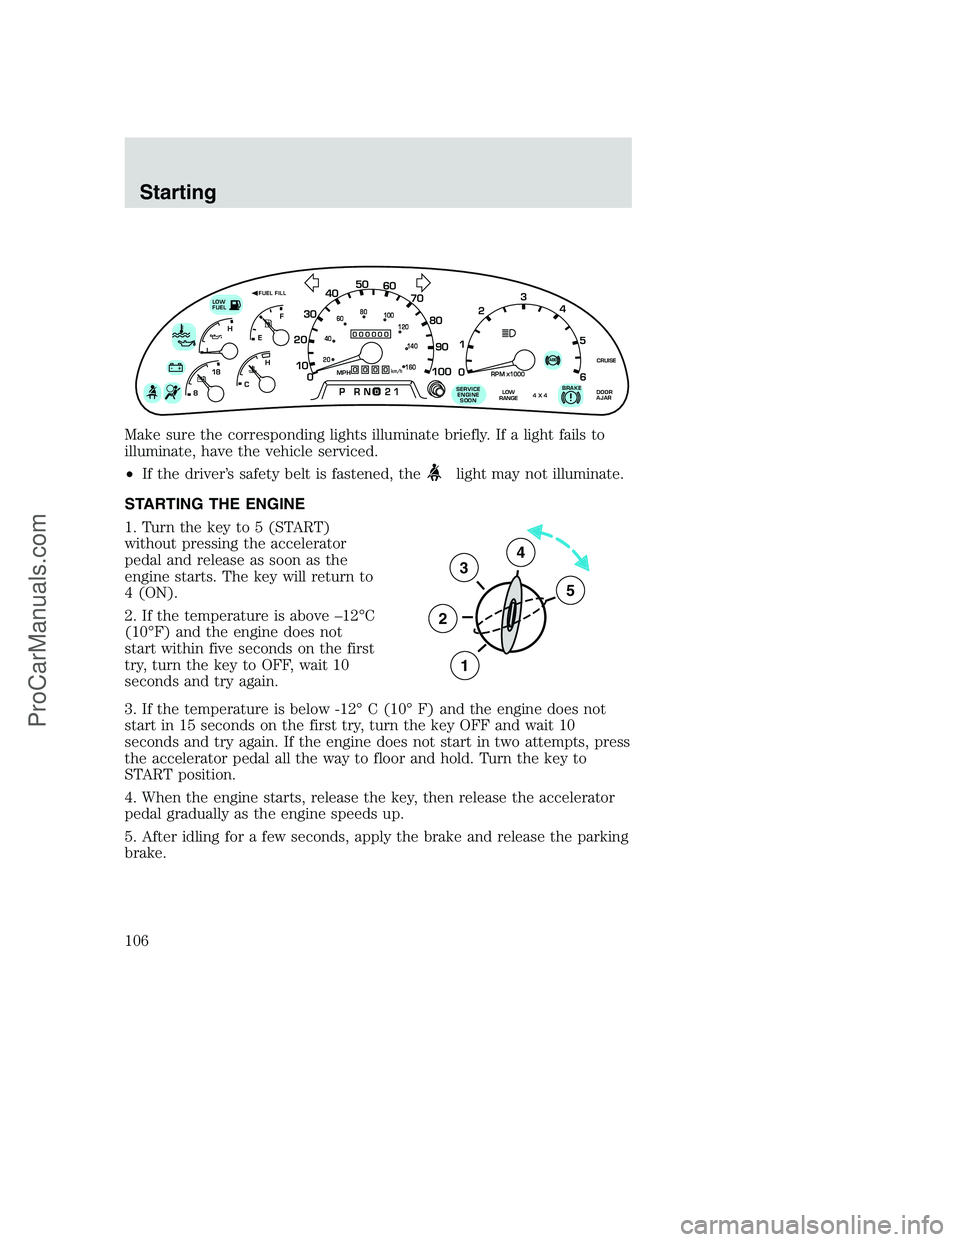
Make sure the corresponding lights illuminate briefly. If a light fails to
illuminate, have the vehicle serviced.
•If the driver’s safety belt is fastened, the
light may not illuminate.
STARTING THE ENGINE
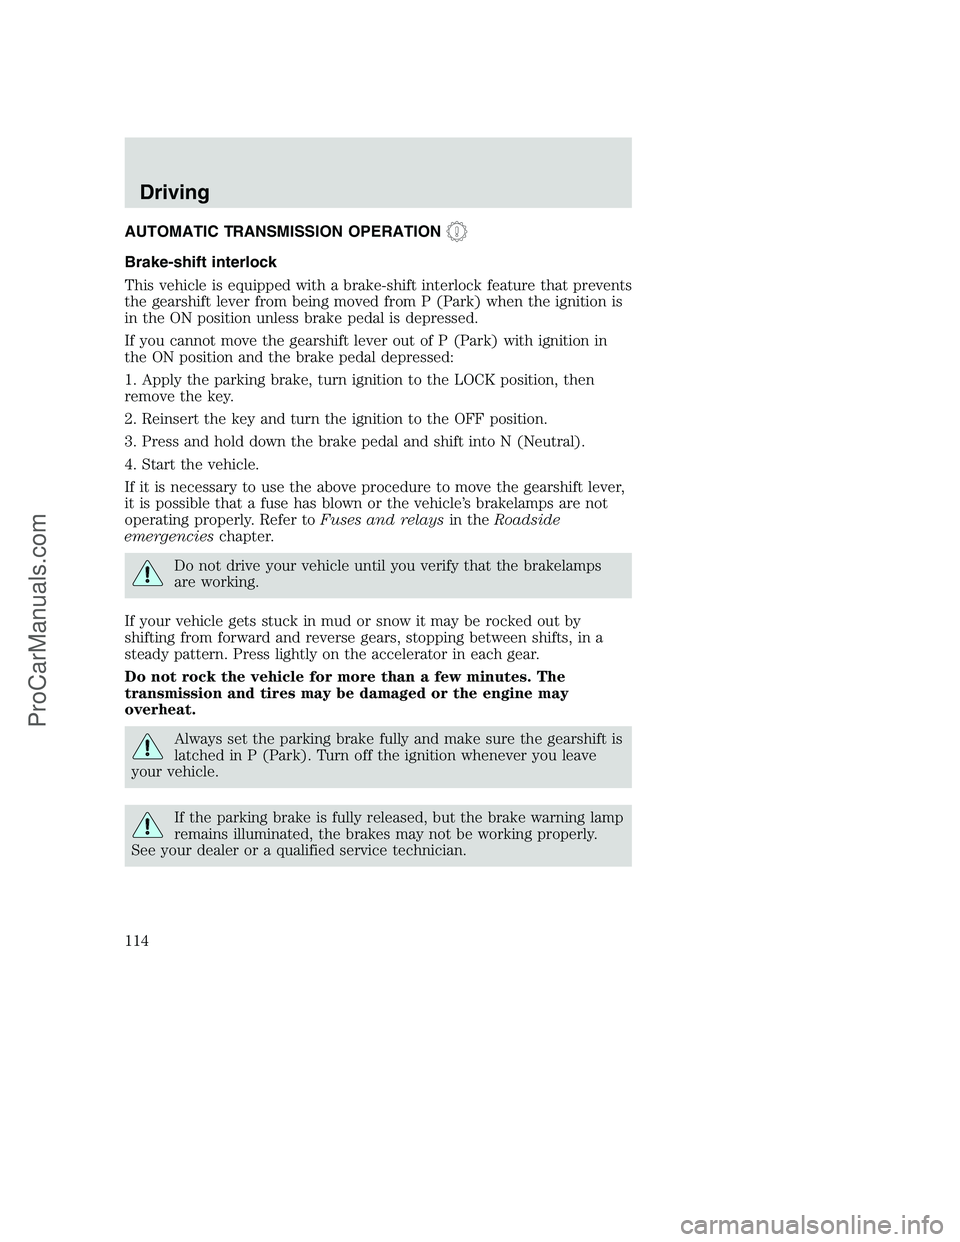
1. Turn the key to 5 (START)
without pressing the accelerator
pedal and release as soon as the
engine starts. The key will return to
4 (ON).
2. If the temperature is above –12°C
(10°F) and the engine does not
start within five seconds on the first
try, turn the key to OFF, wait 10
seconds and try again.
3. If the temperature is below -12° C (10° F) and the engine does not
start in 15 seconds on the first try, turn the key OFF and wait 10
seconds and try again. If the engine does not start in two attempts, press
the accelerator pedal all the way to floor and hold. Turn the key to
START position.
4. When the engine starts, release the key, then release the accelerator
pedal gradually as the engine speeds up.
5. After idling for a few seconds, apply the brake and release the parking
brake.
0
000000000
MPH20km/h
406080
100
120
140
160
010 20304050
60
70
80
90
100
LOW
FUEL
CRUISEABS+ -
LEF
H
RPM1000X0123
5
6 4
PRN 218C 18
H
D
FUEL FILL
DOOR
AJARLOW
RANGE4 X 4BRAKE!SERVICE
ENGINE
SOON
3
2
1
5
4
Starting
106
ProCarManuals.com
Page 114 of 256

AUTOMATIC TRANSMISSION OPERATION
Brake-shift interlock
This vehicle is equipped with a brake-shift interlock feature that prevents
the gearshift lever from being moved from P (Park) when the ignition is
in the ON position unless brake pedal is depressed.
If you cannot move the gearshift lever out of P (Park) with ignition in
the ON position and the brake pedal depressed:
1. Apply the parking brake, turn ignition to the LOCK position, then
remove the key.
2. Reinsert the key and turn the ignition to the OFF position.
3. Press and hold down the brake pedal and shift into N (Neutral).
4. Start the vehicle.
If it is necessary to use the above procedure to move the gearshift lever,
it is possible that a fuse has blown or the vehicle’s brakelamps are not
operating properly. Refer toFuses and relaysin theRoadside
emergencieschapter.
Do not drive your vehicle until you verify that the brakelamps
are working.
If your vehicle gets stuck in mud or snow it may be rocked out by
shifting from forward and reverse gears, stopping between shifts, in a
steady pattern. Press lightly on the accelerator in each gear.
Do not rock the vehicle for more than a few minutes. The
transmission and tires may be damaged or the engine may
overheat.
Always set the parking brake fully and make sure the gearshift is
latched in P (Park). Turn off the ignition whenever you leave
your vehicle.
If the parking brake is fully released, but the brake warning lamp
remains illuminated, the brakes may not be working properly.
See your dealer or a qualified service technician.
Driving
114
ProCarManuals.com
Page 120 of 256
Parking your vehicle
1. Disengage the clutch, apply brake
and shift into N (Neutral).
2. Set parking brake.
3. Shift into 1 (First).
4. Turn the ignition key to position
3 (OFF).
1
24R3D1
24 R
L3D
3
2
1
5
4
Driving
120
ProCarManuals.com
Page 122 of 256

Removing key from ignition
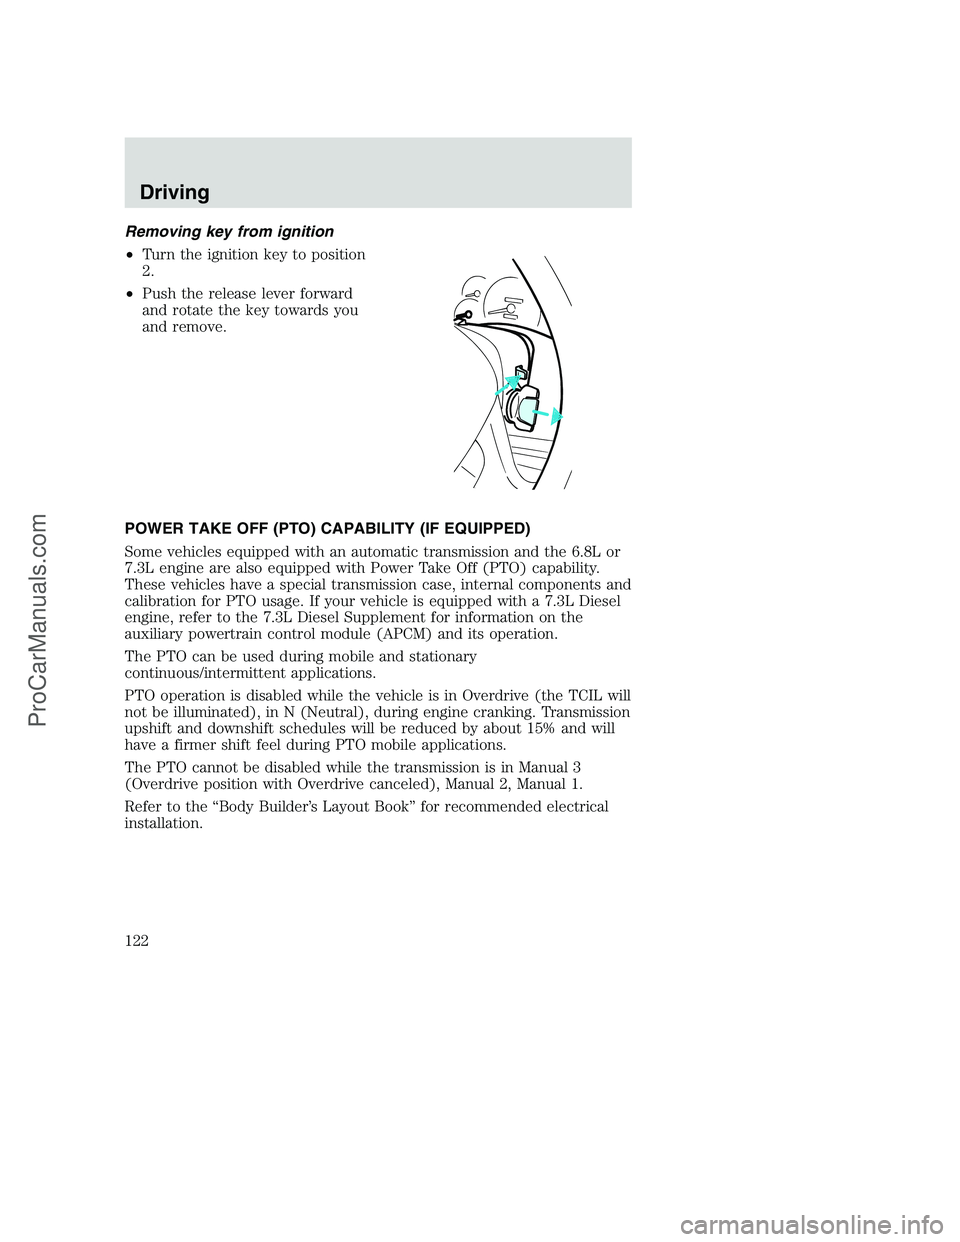
•Turn the ignition key to position
2.
•Push the release lever forward
and rotate the key towards you
and remove.
POWER TAKE OFF (PTO) CAPABILITY (IF EQUIPPED)
Some vehicles equipped with an automatic transmission and the 6.8L or
7.3L engine are also equipped with Power Take Off (PTO) capability.
These vehicles have a special transmission case, internal components and
calibration for PTO usage. If your vehicle is equipped with a 7.3L Diesel
engine, refer to the 7.3L Diesel Supplement for information on the
auxiliary powertrain control module (APCM) and its operation.
The PTO can be used during mobile and stationary
continuous/intermittent applications.
PTO operation is disabled while the vehicle is in Overdrive (the TCIL will
not be illuminated), in N (Neutral), during engine cranking. Transmission
upshift and downshift schedules will be reduced by about 15% and will
have a firmer shift feel during PTO mobile applications.
The PTO cannot be disabled while the transmission is in Manual 3
(Overdrive position with Overdrive canceled), Manual 2, Manual 1.
Refer to the “Body Builder’s Layout Book” for recommended electrical
installation.
Driving
122
ProCarManuals.com
Page 147 of 256
The fuel pump shut-off switch is
located in the passenger’s foot well,
by the kick panel.
Use the following procedure to reset the fuel pump shut-off switch.
1. Turn the ignition to the OFF position.
2. Check the fuel system for leaks.
3. If no fuel leak is apparent, reset the fuel pump shut-off switch by
pushing in on the reset button.
4. Turn the ignition to the ON position. Pause for a few seconds and
return the key to the OFF position.
5. Make a further check for leaks in the fuel system.
FUSES AND RELAYS
Fuses
If electrical components in the
vehicle are not working, a fuse may
have blown. Blown fuses are
identified by a broken wire within
the fuse. Check the appropriate
fuses before replacing any electrical
components.
15
Roadside emergencies
147
ProCarManuals.com
Page 154 of 256

Fuse/Relay
LocationFuse Amp
RatingPower Distribution Box Description
21 50A** Ignition Switch (B1 & B3)
22 50A** Junction Box Battery Feed
23 40A** Blower Motor
24 30A**
(Gasoline only)
20A**
(Diesel only)PCM Power
25 30A*** Power Windows
26 20A** If equipped with Remote Keyless
Entry-Driver Door Unlock Relay Coil,
All Door Unlock Relay Coil, All Door
Lock Relay Coil, Park Lamp Flash
Relay, If not equipped with Remote
Keyless Entry-Power Door Lock Motors
27 - (Gasoline only)
30A**
(Diesel only)Gasoline only-Not Used
Diesel only-Injector Driver Module
28 30A** Trailer Tow Electronic Brake Controller
29 20A** Radio
30 -- PCM Power Relay
31 -- Blower Motor Relay
32 --
A/C CASS (Gasoline only), Injector Driver
Module Power Relay (Diesel only)
33 -- Washer Pump Relay
34 -- Windshield Wiper Park/Run Relay
35 -- Windshield Wiper HI/LO Relay
36 -- A/C Clutch Diode
37 -- PCM Diode
38 -- Trailer Tow Backup Lamp Relay
39 -- Trailer Tow Battery Charge Relay
40 -- Electronic Shift On The Fly Relay #1
41 — Electronic Shift On The Fly Relay #2
* Mini Fuses ** Maxi Fuses ***Circuit Breaker
Roadside emergencies
154
ProCarManuals.com