2000 FORD F150 ignition
[x] Cancel search: ignitionPage 111 of 280

Do not sit on top of a buckled safety belt to avoid the Belt
Minder chime. Sitting on the safety belt will increase the risk of
injury in an accident. To disable (one-time) or deactivate the Belt
Minder feature please follow the directions stated below.
One time disable
Anytime the safety belt is buckled and then unbuckled during an ignition
ON cycle, Belt Minder will be disabled for that ignition cycle only.
Deactivating/activating the belt minder feature
Read steps1-9thoroughly before proceeding with the
deactivation/activation programming procedure.
The Belt Minder feature can be deactivated/activated by performing the
following procedure:
Before following the procedure, make sure that:
²the parking brake is set
²the gearshift is in P (Park) (automatic transmission) or the neutral
position (manual transmission).
²the ignition switch is in the OFF position
²all vehicle doors are closed
²the driver's safety belt is unbuckled
²the parklamps/headlamps are in OFF position (If vehicle is equipped
with Autolamps, this will not affect the procedure.)
To reduce the risk of injury, do not deactivate/activate the Belt
Minder feature while driving the vehicle.
1. Turn the ignition switch to the RUN (or ON) position. (DO NOT
START THE ENGINE)
2. Wait until the safety belt warning light turns off. (Approximately 1±2
minutes)
²Steps 3±5 must be completed within 60 seconds or the procedure will
have to be repeated.
3. Buckle then unbuckle the safety belt three times, ending with the
safety belt unbuckled. This can be done before or during Belt Minder
warning activation.
4. Turn on the parklamps/headlamps, turn off the parklamps/headlamps.
Seating and safety restraints
111
Page 116 of 280

Several air bag system components get hot after inflation. Do not
touch them after inflation.
If the air bag has deployed,the air bag will not function
again and must be replaced immediately.If the air bag is not
replaced, the unrepaired area will increase the risk of injury in a
collision.
The SRS consists of:
²driver and passenger air bag modules (which include the inflators and
air bags),
²one or more impact and safing sensors, passenger air bag deactivation
switch and diagnostic monitor (RCM)
²a readiness light and tone,
²and the electrical wiring which connects the components.
The RCM (restraints control module) monitors its own internal circuits
and the supplemental air bag electrical system warning (including the
passenger air bag deactivation switch, the impact sensors, the system
wiring, the air bag system readiness light, the air bag back up power and
the air bag ignitors).
Determining if the system is operational
The SRS uses readiness lights in the instrument cluster and the
passenger air bag deactivate switch or a tone to indicate the condition of
the system. Refer to theAir bag readinesssection in the
Instrumentationchapter orPassenger air bag deactivate switch
section in this chapter. Routine maintenance of the air bag is not
required.
A difficulty with the system is indicated by one or more of the following:
²The readiness lights will either
flash or stay lit.
²The readiness lights will not
illuminate immediately after
ignition is turned on.
²A series of five beeps will be heard. The tone pattern will repeat
periodically until the problem and/or light are repaired.
Seating and safety restraints
116
Page 118 of 280

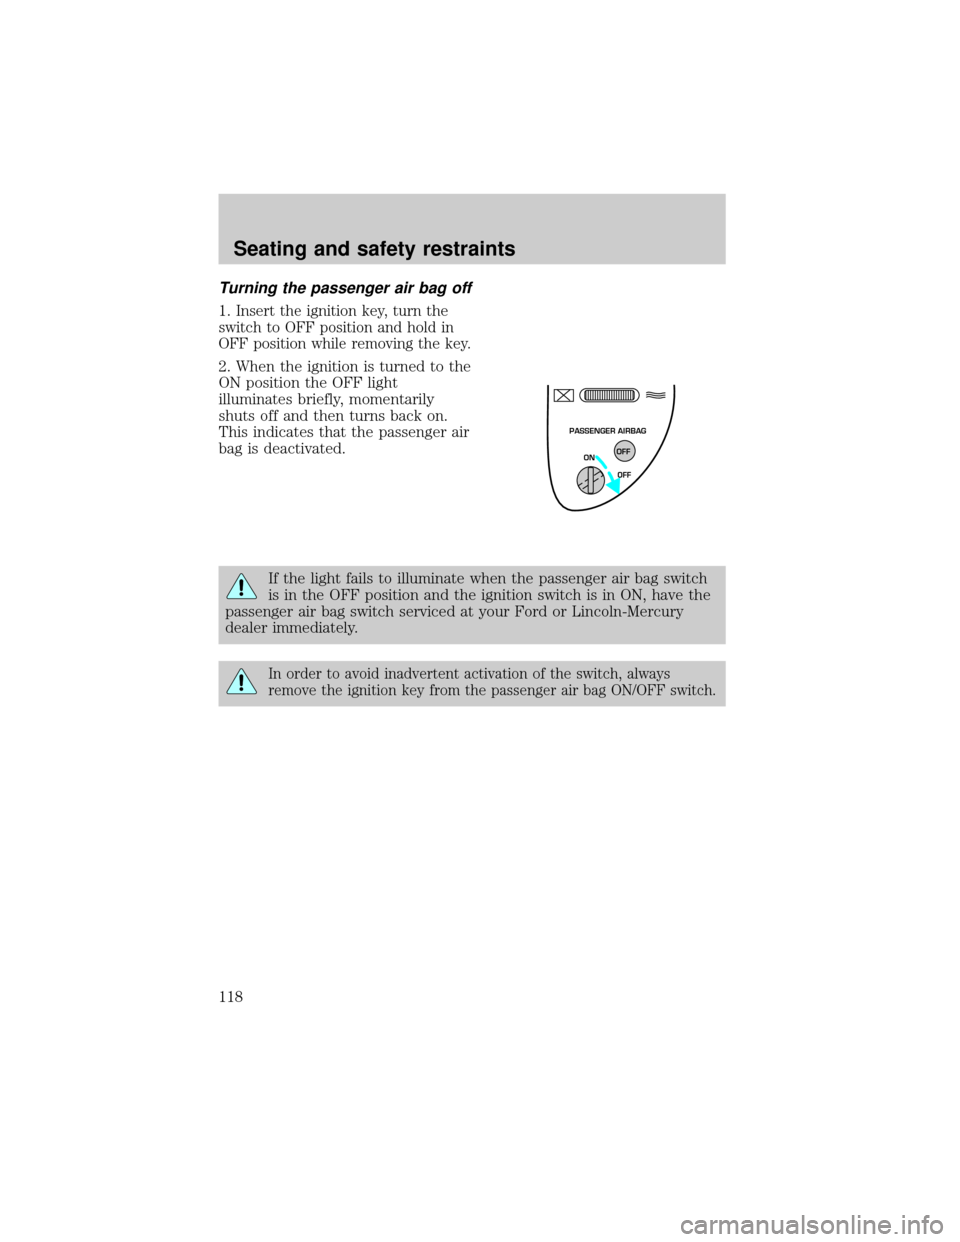
Turning the passenger air bag off
1.Insert the ignition key, turn the
switch to OFF position and hold in
OFF position while removing the key.
2. When the ignition is turned to the
ON position the OFF light
illuminates briefly, momentarily
shuts off and then turns back on.
This indicates that the passenger air
bag is deactivated.
If the light fails to illuminate when the passenger air bag switch
is in the OFF position and the ignition switch is in ON, have the
passenger air bag switch serviced at your Ford or Lincoln-Mercury
dealer immediately.
In order to avoid inadvertent activation of the switch, always
remove the ignition key from the passenger air bag ON/OFF switch.
PASSENGER AIRBAG
ON
OFF OFF
Seating and safety restraints
118
Page 119 of 280

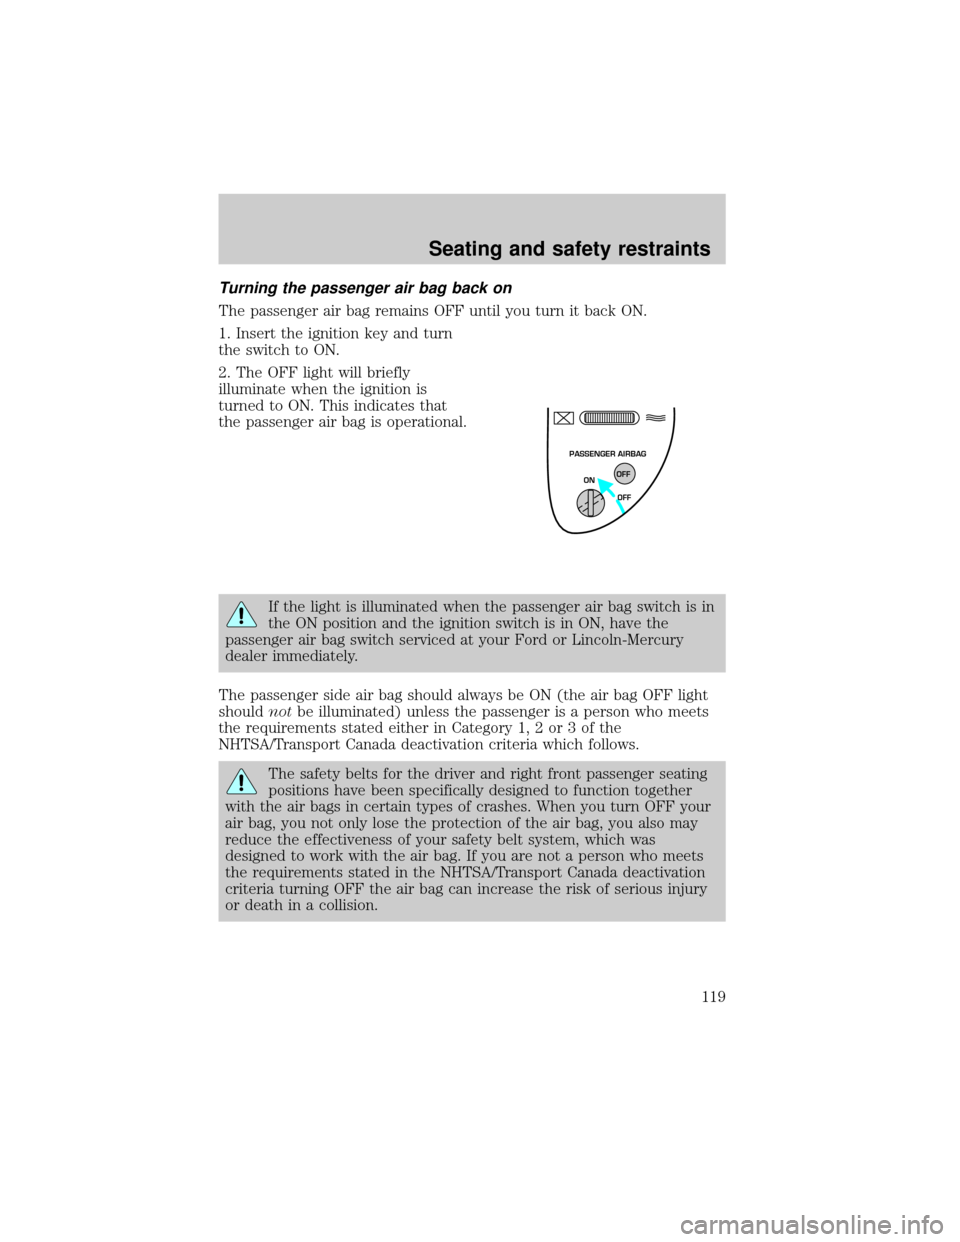
Turning the passenger air bag back on
The passenger air bag remains OFF until you turn it back ON.
1. Insert the ignition key and turn
the switch to ON.
2. The OFF light will briefly
illuminate when the ignition is
turned to ON. This indicates that
the passenger air bag is operational.
If the light is illuminated when the passenger air bag switch is in
the ON position and the ignition switch is in ON, have the
passenger air bag switch serviced at your Ford or Lincoln-Mercury
dealer immediately.
The passenger side air bag should always be ON (the air bag OFF light
shouldnotbe illuminated) unless the passenger is a person who meets
the requirements stated either in Category 1, 2 or 3 of the
NHTSA/Transport Canada deactivation criteria which follows.
The safety belts for the driver and right front passenger seating
positions have been specifically designed to function together
with the air bags in certain types of crashes. When you turn OFF your
air bag, you not only lose the protection of the air bag, you also may
reduce the effectiveness of your safety belt system, which was
designed to work with the air bag. If you are not a person who meets
the requirements stated in the NHTSA/Transport Canada deactivation
criteria turning OFF the air bag can increase the risk of serious injury
or death in a collision.
PASSENGER AIRBAG
ON
OFF OFF
Seating and safety restraints
119
Page 138 of 280

BRAKES
Your service brakes are self-adjusting. Refer to the scheduled
maintenance guide for scheduled maintenance.
Occasional brake noise is normal and often does not indicate a
performance concern with the vehicle's brake system. In normal
operation, automotive brake systems may emit occasional or intermittent
squeal or groan noises when the brakes are applied. Such noises are
usually heard during the first few brake applications in the morning;
however, they may be heard at any time while braking and can be
aggravated by environmental conditions such as cold, heat, moisture,
road dust, salt or mud. If a ªmetal-to-metal,º ªcontinuous grindingº or
ªcontinuous squealº sound is present while braking, the brake linings
may be worn-out and should be inspected by a qualified service
technician.
Rear anti-lock brake system (RABS)
Rear Anti-lock Brake System (RABS) is standard equipment on this
vehicle. RABS is designed to help you maintain directional stability in
emergency stopping situations. With RABS, the rear brakes are kept from
locking during panic stops; however, the front wheels can lock because
they are not controlled by RABS.
A clicking noise and slight pedal pulsation during RABS braking events
indicates the RABS is functioning. Pedal pulsation coupled with clicking
noise while braking under panic conditions on loose gravel, wet or snowy
roads is normal and indicates proper functioning of the vehicle's RABS. If
the vehicle has continuous vibration or shudder in the steering wheel
while braking, the vehicle should be inspected by a qualified service
technician.
The RABS operates by detecting the onset of rear wheel lockup during
brake applications and compensating for this tendency.
RABS warning lamp
TheABSwarning lamp in the instrument cluster momentarily illuminates
when the ignition is turned to the ON position. If the light does not
illuminate momentarily at start up, remains on or continues to flash, the
ABS needs to be serviced.
Driving
138
Page 140 of 280

ABS warning lampABS
TheABSwarning lamp in the instrument cluster momentarily illuminates
when the ignition is turned to the ON position. If the light does not
illuminate momentarily at start up, remains on or continues to flash, the
ABS needs to be serviced.
With the ABS light on, the anti-lock
brake system is disabled and normal
braking is still effective unless the
brake warning light also remains
illuminated with parking brake
released. (If your brake warning lamp illuminates, have your vehicle
serviced immediately.)
Using ABS
²In an emergency or when maximum efficiency from the four wheel
ABS is required, apply continuous force on the brake. The four wheel
ABS will be activated immediately, thus allowing you to retain full
steering control of your vehicle and, providing there is sufficient
space, will enable you to avoid obstacles and bring the vehicle to a
controlled stop.
²The Anti-Lock system does not decrease the time necessary to apply
the brakes or always reduce stopping distance. Always leave enough
room between your vehicle and the vehicle in front of you to stop.
²We recommend that you familiarize yourself with this braking
technique. However, avoid taking any unnecessary risks.
!
BRAKE
Driving
140
Page 141 of 280

Parking brake
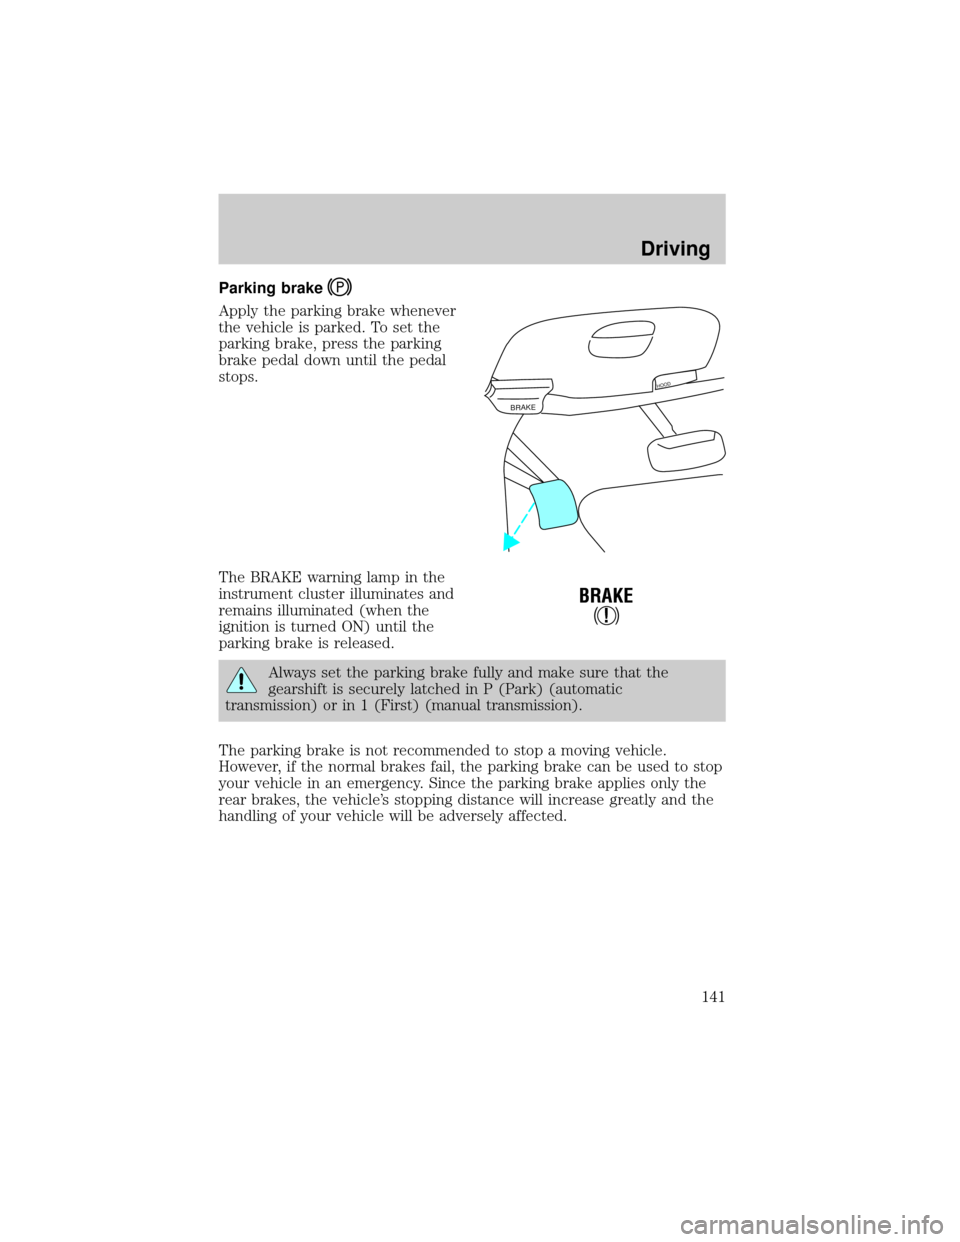
Apply the parking brake whenever
the vehicle is parked. To set the
parking brake, press the parking
brake pedal down until the pedal
stops.
The BRAKE warning lamp in the
instrument cluster illuminates and
remains illuminated (when the
ignition is turned ON) until the
parking brake is released.
Always set the parking brake fully and make sure that the
gearshift is securely latched in P (Park) (automatic
transmission) or in 1 (First) (manual transmission).
The parking brake is not recommended to stop a moving vehicle.
However, if the normal brakes fail, the parking brake can be used to stop
your vehicle in an emergency. Since the parking brake applies only the
rear brakes, the vehicle's stopping distance will increase greatly and the
handling of your vehicle will be adversely affected.
BRAKE
HOOD
!
BRAKE
Driving
141
Page 144 of 280

Use extra caution while becoming familiar with your vehicle. Know the
capabilities and limitations of both you as a driver and your vehicle.
AUTOMATIC TRANSMISSION OPERATION (IF EQUIPPED)
Brake-shift interlock
This vehicle is equipped with a brake-shift interlock feature that prevents
the gearshift lever from being moved from P (Park) when the ignition is
in the ON position unless brake pedal is depressed.
If you cannot move the gearshift lever out of P (Park) with ignition in
the ON position and the brake pedal depressed:
1. Apply the parking brake, turn ignition key to LOCK, then remove the
key.
2. Insert the key and turn it to OFF. Apply the brake pedal and shift to N
(Neutral).
3. Start the vehicle.
If it is necessary to use the above procedure to move the gearshift lever,
it is possible that a fuse has blown or the vehicle's brakelamps are not
operating properly. Refer toFuses and relaysin theRoadside
emergencieschapter.
Do not drive your vehicle until you verify that the brakelamps
are working.
If your vehicle gets stuck in mud or snow it may be rocked out by
shifting from forward and reverse gears, stopping between shifts, in a
steady pattern. Press lightly on the accelerator in each gear.
Do not rock the vehicle if the engine is not at normal operating
temperature or damage to the transmission may occur.
Do not rock the vehicle for more than a few minutes or damage
to the transmission and tires may occur or the engine may
overheat.
Always set the parking brake fully and make sure the gearshift is
latched in P (Park). Turn off the ignition whenever you leave
your vehicle.
Driving
144