2000 FORD F150 lights
[x] Cancel search: lightsPage 135 of 280
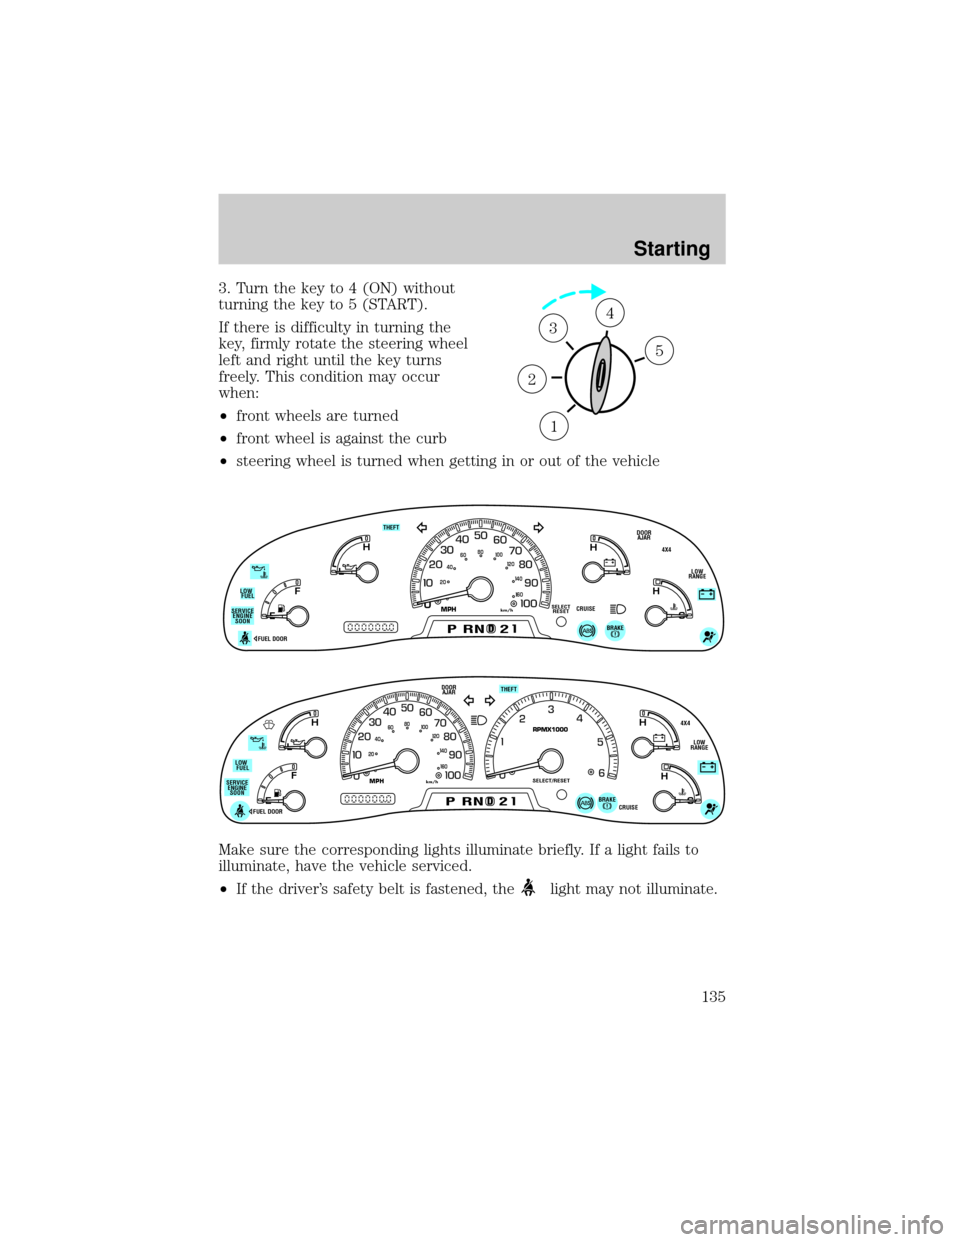
3. Turn the key to 4 (ON) without
turning the key to 5 (START).
If there is difficulty in turning the
key, firmly rotate the steering wheel
left and right until the key turns
freely. This condition may occur
when:
²front wheels are turned
²front wheel is against the curb
²steering wheel is turned when getting in or out of the vehicle
Make sure the corresponding lights illuminate briefly. If a light fails to
illuminate, have the vehicle serviced.
²If the driver's safety belt is fastened, the
light may not illuminate.
1
2
34
5
0
E
L
L
H H
F
CH
DPRND2
DOOR
AJAR
SELECT
RESET
4X4
LOW
RANGE THEFT
FUEL DOOR
20406080
00
20
40
60
BRAKE
MPHkm/hSERVICE
ENGINE
SOONLOW
FUEL
CRUISE
D
L
H
L
H
E
F
C
H
BRAKEPRND2CRUISE DOOR
AJAR
SELECT/RESET
4X4
LOW
RANGE THEFT
FUEL DOOR SERVICE
ENGINE
SOONLOW
FUEL
0MPHRPMX1000km/h
20406080
00
20
40
60
Starting
135
Page 154 of 280
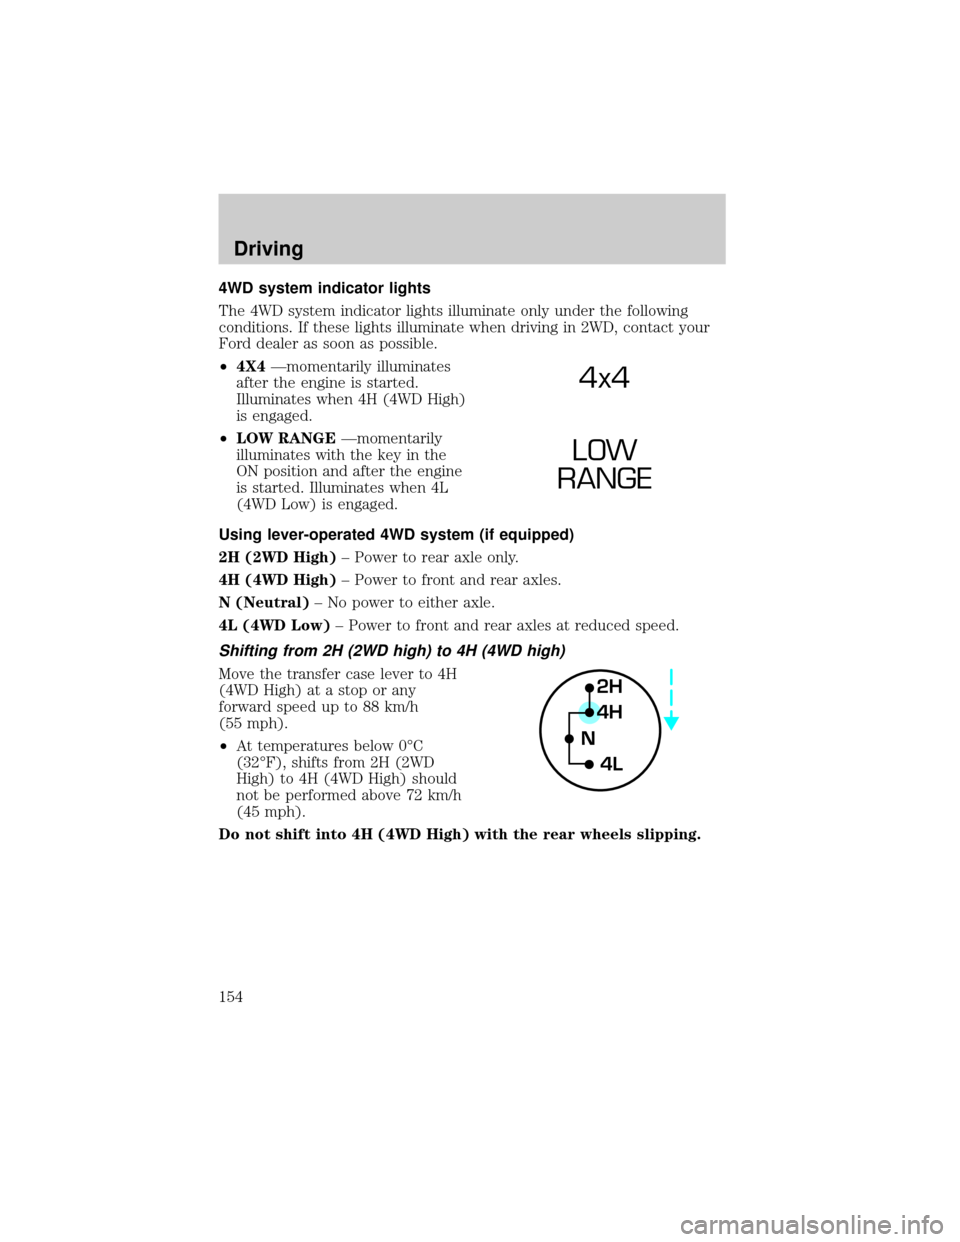
4WD system indicator lights
The 4WD system indicator lights illuminate only under the following
conditions. If these lights illuminate when driving in 2WD, contact your
Ford dealer as soon as possible.
²4X4Ðmomentarily illuminates
after the engine is started.
Illuminates when 4H (4WD High)
is engaged.
²LOW RANGEÐmomentarily
illuminates with the key in the
ON position and after the engine
is started. Illuminates when 4L
(4WD Low) is engaged.
Using lever-operated 4WD system (if equipped)
2H (2WD High)± Power to rear axle only.
4H (4WD High)± Power to front and rear axles.
N (Neutral)± No power to either axle.
4L (4WD Low)± Power to front and rear axles at reduced speed.
Shifting from 2H (2WD high) to 4H (4WD high)
Move the transfer case lever to 4H
(4WD High) at a stop or any
forward speed up to 88 km/h
(55 mph).
²At temperatures below 0ÉC
(32ÉF), shifts from 2H (2WD
High) to 4H (4WD High) should
not be performed above 72 km/h
(45 mph).
Do not shift into 4H (4WD High) with the rear wheels slipping.
4x4
LOW
RANGE
2H
4H
4L N
Driving
154
Page 176 of 280
Roadside coverage beyond basic warranty
In the United States, you may purchase additional roadside assistance
coverage beyond this period through the Ford Auto Club by contacting
your Ford or Lincoln Mercury dealer.
Similarly in Canada, you may purchase additional coverage beyond the
basic coverage period by consulting the Ford Roadside Assistance Club
brochure or by calling 1±877±294±CLUB (1±877±294±2582).
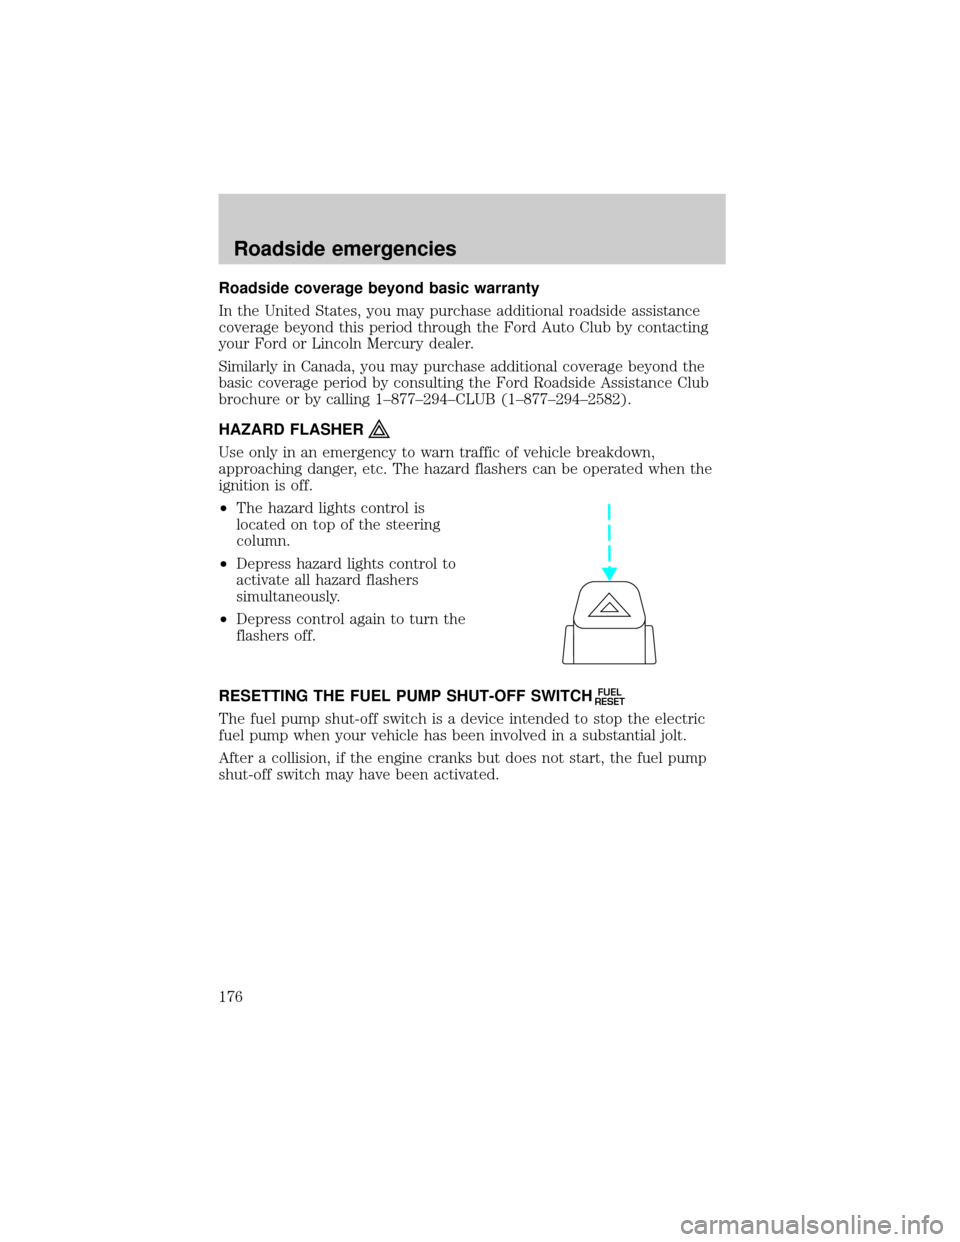
HAZARD FLASHER
Use only in an emergency to warn traffic of vehicle breakdown,
approaching danger, etc. The hazard flashers can be operated when the
ignition is off.
²The hazard lights control is
located on top of the steering
column.
²Depress hazard lights control to
activate all hazard flashers
simultaneously.
²Depress control again to turn the
flashers off.
RESETTING THE FUEL PUMP SHUT-OFF SWITCH
FUEL
RESET
The fuel pump shut-off switch is a device intended to stop the electric
fuel pump when your vehicle has been involved in a substantial jolt.
After a collision, if the engine cranks but does not start, the fuel pump
shut-off switch may have been activated.
Roadside emergencies
176
Page 236 of 280

Do not make any unauthorized changes to your vehicle or engine. By
law, vehicle owners and anyone who manufactures, repairs, services,
sells, leases, trades vehicles, or supervises a fleet of vehicles are not
permitted to intentionally remove an emission control device or prevent
it from working. Information about your vehicle's emission system is on
the Vehicle Emission Control Information Decal located on or near the
engine. This decal identifies engine displacement and gives some tune up
specifications.
Please consult your ªWarranty Guideº for complete emission warranty
information.
Readiness for Inspection/Maintenance (I/M) testing
In some localities, it may be a legal requirement to pass an I/M test of
the on-board diagnostics system. If your ªCheck Engine/Service Engine
Soonº light is on, refer to the description in theWarning Lights and
Chimessection of theInstrumentationchapter. Your vehicle may not
pass the I/M test with the ªCheck Engine/Service Engine Soonº light on.
If the vehicle's powertrain system or its battery has just been serviced,
the on-board diagnostics system is reset to a ªnot ready for I/M testº
condition. To ready the on-board diagnostics system for I/M testing, a
minimum of 30 minutes of city and highway driving is necessary as
described below:
²First, at least 10 minutes of driving on an expressway or highway.
²Next, at least 20 minutes driving in stop-and-go, city-type traffic with
at least four idle periods.
Allow the vehicle to sit for at least eight hours without starting the
engine. Then, start the engine and complete the above driving cycle. The
engine must warm up to its normal operating temperature. Once started,
do not turn off the engine until the above driving cycle is complete.
BULBS
Replacing exterior bulbs
Check the operation of the following lamps frequently:
²Headlamps
²Foglamps (if equipped)
²High-mount brakelamp
²Brakelamps
Maintenance and care
236
Page 241 of 280
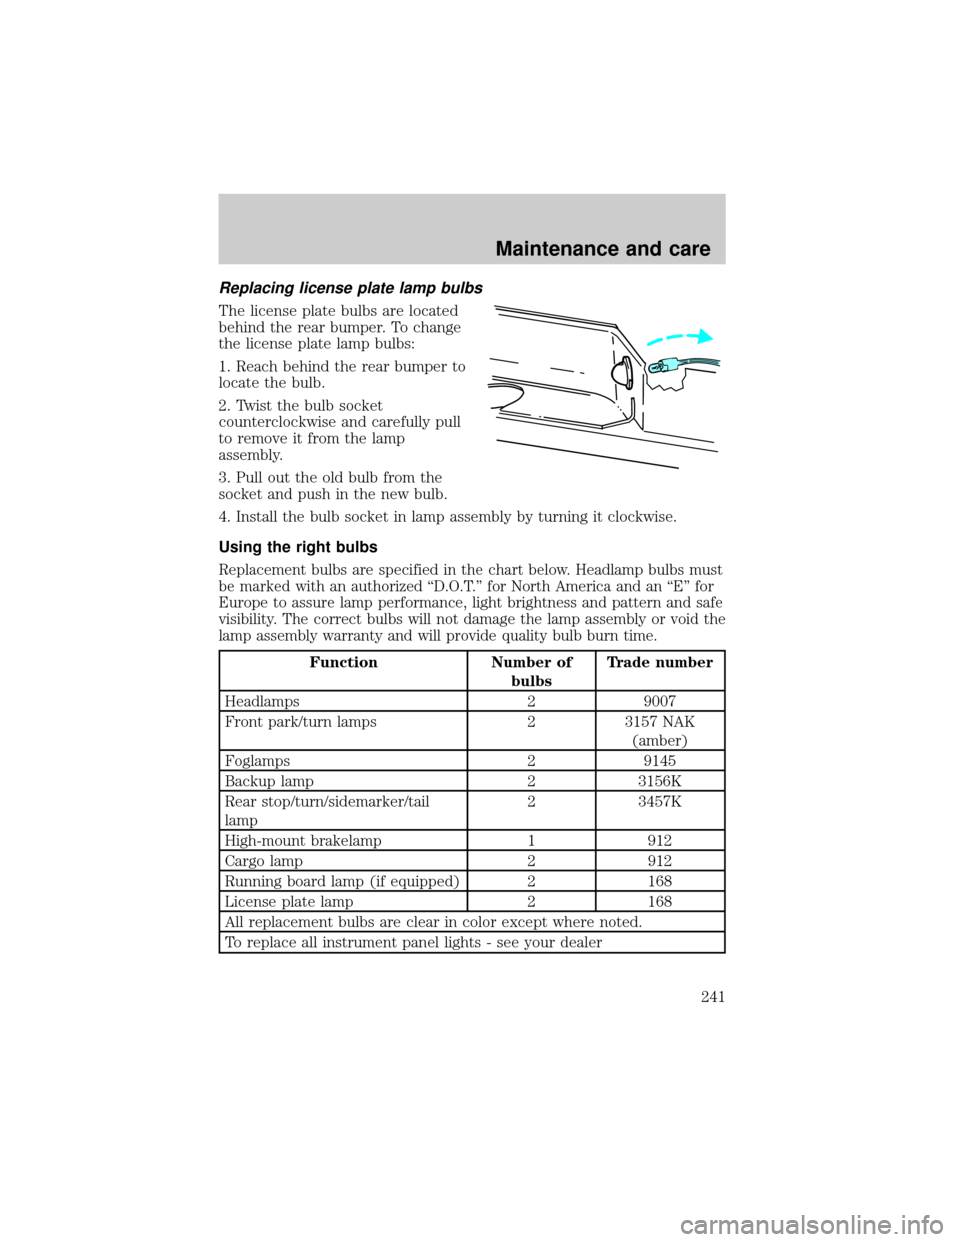
Replacing license plate lamp bulbs
The license plate bulbs are located
behind the rear bumper. To change
the license plate lamp bulbs:
1. Reach behind the rear bumper to
locate the bulb.
2. Twist the bulb socket
counterclockwise and carefully pull
to remove it from the lamp
assembly.
3. Pull out the old bulb from the
socket and push in the new bulb.
4. Install the bulb socket in lamp assembly by turning it clockwise.
Using the right bulbs
Replacement bulbs are specified in the chart below. Headlamp bulbs must
be marked with an authorized ªD.O.T.º for North America and an ªEº for
Europe to assure lamp performance, light brightness and pattern and safe
visibility. The correct bulbs will not damage the lamp assembly or void the
lamp assembly warranty and will provide quality bulb burn time.
Function Number of
bulbsTrade number
Headlamps 2 9007
Front park/turn lamps 2 3157 NAK
(amber)
Foglamps 2 9145
Backup lamp 2 3156K
Rear stop/turn/sidemarker/tail
lamp2 3457K
High-mount brakelamp 1 912
Cargo lamp 2 912
Running board lamp (if equipped) 2 168
License plate lamp 2 168
All replacement bulbs are clear in color except where noted.
To replace all instrument panel lights - see your dealer
Maintenance and care
241
Page 268 of 280
Comfort and convenience
Air conditioner
Air filtration systems
Automatic Headlamp System with Daytime Running Lights (DRL)
Cargo nets
Cargo organizers (interior)
Cargo storage bin (regular cab)
Cargo trays (interior)
Celluar phone holder
Dash trim (wood grain)
Engine block heaters
Manual sliding rear window
Moon roof deflector
Power sliding rear window
Rapid heat system
Tire step
Travel equipment
Bed mount bike carrier
Bumper mount bike carrier
Daytime running lights (DRL)
Fog lights
Heavy-duty battery
Hitch mount bike carrier
Inside mirror with compass display
Inside mirror with compass and temperature display
Outside signal mirror (available only with power mirrors)
Pickup box rails
Retractable bed hooks
Running boards (molded, diamond plate, tubular and stirrup step)
Seatback organizer
Customer assistance
268
Page 276 of 280

driving with a heavy load ......160
location ....................................160
GVWR (Gross
Vehicle Weight Rating) .............160
calculating .......................160, 162
definition .................................160
driving with a heavy load ......160
location ....................................160
H
Hazard flashers .........................176
Headlamps ...................................20
aiming ......................................242
autolamp system .......................22
bulb specifications ..................241
daytime running lights .............20
flash to pass ..............................20
high beam ...........................13, 20
replacing bulbs .......................237
turning on and off ....................20
warning chime ..........................15
Heating ........................................60
heater only system ...................60
heating and
air conditioning system ............62
Hood ..........................................198
I
Ignition .................................66, 253
removing the key ....................153
Infant seats
(see Safety seats) .....................123
Inspection/maintenance
(I/M) testing ..............................236
Instrument panel
cleaning ...................................245
cluster ................................10, 245lighting up
panel and interior .....................21
location of components ............10
J
Jack ............................................185
positioning ...............................185
storage .....................................185
Jump-starting your vehicle ......190
K
Keyless entry system
autolock .....................................91
locking and unlocking doors ....95
programming entry code .........95
Keys
key in ignition chime ...............15
positions of the ignition ...........66
removing from the ignition ....153
L
Lamps
autolamp system .......................22
bulb replacement
specifications chart ................241
cargo lamps ...............................21
daytime running light ...............20
fog lamps ...................................21
headlamps .................................20
headlamps, flash to pass ..........20
instrument panel, dimming .....21
interior lamps ...........................77
replacing bulbs ...............236±241
Lane change indicator
(see Turn signal) ........................66
Lights, warning and indicator ....10
air bag ........................................12
Index
276
Page 279 of 280

V
Vehicle dimensions ...................253
Vehicle Identification
Number (VIN) ...........................258
Vehicle loading ..........................160
Ventilating your vehicle ...........137
W
Warning chimes ...........................15
Warning lights (see Lights) .......10Washer fluid ..............................206
Water, Driving through .............162
Windows
power .........................................78
Windshield washer fluid
and wipers
checking and adding fluid .....206
checking and cleaning ............221
operation ...................................72
replacing wiper blades ...........222
Wrecker towing .........................195
Index
279