2000 FORD F150 change time
[x] Cancel search: change timePage 159 of 280
Water intrusion into the transmission may damage the
transmission.
Replace rear axle lubricant any time the axle has been submerged in
water. The rear axle does not normally require a lubricant change for the
life of the vehicle. Rear axle lubricant quantities are not to be checked or
changed unless a leak is suspected or repair is required.
Driving on hilly or sloping terrain
When driving on a hill, avoid driving crosswise or turning on steep
slopes. You could lose traction and slip sideways. Drive straight up,
straight down or avoid the hill completely. Know the conditions on the
other side of a hill before driving over the crest.
When climbing a steep hill, start in a lower gear rather than downshifting
to a lower gear from a higher gear once the ascent has started. This
reduces strain on the engine and the possibility of stalling.
When descending a steep hill, avoid sudden braking. Shift to a lower gear
when added engine braking is desired.
When speed control is on and you are driving uphill, your vehicle speed
may drop considerably, especially if you are carrying a heavy load.
If vehicle speed drops more than 16 km/h (10 mph), the speed control
will cancel automatically. Resume speed with accelerator pedal.
If speed control cancels after climbing the hill, reset speed by pressing
and holding the SET ACCEL button (to resume speeds over 50 km/h [30
mph]).
Automatic transmissions may shift frequently while driving up steep
grades. Eliminate frequent shifting by shifting out of
(Overdrive) into
a lower gear.
Driving on snow and ice
A 4WD vehicle has advantages over 2WD vehicles in snow and ice but
can skid like any other vehicle.
Avoid sudden applications of power and quick changes of direction on
snow and ice. Apply the accelerator slowly and steadily when starting
from a full stop.
When braking, apply the brakes as you normally would. In order to allow
the anti-lock brake system (ABS) to operate properly, keep steady
pressure on the brake pedal.
Driving
159
Page 170 of 280

Trailer towing tips
²Practice turning, stopping and backing up before starting on a trip to
get the feel of the vehicle trailer combination. When turning, make
wider turns so the trailer wheels will clear curbs and other obstacles.
²Allow more distance for stopping with a trailer attached.
²The trailer tongue weight should be no more than 10±15% of the
loaded trailer weight.
²After you have traveled 80 km (50 miles), thoroughly check your
hitch, electrical connections and trailer wheel lug nuts.
²When stopped in traffic for long periods of time in hot weather, place
the gearshift in P (Park) (automatic transmissions) or N (Neutral)
(manual transmissions). This aids engine cooling and air conditioner
efficiency.
²Vehicles with trailers should not be parked on a grade. If you must
park on a grade, place wheel chocks under the trailer's wheels.
Launching or retrieving a boat
When backing down a ramp during boat launching or retrieval,
²Do not allow the static water level to rise above the bottom edge of
the rear bumper and
²Do not allow waves to break higher than 15 cm (6 inches) above the
bottom edge of the rear bumper.
Exceeding these limits may allow water to enter critical vehicle
components, adversely affecting driveability, emissions, reliability and
causing internal transmission damage.
Replace the rear axle lubricant anytime the axle has been submerged in
water. Rear axle lubricant quantities are not to be checked or changed
unless a leak is suspected or repair required.
Disconnect the wiring to the trailer before backing the trailer into the
water. Reconnect the wiring to the trailer after the trailer is removed
from the water.
Recreational towing (all wheels on the ground)
An example of recreational towing would be towing your vehicle behind
a Motorhome. Follow these guidelines if you have the need for
recreational towing your vehicle with all four wheels on the ground.
Driving
170
Page 213 of 280
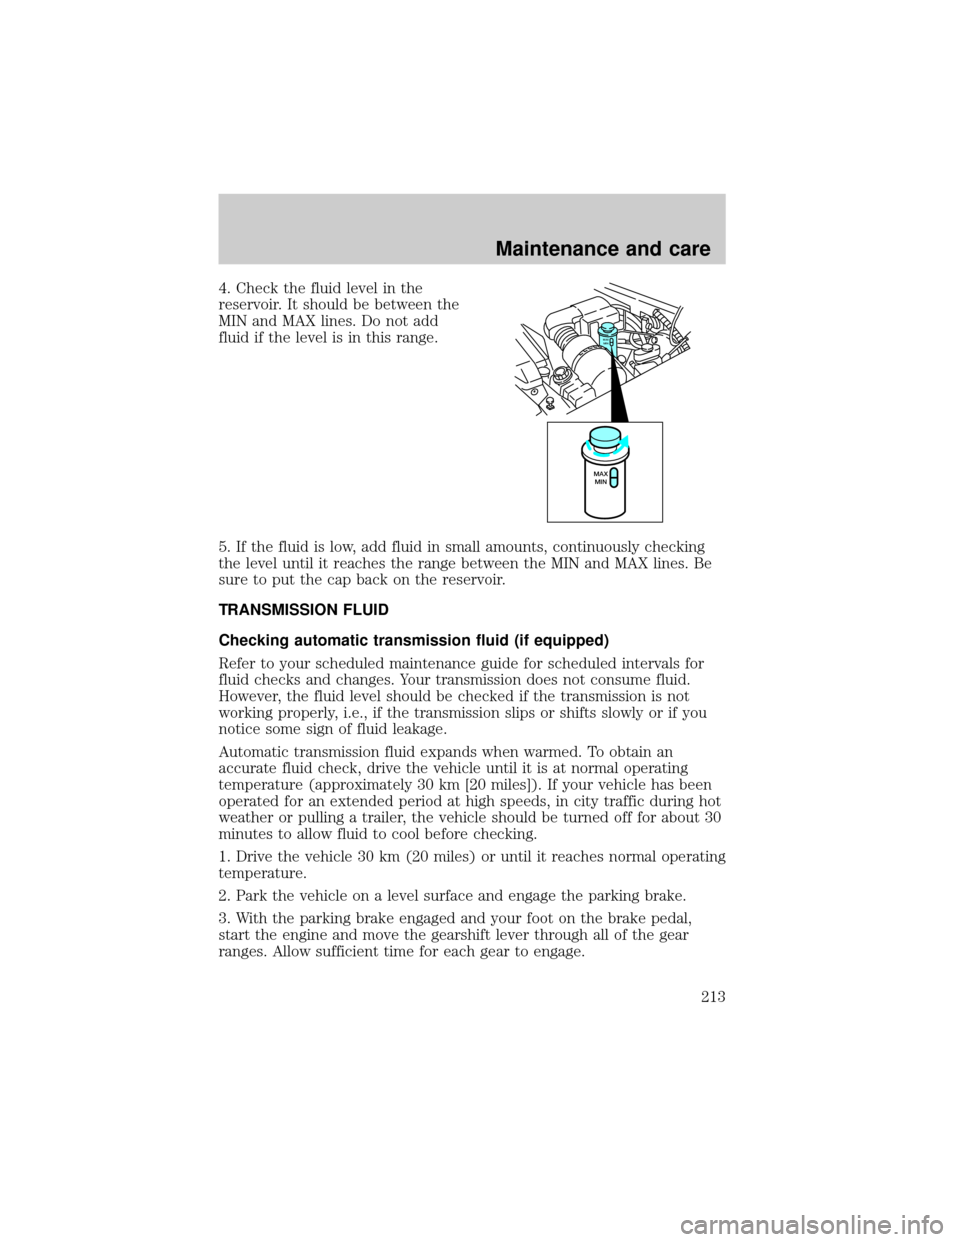
4. Check the fluid level in the
reservoir. It should be between the
MIN and MAX lines. Do not add
fluid if the level is in this range.
5. If the fluid is low, add fluid in small amounts, continuously checking
the level until it reaches the range between the MIN and MAX lines. Be
sure to put the cap back on the reservoir.
TRANSMISSION FLUID
Checking automatic transmission fluid (if equipped)
Refer to your scheduled maintenance guide for scheduled intervals for
fluid checks and changes. Your transmission does not consume fluid.
However, the fluid level should be checked if the transmission is not
working properly, i.e., if the transmission slips or shifts slowly or if you
notice some sign of fluid leakage.
Automatic transmission fluid expands when warmed. To obtain an
accurate fluid check, drive the vehicle until it is at normal operating
temperature (approximately 30 km [20 miles]). If your vehicle has been
operated for an extended period at high speeds, in city traffic during hot
weather or pulling a trailer, the vehicle should be turned off for about 30
minutes to allow fluid to cool before checking.
1. Drive the vehicle 30 km (20 miles) or until it reaches normal operating
temperature.
2. Park the vehicle on a level surface and engage the parking brake.
3. With the parking brake engaged and your foot on the brake pedal,
start the engine and move the gearshift lever through all of the gear
ranges. Allow sufficient time for each gear to engage.
MAX
MIN
MAX
MIN
Maintenance and care
213
Page 233 of 280
5. Follow one of the simple calculations in order to determine fuel
economy:
Multiply liters used by 100, then divide by total kilometers
traveled.
Divide total miles traveled by total gallons used.
Keep a record for at least one month and record the type of driving (city
or highway). This will provide an accurate estimate of the vehicle's fuel
economy under current driving conditions. Additionally, keeping records
during summer and winter will show how temperature impacts fuel
economy. In general, lower temperatures give lower fuel economy.
Driving style Ð good driving and fuel economy habits
Give consideration to the lists that follow and you may be able to change
a number of variables and improve your fuel economy.
Habits
²Smooth, moderate operation can yield up to 10% savings in fuel.
²Steady speeds without stopping will usually give the best fuel
economy.
²Idling for long periods of time (greater than one minute) may waste
fuel.
²Anticipate stopping; slowing down may eliminate the need to stop.
²Sudden or hard accelerations may reduce fuel economy.
²Slow down gradually.
²Driving at reasonable speeds (traveling at 88 km/h [55 mph] uses 15%
less fuel than traveling at 105 km/h [65 mph]).
²Revving the engine before turning it off may reduce fuel economy.
²Using the air conditioner or defroster may reduce fuel economy.
²
You may want to turn off the speed control in hilly terrain if
unnecessary shifting between third and fourth gear occurs. Unnecessary
shifting of this type could result in reduced fuel economy.
²Warming up a vehicle on cold mornings is not required and may
reduce fuel economy.
²Resting your foot on the brake pedal while driving may reduce fuel
economy.
²Combine errands and minimize stop-and-go driving.
Maintenance and care
233
Page 241 of 280
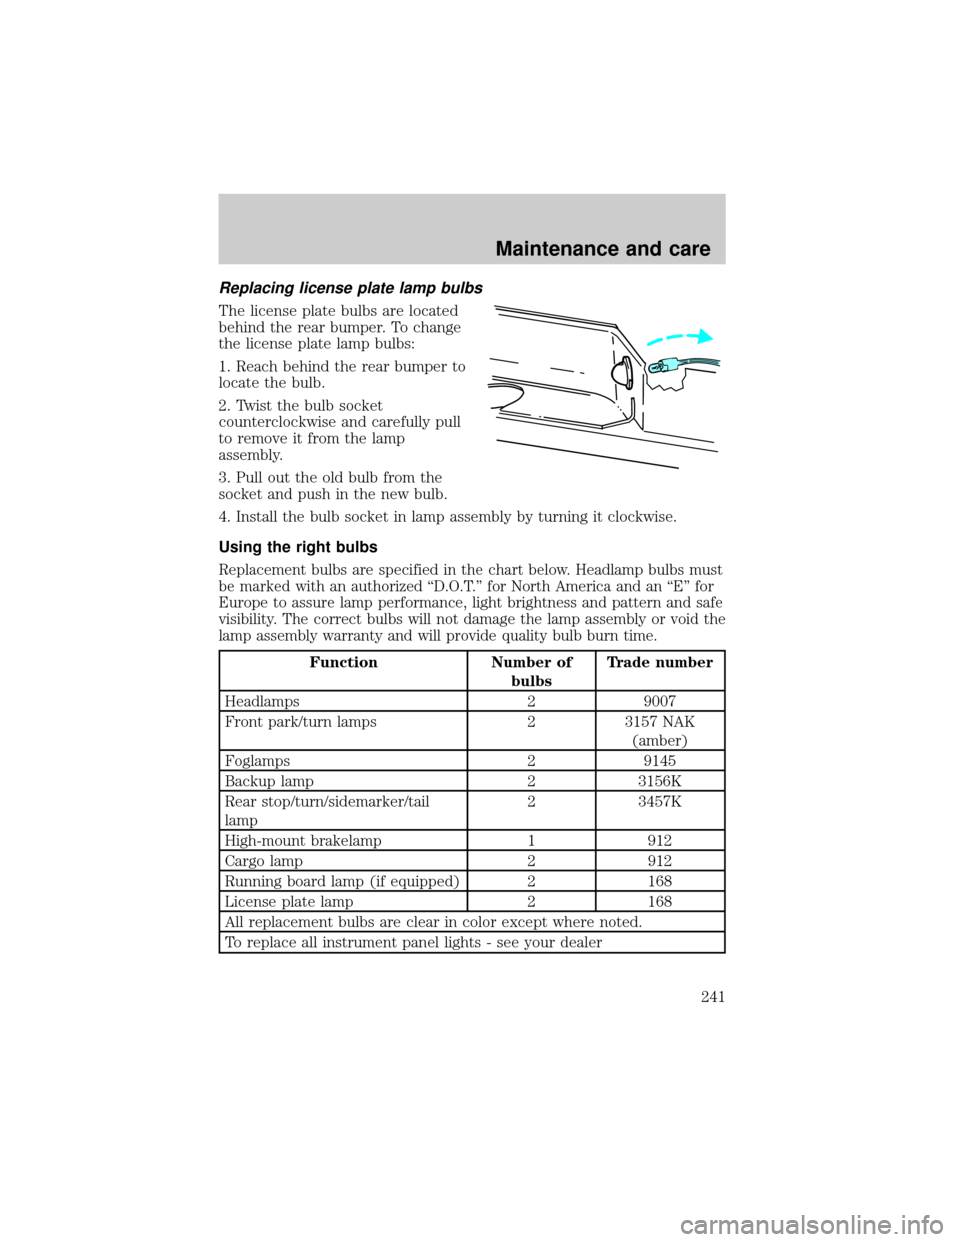
Replacing license plate lamp bulbs
The license plate bulbs are located
behind the rear bumper. To change
the license plate lamp bulbs:
1. Reach behind the rear bumper to
locate the bulb.
2. Twist the bulb socket
counterclockwise and carefully pull
to remove it from the lamp
assembly.
3. Pull out the old bulb from the
socket and push in the new bulb.
4. Install the bulb socket in lamp assembly by turning it clockwise.
Using the right bulbs
Replacement bulbs are specified in the chart below. Headlamp bulbs must
be marked with an authorized ªD.O.T.º for North America and an ªEº for
Europe to assure lamp performance, light brightness and pattern and safe
visibility. The correct bulbs will not damage the lamp assembly or void the
lamp assembly warranty and will provide quality bulb burn time.
Function Number of
bulbsTrade number
Headlamps 2 9007
Front park/turn lamps 2 3157 NAK
(amber)
Foglamps 2 9145
Backup lamp 2 3156K
Rear stop/turn/sidemarker/tail
lamp2 3457K
High-mount brakelamp 1 912
Cargo lamp 2 912
Running board lamp (if equipped) 2 168
License plate lamp 2 168
All replacement bulbs are clear in color except where noted.
To replace all instrument panel lights - see your dealer
Maintenance and care
241
Page 250 of 280

2Service refill capacity is determined by filling the transfer case to the
bottom of the filler hole with the vehicle on a level surface.
3Ensure the correct automatic transmission fluid is used. Transmission
fluid requirements are indicated on the dipstick or on the dipstick
handle. Check the container to verify the fluid being added is of the
correct type. Refer to your scheduled maintenance guide to determine
the correct service interval.
Some transmission fluids may be labeled as dual usage, such as
MERCONtand MERCONtV. These dual usage fluids are not to be used
in an automatic transmission that requires use of the MERCONttype
fluid. However, these dual usage fluids may be used in transmissions that
require the MERCONtV type fluid.
MERCONtand MERCONtV type fluids are not interchangeable.
DO NOT mix MERCONtand MERCONtV. Use of a transmission
fluid that indicates dual usage (MERCONtand MERCONtV) in
an automatic transmission application requiring MERCONtmay
cause transmission damage. Use of any fluid other than the
recommended fluid may cause transmission damage.
4Indicates only approximate dry-fill capacity. Some applications may
vary based on cooler size and if equipped with an in-tank cooler. The
amount of transmission fluid and fluid level should be set by the
indication on the dipstick's normal operating range.
5Your vehicle's rear axle is filled with a synthetic rear axle lubricant and
is considered lubricated for life. These lubricants do not need to be
checked or changed unless a leak is suspected, service is required or the
axle assembly has been submerged in water. The axle lubricant should
be changed any time the rear axle has been submerged in water.
6Service refill capacity is determined by filling the axle to 6-14 mm
(1/4-9/16 inch) below the bottom of the filler hole with the vehicle on a
level surface.
Add 118 ml (4 oz.) of Additive Friction Modifier C8AZ-19B546-A or
equivalent meeting Ford specification EST-M2C118±A, for complete fill of
8.8 inch and 9.75 inch Traction-Lok axles.
7Service refill capacity is determined by filling the axle to the bottom of
the filler hole with the vehicle on a level surface.
For 10.25 inch Traction-Lok axles, use 3.1L (6.5 pints) of Motorcraft SAE
75W-140 Synthetic Rear Axle Lubricant and 236 ml (8 oz.) of Additive
Capacities and specifications
250
Page 259 of 280
Ford Extended Service Plan
You can get more protection for your new car or light truck by
purchasing Ford Extended Service Plan (Ford ESP) coverage. Ford ESP
is an optional service contract which is backed by Ford Motor Company
or Ford Motor Service Company (in the U.S.) and Ford of Canada (in
Canada). It provides the following:
²benefits during the warranty period depending on the plan you
purchase (such as: reimbursement for rentals; coverage for certain
maintenance and wear items)
²protection against repair costs after your Bumper to Bumper Warranty
expires
You may purchase Ford ESP from any participating Ford and Lincoln
Mercury and Ford of Canada dealer. There are several plans available in
various time, distance and deductible combinations which can be tailored
to fit your own driving needs. Ford ESP also offers reimbursement
benefits for towing and rental coverage. (In Hawaii, rules vary. See your
dealer for details.)
When you buy Ford ESP, you receive Peace-of-Mind protection
throughout the United States and Canada, provided by a network of
more than 5,000 participating Ford or Lincoln Mercury and Ford of
Canada dealers.
If you did not take advantage of the Ford Extended Service Plan at the
time of purchasing your vehicle, you may still be eligible. Please contact
your dealer for further information. Since this information is subject to
change, please ask your dealer for complete details about Ford Extended
Service Plan coverage options, or visit the Ford ESP website at
www.ford-esp.com.
Getting the service you need
At home
Ford Motor Company and Ford of Canada have authorized dealerships to
service your vehicle. When you need warranty repairs your selling dealer
would like you to return to it for that service, but you may also take your
vehicle to another Ford Motor Company or Ford of Canada dealership
authorized for warranty repairs. Certain warranty repairs require special
training though, so not all dealers are authorized to perform all warranty
repairs. That means that depending on the warranty repair needed, the
vehicle may need to be taken to another dealer. If a particular dealership
can not assist you, then contact the Customer Relationship Center.
Customer assistance
259
Page 276 of 280

driving with a heavy load ......160
location ....................................160
GVWR (Gross
Vehicle Weight Rating) .............160
calculating .......................160, 162
definition .................................160
driving with a heavy load ......160
location ....................................160
H
Hazard flashers .........................176
Headlamps ...................................20
aiming ......................................242
autolamp system .......................22
bulb specifications ..................241
daytime running lights .............20
flash to pass ..............................20
high beam ...........................13, 20
replacing bulbs .......................237
turning on and off ....................20
warning chime ..........................15
Heating ........................................60
heater only system ...................60
heating and
air conditioning system ............62
Hood ..........................................198
I
Ignition .................................66, 253
removing the key ....................153
Infant seats
(see Safety seats) .....................123
Inspection/maintenance
(I/M) testing ..............................236
Instrument panel
cleaning ...................................245
cluster ................................10, 245lighting up
panel and interior .....................21
location of components ............10
J
Jack ............................................185
positioning ...............................185
storage .....................................185
Jump-starting your vehicle ......190
K
Keyless entry system
autolock .....................................91
locking and unlocking doors ....95
programming entry code .........95
Keys
key in ignition chime ...............15
positions of the ignition ...........66
removing from the ignition ....153
L
Lamps
autolamp system .......................22
bulb replacement
specifications chart ................241
cargo lamps ...............................21
daytime running light ...............20
fog lamps ...................................21
headlamps .................................20
headlamps, flash to pass ..........20
instrument panel, dimming .....21
interior lamps ...........................77
replacing bulbs ...............236±241
Lane change indicator
(see Turn signal) ........................66
Lights, warning and indicator ....10
air bag ........................................12
Index
276